How to Master Straight Cuts with a Circular Saw: Essential Techniques
To cut straight with a circular saw, mark the cut line, align the blade with the line, and use a guide or fence for accuracy. When you need to make precise and straight cuts with a circular saw, it’s essential to know the right techniques.
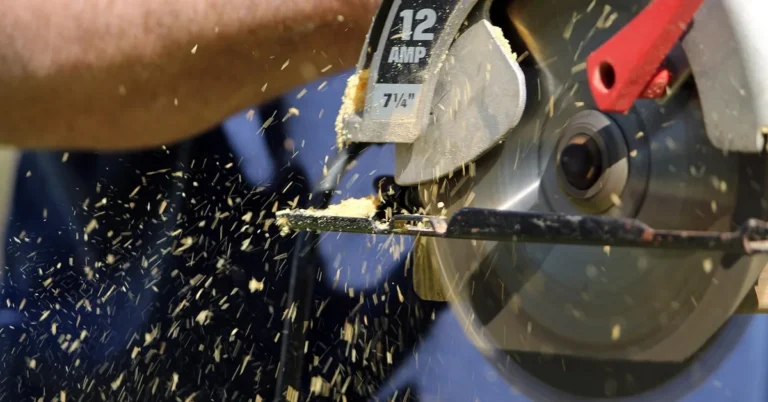
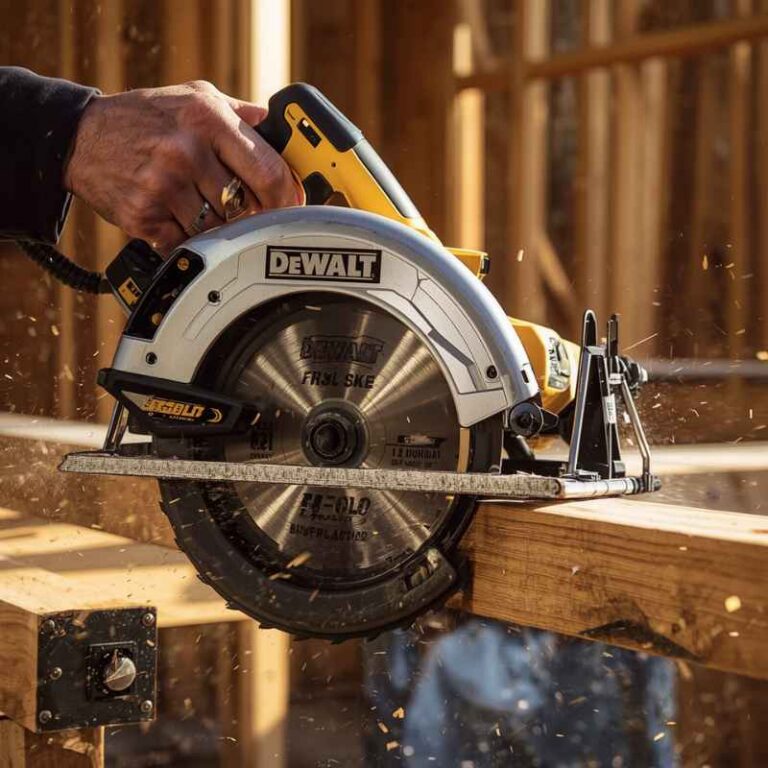
Whether you’re working on a DIY project or a professional woodworking job, cutting straight is crucial for a flawless result. Circular saws are powerful tools that can quickly make long, straight cuts through various materials like wood, metal, or plastic.
However, achieving a straight cut requires proper setup and technique. We’ll discuss the step-by-step process of cutting straight with a circular saw and provide some helpful tips to ensure accurate results. Get ready to improve your cutting skills and achieve professional-quality cuts with your circular saw.
Choosing The Right Blade
When it comes to achieving clean and accurate cuts with a circular saw, choosing the right blade is essential. The blade you select for your project can make a significant difference in the quality of your cuts and overall productivity. In this section, we will explore the importance of blade selection and the factors to consider when choosing a blade for straight cuts.
Understand The Importance Of Blade Selection
Understanding the importance of blade selection is crucial in ensuring precision and efficiency during your cutting tasks. A dull or inappropriate blade can lead to rough cuts, splintering, and even damage to the material being cut. By selecting the right blade, you can maximize the performance of your circular saw and achieve cleaner, smoother cuts.
Factors To Consider When Choosing A Blade For Straight Cuts
When choosing a blade for straight cuts, there are several factors you should take into consideration:
- Blade Size: The size of the blade should match the size of your circular saw. Using an improper blade size can affect the stability and accuracy of your cuts.
- Tooth Count: The tooth count determines the speed and smoothness of the cut. Blades with a higher tooth count are suitable for finer cuts, while blades with lower tooth counts are better for rough cuts.
- Material Compatibility: Different blades are designed to cut specific materials. Ensure that the blade you choose is appropriate for the material you will be cutting, whether it’s wood, metal, or plastic.
- Type of Cut: Consider the type of cut you want to make, whether it’s a rip cut, crosscut, or a combination of both. Some blades are specifically designed for certain types of cuts.
Different Types Of Blades For Different Materials
The type of material you are cutting will determine the blade you should use. Here are some commonly used blades for different materials:
| Blade Type | Material |
|---|---|
| Rip-Cut Blade | Softwood |
| Crosscut Blade | Hardwood |
| Paneling Blade | Plywood and laminates |
| Steel/Aluminum Cutting Blade | Metal |
| Masonry Blade | Concrete and brick |
How To Select The Appropriate Blade For Your Project
Selecting the appropriate blade for your project involves a few simple steps:
- Identify the material you will be cutting.
- Choose a blade specifically designed for that material.
- Consider the type of cut you need to make and select a blade suitable for that type of cut.
- Ensure that the blade size matches your circular saw.
- Check the tooth count to determine the speed and smoothness of the cut.
- Inspect the blade for any signs of wear or damage, and replace it if necessary.
By following these steps, you can ensure that you have the right blade for your project, resulting in clean, precise, and professional-looking cuts.
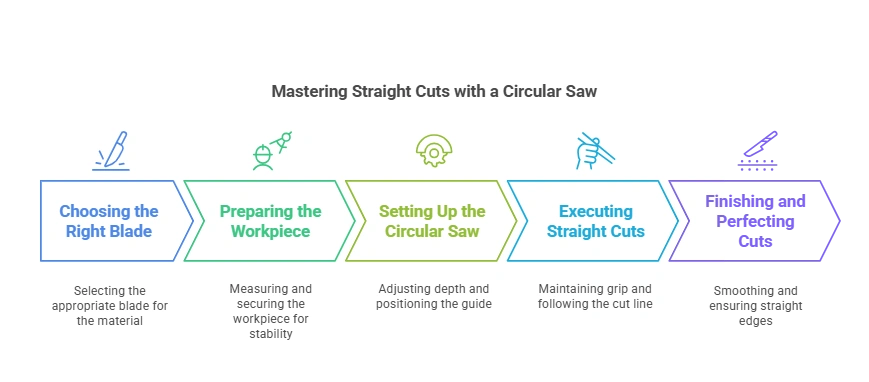
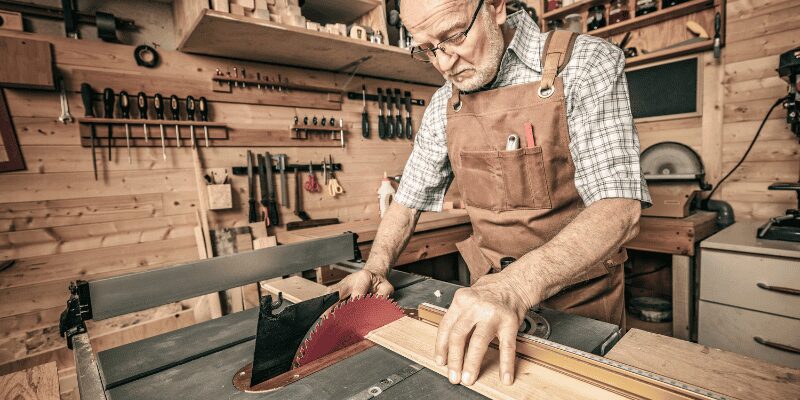
Preparing The Workpiece
When cutting straight with a circular saw, it’s crucial to properly prepare the workpiece. This ensures clean and precise cuts, helping you achieve professional-looking results. Follow these tips to maximize accuracy: align the blade, secure the workpiece, mark your cut, use a guide, maintain a steady hand, and prioritize safety.
Before cutting a straight line with a circular saw, it’s crucial to properly prepare the workpiece. This ensures accurate measurements, straight cut lines, and stability for safe operation. In this section, we’ll explore the key steps to follow when preparing the workpiece for a clean and precise cut with a circular saw.
Properly Measuring And Marking The Cut Line
The first step in preparing the workpiece is to measure and mark the cut line accurately. To achieve a straight cut, it’s essential to take precise measurements and clearly mark the line on the material. Here’s how you can do it:
- Start by using a measuring tape to determine the desired length of the cut. Ensure that the tape is placed securely against the material for accurate measurements.
- Next, use a pencil or a marking knife to mark the measured length on the material. Draw a straight line along the entire length of the material, ensuring that it is clearly visible.
- To enhance visibility, you can also use a straightedge or a ruler to guide your pencil or marking knife and ensure a perfectly straight line.
Techniques For Ensuring A Straight And Accurate Cut
Now that you have measured and marked the cut line, it’s time to focus on cutting straight and precisely. Here are some techniques to help you achieve that:
- Align the saw blade: Before making the cut, ensure that the saw blade is perfectly aligned with the marked cut line. This can be done by aligning a notch or guide on the base plate with the pencil or knife mark.
- Use a guide: To ensure a straight cut, you can utilize a straightedge or a guide. Simply align the guide with the cut line and run the circular saw along it. This technique enhances accuracy and reduces the chances of veering off course.
- Practice steady hand movements: Maintaining a steady hand movement while cutting is essential for a straight line. Make sure to grip the saw firmly and let the blade do the work without applying too much force.
- Double-check alignment: Throughout the cut, it’s crucial to periodically check if the saw blade is still aligned with the cut line. This helps you make adjustments if needed and ensures a straight and accurate outcome.
Securing The Workpiece For Stability And Safety
To cut straight with a circular saw, it’s vital to secure the workpiece properly. This not only ensures stability during the cut but also promotes safety. Here are some methods to consider:
| Method | Description |
|---|---|
| Clamping the workpiece | Using clamps to secure the material firmly to a workbench or surface prevents any movement or shifting during the cut. |
| Using sawhorses | Placing the workpiece on stable sawhorses provides a solid and elevated surface for cutting, ensuring stability and precise cuts. |
| Using a sacrificial board | Placing a sacrificial board underneath the workpiece helps reduce tear-out and prevent damage to the underlying surface, offering stability and a cleaner cut. |
Remember, securing the workpiece properly not only enhances stability but also minimizes the risk of accidents. By implementing these methods, you can ensure a safe and stable cutting environment.
Preparing the workpiece is a crucial step in achieving straight and accurate cuts with a circular saw. By measuring and marking the cut line accurately, employing effective cutting techniques, and securing the workpiece properly, you’ll enhance your cutting precision and achieve excellent results with your circular saw.
Setting Up The Circular Saw
Properly setting up your circular saw is crucial for achieving straight and accurate cuts. By adjusting the cutting depth, setting the bevel angle, and positioning the saw guide correctly, you can optimize the performance of your circular saw. In this article, we will guide you through each step, ensuring you achieve precise cuts every time.
Adjusting The Cutting Depth For Precise Cuts
When it comes to cutting with a circular saw, adjusting the cutting depth is essential for achieving precise results. To adjust the cutting depth of your circular saw, follow these steps:
- Ensure your circular saw is turned off and unplugged for safety.
- Locate the depth adjustment lever or knob on your saw. It is usually located near the front of the saw.
- Loosen the lever or knob to release the blade depth lock.
- Move the blade up or down to adjust the desired cutting depth. Be sure to reference the measurement scale on the saw for accuracy.
- Tighten the lever or knob to secure the blade at the chosen cutting depth.
By adjusting the cutting depth according to the thickness of the material you are cutting, you can ensure clean and precise cuts without any risk of overcutting or undercutting.
Setting The Bevel Angle For Beveled Cuts
If you are looking to make beveled cuts with your circular saw, setting the bevel angle is crucial. The bevel angle determines the tilt of the blade, allowing you to create cuts at different angles. Here’s how you can set the bevel angle on your circular saw:
- Turn off and unplug your circular saw for safety.
- Locate the bevel adjustment mechanism, usually positioned at the back of the saw.
- Loosen the bevel locking lever or knob to release the bevel adjustment.
- Rotate the saw shoe or baseplate to the desired bevel angle.
- Tighten the bevel locking lever or knob to secure the saw at the chosen bevel angle.
By adjusting the bevel angle, you can create beveled cuts for various woodworking projects, enhancing the versatility of your circular saw.
Positioning The Saw Guide For Straight Cuts
To achieve straight cuts with your circular saw, using a saw guide is highly beneficial. A saw guide ensures that the saw remains on a straight path, resulting in accurate and professional-looking cuts. Here’s how you can position the saw guide:
- Place the saw guide on your material, aligning it with the desired cutting line.
- Secure the saw guide in place using clamps or other suitable methods.
- Position the circular saw against the edge of the saw guide.
- Begin your cut, making sure to keep the saw pressed firmly against the edge of the saw guide throughout the cutting process.
Using a saw guide not only helps you achieve straight cuts but also reduces the chances of your saw blade wandering off course.
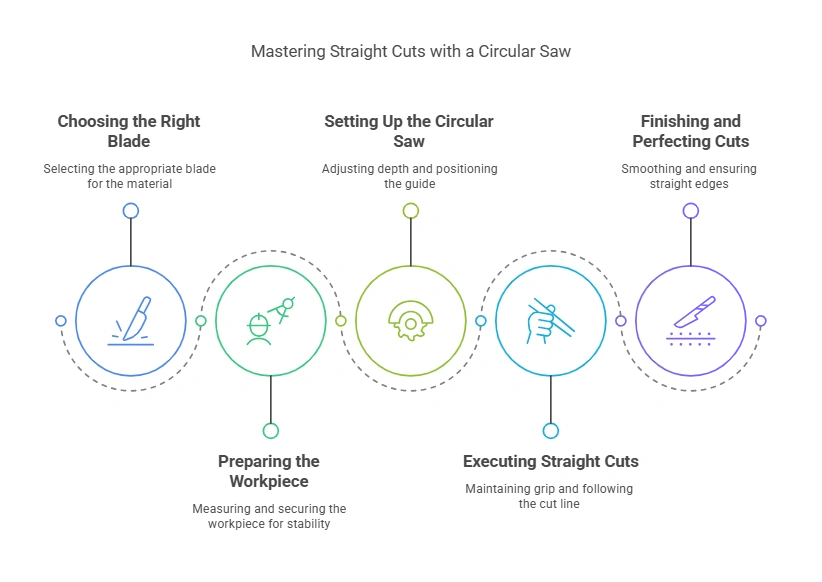
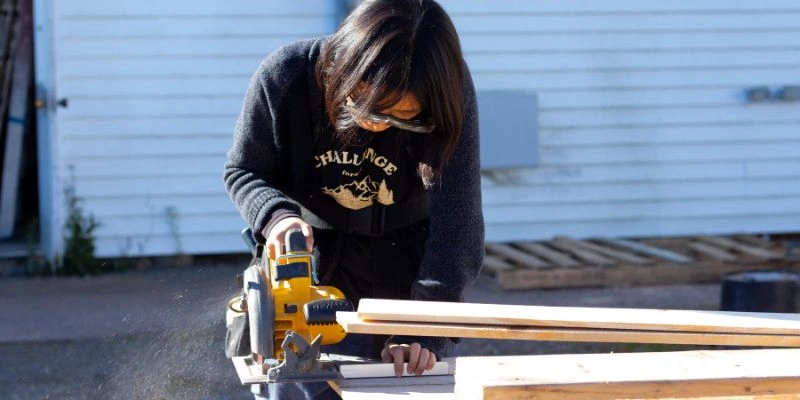
Executing Straight Cuts
Being able to cut straight with a circular saw is an essential skill for any DIY enthusiast or professional woodworker. To achieve precise cuts, you need to focus on several key aspects. In this section, we will explore techniques to help you execute straight cuts with ease and accuracy.
Maintaining A Steady Grip And Proper Body Positioning
Before you start cutting, it’s crucial to establish a stable grip on the circular saw. This will not only provide better control but also minimize the risk of accidents. Hold the saw firmly with both hands, positioning your dominant hand on the main handle and your non-dominant hand on the auxiliary handle. Maintain a firm grip throughout the cutting process.
In addition to a steady grip, proper body positioning is vital for achieving straight cuts. Stand with your feet shoulder-width apart and position yourself in a way that allows for a comfortable and balanced stance. Keep your body aligned with the direction of the cut, with your dominant shoulder slightly behind the saw. This position provides better control and reduces the chances of the saw veering off course.
Techniques For Starting And Stopping The Cut Smoothly
Starting and stopping the cut smoothly is essential for maintaining straight lines. When beginning the cut, position the front edge of the saw shoe on the material, aligning it with the marked cut line. Gently engage the blade and gradually increase the speed as you push the saw forward. This gradual approach ensures a clean and precise start to your cut.
Similarly, when finishing the cut, avoid abruptly jerking the saw backward. Instead, maintain a steady forward motion until the blade has completely cleared the material. This smooth finishing technique helps prevent any splintering or damage to the workpiece.
Tips For Following The Marked Cut Line Accurately
Following the marked cut line accurately is crucial for achieving straight cuts. Here are a few tips to help you stay on track:
- Use a high-quality pencil or marker to make a visible and precise line on the material.
- Position the marked line on the edge of the saw shoe to maintain a consistent reference point.
- Focus on the front of the saw shoe while cutting, ensuring it stays aligned with the marked line.
- Avoid looking directly at the blade but keep your eyes on the marked line to anticipate any changes in direction.
- Take your time and maintain a steady and controlled pace, allowing the saw to do the work.
Handling Potential Issues During The Cutting Process
Despite your best efforts, issues may arise during the cutting process. Here are a few common problems and how to handle them:
| Problem | Solution |
|---|---|
| Saw blade binding or getting stuck | Stop the saw immediately, wait for the blade to come to a complete stop, and then safely remove it from the material. Check for any debris or obstructions causing the issue before continuing. |
| Saw drifting off the marked line | Stop the cut, realign the saw with the marked line, and ensure a steady grip and proper body positioning. Resume the cut slowly and maintain focus on the marked line. |
| Marks or tear-out on the cut line | Consider using a sacrificial piece of wood underneath the workpiece to minimize tear-out. Additionally, using a sharp and high-quality blade can significantly improve the quality of the cut. |
By following these techniques and tips, you’ll be on your way to executing straight cuts with confidence and precision. Take your time, practice, and soon you’ll be creating professional-looking projects with ease.
Finishing And Perfecting Straight Cuts
Learn how to achieve straight and precise cuts with a circular saw. Master six essential tips to enhance your cutting technique and achieve professional-looking results every time.
Removing Any Rough Edges Or Splinters
Once you have made your straight cut with a circular saw, it’s time to perfect it by removing any rough edges or splinters. These imperfections can not only ruin the look of your project but also pose a safety risk. Here are a few techniques to help you achieve a smooth finish on your cut surface:
- Sanding: Sanding is an essential step in achieving a polished and professional-looking result. Start by using a medium-grit sandpaper to gently sand the edges of your cut, working your way up to a fine-grit sandpaper for a smoother finish. Ensure that you sand evenly and apply light pressure to avoid damaging the wood.
- Smoothing with a chamfer bit: If you are looking for a more decorative and refined edge, consider using a chamfer bit on your router to create a sloping beveled edge. This not only removes any roughness but also adds an elegant touch to your workpiece.
- Filing: For small splinters or rough spots that require precision, a file can be a handy tool. Gently file away any imperfections, being careful not to take off too much material.
Remember, the goal is to achieve a seamless transition from the cut area to the rest of your workpiece. Taking the time to remove any rough edges or splinters will result in a professional-looking project that you can be proud of.
Techniques For Sanding And Smoothing The Cut Surface
Sanding and smoothing the cut surface is an important step in achieving a flawless finish with your circular saw. Here are a few techniques to help you get the best results:
- Sand in the direction of the grain: When sanding the cut surface, always go with the grain of the wood. This will help prevent any tear-outs or scratches that may occur if you sand against the grain.
- Use a sanding block: A sanding block can provide stability and even pressure when sanding. Wrap sandpaper around the block and use smooth, controlled strokes to achieve an even finish.
- Progressively change sandpaper grits: Starting with a medium-grit sandpaper and gradually moving to a finer-grit sandpaper will help you achieve a smooth and polished surface. Each grit will remove the scratches left by the previous grit, resulting in a refined finish.
Ensuring Straight Cuts For Long Workpieces With Support Structures
When working with long workpieces, it can be challenging to maintain a straight cut without the proper support structures in place. Here are a few ways to ensure straight cuts on lengthy workpieces:
One of the most effective methods is to use support structures such as sawhorses or workbenches. These sturdy surfaces provide a stable platform for your workpiece, allowing you to guide the circular saw along a straight path. Make sure the support structures are positioned parallel to your intended cut line, providing ample support for the entire length of the workpiece.
Additionally, using clamps to secure the workpiece to the support structure can further enhance stability and prevent any movement or wobbling during the cut.
It’s also crucial to mark your cut line accurately. Use a straightedge, like a ruler or a level, to create a clear and visible guideline. This will help you guide the circular saw and maintain a straight cut throughout the length of the workpiece.
Remember, taking the time to set up proper support structures and accurately marking your cuts is essential when working with long workpieces. These precautions will help you achieve straight, precise cuts every time.
Frequently Asked Questions Of How To Cut Straight With Circular Saw
How Do You Make A Perfect Straight Cut With A Circular Saw?
To make a perfect straight cut with a circular saw:
1. Measure and mark your cut line accurately.
2. Use a straight edge or guide to follow the line precisely.
3. Adjust the circular saw’s blade depth to match the thickness of the material.
4. Hold the saw firmly and maintain a steady, controlled motion.
5. Ensure proper safety precautions such as wearing protective gear.
Do You Cut On The Line Or Leave The Line?
Cut on the line for precise results.
Why Does My Circular Saw Kickback At The End Of A Cut?
Kickback in a circular saw occurs at the end of a cut due to several factors. Incorrect blade alignment, pushing the saw too hard, or lack of proper support may cause the blade to bind or twist, resulting in kickback.
Ensuring smooth and controlled cuts with proper technique and safety precautions can help prevent kickback.
Where Do You Look When Cutting With A Circular Saw?
When cutting with a circular saw, always look ahead along the cutting line to maintain accuracy and prevent mistakes. Focus on the area where the blade meets the material you’re cutting. Keep your eyes on the workpiece, ensuring a straight and precise cut.
Conclusion
To sum up, achieving straight cuts with a circular saw is a skill that can be mastered with practice. By following the techniques and tips discussed in this blog post, such as using a guide, taking precautions, and maintaining the right posture, you will be able to make precise cuts on various materials.
Remember, practice makes perfect, so don’t get discouraged if you don’t get it right the first time. Keep at it, and soon you’ll become an expert at cutting straight with a circular saw. Happy cutting!