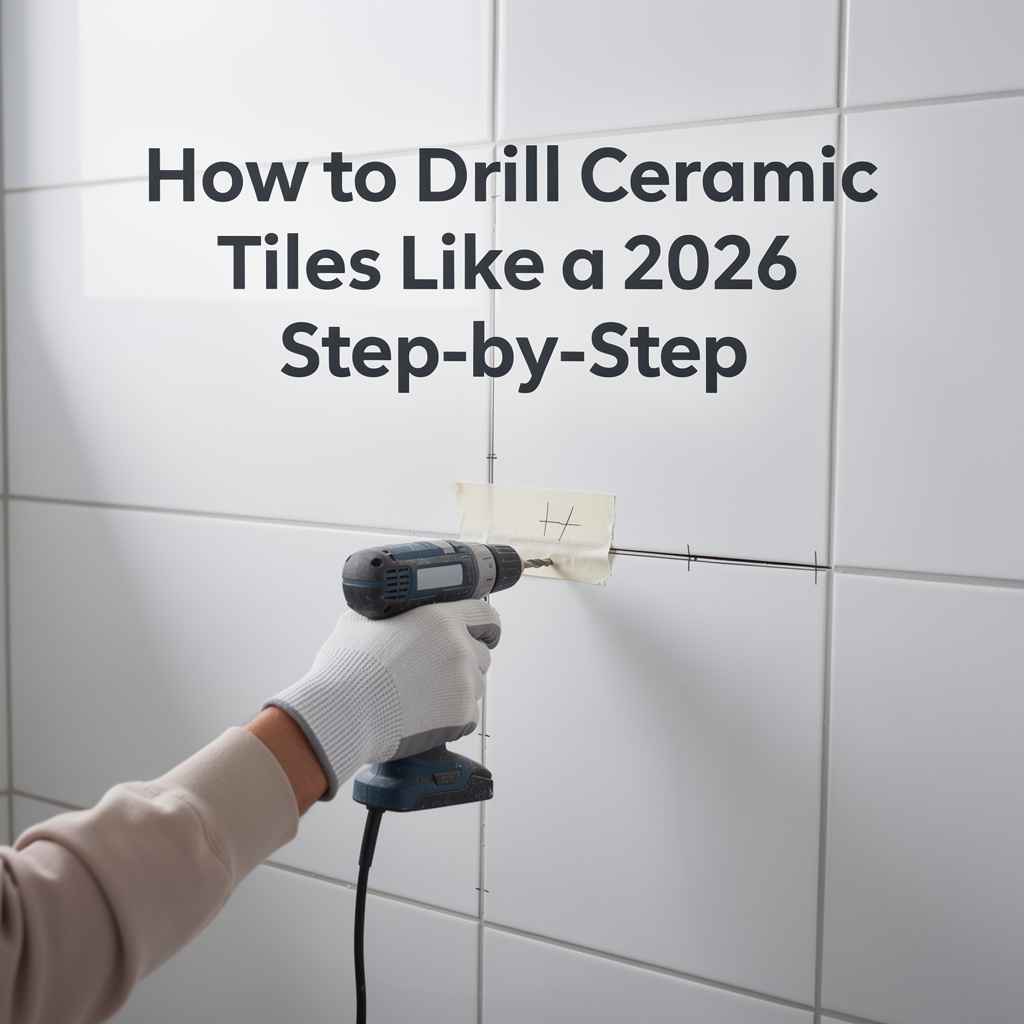
How to Drill Ceramic Tiles Like a Pro: 2026 Step-by-Step
Drilling into ceramic tiles can seem tricky. Many people worry about cracking or chipping their beautiful tiles. This is why knowing How to Drill Ceramic Tiles Like a Pro: 2026 Step-by-Step is important.
It might sound difficult, but it’s actually quite simple with the right tools and techniques. This guide will show you exactly how to get clean, perfect holes every time. We will walk you through it all, from picking the right drill bit to finishing the job without any mess.
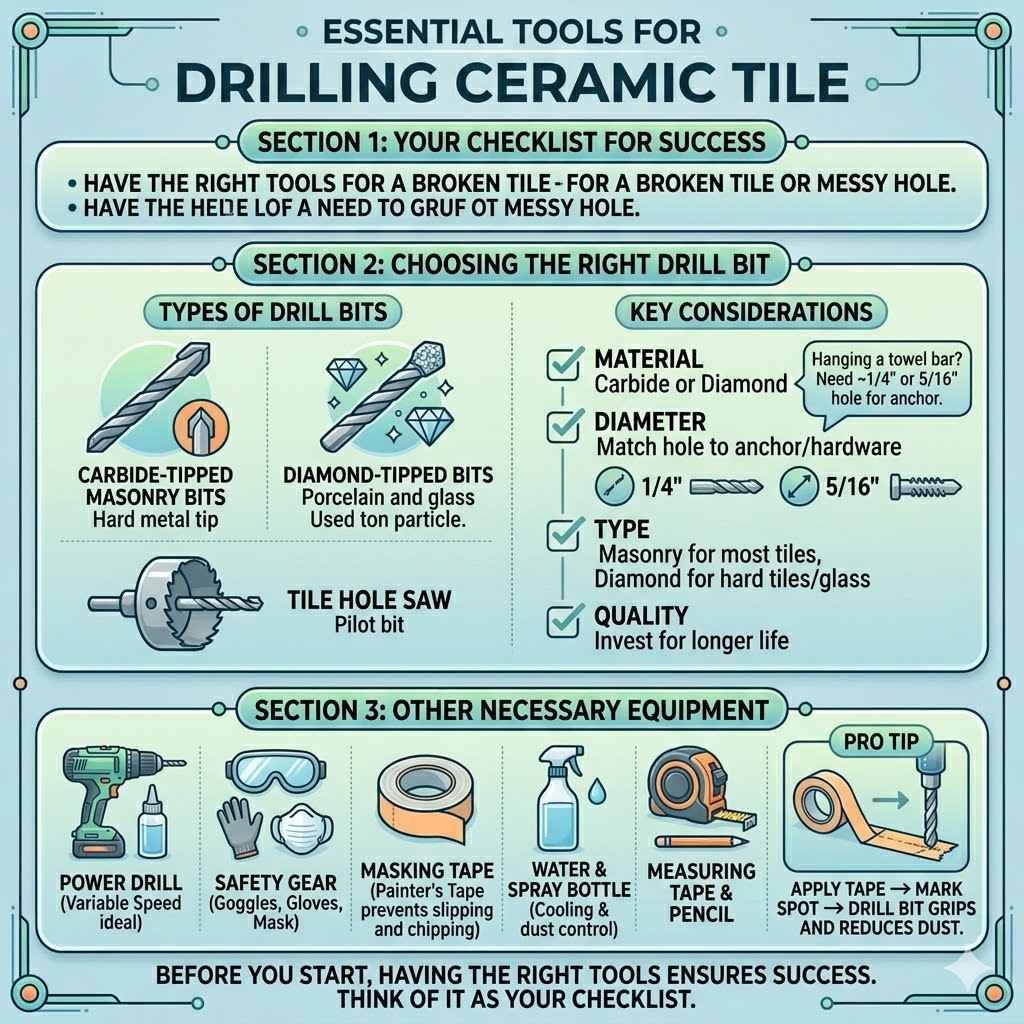
Essential Tools for Drilling Ceramic Tile
Before you start drilling, having the right tools makes all the difference. Using the wrong tools can lead to a broken tile or a messy hole. This section covers the key items you’ll need.
Think of it as your checklist to ensure success. We’ll look at different types of drill bits and other helpful gadgets.
Choosing the Right Drill Bit
The most important tool is your drill bit. Standard wood or metal bits will not work on ceramic tile. They will either dull immediately or shatter the tile.
You need a bit specifically designed for hard materials like tile or glass. These bits have special tips that can cut through the tough ceramic surface.
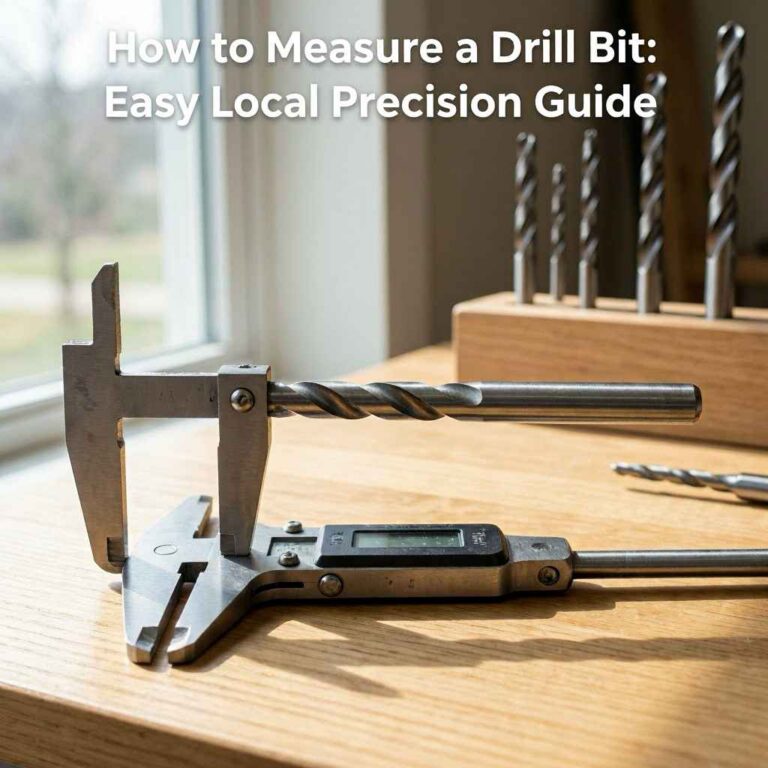
Carbide-tipped masonry bits are a common choice. They have a very hard metal tip that can bore through tile. For very hard tiles, diamond-tipped bits are even better.
They use tiny diamond particles embedded in the metal to grind away the tile material. These are often used for glass and very dense porcelain tiles. The cost of diamond bits is higher, but they offer superior performance and longevity, especially for frequent drilling or very tough materials.
Consider the size of the hole you need. Drill bits come in many diameters. Make sure you have the correct size for your screw, anchor, or whatever you plan to put through the hole.
For larger holes, like for plumbing fixtures, you might need a hole saw designed for tile. These look like a circular saw blade with a pilot drill bit in the center.
Here are some key considerations when selecting a drill bit:
- Material: Always opt for carbide-tipped or diamond-tipped bits.
- Diameter: Match the bit size to the diameter of the hole needed.
- Type: Masonry bits are good for most tiles. Diamond bits are for very hard tiles and glass.
- Quality: Invest in good quality bits. They last longer and perform better.
For example, if you are hanging a towel bar in your bathroom, you will need a bit that can create a hole for the anchor that comes with the towel bar. This might be around a 1/4 inch or 5/16 inch diameter. If you are installing a new faucet and need to drill through a tiled backsplash, the hole size will depend on the faucet’s mounting hardware.
Other Necessary Equipment
Beyond the drill bit, several other items are essential for a smooth drilling experience. Safety gear is paramount. You’ll also need tools to control the drilling process and keep the area clean.
- Drill: A corded or cordless drill works well. A drill with a variable speed setting is ideal. This allows you to control how fast the bit spins. Lower speeds are generally better for tile.
- Safety Glasses: Always wear safety glasses to protect your eyes from flying debris.
- Gloves: Work gloves can improve your grip and protect your hands.
- Mask: A dust mask is recommended to avoid inhaling ceramic dust, especially when drilling multiple holes.
- Masking Tape: Painter’s tape or masking tape helps prevent the drill bit from slipping when you start drilling. It also helps reduce chipping on the surface.
- Water or Lubricant: Water is often used to cool the drill bit and tile, reducing heat and dust. A spray bottle filled with water is handy. Some professionals use cutting fluid for tile, but water is usually sufficient for DIY projects.
- Measuring Tape and Pencil: For marking the exact spot to drill.
- Vacuum Cleaner: To clean up dust and debris as you go.
Using masking tape is a simple trick that many pros use. Before drilling, apply a strip of painter’s tape over the spot where you want to drill. Then, mark your spot on the tape.
This gives the drill bit a surface to grip and prevents it from skidding across the smooth tile. The tape also helps to hold small chips of tile in place as you drill, reducing the amount of dust that flies around.
Preparing the Tile Surface
Proper preparation is key to successful tile drilling. Skipping this step is a common mistake that can lead to a cracked tile or a hole in the wrong place. This part is about making sure everything is ready before you even pick up the drill.
Marking the Drilling Spot
Precision is important. You need to mark exactly where the hole should go. Use a measuring tape and a pencil for accuracy.
Double-check your measurements before making the mark. Remember, once you drill, you cannot easily move the hole.
For marking, a light pencil mark is usually enough. If you are drilling into a dark tile, a chalk pencil or a wax pencil might show up better. After marking, apply painter’s tape over the spot.
This is a crucial step as it provides grip for the drill bit. It also helps to catch any small chips that might break off the tile surface. Make your mark on the tape itself.
Consider the location of the mark carefully. Is it too close to an edge? Will drilling there compromise the tile’s integrity?
If you’re installing something that needs to be level, use a level to ensure your mark is in the right position.
Stabilizing the Tile
For most wall tiles, the tile is already fixed to the wall, so extra stabilization might not be needed. However, if you are drilling a tile that is loose or if you are concerned about vibration, you can add support. For very delicate tiles or when drilling a large hole, you might want to place a piece of scrap wood behind the tile if accessible.
This adds stability and can catch the drill bit if it punches through too quickly.
The goal is to prevent the tile from moving or vibrating excessively while you drill. Uncontrolled movement can cause the drill bit to wander, leading to an off-center hole or a cracked tile. If the tile is already installed on a wall or floor, the underlying surface should provide sufficient support.
The main concern then becomes preventing the drill bit from slipping on the glazed surface of the tile.
This preparation stage is not just about marking. It’s about setting up for a clean and controlled drilling process. Taking these few extra minutes can save you a lot of frustration and prevent costly mistakes down the line.
It ensures that your drilling action is precise and minimizes the risk of damaging the tile.
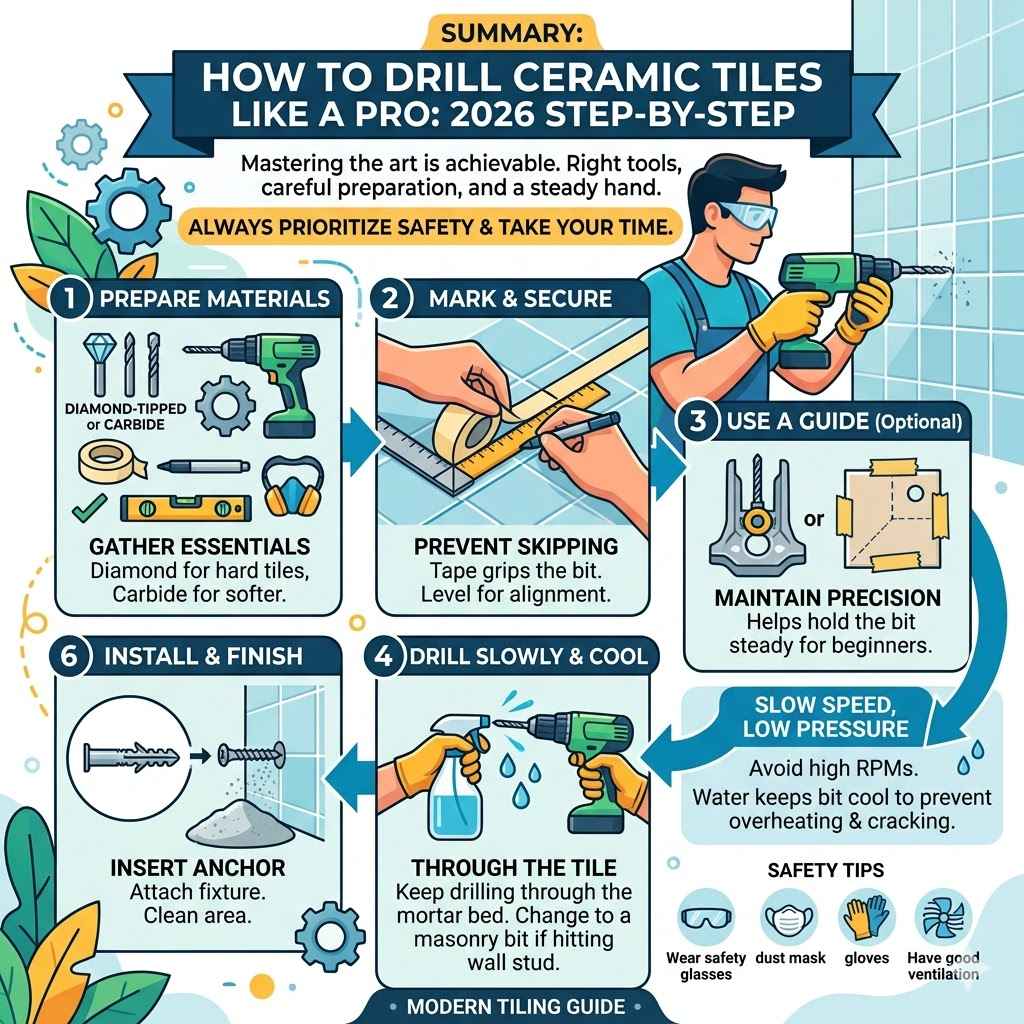
The Step-by-Step Drilling Process
Now that you have your tools and the surface is prepped, it’s time to drill. This section breaks down the actual drilling into simple, manageable steps. Follow these carefully, and you’ll achieve the results you want.
Setting Up Your Drill
First, insert the appropriate drill bit into your drill. Make sure it’s securely tightened in the chuck. For drilling into ceramic, you’ll want to use a low to medium speed setting on your drill.
High speeds can generate too much heat, which can damage the drill bit and the tile. Some drills have a hammer function; make sure this is turned OFF for tile.
The hammer function is designed for masonry and concrete, providing a percussive action. This action is too aggressive for ceramic tile and will likely cause it to crack. You want a smooth, steady rotation.
Using a variable speed drill is very helpful here. You can start very slowly to get the bit to bite into the tile, then gradually increase the speed as needed, but never to the maximum setting.
Ensure your drill is fully charged if it’s a cordless model, or plugged in if it’s a corded one. You don’t want to run out of power mid-hole. Having a stable grip on the drill is also important.
Hold it firmly but without excessive tension. This allows for better control and accuracy.
Starting the Hole
Once the drill is set up and you’re ready, position the tip of the drill bit precisely on the marked spot on the painter’s tape. Start the drill at a very slow speed. Apply gentle, consistent pressure.
You should feel the bit start to cut into the tape and then the tile. Don’t push too hard; let the bit do the work.
As the bit begins to create a small indentation, you can slightly increase the drill speed, but still keep it moderate. If you’re using water, have a spray bottle ready. Periodically spray a small amount of water onto the drilling area.
This cools the bit and the tile, which reduces friction and the risk of heat buildup. It also helps to flush away dust and debris.
The initial bite into the tile is the most critical part. This is where the bit is most likely to slip. The painter’s tape significantly helps prevent this.
If you notice the bit wandering, stop, reposition it, and try again. A steady hand and a controlled start are your best friends here.
A practical scenario: You need to hang a shelf and have marked two spots on a tiled backsplash. You apply painter’s tape to both spots and mark your precise drill locations. You set your drill to a low speed, place the carbide-tipped bit on the first mark, and slowly squeeze the trigger.
As soon as a small divot forms, you can increase the speed slightly, continuing to apply steady pressure and occasionally spraying a little water.
Drilling Through the Tile
Continue drilling, maintaining consistent, gentle pressure. As you get deeper into the tile, you might feel a change in resistance. Once you’ve drilled about halfway through the tile’s thickness, you can increase the pressure slightly, but remain steady.
Keep spraying water to cool the bit.
If drilling through wall tile, be aware of what’s behind it. You don’t want to drill into pipes or wires. Once the drill bit breaks through the back of the tile, reduce the pressure immediately.
Let the drill bit pass through the remaining material without forcing it. This helps prevent chipping on the backside of the tile.
Periodically pull the drill bit out slightly while it’s still spinning. This helps to clear out the dust and debris from the hole and the bit itself. This action also helps to keep the bit cool.
If you see a lot of dust accumulating, it means the cooling and clearing aren’t happening efficiently. A continuous stream of water helps with this, acting like a lubricant and coolant.
For larger holes using a hole saw, the process is similar but requires more patience. Keep the hole saw center steady and apply even pressure. Frequently clear the debris and cool the bit.
Slow and steady wins the race when drilling tile. Rushing the process is the quickest way to cause damage.
Let’s consider another example: you’re installing a tile ledger for a countertop. You’ve marked your spots. You pick up your drill with a 1/4-inch carbide bit.
You start slow, let the tape grip, then the tile. You feel the bit start to cut. You increase speed slightly, applying even pressure.
A few squirts of water keep things cool. You feel the resistance change as you near the other side, and then ease up on pressure as the bit punches through.
Finishing and Cleaning Up
Once the hole is drilled, slowly pull the drill bit out while it’s still spinning. This helps to smooth the edges of the hole. If there are any small burrs or rough edges, you can gently smooth them with the drill bit itself or a small piece of sandpaper.
Be careful not to enlarge the hole.
Clean the area thoroughly. Use a vacuum cleaner to suck up all the dust and any small tile fragments. A damp cloth can be used to wipe away any remaining residue.
Inspect the hole for any chips or cracks. If the hole is clean and smooth, you’ve succeeded!
It’s satisfying to see a clean hole with no damage to the surrounding tile. This clean-up step is just as important as the drilling itself. A tidy workspace is a safe workspace.
It also makes the final installation of whatever you are mounting much easier and cleaner.
Dealing with Common Problems
Even with the best preparation, things can sometimes go wrong when drilling tile. Knowing how to handle common issues can save your project. This section covers some frequent problems and how to solve them.
Drill Bit Slipping
This is perhaps the most common issue. The smooth, glazed surface of ceramic tile doesn’t offer much grip for a drill bit. If your bit starts to slip, stop immediately.
Re-apply painter’s tape to the area, ensuring it’s smooth and well-adhered. You can also try scoring a small ‘X’ into the tape with a utility knife where you want to drill. This provides a slight edge for the bit to catch.
Another trick is to start the hole with a different type of bit that has a pointier tip, like a small nail or a center punch, to create a tiny divot. Then, switch to your tile bit and place its tip into that divot. This requires careful application of force with the nail or punch, so it’s best done with a firm tap from a hammer, just enough to create a starting point.
Be cautious not to crack the tile with this method.
The key is to create a starting point that prevents the drill bit from skidding across the surface. The painter’s tape method is generally the safest and most effective for most DIYers. If the bit is still slipping, you might need a stronger adhesive tape or a specialized drill bit guide.
Some drill bit guides are designed to clamp onto the tile surface and hold the bit in place.
Tile Cracking or Chipping
If you notice cracks or significant chipping, you’re likely applying too much pressure, drilling too fast, or using the wrong drill bit. If the tile is already cracked, you may need to replace it. However, sometimes minor chips can be disguised or minimized.
For minor chipping around the hole, you can sometimes use a fine-grit sandpaper or a small grinding stone to smooth the edges. If the crack is small and not structural, it might be acceptable. However, for anything load-bearing or highly visible, a cracked tile usually needs replacing.
To prevent cracking: use a slow speed, apply steady but gentle pressure, and keep the bit cool with water. Also, ensure the tile is well-supported behind it, especially if it’s a large format tile. If you are drilling near an edge, be extra cautious as this is a weak point.
Consider a scenario where you’re drilling through a border tile. These are often thinner and more prone to cracking. You’d use the slowest speed, minimal pressure, and plenty of water.
If a small chip occurs, a clear epoxy can sometimes fill it and make it less noticeable.
Hole Not Round or Too Large
This can happen if the drill bit overheats, causing the tile material to expand and then contract unevenly, or if the bit wobbled during drilling. If the hole is slightly larger than intended, and you’re not mounting something precisely, it might still work. For anchors, a slightly larger hole can sometimes be filled with epoxy and then re-drilled if needed, though this is more complex.
If the hole isn’t perfectly round, you can try carefully using a small file or even the drill bit itself (at very low speed) to gently clean up the edges and make it more circular. However, avoid excessive force. The best way to prevent this is to ensure the drill bit is sharp, you’re using a consistent speed, and you’re not letting the drill wobble.
For precise applications where a perfect circle is essential, such as installing a new faucet with a specific gasket, you might need a diamond hole saw. These create very clean, precise holes. If you’ve made a mistake, sometimes a decorative element, like a large escutcheon plate for a faucet or a large screw cover, can hide an imperfect hole.
Advanced Techniques and Tips
Once you’ve mastered the basics, there are a few advanced techniques and tips that can help you achieve even more professional results. These are especially useful for challenging projects or when working with very delicate materials.
Using a Drill Guide
A drill guide, sometimes called a jig or template, is an invaluable tool for ensuring accuracy, especially when drilling multiple holes or precise placements. These devices clamp onto the tile surface and have a sleeve that guides the drill bit.
How it works: The guide has a stable base that adheres to the tile. A central opening or sleeve directs the drill bit to the exact spot. This prevents the bit from wandering and ensures all holes are perfectly aligned and at the same depth.
They are particularly useful for drilling rows of holes for tiling projects or when installing hardware that requires precise spacing.
Many modern drill guides are adjustable for different drill bit sizes and can be used with water reservoirs to keep the bit cool. This takes much of the guesswork out of the process and significantly reduces the risk of error. Some even feature suction cups to hold them firmly in place, making them easy to position and reposition.
When to Call a Professional
While drilling tile is a manageable DIY task, there are times when it’s best to leave it to the experts. If you’re dealing with extremely expensive or rare tiles, or if the project involves complex plumbing or electrical work that requires drilling through tiled walls, a professional might be a safer bet.
Professionals have access to specialized equipment, like core drills, which can create very large, clean holes with minimal risk of damage. They also have the experience to anticipate potential problems and know how to handle them. For major renovations or when you need perfect, flawless results, consider consulting a tile installer or contractor.
For instance, if you’re retrofitting a shower and need to drill through a fully tiled area with plumbing behind it, the risk of hitting a pipe is high. A professional plumber will have the tools and knowledge to locate pipes and drill safely. Similarly, if you’ve invested heavily in artisanal ceramic tiles, the cost of replacing one mistake might outweigh the cost of hiring a professional to do the job.
Consider these situations where professional help is wise:
- Very large holes are required.
- The tile is extremely delicate or valuable.
- There are significant plumbing or electrical lines behind the tile.
- You are uncomfortable with power tools or precision work.
- Multiple holes need to be drilled with perfect alignment.
Summary of How to Drill Ceramic Tiles Like a Pro: 2026 Step-by-Step
Mastering how to drill ceramic tiles like a pro is achievable. You need the right tools, careful preparation, and a steady hand. Follow these steps for clean holes without cracks.
Always prioritize safety and take your time.
Frequently Asked Questions
Question: What is the best type of drill bit for ceramic tile?
Answer: The best drill bits for ceramic tile are carbide-tipped masonry bits or diamond-tipped bits. Diamond bits are generally more effective for very hard tiles and glass.
Question: Do I need a special drill for ceramic tile?
Answer: No, a standard corded or cordless drill works well. It should have a variable speed setting, and the hammer function should be turned off.
Question: How do I prevent the drill bit from slipping on the tile?
Answer: Applying painter’s tape to the drilling spot before marking helps the bit grip. You can also try scoring the tape or creating a small divot with a nail or center punch.
Question: What speed should I use when drilling tile?
Answer: Always use a low to medium speed setting. High speeds create too much heat and can damage the tile and the drill bit.
Question: Is it okay to use water when drilling tile?
Answer: Yes, using water to cool the drill bit and tile is highly recommended. Spray a little water periodically onto the drilling area.
Conclusion
You now have a clear guide to drilling ceramic tiles successfully. By using the correct bits, prepping properly, and working steadily, you can achieve professional results. Practice makes perfect, so don’t be afraid to try.
Enjoy your newly installed fixtures!