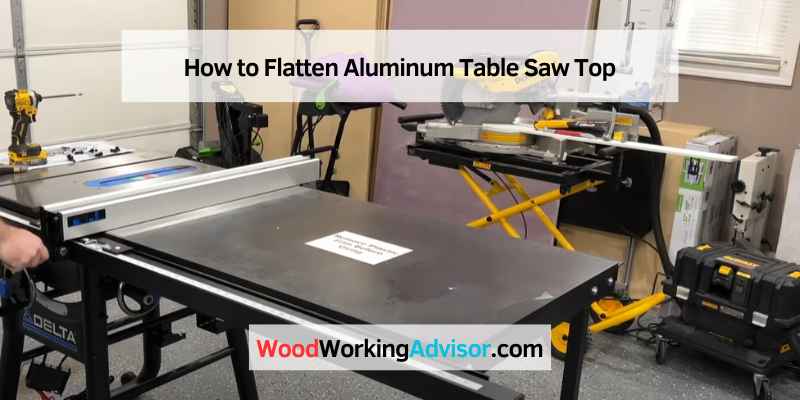
How to Flatten Aluminum Table Saw Top
A table saw is a versatile tool that can be used for a variety of woodworking projects. However, over time the top of the table saw can become warped and uneven. This can make it difficult to use the table saw for precision cuts.
Luckily, there is a way to fix this problem. By flattening the aluminum table saw top, you will be able to use your table saw with ease once again.
- Place the aluminum table saw top on a flat surface
- Use a straight edge to mark a line across the aluminum table saw top
- Use a sander to sand down the aluminum table saw top until it is level with the line you marked in Step 2
- Wipe away any dust or debris from sanding before moving on to the next step
- Use an adhesive to attach strips of wood around the perimeter of the aluminum table saw top
- Clamp the wood strips in place and allow the adhesive to dry completely according to manufacturer’s instructions
- 7 Once dry, flip over the entire assembly and repeat Steps 2-4 on this new surface
Credit: www.reddit.com
How Do You Restore an Aluminum Table Saw Top?
If you’re lucky enough to have an aluminum table saw top, you know that it’s a durable and long-lasting material. But, like any other surface, it can become scratched or damaged over time. If you want to restore your aluminum table saw top to its original condition, there are a few things you can do.
First, if the damage is just superficial scratches or marks, you can try polishing the surface with a metal polish. Be sure to test the polish on a small area first to make sure it doesn’t damage the finish. If the scratches are deeper, you may need to sand the surface before polishing.
If the damage is more severe, such as gouges or dents, you’ll need to fill in those areas before polishing. You can use a product like JB Weld or similar epoxy putty designed for metal repairs. Once the repair is dry, sand it smooth and then proceed with polishing.
No matter what type of damage you’re dealing with, taking the time to restore your aluminum table saw top will pay off in terms of both function and aesthetics. With a little effort, you can keep your saw looking like new for years to come!
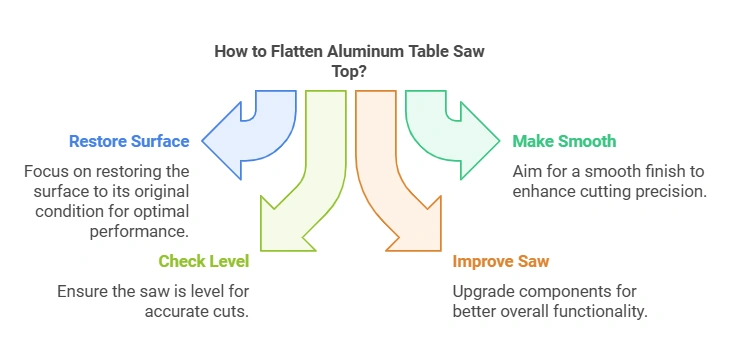
How Do I Make My Table Saw Top Smooth?
If you’re looking to smooth out the top of your table saw, there are a few different methods you can try. The first is to use sandpaper. Start with a coarse grit and then move to a finer grit until you get the desired results.
Another option is to use a hand planer. This will take more time, but it will give you a smoother finish. Finally, you can use a belt sander.
If you go this route, start with a coarse grit and work your way up to a finer one. Whichever method you choose, be sure to take your time and work slowly so that you don’t damage the surface of your table saw.
Does a Table Saw Need to Be Level?
Table saws are one of the most versatile tools in a woodworker’s arsenal, and they can be used for a variety of tasks. While most table saws come with legs that can be adjusted to level the table, it is not always necessary to have a perfectly level table. In fact, there are some situations where a slightly tilted table can actually be beneficial.
That being said, there are also some circumstances where it is absolutely essential to have a level table saw. For example, when making rip cuts (cuts that run parallel to the grain of the wood), it is important to have a level table so that your cuts are straight and accurate. Additionally, when using certain jigs or attachments (such as a dado stack), having a level surface is vital in order to avoid kickback and other accidents.
So, while you don’t necessarily need to have a perfectly level table saw all the time, there are certain situations where it is very important. Make sure to assess your needs before making any final decisions about leveling your own table saw.
How Can I Improve My Table Saw?
If you’re like most woodworkers, your table saw is probably one of the most important tools in your shop. And if you’re looking to get the most out of your table saw, there are a few things you can do to improve its performance. First, make sure that the blade is sharp and properly aligned.
A dull blade or one that’s not properly aligned will cause the saw to work harder and can lead to inaccuracies in your cuts. Second, keep the table and fence clean and free of debris. Any build-up on either can cause problems with the saw’s operation.
Finally, take some time to tune up your saw. This includes making sure that all of the nuts and bolts are tight, as well as adjusting the tension on the belt (if applicable). By taking these simple steps, you can help ensure that your table saw will operate at peak performance for years to come.
Table Saw Top Not Flat
If you’re a woodworker, you know that one of the most important tools in your shop is the table saw. And one of the most important parts of the table saw is the top. It needs to be flat so that your material will slide across it easily and smoothly.
Unfortunately, over time, even the best-made table saws can develop a bit of a bow in their tops, which can make your cuts less than perfect. So what can you do to fix a table saw top that’s not flat? There are a few different methods that you can try.
One is to use weights to flatten out the top. You’ll need to place them on the high spots and let them sit for a day or two until the top is level again. Another option is to use shims under the low spots.
This will raise those areas up so that they’re level with the rest of the top. Again, you’ll need to let this sit for a while before using your table saw again. If neither of these options works for you, then you may need to replace your table saw top altogether.
Luckily, there are plenty of replacement tops available on the market today. Just make sure to get one that’s made specifically for your model of table saw and follow any installation instructions carefully.
Sawstop
Sawstop is a table saw that uses sensors to detect contact with skin and quickly stop the blade to prevent serious injury. It was invented in 1999 by Stephen Gass, who started the company SawStop to sell the saws. The Sawstop table saw is designed to prevent serious injuries by stopping the blade within milliseconds of detecting contact with skin.
The system consists of three main parts: a sensor in the blade guard, a controller unit, and an electromagnetic brake. When the sensor in the blade guard detects contact with skin, it sends a signal to the controller unit. The controller unit then activates the brake, which stops the blade within milliseconds.
The Sawstop table saw has been very successful in preventing injuries. In fact, since its inception in 1999, there have been no reported injuries from users of the saw.
Table Saw Used
A table saw is one of the most important tools in any woodshop. It allows for quick, accurate cuts and can be used to create a variety of different projects. If you’re just getting started in woodworking, or if you’re looking to add a new tool to your shop, here’s what you need to know about table saws.
There are two main types of table saws: portable and stationary. Portable table saws are great for those who need to move their saw around the shop or take it with them on job sites. Stationary table saws are more powerful and offer more features, but they’re not as mobile.
Most table saws have a 10″ blade, but there are also models available with 12″ and 14″ blades. The size of the blade will determine how deep of a cut you can make. Table saws can be operated manually or with an electric motor.
Electric models are more expensive, but they’re also more convenient since you don’t have to worry about starting a gas engine each time you want to use the saw. When shopping for a table saw, pay attention to the following features: rip fence, miter gauge, dust collection system, safety features, and warranty. A good rip fence will allow you to make precise cuts while the miter gauge lets you make angled cuts easily.
A dust collection system is important if you want to keep your work area clean and safe from harmful airborne particles. And finally, safety features like anti-kickback devices and flesh detection systems help reduce the risk of injury while using thesaw .
What to Check When Buying a Used Table Saw
If you’re in the market for a used table saw, there are a few things you’ll want to check before making your purchase. First, take a close look at the blade. Make sure it’s not excessively worn or chipped.
Second, check the fence to be sure it’s straight and in good condition. Third, test the motor by turning it on and letting it run for a minute or so. Fourth, make sure all of the safety features are in working order.
Finally, give the table a once-over to look for any other signs of wear and tear. By following these simple tips, you can be sure you’re getting a quality used table saw that will serve you well for years to come.
What to Look for When Buying a Table Saw
A table saw is a big investment for any woodworker, so it’s important to do your research before making a purchase.
Here are some things to look for when shopping for a table saw:
1. Blade size and type: The size and type of blade you need will depend on the projects you plan to use the saw for.
A larger blade can make longer cuts, but it will also be more expensive and require more power to operate.
2. Table size: The size of the table will determine how much material you can cut at one time. A larger table will be able to accommodate longer boards, but it will also take up more space in your shop.
3. Fence: A good fence is essential for making accurate cuts on your table saw. Look for a fence that is easy to adjust and has positive locks to keep it in place during use.
4. Motor: The motor is what powers the blade, so it’s an important consideration when choosing a table saw.
Look for a powerful motor that can handle the types of cuts you want to make without bogging down or overloading itself.
Best Used Table Saw
Whether you’re a professional woodworker or a passionate hobbyist, having a quality table saw is essential to your success. But with so many different models on the market, it can be tough to know which one is right for you. That’s why we’ve compiled this list of the best used table saws – perfect for anyone looking for a great deal on a top-notch tool.
First up is the Delta 36-L552 5HP Unisaw with 52″ Biesemeyer Fence System. This powerful table saw comes equipped with a massive 5-horsepower motor that can handle even the most challenging projects. It also features a 52″ Biesemeyer fence system, making it easy to get precise cuts every time. If you’re looking for a high-powered table saw that won’t break the bank, this is an excellent option. Next up is the Makita 2705X1 10″ Contractor Table Saw.
This saw is ideal for anyone who needs portability and power in one package. It features a powerful 15 amp motor that can handle even the most strenuous tasks, and it’s compact enough to easily transport from one job site to another. Plus, its integrated stand makes set-up quick and easy – no need for separate tripods or stands!
Last but not least is the Jet 708675PK Xacta II 3HP 30″ Rip Fence Table Saw Kit . This top-of-the-line table saw comes with everything you need to get started on your next project, including a 3 horsepower motor, 30″ rip fence, and miter gauge assembly kit. Plus, its cast iron wings provide superior stability while you work. If you’re looking for a top-of-the-line table saw that has all the bells and whistles, this is the one for you!
Miter Saw Set Up
A miter saw is a power tool that can make quick, clean cuts in wood. It’s a versatile tool that can be used for everything from framing to trim work. You can even use it to cut crown molding and baseboards.
The key to making perfect cuts with a miter saw is having it set up correctly.
Here’s how to do it:
1. Start by attaching the blade guard.
This will help protect you from the spinning blade while you’re working.
2. Next, adjust the blade to the correct angle. For most cuts, you’ll want to set it at 45 degrees.
However, for special cuts like crown molding, you may need to adjust the angle slightly.
3. Once the blade is in place, clamp the workpiece down securely. This will help prevent kickbacks and ensure that your cuts are precise.
4 . Now you’re ready to start cutting!
How to Level Dewalt Miter Saw
If you’re looking to get the most precise cuts possible with your Dewalt miter saw, it’s important to keep the blade perfectly level. Luckily, this is a relatively easy process that only requires a few simple steps. First, start by loosening the bolts that hold the blade in place.
Next, use a small level to check if the blade is perfectly horizontal. If it’s not, simply adjust the blade until it is. Once the blade is level, retighten the bolts and make sure everything is secure.
And that’s it! By following these simple steps, you can ensure that your Dewalt miter saw will provide accurate cuts every time.
Conclusion
If you have an aluminum table saw top that’s warped or uneven, there are a few different ways you can flatten it out. One method is to use a hand planer; another is to use a belt sander. If you don’t have either of those tools, you can also use a router with a flush-trim bit.
Whichever method you choose, the goal is to remove enough material from the high spots so that the entire surface is level. Assuming your aluminum table saw top is only slightly warped or uneven, a hand planer will likely be the quickest way to flatten it out. Just set the cutting depth of the blade so that it’s taking off only a small amount of material with each pass, and then run the planer back and forth over the surface until it’s level.
If you don’t have a hand planer, another option is to use a belt sander. Start with coarse sandpaper (60 grit or higher) and work your way up to finer grits until the surface is smooth. Again, be sure to set the sanding depth so that you’re only removing a small amount of material at a time; if you take off too much, it’ll be difficult to fix later on.
Finally, if you don’t have access to either a hand planer or belt sander, you can use a router with a flush-trim bit. This method will take longer than either of the other two options since you’ll need to make multiple passes with the router in order to remove enough material. But if done carefully, it can produce good results.