How to Get a High Gloss Finish on Wood (Step-by-Step)
To get a high gloss finish on wood, build up several thin coats of a high-gloss topcoat (polyurethane, lacquer, or conversion varnish), wet-sand between coats in a grit progression from around 400 up to 2000, and finish by buffing with a cutting compound followed by a swirl-free polishing compound. Thin coats and patient wet-sanding matter more than which brand you buy. Most cloudy, low-gloss results come from rushed prep and buffing, not from the finish itself.
Below is the full sequence, from surface prep through the final rub-out, along with the wet-sanding grit chart and a lacquer-vs-polyurethane-vs-conversion-varnish comparison that most guides skip.
Quick Answer
Sand up to 320 grit, seal, then apply 3-5 thin coats of your chosen high-gloss finish. Wet-sand between coats starting at 400 grit and working up to 2000 grit, wiping with a tack cloth after every grit change. Finish by rubbing out with a cutting compound followed by a swirl-free polishing compound in a dust-free space.
Types Of Finishes For Wood
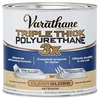
Best High Gloss Topcoat Pick
|
Varathane Triple Thick Polyurethane, Gloss
|
When it comes to enhancing the natural beauty of wood, choosing the right finish is crucial. There are several types of finishes available, each with its own unique characteristics and benefits. In this article, we will explore three commonly used finishes for wood: oil-based finishes, water-based finishes, and polyurethane finishes.
For a broader look at every finish category, including stains, oils, sealers, and paints, see our complete wood finishing guide.
Oil-based Finishes
An oil-based finish is one of the most traditional options for achieving a high gloss finish on wood. It is made by combining oil, such as linseed or tung oil, with a resin or varnish. This type of finish penetrates the wood, providing a deep, rich color and a durable protective layer.
Pros:
- Enhances the natural beauty of the wood grain
- Provides a warm and lustrous finish
- Offers excellent durability and resistance to wear and tear
- Easy to apply and maintain
- Can be used on both interior and exterior wood surfaces
- Cons:
- Takes longer to dry compared to other finishes
- Can emit strong fumes during application
- Requires proper ventilation
Water-based Finishes
Water-based finishes have gained popularity in recent years due to their low VOC (volatile organic compounds) content and environmental friendliness. These finishes are made by suspending acrylic or polyurethane particles in water. They provide a clear, glossy, and durable finish that dries quickly.
Pros:
- Low odor and low VOC emissions
- Fast drying time
- Easy to clean up with soap and water
- Non-yellowing formula retains the natural color of the wood
- Provides excellent resistance to scratches and stains
- Cons:
- May not bring out the depth of the wood grain as well as oil-based finishes
- May require more coats for a high-gloss finish
- Not as heat-resistant as other finishes
Polyurethane Finishes
Polyurethane finishes are known for their durability and versatility. They are available in both oil-based and water-based formulations. These finishes contain polyurethane resins, which create a protective coating on the wood surface, providing excellent resistance to scratches, stains, and moisture.
Pros:
- Offers a high level of protection against wear and tear
- Provides a glossy, smooth finish
- Easy to clean and maintain
- Available in both oil-based and water-based options
- Can be used on various wood surfaces
- Cons:
- May require rigorous surface preparation for proper application
- Oil-based polyurethane can produce strong fumes during application
- Water-based polyurethane may require more coats to achieve a high-gloss finish
Conversion Varnish And Lacquer (Professional-Grade Options)
Beyond oil-based, water-based, and polyurethane finishes, professional shops often reach for nitrocellulose lacquer or conversion varnish when the goal is maximum gloss. Lacquer dries fast enough that it sheds airborne dust before the film has time to trap it, which makes it a practical choice in a shop that isn’t fully dust-free. Conversion varnish (a catalyzed, professional-grade finish) cures harder and stands up better to heat, solvents, and everyday wear than polyurethane, but it needs spray equipment and ventilation to apply safely. If you’re choosing between a table-top-grade finish and a standard high-gloss polyurethane for furniture, durability needs should drive that choice as much as sheen.
Whichever finish you pick, keep the work area as dust-free as you reasonably can. Gloss surfaces reflect light evenly, so every speck of dust, hair, or lint that lands in a wet coat stays visible once the sheen builds up: a flaw that a satin or matte finish would hide completely.
Preparing The Wood Surface
Before achieving a high gloss finish on wood, it is crucial to properly prepare the wood surface. This ensures that the finish adheres smoothly and flawlessly to the wood, resulting in a beautiful and professional-looking outcome. There are three main steps involved in preparing the wood surface: sanding the wood, filling the grain, and cleaning the wood.
Sanding The Wood
One of the first steps in preparing the wood surface is sanding. Sanding is essential for creating a smooth and even surface that allows the finish to adhere properly. Start by using a coarser grit sandpaper, such as 80 or 120 grit, to remove any rough spots, imperfections, or previous finishes. Always sand in the direction of the grain to avoid damaging the wood fibers.
After sanding with the coarser grit sandpaper, switch to a finer grit sandpaper, such as 220 or 320 grit, to achieve a smoother surface. This helps to eliminate any remaining scratches or marks left by the coarser sandpaper. Be sure to wipe away any dust or debris between sanding grits to ensure a clean surface for the next step.
Filling The Grain
Next, filling the grain is an essential step for achieving a high gloss finish on wood. Depending on the type of wood and the desired level of smoothness, it may be necessary to fill the grain to create a flawless surface. Grain filler helps to even out the texture of the wood by filling in the pores and grain lines.
To fill the grain, start by applying the grain filler in the direction of the wood grain using a putty knife or a plastic spreader. Ensure that the filler is evenly distributed and covers the entire surface. Allow the filler to dry according to the manufacturer’s instructions, and then sand the surface lightly with a fine-grit sandpaper to smooth out any excess filler.
Cleaning The Wood
Cleaning the wood is the final step in preparing the wood surface for a high gloss finish. It is essential to remove any dust, dirt, or grease that may have accumulated during the sanding and filling process. This ensures that the finish will adhere properly and result in a flawless gloss.
Use a soft cloth or tack cloth to gently wipe down the entire surface, ensuring that all dust and debris are removed. If necessary, use a mild soap solution or a wood cleaner specifically designed for cleaning wood surfaces. Thoroughly rinse the wood with clean water and allow it to dry completely before applying the finish.
Applying The Finish
Applying a high gloss finish to wood can give it a stunning, professional look. However, achieving that perfectly glossy finish requires careful application techniques. In this section, we will discuss the importance of choosing the right applicator, applying thin coats, and allowing for adequate drying time.
Choosing The Right Applicator
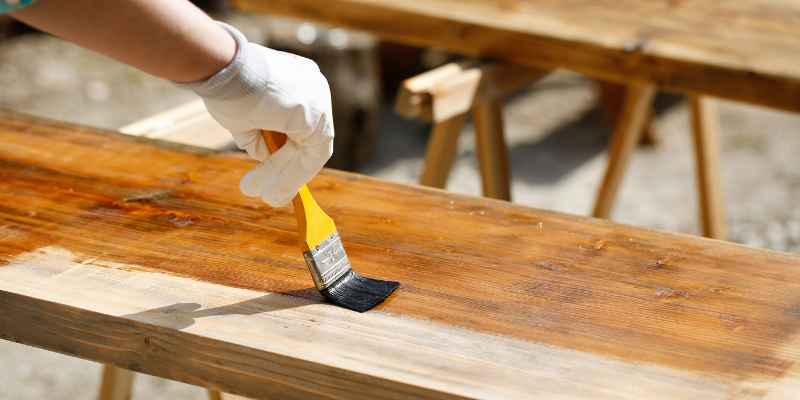
When it comes to applying a high gloss finish on wood, choosing the right applicator is essential. The applicator you choose can greatly affect the finish’s final appearance and quality. Let’s explore some options for efficient and effective application:
- Brushes: Synthetic brushes with fine bristles are commonly used for applying high gloss finishes. These brushes help in achieving a smooth, even application. Ensure that the brush is clean and free from any debris or loose bristles.
- Spray Guns: For larger surfaces or intricate woodworking projects, spray guns can provide a more efficient and evenly spread coat. However, spray guns require proper training and precautions to avoid overspray.
- Rollers: Foam or high-density foam rollers can work well when applying clear coats or finishing oils on wood surfaces. They allow for quick application and can give a smooth finish without brush strokes.
Applying Thin Coats
When applying a high gloss finish on wood, it’s crucial to apply thin coats rather than thick ones. Thin coats help ensure a more level finish and prevent the formation of bubbles or streaks. Here are some tips to apply the finish in thin coats:
- Begin by stirring the finish thoroughly to evenly distribute any settled pigments or solids.
- Use a clean brush or applicator to apply a thin and even coat of finish. Avoid overloading the brush, which can result in excess material and an uneven finish.
- Apply the finish in the direction of the wood grain to achieve a uniform appearance.
- Allow the first coat to dry completely before applying subsequent coats. This will help prevent any unwanted texture or inconsistencies.
Allowing For Drying Time
Patience is key when it comes to applying a high gloss finish on wood. Allowing the finish to dry properly between coats is crucial for achieving a flawless finish. Here’s what you need to keep in mind:
- Refer to the manufacturer’s instructions regarding the recommended drying time for the specific finish you are using.
- Avoid rushing the drying process by using artificial heat or placing objects on the freshly coated surface.
- Give each coat enough time to dry and cure before sanding or applying the next coat. This will help prevent any surface imperfections or damage.
- Stay patient and resist the temptation to rush the process. Remember, achieving a high gloss finish is worth the wait.
Achieving A Smooth Surface
When it comes to achieving a high gloss finish on wood, one of the most crucial steps is achieving a smooth surface. A smooth surface is the foundation for a flawless finish, as any imperfections or rough areas will be highlighted once the gloss is applied. In this post, we will delve into two effective techniques for achieving a smooth surface on wood: using fine-grit sandpaper and buffing and polishing.
Using Fine-grit Sandpaper
Using fine-grit sandpaper is an essential step in achieving a smooth surface on wood. Fine-grit sandpaper, typically with a grit of 220 or higher, is designed to remove any roughness, scratches, or blemishes on the wood surface. Here’s how you can use fine-grit sandpaper:
- Start by cleaning the wood surface to ensure it is free from any dust or debris.
- Wrap the sandpaper around a sanding block or use a sanding sponge for a better grip.
- Working in the direction of the wood grain, apply light pressure and sand the surface in smooth, even strokes.
- Inspect the surface regularly to ensure the desired smoothness is achieved. If needed, continue sanding until all imperfections are removed.
- After sanding, wipe away any residual dust with a clean, damp cloth.
By using fine-grit sandpaper, you can effectively smooth out the wood surface, creating the ideal base for a high gloss finish.
Wet-Sanding Grit Progression Between Coats
Once you are building up coats of finish, dry sanding gives way to wet-sanding, which means sanding with a lubricant such as mineral spirits or soapy water so the paper cuts cleanly without clogging or scratching the film. Working through the grits in order, without skipping steps, is what actually produces a mirror finish:
| Stage | Grit | Purpose |
|---|---|---|
| Leveling early coats | 400 | Knocks down dust nibs and brush texture without cutting through the coat |
| Mid-build refinement | 600-800 | Removes 400-grit scratches and prepares the surface for the next coat to bond |
| Pre-final-coat leveling | 1000 | Final flattening pass before the last coat goes on |
| Post-final-coat rub-out | 1500-2000 | Removes any remaining texture from the cured final coat, leaving a haze that buffing compound will clear |
Wipe the surface with a tack cloth every time you change grits, because carrying coarser grit particles into a finer-grit pad reintroduces the scratches you just removed.
Rubbing Out A Cured Finish To A Mirror Gloss
Even a well-applied coat dries with faint texture: dust nibs, brush marks, or orange peel. The mirror look comes from leveling that film flat and then polishing the scratches out of it, a stage woodworkers call rubbing out. It is separate from the between-coat sanding above, and it is where most of the gap between "shiny" and "mirror" is made. This section covers only that stage. For picking a finish and sheen level, see our guide to the best polyurethane for hardwood floors, and for coat-by-coat application on a flat surface, see how to finish a table top with polyurethane.
When To Start Rubbing Out
Wait until the final coat is hard enough that wet-sanding produces a fine slurry instead of gumming up the paper. Dry-to-touch and recoat times on the can are much shorter than the time a finish needs to cure fully, and cure times for polyurethane are generally quoted in days to weeks, so follow the manufacturer’s instructions for your specific product. If the pad clogs or the film smears, it is not ready.
The Rub-Out Ladder
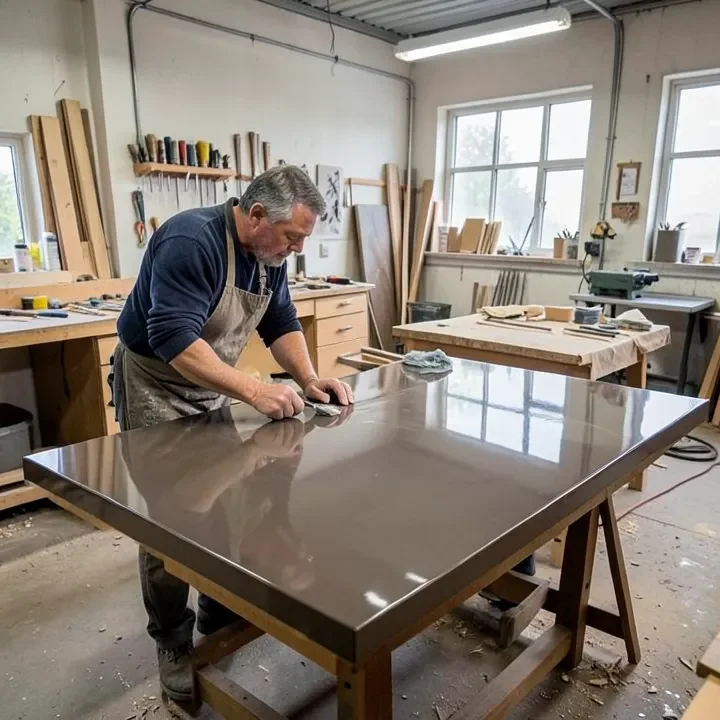
Work through these steps in order and wipe the surface clean between each one. Use a flat sanding block rather than your fingertips so you level the film instead of following its dips.
| Step | Abrasive | Lubricant | Purpose | What it looks like when done |
|---|---|---|---|---|
| 1 (only if needed) | 800-1000 grit wet/dry paper on a flat block | Water with a drop of dish soap | Level orange peel and heavy dust nibs | Even dull gray; any shiny spots left are low spots you have not touched yet |
| 2 | 1500 grit | Soapy water | Remove the 800-1000 scratches | Uniform, silky matte |
| 3 | 2000 grit, or Micro-Mesh style pads in the 1500-3200 range | Soapy water | Refine the scratch pattern before polishing | Very fine satin haze with no visible scratches |
| 4 | Cutting compound on a clean foam pad or cloth | None; work one 2 ft section at a time | Remove the 2000 grit scratches | Hazy gloss, reflections starting to show |
| 5 | Fine polishing or swirl-remover compound on a separate clean pad | None | Remove the cutting-compound haze | Deep, mirror-like gloss |
Hand Or Machine?
Small flat projects can be rubbed out entirely by hand with a block and a cloth or foam pad. On a large tabletop, a random-orbit polisher at low speed saves effort, but heat is the enemy: keep the pad moving and avoid dwelling on one spot, because friction heat can soften or burn through a thin film. Use a separate pad for each compound so coarse particles never reach the final polish. For a gentler finishing polish afterward, see our best wood polish roundup.
Why Steel Wool And Pumice Will Not Give A Mirror
The traditional hand-rub with fine steel wool, pumice, or rottenstone leaves a soft satin to semi-gloss look rather than a mirror, which is exactly what some furniture makers want. Penetrating oils behave differently again: Danish oil sinks into the wood instead of building a film, so it leaves a soft, low sheen and cannot be rubbed out to a mirror. If you want a true high gloss, start with a film-building finish such as polyurethane, lacquer, or varnish.
Fixing Common Rub-Out Problems
| Problem | Likely cause | Fix |
|---|---|---|
| Dull or shiny pits remain after 2000 grit | The film was never fully leveled at a coarser grit | Go back to 800-1000 grit until the whole surface is one uniform dull tone, then repeat the ladder |
| Fine circular swirls in sunlight | Compound too aggressive, or a pad contaminated with grit | Switch to a fine polish on a clean pad with light pressure |
| Bare wood or color showing at edges and corners | The film is thinnest at edges and corners, and pressure concentrates there | Tape off edges or stay off them; if you cut through, brush on more thin coats, let them cure, then rework |
| Haze that will not clear | Skipped a grit, or sanding slurry and compound left on the surface | Wipe clean with a microfiber cloth and back up one grit before polishing again |
| Pad clogs or the film feels gummy | The finish has not cured enough | Stop and wait longer; rubbing out too early smears the film instead of cutting it |
Safety While Wet-Sanding And Polishing
Wear a respirator or dust mask for any dry sanding, and gloves when working with mineral spirits. Rags soaked with oil-based finishes or oil-based thinners can heat up as the finish cures and, in a pile, can catch fire. Lay them flat outdoors to dry, or soak them in water inside a sealed metal container before disposal.
Maintaining The High Gloss Finish
Achieving a high gloss finish on wood requires careful maintenance. Follow these tips to ensure your wood stays shiny and lustrous for a long time.
Regular Cleaning And Dusting
Regular cleaning and dusting are essential for maintaining the high gloss finish on wood. By keeping the surface free from dirt, dust, and debris, you can preserve the shine and beauty of your wooden furniture or floors. Here are some tips for effective cleaning and dusting:
- Use a soft, lint-free cloth or a microfiber duster to gently remove dust from the surface.
- Avoid using abrasive materials or rough sponges that can scratch the glossy finish.
- Wipe the wood in the direction of the grain to prevent any damage.
- For stubborn stains or spills, use a mild soap solution and a damp cloth to gently clean the area.
- Remember to dry the surface immediately to prevent water damage.
Avoiding Harsh Chemicals
When it comes to maintaining a high gloss finish on wood, it is important to avoid using harsh chemicals that can damage the surface. Certain cleaning products contain strong chemicals or solvents that may strip away the protective coating and dull the glossy shine. Instead, opt for gentle, non-abrasive cleaners and follow these tips:
- Read the labels of cleaning products and avoid those that contain ammonia or bleach.
- Choose cleaners specifically designed for wood surfaces and follow the recommended usage instructions.
- When using any cleaner, always test it on a small, inconspicuous area first to ensure it does not cause any discoloration or damage.
- After cleaning, rinse the surface thoroughly with clean water and dry it immediately.
Periodic Refinishing
Periodic refinishing is an important step in maintaining the high gloss finish on wood. Over time, the glossy surface may start to wear off or develop scratches and dull spots. By refinishing the wood, you can restore its original shine and protect it from further damage. Here are some points to remember:
- Before refinishing, ensure the surface is clean and free from any dust or debris.
- If the gloss has faded or there are scratches, lightly sand the wood using fine-grit sandpaper.
- After sanding, apply a gloss-enhancing wood finish, such as varnish or a polyurethane coating, following the manufacturer’s instructions.
- Allow the finish to dry completely before using the furniture or walking on the refinished wood floors.
- Periodically inspect the wood for any signs of wear and tear, and refinish as necessary to maintain the high gloss finish.
Frequently Asked Questions On How To Get A High Gloss Finish On Wood
How Do You Get High Gloss Shine On Wood?
Sand the wood smooth, apply a wood conditioner if the species blotches, then brush on several thin coats of a high gloss polyurethane, letting each coat dry fully and lightly sanding between coats. Finish by rubbing out the cured final coat with fine wet-sanding grits and polishing compound.
How Do You Get The Perfect Gloss Finish?
Sand to 320 grit, remove all dust, and apply three to five thin coats of a gloss clear finish. Wet-sand between coats with 400 up to 1000 grit, then rub out the cured final coat with 1500 to 2000 grit followed by a cutting compound and a fine polish. Thin coats and a clean, dust-free space matter more than brand.
How Do You Give Furniture A High Gloss Finish?
Sand the furniture to 220 to 320 grit, then brush or spray thin, even coats of gloss polyurethane, varnish, or lacquer. Level between coats with fine wet-sanding, and rub out the final coat for the mirror look. A gloss paint with primer is a different, opaque finish and is not what shows off wood grain.
How Do I Get A High Gloss Polyurethane Finish?
Sand the surface smooth, apply a thin even coat with a brush or sprayer, and let it dry completely. Lightly sand to remove nibs, wipe off the dust, and repeat for several coats. Once the final coat has cured, wet-sand and polish it to bring out the full gloss.
What Grit Should I Wet-Sand Between Coats Of A High Gloss Finish?
Work through the grits in order rather than jumping ahead: 400 grit to knock down dust nibs on early coats, 600-800 grit to remove those scratches and prep for the next coat, 1000 grit as a final leveling pass before the last coat, then 1500-2000 grit to rub out the cured final coat before buffing. Wipe with a tack cloth between every grit change.
Should I Use Lacquer Or Polyurethane For The Glossiest Finish?
Lacquer dries fast enough to shed airborne dust before it settles in the wet film, so it is often the better choice in a shop that is not fully dust-free, and it naturally lays down a very high gloss. Polyurethane and conversion varnish take longer to dry and need a cleaner environment, but they cure harder and resist heat, solvents, and wear better over time, a real consideration for tabletops and other high-use surfaces.
Do I Have To Rub Out The Finish To Get A True Mirror Gloss?
Usually yes. A finish straight from the brush or spray gun dries with some texture, so it looks glossy but not like a mirror. Leveling it with fine wet-sanding grits and then polishing out the scratches with compound is what produces the mirror look. See the rub-out ladder above.
Can Danish Oil Give A High Gloss Finish?
Not really. Danish oil soaks into the wood and leaves a soft, low sheen instead of a thick film, so there is nothing to level and polish to a mirror. For a high gloss, use a film-building finish such as polyurethane, lacquer, or varnish.
Conclusion
A high gloss finish comes down to three things done well: thorough surface prep, thin coats with a full wet-sanding grit progression between them, and a two-stage buffing routine at the end.
Remember to sand and prepare the wood surface, apply multiple thin coats of varnish or lacquer, and polish with a high-quality rubbing compound for a smooth and shiny result. With a little patience and attention to detail, your wood projects will have a professional and glossy finish that is sure to impress.
Sponsored / affiliate links. As an Amazon Associate I earn from qualifying purchases. I may earn additional commission from eligible campaigns.