How to Glue Stones Together: Expert Tips for Bonding Your Stones
To glue stones together, clean the surface, apply a strong adhesive, and press firmly until the glue is set. Proper preparation and a suitable adhesive are key for a successful bond between stones.
The process of gluing stones together requires careful attention to detail to ensure a secure and long-lasting bond. Whether you are working on a DIY project or repairing a piece of stone artwork, the right adhesive and technique can make all the difference.
This article will guide you through the steps needed to glue stones together effectively. By following these instructions, you will be able to create a reliable bond that will withstand various environmental conditions and maintain the aesthetic appeal of the stones. Discover the secrets of gluing stones together in the next paragraphs.
Choosing The Right Adhesive For Your Project
Choosing the right adhesive for your project is key when it comes to gluing stones together. Ensure a strong bond with a carefully selected adhesive that suits the specific requirements of your stone materials for a successful and durable result.
When it comes to gluing stones together, selecting the right adhesive is crucial for a successful and long-lasting result. Here are some factors to consider when choosing an adhesive for your stone project:
- Compatibility: Ensure that the adhesive you choose is compatible with the type of stones you are working with. Different stones may have different porosities and chemical compositions, so it’s important to select an adhesive that works well with your specific stones.
- Strength: Consider the strength requirements for your project. If you are gluing small, lightweight stones, a less strong adhesive may be sufficient. However, for larger or heavier stones, a stronger adhesive that can withstand the weight and pressure is necessary.
- Durability: Depending on the location and purpose of your project, you may need an adhesive that can withstand exposure to water, heat, or UV rays. Consider the durability requirements and choose an adhesive that is suitable for the intended environment.
- Application: Think about the application method that works best for your project. Some adhesives come in tubes for easy application, while others may require mixing or specialized tools. Choose an adhesive that aligns with your preferred application method.
Now that you understand the factors to consider, let’s take a look at the different types of adhesives commonly used for bonding stones together.
Different Types Of Adhesives For Different Stones
When it comes to bonding stones, various types of adhesives are available to suit different stone materials and project requirements. Here are some common types of adhesives used for gluing stones together:
- Epoxy: Epoxy adhesives are popular for their excellent bonding strength and durability. They are suitable for bonding a wide range of stones, including granite, marble, and other natural stones. Epoxy adhesives often come in two parts that need to be mixed before use, providing a strong bond that can resist moisture and chemicals.
- Cyanoacrylate: Also known as super glue or instant adhesive, cyanoacrylate adhesives are quick-setting and provide a strong bond. They are suitable for bonding smaller stones and can work well with materials like gemstones, quartz, and glass. However, cyanoacrylate adhesives may not be the best option for larger or heavier stones.
- Construction Adhesive: Construction adhesives, such as polyurethane-based adhesives, are commonly used for outdoor stone projects. They offer good adhesion and are resistant to weathering and moisture. Construction adhesives are versatile and can bond a variety of stones, including concrete, brick, and natural stones.
- Silicone: Silicone adhesives provide flexibility and are commonly used for projects that require some degree of movement, such as sealing and bonding stones in areas prone to vibration or expansion. Silicone adhesives can work well with stones like quartz, slate, and limestone.
Remember that it’s essential to ensure compatibility between the adhesive and the stones you are working with. Always read the manufacturer’s instructions and test the adhesive on a small, inconspicuous area before applying it to your entire project. With the right adhesive and proper application, you can achieve a strong and durable bond between your stones.
Preparing The Stones For Bonding
Learn the essential steps for preparing stones before bonding them together. This guide will help you achieve a strong and long-lasting bond for your stone projects.
Cleaning The Surfaces Of The Stones:
To ensure a strong bond between the stones, it is important to thoroughly clean their surfaces. This will remove any dirt, dust, or debris that might hinder the adhesive from sticking properly. Here’s how you can clean the surfaces of the stones:
- Start by rinsing the stones with water to remove loose dirt and debris.
- Use a mild detergent or stone cleaner to scrub the stones gently.
- Rinse the stones thoroughly to remove any leftover cleaning solution.
- Allow the stones to dry completely before proceeding to the next step.
Sanding Or Roughening The Surfaces For Better Adhesion:
In order to achieve a strong bond between the stones, it is recommended to sand or roughen their surfaces. This creates a better surface area for the adhesive to adhere to. Here’s what you need to do:
- Start by selecting an appropriate grit sandpaper. The grit level will depend on the type of stone you are working with.
- Gently sand the surfaces of the stones in a circular motion. Be careful not to apply too much pressure, as this can damage the stones.
- Continue sanding until the surfaces feel rough to the touch.
- Once you have finished sanding, make sure to remove any dust or debris from the stones.
Removing Any Existing Coatings Or Sealants:
Before bonding the stones together, it is essential to remove any existing coatings or sealants. This ensures that the adhesive can bond directly to the stone surfaces. Follow these steps to remove coatings or sealants:
- Start by using a sealant remover or appropriate solvent for the specific coating or sealant on the stones.
- Apply the remover or solvent to the affected areas and let it sit for a few minutes to loosen the coating or sealant.
- Use a scraper or a soft brush to gently remove the coating or sealant from the surfaces of the stones.
- Repeat the process if necessary until all coatings or sealants have been completely removed.
By following these steps and ensuring that the surfaces of the stones are properly prepared, you will create a solid foundation for bonding the stones together effectively.
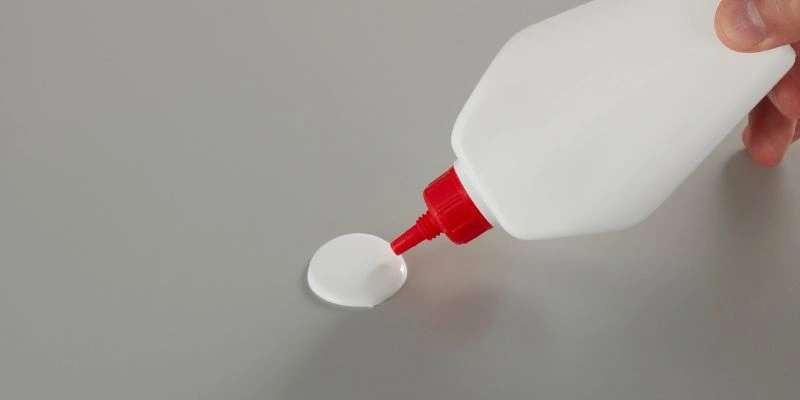
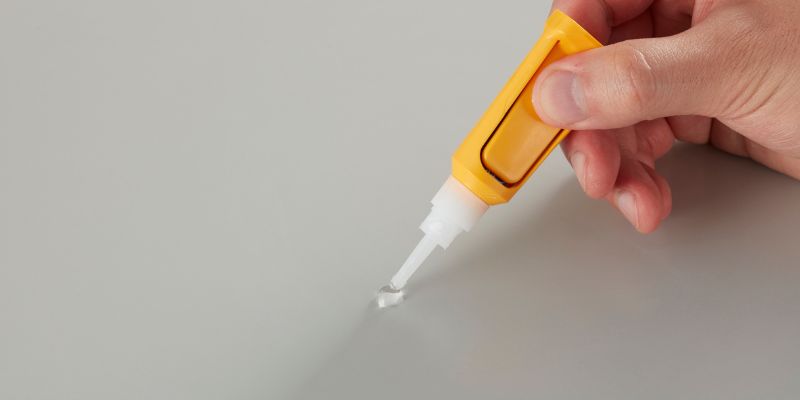
Applying The Adhesive
To glue stones together, follow these simple steps for applying adhesive. Firstly, choose a suitable adhesive for your stones. Then, clean and prepare the surfaces to be glued, applying a thin layer of adhesive on both stones. Press the stones together firmly and allow the adhesive to dry completely for a strong bond.
Applying The Adhesive Evenly And Consistently
When it comes to gluing stones together, applying the adhesive evenly and consistently is crucial for a strong and lasting bond. Here are some tips to help you achieve just that:
- Start by cleaning the surfaces of the stones that will be glued together. Remove any dirt, dust, or debris to ensure a clean surface for better adhesion.
- Using a small brush or applicator, apply a thin and even layer of adhesive to one of the stone surfaces. Be sure to cover the entire area where the stones will meet.
- Take care not to apply too much adhesive, as this can result in excess overflow when the stones are pressed together.
- For larger stones, it may be necessary to apply adhesive in sections, working on one area at a time to ensure even coverage.
- Once the adhesive is applied, align the stones carefully and press them firmly together. Gently wiggle the stones to ensure a secure bond and to remove any air bubbles trapped between them.
- Wipe away any excess adhesive that may have squeezed out from the edges of the stones with a clean cloth or sponge.
- Allow the adhesive to dry completely according to the manufacturer’s instructions before moving or handling the glued stones.
- If you’re gluing stones with porous surfaces, such as natural stones or unglazed ceramics, it is recommended to apply a second coat of adhesive to ensure better adhesion.
Considering The Amount Of Adhesive Needed For Different Stone Sizes
Different stone sizes require varying amounts of adhesive to ensure a strong bond. Here’s a guideline to help you determine the right amount:
- For small stones, such as pebbles or beads, a small dot or thin line of adhesive is usually sufficient. Remember to apply the adhesive evenly and avoid using too much, as it can overflow and create a messy appearance.
- Medium-sized stones may require a slightly larger amount of adhesive. Apply a thin layer that covers the entire area where the stones will be joined, ensuring even coverage.
- Larger stones will generally require more adhesive. It is best to apply the adhesive in sections, working on one area at a time to ensure even coverage. Take care not to exceed the recommended amount of adhesive, as excess overflow can weaken the bond.
- If you’re unsure of the right amount of adhesive to use, it’s better to start with a smaller amount and add more if needed. Remember, it’s easier to add more adhesive than to remove excess.
Using The Appropriate Tools For Applying The Adhesive
Using the appropriate tools for applying adhesive is essential to achieve better control and precision. Here are some tools you can use:
- Small brush or applicator: This is ideal for applying adhesive to small stones. The bristles should be firm enough to provide control but soft enough to avoid scratching delicate surfaces.
- Toothpick or wooden stick: These are useful for applying glue to tight spots or narrow areas between stones. They allow for precise application with minimal mess.
- Tweezers or small tongs: These tools can be handy when working with small stones or delicate pieces. They help to hold the stones in place during application and avoid smudging the adhesive.
- Disposable gloves: Wearing gloves can prevent the adhesive from sticking to your fingers and allow for easier cleanup.
- Clean cloth or sponge: This is useful for wiping away any excess adhesive that may have squeezed out from the edges of the stones. It helps to maintain a neat and tidy appearance.
Remember to choose the appropriate tools based on the size and type of stones you are working with. Using the right tools will make the adhesive application process easier and more precise.
Securing The Bonded Stones
Learn how to securely bond stones together with these simple tips and techniques. Discover the best glues and methods to ensure a strong and long-lasting bond for your stone projects.
Techniques For Holding The Stones Together During The Bonding Process:
- Positioning the stones: Ensure that the stones fit together snugly, with minimal gaps. Place them in the desired alignment before applying the adhesive.
- Clamping: Use clamps or a vise to hold the stones in place while the adhesive sets. This provides steady pressure and prevents the stones from moving.
- Rubber bands or tape: If clamping is not feasible, use rubber bands or tape to hold the stones together tightly. Wrap them around the stones and apply gentle pressure to maintain a secure bond.
Allowing Sufficient Drying Or Curing Time For The Adhesive To Set:
- Read the adhesive instructions: Different adhesives require varying amounts of time to fully bond. Follow the manufacturer’s guidelines to determine the drying or curing time required.
- Patience is key: Avoid handling or disturbing the stones before the adhesive has fully set. Rushing this step may weaken the bond and compromise the durability of the project.
- Optimal conditions: Provide the stones with adequate ventilation and avoid exposing them to excessive heat or moisture, as these conditions may affect the adhesive’s ability to cure properly.
Adding Additional Support Or Reinforcement If Needed:
- Epoxy putty or filler: If the stones have uneven surfaces or gaps, consider using epoxy putty or filler to strengthen the bond. Apply the putty or filler to fill any voids and create a more secure connection.
- Wire or mesh: In cases where the stones are larger or heavier, adding wire or mesh can provide additional reinforcement. Embed the wire or mesh into the adhesive while it is still wet, ensuring it is securely anchored in both stones.
- Support structures: For larger projects, constructing support structures like wooden frames can help distribute the weight evenly and provide stability. Place the stones on the support structures as the adhesive sets, allowing it to dry in a secure position.
Remember, the success of gluing stones together lies in effective techniques for holding the stones during bonding, allowing ample time for the adhesive to set, and incorporating additional support if necessary. By following these steps, you will create a strong and lasting bond between the stones.
Finishing And Sealing The Bonded Stones
Learn how to effectively glue stones together by following these step-by-step instructions for finishing and sealing the bonded stones. Achieve a strong and durable bond that will last for years with these expert tips.
Sanding And Smoothing The Bonded Area For A Seamless Finish
To achieve a professional and polished look when gluing stones together, it’s crucial to sand and smooth the bonded area. By following these steps, you can seamlessly blend the stones and create a visually appealing result:
- Clean the bonded area: Before sanding, ensure that the bonded stones are free from dirt, dust, or any debris. This will help achieve a smooth finish without any unwanted particles.
- Choose the right sandpaper: Select a sandpaper with an appropriate grit level based on the hardness of the stones. For softer stones, a finer grit (between 200-500) works well, while harder stones might require a coarser grit (between 80-120).
- Begin sanding: Rub the sandpaper gently in a circular motion over the bonded area, applying even pressure. Keep sanding until the stones start to blend together seamlessly. Be patient and take your time to avoid damaging the stones.
- Check the progress: Periodically stop sanding and wipe away the dust to assess the progress. Look closely at the bonding joint to ensure it is becoming less noticeable. If needed, continue sanding until you achieve a uniform and smooth surface.
- Finish with a finer grit: Once you have sanded away any roughness and achieved a smooth surface, switch to a finer grit sandpaper (around 1000-2000 grit) for a final touch. This will give the bonded area a polished and refined appearance.
Remember, sanding is a delicate process, so take care not to apply excessive force or sand too aggressively. The goal is to achieve a seamless blend between the stones, creating a bond that appears as natural as possible.
Applying A Sealant To Protect The Bond And Enhance The Appearance
After gluing stones together, it’s essential to apply a sealant. This not only helps protect the bond from external elements but also enhances the overall appearance of the finished piece. Follow these steps to apply a sealant effectively:
- Choose the right sealant: There are various types of sealants available, ranging from epoxy resin to specialized stone sealants. Consider the type of stones you are working with and select a sealant that is suitable for their specific needs.
- Prep the surface: Before applying the sealant, make sure the bonded area is thoroughly clean and dry. Remove any dust, debris, or sanding residue. It’s important to have a clean surface for the sealant to adhere evenly.
- Apply the sealant: Follow the instructions provided by the sealant manufacturer for application. Using a brush or applicator, carefully apply an even layer of sealant over the entire bonded area. Take care not to miss any spots, ensuring full coverage.
- Allow drying time: Give the sealant sufficient time to dry and cure as per the manufacturer’s instructions. This may take several hours or even days, depending on the type of sealant used. Avoid touching or disturbing the sealant during the drying process.
- Optional additional coats: Depending on the specific sealant and desired level of protection, you may need to apply multiple coats. Allow each coat to dry fully before applying the next. This will provide enhanced durability and longevity for the bonded stones.
Applying a sealant not only protects the bonding joint from moisture and wear but also brings out the natural beauty of the stones. The sealant enhances their colors and textures, making them more vibrant and visually appealing.
Tips For Maintaining The Bonded Stones Over Time
Once you have successfully glued and sealed stones together, it’s important to maintain their bond and overall appearance to ensure long-lasting durability. Consider the following tips for proper maintenance:
- Avoid excessive force or pressure: Be cautious when handling or using the bonded stones to prevent applying unnecessary force or pressure that could weaken the bond. Treat them gently and with care.
- Clean with mild soap and water: Regular cleaning is essential to keep the bonded stones looking their best. Use a soft cloth or sponge, mild soap, and water to gently clean the surface. Avoid harsh abrasives or chemicals that may damage the sealant or stones.
- Dry thoroughly: After cleaning, ensure that the bonded stones are dried thoroughly to prevent moisture buildup. Moisture can potentially weaken the bond or cause discoloration over time.
- Periodic resealing: Depending on the type of sealant used, periodic resealing may be necessary to maintain the bond’s integrity. Follow the recommended resealing schedule provided by the sealant manufacturer.
- Protect from extreme temperatures: Extreme heat or cold can affect the bond between stones. Avoid exposing the bonded area to sudden temperature changes or prolonged exposure to direct sunlight or freezing conditions.
With proper maintenance and care, your bonded stones can retain their beauty and durability for years to come. Regular cleaning, gentle handling, and appropriate protection from environmental factors will help preserve the bond and ensure the longevity of your stone creation.
Tips For Troubleshooting And Repairing Bonds
Learn how to effectively troubleshoot and repair bonds by following these practical tips. Whether you’re working with stones or any other material, this guide will help you glue them together effortlessly.
When gluing stones together, you may encounter common issues that can affect the bonding process. To help you troubleshoot and repair any damage or failed bonds, as well as prevent future problems, consider the following tips:
Common Issues That May Arise During The Bonding Process
- Inadequate adhesion: If your stones are not sticking together properly, it could be due to inadequate adhesion. Possible reasons for this include using the wrong type of adhesive, not preparing the surfaces correctly, or not applying enough pressure during the bonding process. Ensure you choose the appropriate adhesive, clean and dry the surfaces thoroughly, and use sufficient pressure to create a strong bond.
- Uneven surfaces: Uneven surfaces can cause gaps and hinder proper bonding. If your stones have uneven surfaces, consider using a filler material or sanding them down to create a more even contact area.
- Drying time: Some adhesives require a specific amount of time to dry and cure properly. If you remove clamps or start using the stones before the adhesive is fully cured, it may compromise the bond. Make sure to follow the manufacturer’s instructions regarding the drying time and avoid disturbing the bonded stones too soon.
Techniques For Repairing Damaged Or Failed Bonds
- Remove the old adhesive: When repairing damaged or failed bonds, it’s crucial to remove any remnants of the old adhesive. Use a solvent recommended for the specific adhesive, and carefully clean both surfaces to ensure a fresh start.
- Apply a fresh layer of adhesive: Once the old adhesive is removed, apply a fresh layer of adhesive to both surfaces. Ensure you use an adhesive that is strong enough for the type of stones you are working with. Follow the manufacturer’s recommendations on application techniques and drying time.
- Use clamps or weights: To create a strong bond during the repair process, apply pressure by using clamps or weights and leave them in place until the adhesive is fully cured. This will help ensure a secure bond between the stones.
Preventative Measures To Avoid Future Bonding Problems
- Surface preparation: Properly preparing the surfaces of the stones is essential for a successful bond. Clean the surfaces thoroughly to remove any dirt, oil, or debris that could affect adhesion.
- Compatibility: Ensure that the adhesive you choose is compatible with the specific types of stones you are working with. Some adhesives may not be suitable for certain stone materials. Check the manufacturer’s instructions or consult with a professional for guidance.
- Testing: Before applying the adhesive to the stones permanently, consider doing a small test bond to evaluate the adhesive’s performance. This will allow you to identify any potential issues before working on the actual project.
- Follow manufacturer’s instructions: Adhesive products often come with specific instructions for optimal usage. To maximize the bonding strength and longevity, carefully read and follow the manufacturer’s instructions regarding application, drying time, and storage.
By following these troubleshooting tips, repair techniques, and preventative measures, you can ensure a successful bonding process for your stones. Don’t let common issues discourage you – with the right approach, you can achieve sturdy and long-lasting bonds.
Safety Precautions And Best Practices
Looking for safety precautions and best practices when it comes to gluing stones together? Follow these 6 guidelines to ensure a secure bond and avoid any mishaps. With brief and concise sentences, this SEO-friendly content will provide you with the information you need.
Using Protective Equipment When Working With Adhesives:
When working with adhesives to glue stones together, it is crucial to prioritize your safety. Here are some safety precautions and best practices to consider:
- Wear Safety Gloves: Protect your hands from potential chemical exposure and skin irritation by wearing safety gloves. Opt for gloves made from nitrile or another appropriate material that will provide a barrier between your skin and the adhesive.
- Use Safety Glasses: Shield your eyes from splashes or vapors by wearing safety glasses. This will reduce the risk of eye irritation or injury caused by accidental contact with the adhesive.
- Work in a Well-Ventilated Area: Ensure proper ventilation during the bonding process by working in an area with good air circulation. Adhesive fumes can be harmful when inhaled, so opening windows or using fans can help disperse these fumes and maintain air quality.
- Consider a Respirator: If you anticipate working with adhesives that emit strong fumes, it’s advisable to use a respirator. This will provide additional protection against inhalation of potentially harmful substances. Choose a respirator that is appropriate for the type of adhesive you are using.
- Protective Clothing: Avoid direct skin contact with adhesives by wearing appropriate clothing, such as long sleeves and pants. This will help prevent any accidental adhesive spills or splashes from coming into contact with your skin.
- Keep Adhesives Away from Children and Pets: Store adhesives out of reach of children and pets to prevent accidental ingestion or exposure. Store them in a secure location where they cannot easily be accessed.
Remember, following these safety precautions and wearing protective equipment when working with adhesives will help ensure a safe and successful stone bonding process. Now, let’s discuss how to store and handle adhesives properly.
Storing And Handling Adhesives Properly:
Taking proper care of your adhesives is essential to maintain their effectiveness and ensure your safety. Here are some guidelines for storing and handling adhesives:
- Store in a Cool and Dry Place: It is important to store adhesives in a cool and dry location to prevent moisture or extreme temperatures from affecting their performance. Look for a dedicated storage area away from direct sunlight or heat sources.
- Seal Containers Tightly: To prevent the adhesive from drying out or deteriorating, always seal the containers tightly after use. Make sure the lids or caps are securely fastened to maintain the adhesive’s adhesive properties.
- Avoid Freezing: Some adhesives can be sensitive to freezing temperatures. Check the product labeling or manufacturer’s instructions to determine if the adhesive should be kept above freezing temperatures.
- Read and Follow Instructions: Before using any adhesive, thoroughly read the instructions provided by the manufacturer. Follow the recommended guidelines for application, drying time, and any specific handling instructions.
- Clean Tools and Surfaces: After using adhesives, clean your tools and surfaces immediately. This will prevent the adhesive from hardening and prolong the lifespan of your tools. Use appropriate cleaning solvents or follow the manufacturer’s recommendations for adhesive removal.
By adhering to these best practices for storing and handling adhesives, you can ensure their longevity and maintain their adhesive properties. Next, let’s discuss the importance of proper ventilation during the bonding process.
Project Ideas And Inspiration
Discover unique and creative project ideas to glue stones together and bring your artistic vision to life. With endless possibilities and inspiration, explore different techniques to effortlessly bond stones and create stunning DIY crafts. Unleash your creativity and transform ordinary stones into extraordinary works of art.
Creative Ways To Use Bonded Stones In Various Craft And Diy Projects
Many people are discovering the beauty of bonding stones together to create unique and stunning craft and DIY projects. Whether you’re a seasoned crafter or a beginner looking for inspiration, there are countless creative ways to use bonded stones in your projects.
Here are some ideas to get you started:
- Stone picture frames: Glue stones around the edges of a plain picture frame to add a touch of natural beauty to your cherished photos.
- Stone coasters: Bond small stones together to create coasters that will add an earthy element to your coffee table.
- Stone jewelry: Use small, polished stones and jewelry adhesive to make beautiful pendants, earrings, or bracelets.
- Stone candle holders: Create rustic and charming candle holders by bonding stones together in a circular or square shape.
- Stone garden markers: Add a decorative touch to your garden by gluing stones with plant names onto small sticks or stakes.
- Stone mosaic art: Arrange different colored stones into intricate patterns and designs to create stunning mosaic wall art.
Examples Of Stunning Stone Bonding Projects
The possibilities of what you can create with bonded stones are endless. Here are some examples to inspire your next project:
- Stone-covered mailbox: Transform your mailbox into a unique and eye-catching piece by covering it with bonded stones.
- Stone pathway: Create a beautiful pathway for your garden by bonding flat stones together to form a sturdy and decorative walkway.
- Stone serving tray: Make a one-of-a-kind serving tray by gluing flat stones onto a wooden or metal base. Perfect for entertaining guests.
- Stone coasters with patterns: Combine stones of different colors and shapes to create intricate and mesmerizing patterns on your coasters.
- Stone wall art: Arrange various sizes and shapes of stones on a canvas or wooden board to create a stunning wall art piece for your home.
- Stone birdhouse: Bond stones onto a wooden birdhouse to give it a natural and rustic look that will blend seamlessly into your garden.
Using Different Stone Types For Unique Effects And Designs
One of the exciting aspects of bonding stones together is the ability to experiment with different stone types to achieve unique effects and designs. Here are some stones to consider and their characteristics:
- River rocks: These smooth and rounded stones are perfect for creating a soothing and natural look.
- Gemstones: Add a touch of elegance to your projects by using polished gemstones for a pop of color and shine.
- Slate: This durable and versatile stone can be used to create intricate patterns and designs.
- Limestone: Its soft and light colors make it ideal for creating a subtle and calming effect in your projects.
- Marble: Known for its elegance and sophistication, marble stones can elevate any craft or DIY project.
Remember to explore different combinations of stone types to find the perfect balance and create a truly unique and personalized piece.
Now that you have some project ideas and inspiration, it’s time to gather your materials and let your creativity shine. Whether you’re making stone jewelry, mosaic art, or transforming everyday objects with bonded stones, the end result will be a beautiful and unique piece that reflects your creativity and love for nature.
Frequently Asked Questions Of How To Glue Stones Together
What Is The Best Glue For Stone?
The best glue for stone is epoxy adhesive. It provides strong and durable bonds.
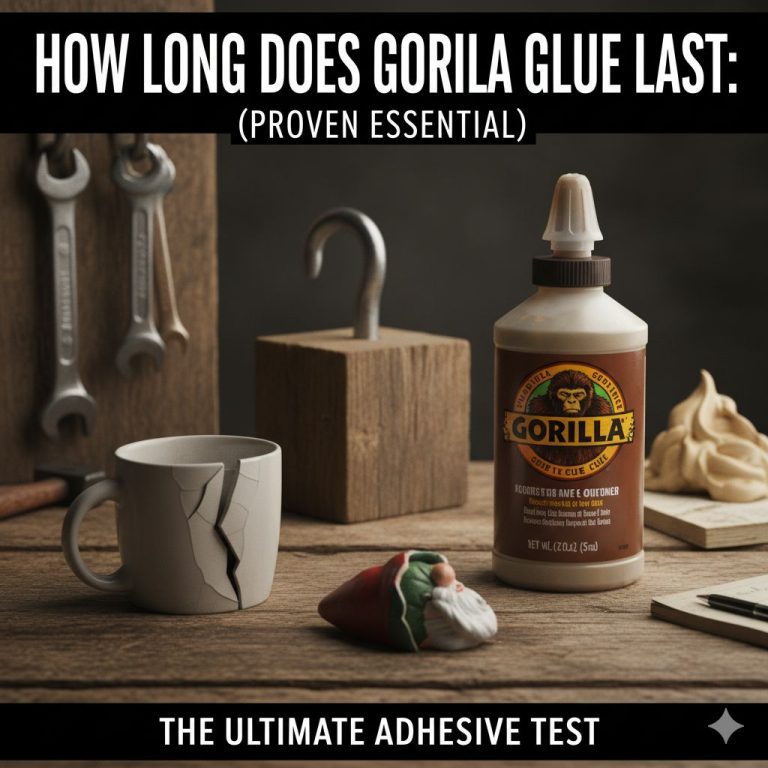
Will Gorilla Glue Hold Rocks Together?
Yes, Gorilla Glue can effectively hold rocks together due to its strong adhesive properties.
How Do You Glue Landscape Rocks Together?
To glue landscape rocks together, follow these steps:
1. Clean the surfaces of the rocks to be glued.
2. Use a specialized landscape adhesive for better results.
3. Apply the adhesive evenly on the contact areas of the rocks.
4. Press the rocks together firmly and allow the adhesive to dry completely.
Can You Glue Stones Together With Regular Glue?
Yes, you can use regular craft glue or a strong adhesive like epoxy to glue stones together. Make sure to clean the stones thoroughly and choose a glue that is suitable for the type of stones you are working with.
Conclusion
To sum it up, gluing stones together can be a creative and fulfilling DIY project that allows you to showcase your unique style and create stunning decorative pieces. Whether you’re looking to make jewelry, home decor, or garden accents, the right adhesive and technique are key to ensuring a durable bond.
Remember to properly prepare the stones by cleaning and roughing up the surface, choose the appropriate adhesive for the type of stones you’re working with, and allow ample drying time for the glue to set. Additionally, consider using tools and techniques like clamping, pressure, or heat to enhance the bond.
By following these guidelines and experimenting with different stones and designs, you’ll discover endless possibilities to express your creativity. So grab your stones and adhesive, and let your imagination go wild!