How to Make Exposed Tile Edges Look Finished: Expert Tips & Tricks
To make exposed tile edges look finished, you can use tile trim or bullnose tiles for a clean and polished appearance. Additionally, you can apply edge treatments like metal strips or wood molding to hide the exposed edges and provide a finished look to the tiles.
2. Understanding Exposed Tile Edges
In this section, we will delve into the world of exposed tile edges and gain a comprehensive understanding of their significance. Knowing what exposed tile edges are and why they need to be finished is key to achieving a polished and professional-looking tile installation. So, let’s explore further!
2.1 What Are Exposed Tile Edges?
Exposed tile edges refer to the sides or ends of tiles that are visible in a tile installation. Unlike the enclosed edges that are nestled against walls or other surfaces, exposed edges are left open, leaving the raw edges of the tiles exposed.
Without proper finishing, exposed tile edges can appear unrefined and unfinished, detracting from the overall aesthetics of the tiled area. Therefore, it becomes essential to pay attention to these edges and take appropriate measures to ensure they look as clean and polished as the rest of the tiled surface.
2.2 Importance Of Finishing Exposed Tile Edges
Finishing the exposed tile edges is crucial to achieving a professional and sophisticated look in your tile installation. Not only does it enhance the overall appearance, but it also provides functional benefits:
- Preventing tile damage: Unfinished tile edges are susceptible to chipping, cracking, or breakage. By properly finishing these edges, you can protect the tiles from potential damage caused by day-to-day use or accidental impacts.
- Facilitating easier cleaning: Exposed edges can accumulate dirt, debris, or moisture more easily than enclosed edges. When the edges are properly finished, cleaning becomes easier, allowing you to maintain a hygienic and pristine tiled surface effortlessly.
- Enhancing durability: Finished tile edges provide structural support and stability to the tiles. This helps to prevent loosening, shifting, or dislodging of the tiles over time, ensuring a long-lasting and durable tile installation.
To achieve the desired finish for exposed tile edges, various methods and materials can be used, such as bullnose tiles, trim pieces, or edge profiles. These options not only add a polished look to the edges but also create a seamless transition between tiles, resulting in a cohesive and visually appealing tile installation.
Now that we have gained a clear understanding of exposed tile edges and their importance, it’s time to explore the different techniques and materials that can be utilized to ensure these edges look finished. Stay tuned for the next section!
3. Types Of Finishes For Exposed Tile Edges
When it comes to finishing the edges of your tiles, there are several options available. These finishes not only add a polished look to your tiled surface but also provide protection to the exposed edges. Let’s explore three popular types of finishes for exposed tile edges.
3.1 Bullnose Tiles
Bullnose tiles are a great option for achieving a polished and professional finish on exposed tile edges. These tiles have one or more rounded edges, which create a smooth and continuous transition from the face of the tile to the edge. Bullnose tiles are available in various sizes and can be easily incorporated into your tile design.
With bullnose tiles, you won’t have to worry about rough or unfinished edges. These tiles provide a clean and elegant look while protecting the vulnerable edges from damage. Whether you’re working with ceramic, porcelain, or natural stone tiles, you can find bullnose options that complement your chosen tile material perfectly.
3.2 Metal Edge Trims
Metal edge trims are another popular choice for finishing exposed tile edges. These trims are made of durable materials such as stainless steel, aluminum, or brass, which not only protect the edges but also add a stylish and contemporary touch to your tile installation. Metal trims come in various profiles, including L-shaped, round, and square, allowing you to select the one that suits your design aesthetic.
Installing metal edge trims is relatively straightforward. These trims are usually fixed in place using adhesive or mortar, ensuring a secure and long-lasting finish. Metal trims offer excellent protection against impact and chipping, making them a wise choice for high-traffic areas or spaces prone to wear and tear.
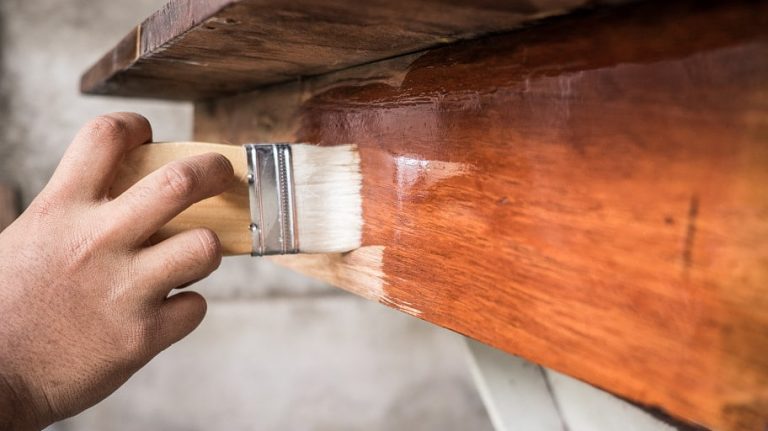
3.3 Wood Edge Trims
If you’re looking for a warm and natural finish for your exposed tile edges, wood edge trims are an excellent option. These trims are typically crafted from hardwood or engineered wood, which provides a soft and organic feel to your tile installation. Wood trims come in various styles, including flat, rounded, or beveled, offering versatility in design.
Wood edge trims are often used to create a seamless transition between tile and other flooring materials, such as hardwood or laminate. They can be stained or painted to match your existing decor or left in their natural finish for a rustic charm. It’s worth mentioning that wood trims may require regular maintenance to prevent moisture damage, so sealing them properly is essential.
When it comes to finishing exposed tile edges, bullnose tiles, metal edge trims, and wood edge trims are three great options to consider. Each provides its unique benefits, ensuring a polished look while protecting the vulnerable edges of your tiles. Whether you prefer a modern, sleek finish or a warm, natural feel, there’s a finish out there to suit your style and design preferences.
4. Choosing The Right Finish For Your Tile Edges
When it comes to making exposed tile edges look finished, choosing the right finish is crucial. It not only adds a polished touch to your tiles but also ensures their longevity and durability. In this section, we’ll explore three factors to consider when selecting the finish for your tile edges:
4.1 Consider The Tile Material
Before choosing a finish for your tile edges, it’s important to consider the material of the tiles themselves. Different tile materials require different finishes to achieve the desired look and protection. Here’s a quick breakdown:
| Tile Material | Recommended Finish |
|---|---|
| Ceramic | Glazed or polished finish |
| Porcelain | Polished or unglazed finish |
| Natural Stone | Honed or polished finish |
| Glass | Smooth or polished finish |
By matching the tile material with the appropriate finish, you’ll not only ensure a cohesive look but also enhance the overall durability and performance of your tiles.
4.2 Evaluate The Application Area
When choosing a finish for your tile edges, it’s important to evaluate the application area. Is it a high-traffic space like a kitchen or a bathroom? Or is it a low-traffic area like a bedroom or a study room? Evaluating the application area will help you determine the level of durability required for your finish.
In high-traffic areas, a more robust finish, such as a metal trim or bullnose edge, is recommended to protect against frequent wear and tear. In low-traffic areas, you may opt for a simpler finish, such as a rounded edge or a beveled edge.
4.3 Match The Finish With The Overall Design
It’s essential to match the finish of your tile edges with the overall design of your space. The finish you choose should complement the style and aesthetic of the room. Here are some factors to consider:
- Color: Ensure the finish color complements or contrasts harmoniously with the tile color.
- Texture: Consider whether a smooth, polished finish or a more textured finish would best complement the surrounding materials.
- Style: Determine whether a modern, sleek finish or a more traditional, ornate finish would align with the overall design theme.
By considering these design elements, you can create a seamless transition from the tile edges to the rest of the room, resulting in a polished and cohesive look.
5. Steps To Install Bullnose Tiles On Exposed Edges
When it comes to finishing exposed tile edges, installing bullnose tiles is a popular and effective solution. Bullnose tiles have a rounded or beveled edge that provides a smooth and finished look to your tile installation. In this section, we will go through the step-by-step process of installing bullnose tiles on exposed edges.
5.1 Measure And Mark The Tile Edges
Before you begin installing the bullnose tiles, it is important to measure and mark the tile edges accurately. This step ensures that the bullnose tiles fit perfectly and create a seamless transition between the exposed edges and the tiled surface.
To measure and mark the tile edges:
- Measure the length of each edge: Use a tape measure to determine the length of each exposed edge where the bullnose tiles will be installed.
- Mark the center point: Mark the center point of each edge using a pencil or marker. This will help you align the bullnose tiles properly.
5.2 Cut And Shape The Bullnose Tiles
After measuring and marking the tile edges, it’s time to cut and shape the bullnose tiles to fit the edges perfectly. This step requires careful attention to detail to ensure a clean and professional-looking finish.
To cut and shape the bullnose tiles:
- Prepare the necessary tools: Gather a wet saw or a tile nipper, a straight edge or a tile file, and safety goggles.
- Measure and mark the bullnose tiles: Measure and mark each bullnose tile according to the dimensions of the exposed edges.
- Cut the tiles: Use a wet saw or tile nipper to cut the bullnose tiles along the marked lines. Take your time and make precise cuts for a clean look.
- Shape the edges: Use a straight edge or a tile file to smooth and shape the cut edges of the bullnose tiles for a seamless fit.
5.3 Apply Adhesive And Install The Bullnose Tiles
Now that the bullnose tiles are prepared, it’s time to install them on the exposed edges. Applying adhesive properly is crucial to ensure a strong bond and a long-lasting finish.
To apply adhesive and install the bullnose tiles:
- Prepare the adhesive: Follow the instructions on the adhesive packaging to prepare it correctly.
- Apply the adhesive: Use a notched trowel to spread a layer of adhesive onto the back of each bullnose tile.
- Align and press: Align the bullnose tiles with the marked center points on the edge and press them firmly onto the adhesive.
- Allow to dry: Let the adhesive dry for the recommended amount of time according to the adhesive manufacturer’s instructions.
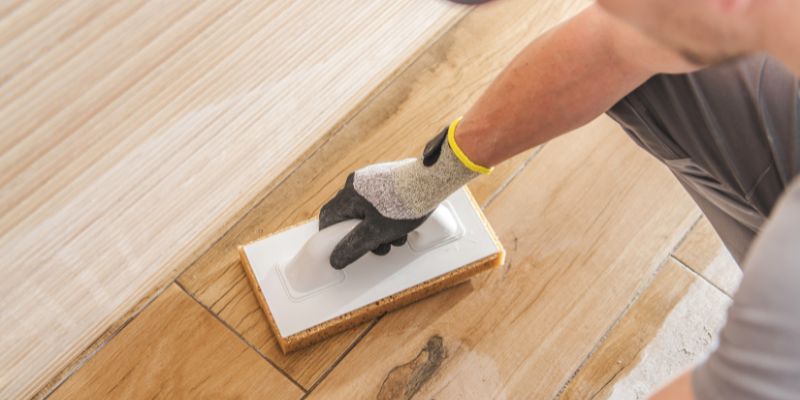
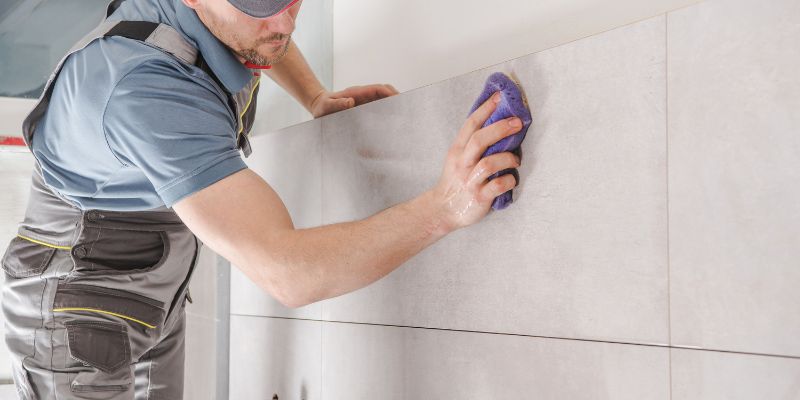
5.4 Grout And Clean The Installed Tiles
After the bullnose tiles are securely installed, it’s essential to grout and clean the tiles for a polished and finished appearance. Grouting fills in the gaps between the tiles and protects them from moisture and dirt.
To grout and clean the installed tiles:
- Prepare the grout: Mix the grout according to the manufacturer’s instructions until you achieve a smooth consistency.
- Apply the grout: Use a grout float or a rubber grout float to apply the grout onto the tiled surface, ensuring that the gaps between the tiles are completely filled.
- Clean the tiles: Use a damp sponge or a grout cleaning tool to remove excess grout from the tiles, working in a diagonal motion.
- Allow to dry: Let the grout dry for the recommended time specified by the grout manufacturer.
- Final clean up: Once the grout is dry, use a clean, dry cloth to buff and shine the tiles, revealing their finished beauty.
6. Installing Metal Edge Trims For A Polished Look
When it comes to achieving a sleek and professional finish for your exposed tile edges, installing metal edge trims is the way to go. These trims not only protect the edges from chipping and cracking but also add a touch of elegance to your tile installation. In this section, we will walk you through the process of measuring, cutting, applying adhesive, and attaching metal edge trims to your tile edges. Let’s dive in!
6.1 Measure And Cut The Metal Edge Trims
Before you start the installation process, it is crucial to accurately measure and cut the metal edge trims to ensure a seamless fit. Here’s how you can do it:
- Using a measuring tape, measure the length of the exposed tile edge where you want to install the trim. Be sure to account for any corners or angles.
- Transfer the measurements onto the metal edge trim using a pencil or marker.
- Using a hacksaw or tin snips, carefully cut the metal trim along the marked lines. Take your time to ensure clean and precise cuts.
6.2 Apply Adhesive And Attach The Trims To The Tile Edges
Now that you have your metal edge trims ready, it’s time to attach them to the tile edges. Follow these steps:
- Clean the tile edges thoroughly to remove any dirt, dust, or debris.
- Apply a thin layer of tile adhesive along the edge of the tile where the trim will be installed.
- Press the metal edge trim firmly onto the adhesive, making sure it aligns perfectly with the tile edge.
- Use a rubber mallet or a block of wood to gently tap the trim into place, ensuring it adheres securely to the tile.
- Repeat the process for each exposed tile edge, taking your time to achieve a neat and even installation.
6.3 Clean And Polish The Metal Edge Trims
To complete the polished look of your metal edge trims, it’s essential to clean and polish them after installation. Here’s what you need to do:
- Wipe down the trims with a damp cloth to remove any adhesive residue or dirt.
- Apply a metal cleaner or polish to a soft cloth and gently buff the trims to enhance their shine.
- Continue polishing until the trims are free from smudges and fingerprints.
- Inspect the trims for any uneven spots or imperfections and make necessary adjustments.
By following these steps, you can ensure that your exposed tile edges have a polished and finished appearance. Installing metal edge trims not only adds a decorative touch but also protects your tiles from potential damage. Now that you know how to achieve a professional look, it’s time to take your tile installation to the next level!
7. Enhancing Tile Edges With Wood Edge Trims
The exposed edges of tile installations can often look unfinished and unprofessional. But there’s a simple solution to enhance the appearance of these edges – wood edge trims. By using wood trims, you can add a touch of elegance and sophistication to your tile edges, making them look polished and complete. In this section, we will explore how to choose the right wood trim for your tile edges, measure, cut, and attach the trims, and finally, sand and finish them to achieve a flawless result.
7.1 Choose The Right Wood Trim For Your Tile Edges
When it comes to selecting the right wood trim for your tile edges, there are a few factors to consider. First, choose a type of wood that matches or complements the overall style of your space. Popular wood options include oak, maple, and pine, among others.
Additionally, ensure that the wood trim is the appropriate size and shape for your tile edges. You can opt for straight or curved trims, depending on your design preference. For a seamless transition between the tiles and the trim, consider the thickness and width of your tile when choosing the trim.
7.2 Measure, Cut, And Attach The Wood Trims
To ensure a precise fit, begin by measuring the length of each tile edge that requires a wood trim. Use a tape measure to measure the distance from one end of the edge to the other. Note down the measurements for each tile, as they might slightly differ.
Next, using those measurements, carefully cut the wood trims to the appropriate length. Use a miter saw for accurate and clean cuts. Remember to double-check your measurements before cutting, as precision is key.
Once the trims are cut, it’s time to attach them to the tile edges. Apply a strong adhesive or tile adhesive along the back of the trim and press it firmly onto the edge of the tile. Make sure the trim is perfectly aligned with the edge, and use clamps or tape to hold it in place while the adhesive dries.
7.3 Sand And Finish The Wood Trims
After the wood trims are securely attached to the tile edges, it’s important to sand and finish them to achieve a polished look. Start by using sandpaper to smooth any rough edges or imperfections on the wood. Sand in the direction of the wood grain for the best results.
Once the trims are smooth, wipe away any dust or debris. Then, apply a wood finish or stain of your choice to enhance the natural beauty and protect the wood from moisture and wear. Use a clean brush or cloth to evenly apply the finish, making sure to follow the manufacturer’s instructions.
Allow the finish to dry thoroughly before handling or placing any objects on the trims. This step will not only protect the wood but also give it a visually appealing sheen and luster.
8. Other Creative Ways To Finish Exposed Tile Edges
When it comes to tiling, achieving a polished look is essential, and that includes finishing those exposed tile edges. While standard tile trim is commonly used, there are other creative ways to add a unique touch and make your tile edges stand out. In this section, we will explore three distinct methods: mosaic borders, tile edge paint, and decorative molding.
8.1 Mosaic Borders
If you’re looking for a visually striking way to finish your exposed tile edges, mosaic borders are a fantastic option. By incorporating small tiles or glass pieces of various colors and shapes, you can create a border that complements your tile design. This method adds personality and a custom touch to your tiling project.
Creating a mosaic border is a straightforward process:
- Choose the mosaic pieces: Select small tiles, glass pieces, or even pebbles that match or contrast beautifully with your tiled surface.
- Prepare the surface: Ensure the exposed tile edge is clean, dry, and free from any debris or dust.
- Apply adhesive: Use an appropriate adhesive to attach the mosaic pieces to the edge. Apply the adhesive carefully, following the manufacturer’s instructions.
- Set the mosaic: Place the chosen mosaic pieces onto the adhesive, arranging them in a pattern or design of your liking. Press them gently but firmly into place.
- Grout the mosaic: Once the adhesive has dried, apply grout between the mosaic pieces, filling the gaps and providing a polished look. Wipe away any excess grout.
- Clean and finish: Clean the mosaic border with a damp sponge or cloth to remove any grout residue, and let it dry completely.
8.2 Tile Edge Paint
If you want a simpler and more economical solution to finish exposed tile edges, tile edge paint is an excellent choice. With tile edge paint, you can achieve a clean and cohesive look by matching or contrasting the color of the paint with your tiles.
Follow these steps to paint your tile edges:
- Preparation: Clean the exposed tile edge thoroughly, ensuring it is free from dirt, grease, or any other contaminants.
- Masking: Use painter’s tape to protect the adjacent surfaces from paint spills or smudges.
- Priming: Apply a layer of quality tile primer to promote paint adhesion. Let it dry according to the manufacturer’s instructions.
- Painting: Using a small brush or roller, carefully apply the tile edge paint to the exposed edge. Make sure to cover the entire surface evenly.
- Multiple coats: Apply additional coats of paint if necessary, allowing sufficient drying time between coats.
- Sealing (optional): Consider applying a clear sealer over the painted tile edges for added protection and durability.
8.3 Decorative Molding
If you prefer a more traditional and elegant approach to finishing your tile edges, decorative molding is a classic option. Available in various materials, such as wood, metal, or PVC, decorative molding adds a refined touch to your tiled surfaces.
To install decorative molding to your exposed tile edges, follow these general steps:
- Measure and cut: Take precise measurements of the exposed edge and cut the molding pieces accordingly, ensuring they fit snugly.
- Preparation: Sand or clean the molding pieces, removing any rough edges or imperfections.
- Adhesive application: Apply a suitable adhesive to the back of the molding pieces, making sure to cover the entire surface.
- Placement: Carefully press the molding into place, aligning it with the exposed tile edge. Hold it firmly for a few seconds to allow the adhesive to bond.
- Finishing touches: Wipe away any excess adhesive and fill any gaps between the molding and the tile with caulk or putty.
- Paint or stain (optional): If desired, you can paint or stain the decorative molding to match your tile or complement your overall design.
By exploring these creative methods, you can add a distinctive finishing touch to your exposed tile edges. Whether you opt for mosaic borders, tile edge paint, or decorative molding, each technique offers a unique way to elevate the look of your tiled surfaces. Choose the method that best suits your style, and enjoy the beautifully finished results!
9. Tips And Tricks For A Professional Finish
When it comes to tiling projects, achieving a professional finish is key to transforming exposed tile edges into a cohesive and polished look. To help you achieve this, here are nine essential tips and tricks that will ensure your tile edges look finished and refined.
9.1 Use Proper Tools And Equipment
Using the right tools and equipment is crucial for a professional finish. Make sure you have a tile cutter or wet saw, tile nippers, trowels, and a rubber grout float in your toolkit. These tools will help you achieve clean, precise cuts and ensure that the tile edges fit together seamlessly.
9.2 Take Accurate Measurements
Precise measurements are essential for a flawless tile installation. Before cutting your tiles or choosing edging materials, measure the exposed edges carefully. Take into account any corners or angles that may require special attention. Accurate measurements will help you determine the proper length and size of the edging materials needed.
9.3 Pre-plan And Dry Fit The Edging Materials
Before applying any adhesive or grout, it’s essential to pre-plan and dry fit the edging materials. Lay the edging pieces alongside the exposed tile edges without bonding them to ensure they fit correctly. This step allows you to make adjustments if necessary and ensures a seamless transition between the tile and the edge materials.
9.4 Pay Attention To Tile And Grout Color Coordination
To achieve a truly professional finish, pay attention to tile and grout color coordination. Ensure that the edging materials complement the color of your tiles and grout. A well-coordinated color scheme will enhance the overall appearance of the exposed edges and contribute to a polished and cohesive look.
9.5 Seek Professional Assistance If Needed
While these tips and tricks can help you achieve a professional finish on your own, don’t hesitate to seek professional assistance if you’re unsure or overwhelmed. Professional tile installers have the expertise and experience to ensure a flawless finish, especially when it comes to tricky corners or complex layouts. Investing in professional help can save you time, effort, and potential headaches in the long run.
Frequently Asked Questions On How To Make Exposed Tile Edges Look Finished
How Do You Finish Exposed Edge Of Tile?
To finish the exposed edge of a tile, you can use various methods like metal trims, bullnose tiles, or wood molding. These options provide a clean and polished look to the tile installation, ensuring durability and preventing any potential damage to the edges.
How Do I Hide Unfinished Tile Edges?
To hide unfinished tile edges, consider using tile trim or bullnose tiles. These options provide a finished look and protect the raw edges. Additionally, you can use grout in a color that matches the tiles to minimize the visibility of unfinished edges.
Remember to measure and cut the trim or tiles accurately for a seamless finish.
How Do You Cover Tile Edging?
To cover tile edging, you can use trim pieces specifically designed for this purpose. These trim pieces, like bullnose tiles or metal edging, provide a finished look and protect the edges. Simply apply adhesive and press the trim onto the edge of the tiles.
How Do You Finish Tile Edges Without Bullnose?
Finish tile edges without bullnose by using alternative methods like metal edge trim, wood trim, or mitering the tiles. Metal edge trim provides a sleek and clean look, while wood trim offers a more natural and rustic finish. Mitering the tiles involves cutting them at a 45-degree angle for a seamless edge.
Conclusion
To wrap up, creating a polished look for your exposed tile edges doesn’t have to be a challenge. By following these tips and utilizing the right materials, you can achieve a professional and finished appearance. From using bullnose tiles or trim pieces to employing grout colorants, there are various options to choose from.
Remember to plan and prep your project thoroughly for the best results. Let your creativity shine as you enhance the aesthetics of your tile installation. Happy tiling!