
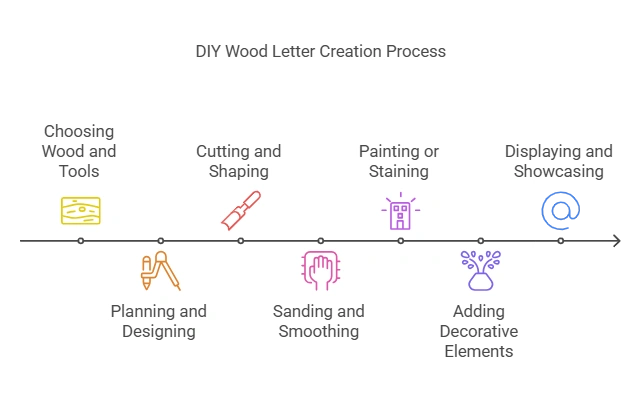
How to Make Wood Letters: Easy DIY Guide for Stunning Wooden Creations
To make wood letters, you need to trace the letter shapes onto the wood, cut them out, sand the edges, and paint or stain as desired. Creating wood letters is a simple and rewarding craft that allows you to customize and personalize various projects.
Wood letters are a versatile and popular choice for DIY enthusiasts, crafters, and home decorators alike. Whether you want to add a personalized touch to a nursery, create unique signage for an event, or enhance the aesthetic appeal of your home decor, wood letters can be easily made to suit your specific needs and preferences.
We will provide you with a step-by-step guide on how to make wood letters, ensuring that you achieve professional-looking results. So let’s get started and bring your creative ideas to life with beautiful and stylish wooden letters.
Choosing The Right Wood And Tools
Learn how to make wood letters by choosing the right wood and tools. Discover tips and techniques for creating personalized wooden letters for various crafts and home decor projects.
Wood letters can add a touch of warmth and personality to any space. Whether you want to create custom signage, decorate walls, or personalize a gift, making wood letters is a fun and rewarding DIY project. In this section, we will guide you through the process of choosing the right wood and tools for your wood letter-making endeavor.
Selecting The Ideal Wood For Wood Letters
When it comes to making wood letters, selecting the right type of wood is crucial. Here are some considerations to keep in mind:
- Density: Opt for a wood that is dense enough to withstand cutting and shaping without splintering or breaking easily. Hardwoods like oak, maple, or birch are excellent choices.
- Grain: Look for wood with a tight and even grain pattern. This will ensure that your letters have a smooth and uniform appearance.
- Smooth Surface: Prioritize using wood that has a smooth surface to facilitate better painting or staining results. Sanding the surface beforehand can also help achieve a polished finish.
- Thickness: Consider the thickness of the wood to ensure that it is durable and substantial enough for your desired application. Thicker wood is recommended for large or freestanding letters, while thinner wood can work well for wall-mounted or small-sized letters.
Essential Tools For Wood Letter Making
To bring your wood letters to life, you will need a few essential tools. Here are the must-haves:
- Jigsaw: A jigsaw is a versatile power tool that allows you to cut intricate shapes precisely. It is essential for cutting out your wood letters.
- Sander: A sander helps smooth the edges and surfaces of your wood letters, ensuring a professional finish. A random orbital sander is highly recommended for its efficiency and ease of use.
- Clamps: Clamps are invaluable for holding the wood in place securely while cutting and sanding. They help prevent any movement or vibration that could affect the precision of your cuts.
- Drill: A drill is useful for creating holes or countersinking screws if you plan to attach or mount the wood letters. It is also handy when you need to add any decorative elements.
- Paintbrushes: Quality paintbrushes are necessary for applying paint or stain to your wood letters. Look for brushes with bristles that are appropriate for the type of paint or stain you will be using.
- Safety Gear: Don’t forget to prioritize safety when working with wood. Wear safety goggles, a dust mask, and gloves to protect yourself from potential hazards.
Remember, investing in good quality tools will yield better results and make your wood letter-making experience more enjoyable.
Now that you know how to choose the right wood and tools, let’s take a look at some important safety precautions and recommended gear to ensure a smooth and accident-free process.

Planning And Designing Your Wood Letters
Discover the art of making wood letters by exploring the essential steps involved in planning and designing. From choosing the right materials to adding personal touches, this guide provides a comprehensive overview to help you create beautifully crafted wood letters.
Before embarking on your wood letter project, it’s important to plan and design your letters. This will help ensure that your finished product looks professional and meets your desired outcome. In this section, we will explore the essential steps to take when planning and designing your wood letters.
Creating A Letter Template Or Stencil:
- Start by deciding on the size of your wood letters. Measure the space where you plan to display them to determine the appropriate dimensions.
- Print or draw the letters you want to make on a piece of paper. Make sure they fit within the dimensions you’ve chosen.
- Trace the printed or hand-drawn letters onto a sheet of stencil plastic or cardboard. Use a sharp craft knife or scissors to carefully cut out the letter shapes.
- Place the stencil or template on your wood surface and trace the letter outlines with a pencil or a pen. This will serve as a guide when cutting and shaping the wood.
Choosing The Best Font Style And Size:
- Experiment with different font styles and sizes to find the one that suits your project. Consider the overall aesthetic and theme you’re going for.
- Avoid overly decorative or complex fonts that may be challenging to cut or read. Opt for clear and legible options.
- Make sure the size of your chosen font is appropriate for the scale of your wood letters. Fonts that are too small may appear indistinct, while fonts that are too large might not fit within your intended display area.
Planning And Sketching The Design:
- Sketch out your design ideas on paper before transferring them to the wood. This will allow you to visualize the placement of decorative elements or any additional embellishments you may want to include.
- Consider the overall composition of your wood letters. Decide if you want a simple, minimalist design or something more elaborate.
- Experiment with different arrangements of letters if you’re creating multiple wood letters. Balance their positioning to ensure an aesthetically pleasing arrangement.
- Once you’re satisfied with your sketches, transfer the design onto your wood surface using pencil or chalk. This will serve as a guide throughout the woodworking process.
By carefully planning and designing your wood letters, you set the foundation for a successful project. The letter template or stencil ensures precision, while choosing the right font style and size enhances your desired visual impact. Additionally, planning and sketching the design allows you to explore different options and create a truly unique and personalized result.
Cutting And Shaping The Wood Letters
Learn how to make wood letters by mastering the art of cutting and shaping. Transform a plain piece of wood into personalized lettering for your projects with precision and finesse.
When it comes to making wood letters, cutting and shaping the wood are essential steps that will determine the final outcome of your project. Whether you want clean lines or a more artistic touch, the methods you choose will play a significant role.
In this section, we will explore different cutting and shaping techniques to help you create the perfect wood letters for your project.
Cutting The Wood Into Desired Sizes And Thicknesses:
To start the wood letter-making process, you first need to cut the wood into the desired sizes and thicknesses. Here are the steps to follow:
- Measure and mark the dimensions of your letters on the wood, ensuring accuracy.
- Use a circular saw or a table saw to make straight cuts along the marked lines.
- If you prefer rounded edges, consider using a router to shape the edges of the letters.
- Sand the cut edges to smooth out any roughness or splinters.
Remember, safety should always be a priority when working with power tools. Wearing protective gear, such as goggles and gloves, is highly recommended.
Using A Scroll Saw To Shape The Letters:
A scroll saw is a versatile tool that allows for precise and intricate cuts, making it an excellent choice for shaping wood letters. Here’s how you can use a scroll saw for this purpose:
- Secure the wood firmly onto the scroll saw’s working surface.
- Begin cutting along the outline of each letter, using slow and steady movements.
- For curved sections, carefully maneuver the wood, making sure to follow the intended shape.
- Take breaks if necessary to prevent the wood from overheating.
- Smooth out any imperfections using sandpaper or a file.
A scroll saw gives you the freedom to create unique and detailed designs, so let your creativity flow!
Hand Carving For A Personalized Touch:
If you want to add a personal touch to your wood letters, hand carving is an excellent technique to consider. This manual approach allows for more intricate details and a unique finish. Here’s how you can hand carve your wood letters:
- Draw the letter design onto the wood surface using a pencil or a stencil.
- Use a chisel or a gouge to slowly carve out the shape of each letter.
- Work in small sections, applying controlled pressure to ensure accuracy.
- Smooth and refine the carved areas using sandpaper or a carving knife.
- Take your time and enjoy the process, creating depth and dimension as you go.
Hand carving offers a sense of fulfillment and allows you to showcase your craftsmanship. Embrace the imperfections and let your personal style shine through.
Remember, practice makes perfect, and experimenting with different techniques will help you refine your skills in cutting and shaping wood letters. So grab your tools, unleash your creativity, and start crafting unique wood letters for your projects.
Sanding And Smoothing The Wood Letters
Learn how to make wood letters by sanding and smoothing the surfaces for a flawless finish. Achieve professional results by following these steps for a smooth and polished look.
Importance Of Sanding For A Professional Finish
Achieving a professional finish is essential when making wood letters. One of the key steps in this process is sanding and smoothing the wood. Sanding not only helps remove any rough edges and imperfections but also prepares the surface for painting or staining.
Here’s why sanding is crucial for a professional finish:
- Smooth Surface: Sanding helps create a smooth and even surface on the wood letters, ensuring they look polished and professional.
- Improved Appearance: By sanding the wood, you can remove any scratches, bumps, or dents, enhancing the overall appearance of the letters.
- Absorbency: Sanding opens up the pores of the wood, which allows the paint or stain to adhere better to the surface, resulting in a more vibrant and long-lasting finish.
- Professional Appeal: Sanding gives the wood a refined and sleek look, making the final product look more professional and well-crafted.
Selecting The Right Grit Sandpaper
Choosing the appropriate grit sandpaper is crucial to achieve the desired finish on your wood letters. The grit refers to the size of the abrasive particles on the sandpaper. Here’s a guide to help you select the right grit sandpaper for your project:
- Coarse Grit (60-80): Use coarse grit sandpaper when you need to remove rough surfaces, major imperfections, or to shape the letters initially.
- Medium Grit (120-150): This grit is ideal for smoothing the rough surfaces created by the coarse grit sandpaper. It helps refine the shape of the letters and prepares them for the final sanding.
- Fine Grit (180-220): Fine grit sandpaper is excellent for the final sanding before painting or staining. It helps create a smooth and polished surface.
- Extra Fine Grit (320 and above): Use extra fine grit sandpaper for a final touch to achieve an ultra-smooth finish on your wood letters.
Remember to start with a lower grit and gradually work your way up to a higher grit for the best results.
Sanding Techniques For Smooth Edges And Surfaces
To achieve smooth edges and surfaces on your wood letters, it’s essential to use proper sanding techniques. Follow these tips for effective sanding:
- Sand With the Grain: Always sand in the direction of the wood grain to prevent any scratches or marks on the surface.
- Use Light Pressure: Apply light pressure while sanding to avoid removing too much wood or creating uneven areas.
- Sand in a Uniform Motion: Move the sandpaper back and forth in a steady and consistent motion. Avoid applying more pressure in one spot as it can create uneven surfaces.
- Transition Between Grits: When using multiple grits of sandpaper, gradually transition from a lower to a higher grit, ensuring each level of sanding smoothens the previous marks.
- Check the Surface: After sanding, run your hand over the wood surface to feel for any rough spots or imperfections. If necessary, repeat sanding using a finer grit sandpaper.
By following these sanding techniques and using the right grit sandpaper, you’ll be able to achieve smooth and professional-looking wood letters. Sanding is a crucial step in the process, ensuring your final product stands out with its polished finish.
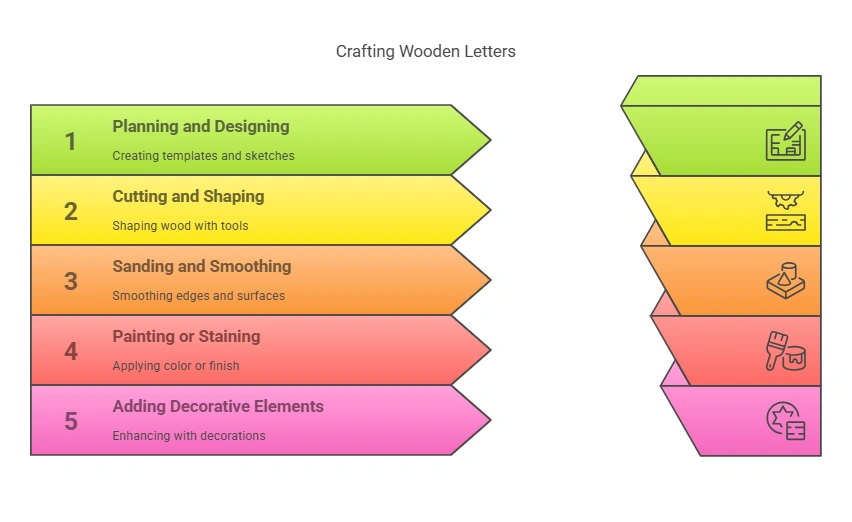
Painting Or Staining Your Wood Letters
Learn how to make wood letters pop with vibrant colors or elegant stains. Discover the secrets to painting or staining your wood letters for a personalized and eye-catching touch to any project.
Preparing The Wood Surface For Painting Or Staining
Before diving into the exciting process of painting or staining your wood letters, it is crucial to properly prepare the wood surface. This will ensure that the paint or stain adheres well and creates a smooth, professional finish. Here are the steps to follow:
- Sand the wood: Begin by sanding the surface of the wood letters using sandpaper or a sanding block. This will remove any rough spots, imperfections, or previous finishes, allowing the paint or stain to adhere better.
- Remove dust: After sanding, make sure to remove any dust or debris from the wood surface. You can use a tack cloth or a soft brush to gently remove any loose particles.
- Clean the surface: It’s important to clean the wood surface thoroughly before applying any paint or stain. You can use a mild detergent mixed with water or a wood cleaner specifically designed for this purpose. Scrub the surface gently and wipe it clean with a damp cloth.
Choosing The Right Type Of Paint Or Stain
Selecting the appropriate type of paint or stain is essential to achieve the desired look for your wood letters. Consider the following options:
- Latex paint: Latex paint is a versatile choice for painting wood letters, as it comes in various colors, finishes, and sheens. It dries quickly, is easy to clean up, and provides good coverage.
- Oil-based paint: Oil-based paint offers a durable and long-lasting finish. It provides a smoother surface and is suitable for exterior wood letters or areas with high traffic. Keep in mind that oil-based paint takes longer to dry and requires mineral spirits for cleanup.
- Wood stain: If you prefer to enhance the natural beauty of the wood grain, staining is an excellent option. Wood stains come in different tints and opacities, allowing you to achieve various effects. Make sure to choose a stain that is compatible with the type of wood you are using.
Applying Multiple Coats And Finishing Techniques
To achieve a professional and polished look for your wood letters, it is often necessary to apply multiple coats of paint or stain. Additionally, various finishing techniques can add depth and character to the final result. Consider the following tips:
- Apply thin coats: When painting or staining wood letters, it is best to apply thin coats rather than thick ones. This allows for better control, prevents drips or streaks, and ensures even coverage. Let each coat dry completely before applying the next.
- Sand between coats: For an extra smooth finish, lightly sand the wood surface with fine-grit sandpaper between each coat. This helps to remove any imperfections or raised grain and promotes better adhesion of subsequent coats.
- Use a brush or sprayer: The application method will depend on personal preference and the specific product being used. Brushes are great for smaller projects and intricate details, while paint sprayers offer quicker and more even coverage for larger surfaces.
- Optional finishes: If desired, you can further enhance the appearance of your wood letters by adding optional finishes. For example, you can apply a clear topcoat for added protection and shine or distress the surface for a vintage or rustic look.
By following these steps and considering the type of paint or stain best suited to your project, you can create beautiful, customized wood letters that will stand out and make a statement in any space.
Adding Decorative Elements And Finishing Touches
Enhance the beauty of wood letters by incorporating decorative elements and adding finishing touches, giving them a personalized touch.
Wood letters can be transformed into beautiful and personalized pieces by incorporating decorative elements and adding those finishing touches. Whether you prefer a touch of sparkle or a unique design, there are various techniques you can use to enhance the beauty of your wood letters.
Here are some ideas to get you started:
Incorporating Embellishments like Rhinestones or Beads:
- Apply craft glue to specific areas of the wood letters where you want to add rhinestones or beads.
- Carefully place the rhinestones or beads onto the glue, ensuring they adhere firmly.
- Allow the glue to dry completely before handling the letters, ensuring a secure and long-lasting embellishment.
- This technique allows you to add a touch of glamour and glitz to your wood letters, making them stand out.
Using Wood Burning Techniques for Unique Designs:
- Use a wood burning tool with interchangeable tips to create unique designs on the surface of the wood letters.
- Experiment with different tip sizes and shapes to achieve various patterns and effects.
- Start by sketching your design lightly onto the wood letters with a pencil, then carefully trace over the lines with the wood burning tool.
- Take your time to prevent any mistakes, as wood burning is a permanent process.
- Wood burning adds an artistic and rustic charm to your wood letters, making them one-of-a-kind.
Sealing and Protecting the Wood Letters for Durability:
- Apply a protective sealer to the wood letters to ensure they withstand the test of time.
- Use a brush or sponge to evenly apply the sealer onto all surfaces of the letters.
- Allow the sealer to dry completely before handling the letters.
- Repeat this process for multiple coats of sealer for added durability.
- Sealing the wood letters helps protect them from moisture, fading, and damage, ensuring they last for years to come.
By incorporating embellishments, using wood burning techniques, and sealing the wood letters, you can elevate their appearance and create stunning decorative pieces. Let your creativity shine as you add those finishing touches to your wood letters and bring them to life!
Displaying And Showcasing Your Wood Letters
Looking to display and showcase your wood letters? Learn how to make wood letters that are both visually appealing and personal with these simple steps.
Wood letters are a versatile and beautiful addition to any home decor. Once you have crafted your wooden creations, the next step is to find the perfect way to display and showcase them. Whether you want to hang them on the wall, place them on a shelf, or attach them to a surface, there are several options to consider.
Additionally, you’ll want to find styling and decor tips that will complement your wood letters and enhance their overall appeal.
Choosing The Perfect Location For Your Wood Letters:
- Consider the purpose: Think about where your wood letters will have the most impact and visibility. Is it a statement piece for the living room or a personalized touch for a child’s bedroom?
- Wall space: Look for a prominent wall, such as above a fireplace, above a bed, or in an empty hallway. This will ensure that your wood letters catch the eye and become a focal point.
- Shelf or mantel: If you prefer a more subtle display, consider placing your wood letters on a shelf or the mantel. This adds depth and visual interest while still showcasing your wooden creations.
Mounting Options – Hanging, Standing, Or Attaching To A Surface:
- Hanging: To hang your wood letters on the wall, use adhesive hooks, picture hangers, or nails. Ensure that they are evenly spaced and level for a polished look.
- Standing: If you want your wood letters to be freestanding, consider attaching a wooden base or using a display stand. This allows your letters to stand securely on any surface, whether it’s a shelf, table, or mantel.
- Attaching to a Surface: Another option is to attach your wood letters to a surface, such as a wooden sign or canvas. This creates a unique and personalized display that can be easily moved or rearranged.
Styling And Decor Tips To Complement Your Wooden Creations:
- Contrast: Create contrast by pairing your wood letters with complementary colors or textures. For example, if your letters have a natural wood finish, place them against a brightly-painted wall to make them pop.
- Grouping: Arrange your wood letters in groups or phrases to make a statement. Experiment with different layouts and sizes to find the most visually appealing combination.
- Personalization: Add a personal touch by incorporating other decorative items that reflect your style. This could include flowers, greenery, framed photos, or other meaningful objects.
- Lighting: Consider adding accent lighting to highlight your wood letters and create a cozy ambiance. Use LED strip lights or spotlights to showcase the details and textures of the wood.
Remember, the key to displaying and showcasing your wood letters is to find a location that makes them stand out and complements your overall decor. Experiment with different mounting options and utilize styling tips that enhance the appeal of your wooden creations.
Whether you choose to hang them, stand them, or attach them, your wood letters will serve as a stylish and personalized addition to your home.

Frequently Asked Questions Of How To Make Wood Letters
How Do You Cut Lettering Out Of Wood?
To cut lettering out of wood:
1. Design your letters and transfer the design onto the wood.
2. Use a scroll saw or a handheld jigsaw to carefully cut along the outlines of the letters.
3. Sand the edges of the letters to smoothen them.
4. Apply a finish or paint to enhance the appearance of the wood letters.
How Do You Cut Words Into Wood?
To cut words into wood, use a wood carving tool or a laser engraver. Be sure to go slowly and make precise cuts for accurate results.
What Machine Cuts Wood Letters?
A CNC router is a machine that cuts wood letters accurately and precisely.
How Do You Imprint Letters On Wood?
To imprint letters on wood, you can use various methods such as wood burning, carving with a router, or using stencils and paint.
Conclusion
Creating personalized wood letters can be a fun and rewarding DIY project. By following the steps outlined in this blog post, you can easily make your own customized wood letters to add a touch of personalization and creativity to any space.
Whether you want to spell out a name, create a decorative sign, or make unique crafts, this tutorial has you covered. Remember to gather all the necessary materials, take accurate measurements, and carefully plan out your design before starting. With patience and attention to detail, you can achieve professional-looking wooden letters that will impress everyone who sees them.
So, don’t delay – start making your own wood letters today and enjoy the sense of accomplishment that comes with crafting something beautiful with your own hands. Happy crafting! Word count: 148 words