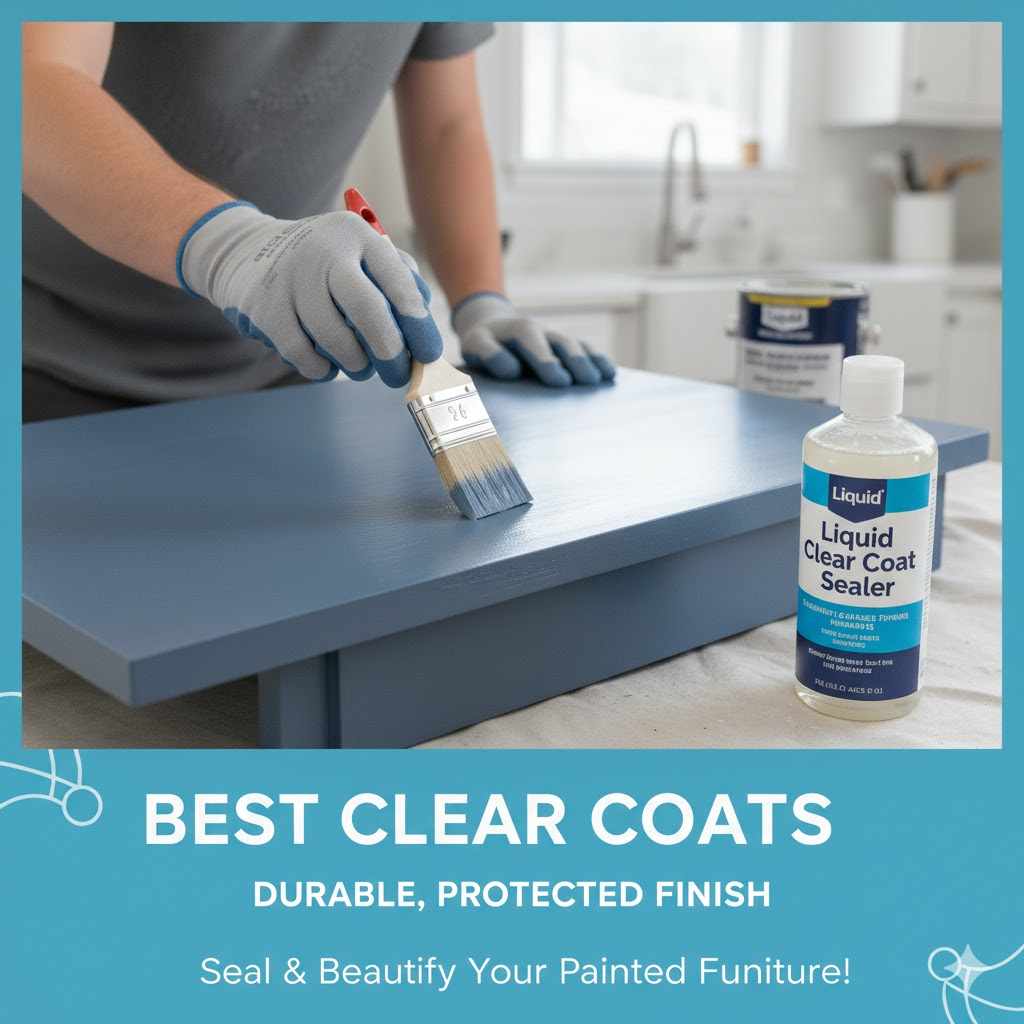
How to Seal Paint on Wood Best Clear Coats
Many folks find sealing painted wood a bit tricky. They worry about making the paint look dull or sticky. It’s a common question: How to Seal Paint on Wood: Best Clear Coats Explained?
This guide will make it super simple. We’ll walk through it step-by-step so your projects look amazing and last a long time. Let’s get your painted wood protected.
Choosing the Right Clear Coat for Painted Wood
Picking the perfect clear coat is key to protecting your painted wood. It’s not just about making it shiny; it’s about creating a barrier. This barrier keeps your paint looking fresh and prevents wear and tear.
For beginners, the options can seem overwhelming. Knowing the different types helps you make the best choice for your specific project.
Understanding Clear Coat Types
Clear coats come in many forms. Each has its own strengths. Some are water-based, others are oil-based.
Some give a matte finish, while others are high gloss. Understanding these differences helps you match the coat to your wood and paint.
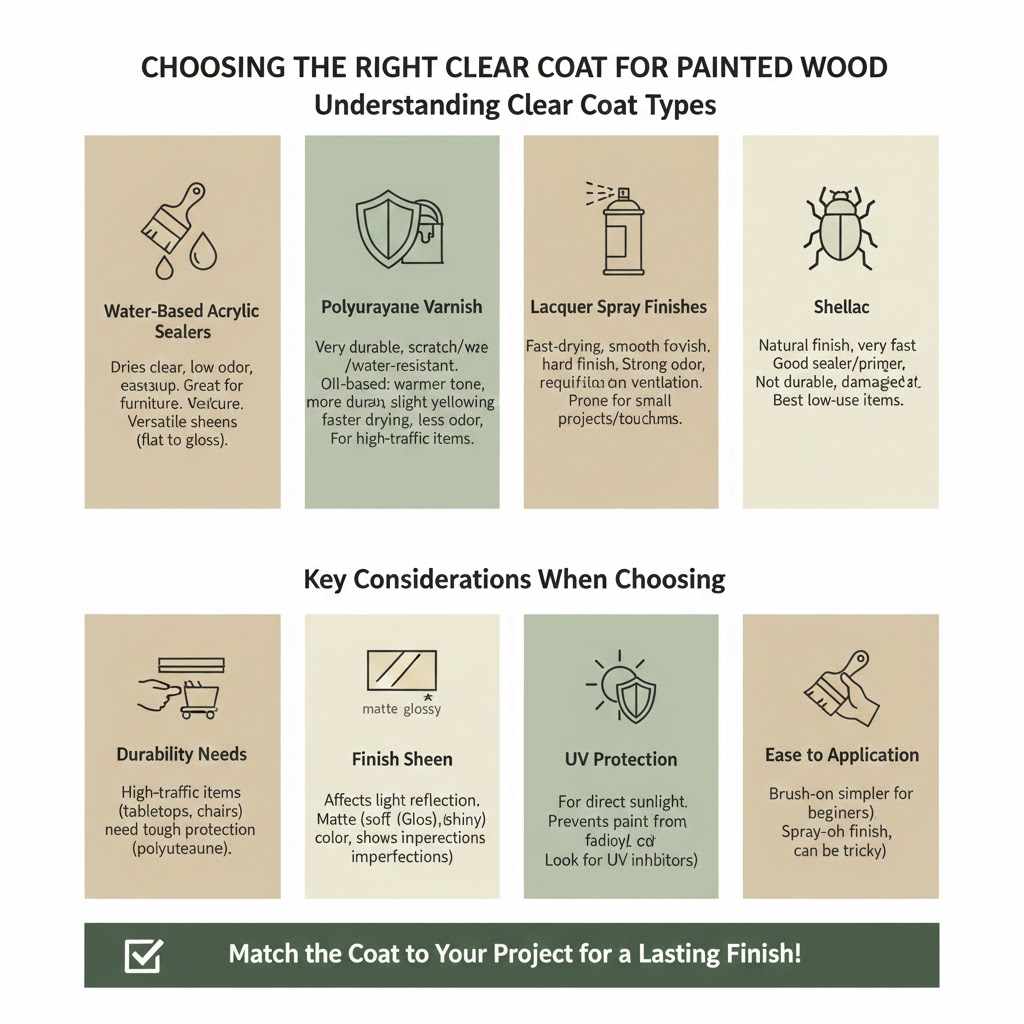
- Water-Based Acrylic Sealers: These are a popular choice because they dry clear and don’t yellow over time. They are easy to clean up with water. This makes them great for indoor projects. Think furniture or decor. They are also low in odor, which is a big plus.
Acrylic sealers are versatile. They work well over latex or acrylic paints. Many come in different sheens, from flat to high gloss.Applying them is usually straightforward. You can brush them on or spray them. For best results, apply thin, even coats.Avoid applying too much at once, as this can lead to a cloudy finish.
- Polyurethane Varnish: Polyurethane offers excellent durability. It’s a tough finish that resists scratches and water. It’s a good option for high-traffic items like tabletops or doors. However, oil-based polyurethane can sometimes give a slight yellow tint, especially over light colors. Water-based polyurethane, also known as polycrylic, dries clear and is a good alternative.
Polyurethane comes in both oil-based and water-based versions. Oil-based versions are generally more durable and provide a warmer tone. They are ideal for floors or heavily used surfaces.Water-based polyurethanes are clearer, dry faster, and have less odor. They are a safer bet for white or pastel painted items to avoid yellowing.
- Lacquer Spray Finishes: Lacquer sprays are quick and easy to use. They dry very fast, allowing for multiple coats in a short time. They provide a smooth, hard finish. However, lacquers can be strong smelling and require good ventilation. They are best for smaller projects or touch-ups.
Lacquer is known for its fast drying time. This makes it convenient for quick projects. It creates a very smooth surface.However, it is also less durable than polyurethane. It can be more prone to chipping or scratching. Always use lacquer in a well-ventilated area, as the fumes can be strong.
- Shellac: Shellac is a natural finish made from beetle secretions. It dries very quickly and can provide a nice sheen. It’s often used as a sealer or primer. However, it’s not as durable as polyurethane or acrylics. It can be damaged by heat and alcohol.
Shellac is a natural finish. It dries incredibly fast. This makes it useful for sealing knots in wood or as a quick topcoat.It can be a good choice if you want an all-natural product. However, it is not very resistant to water or heat. It’s best suited for items that won’t see heavy use or exposure to moisture.
Key Considerations When Choosing
When you’re deciding, think about where the item will live. Will it be in a kitchen with moisture? Or a living room where it might get bumped?
Also, consider the look you want. Do you want the paint color to really pop, or do you prefer a softer finish? The type of paint you used also matters.
Some sealers work better with certain paint types.
- Durability Needs: High-traffic items need tougher protection. Think tabletops, chairs, or doors. For decorative pieces, a lighter seal might be fine.
Durability is about how well the finish will stand up to daily life. If you’re sealing a coffee table, it will get drinks placed on it, remotes moved, and maybe even feet propped up. This calls for a strong, scratch-resistant finish like polyurethane.For a wall shelf holding only light decorative items, a less robust finish might suffice.
- Finish Sheen: Do you want a shiny look, a subtle sheen, or a completely flat, matte appearance? The clear coat will affect how your paint color looks. High gloss can make colors pop but shows every fingerprint. Matte finishes are more forgiving.
The sheen of a clear coat determines how much light reflects off the surface. A matte finish absorbs light, giving a soft look. A satin or eggshell finish has a gentle sheen.Semi-gloss and high-gloss finishes reflect a lot of light, making the surface look brighter and colors appear more vivid. Choose a sheen that complements your painted item.
- UV Protection: If your project will be in direct sunlight, look for a clear coat with UV inhibitors. This helps prevent the paint from fading over time. Many outdoor furniture paints already have this, but adding a UV-protective topcoat is extra insurance.
Sunlight can be harsh on painted surfaces. Over time, UV rays can break down paint pigments, causing colors to fade or turn dull. Clear coats with UV protection act like sunglasses for your painted wood.They absorb or reflect the harmful UV rays, helping to keep your paint color vibrant for longer.
- Ease of Application: Some finishes are easier for beginners than others. Spray cans offer a smooth finish but can be tricky to get even. Brushing on a water-based product is often the simplest for those new to sealing.
How easy is it to put on? Some finishes go on smoothly with a brush, while others are best sprayed. If you’re new to this, a water-based brush-on product might be less intimidating than a spray can or an oil-based varnish.Think about your comfort level with tools and techniques.
Preparing Your Painted Wood for Sealing
Getting the surface ready is just as important as picking the right clear coat. A clean, smooth surface ensures the sealer sticks well. It also helps create a flawless final look.
Skipping this step can lead to problems like peeling or an uneven finish. Proper prep is your best friend.
Cleaning the Painted Surface
Before you seal, the painted surface must be clean and free of dust, dirt, or grease. Even a little bit of grime can get trapped under the clear coat. This can make the finish look bumpy or cloudy.
A simple wipe-down is usually enough.
- Dust Removal: Always start by dusting the item. Use a clean, dry microfiber cloth. Pay attention to nooks and crannies where dust likes to hide.
Dust is the enemy of a smooth finish. It’s tiny particles that get everywhere. Wiping with a dry cloth is the first step to remove loose dust.For painted surfaces, a soft microfiber cloth is best. It traps dust rather than just pushing it around.
- Washing (If Needed): If the wood is greasy or grimy, use a mild soap and water solution. A degreaser might be necessary for kitchen cabinets. Make sure to rinse thoroughly.
Sometimes, dust isn’t the only problem. If your painted wood has sticky spots, grease, or food stains, you’ll need to wash it. A gentle cleaner, like a mild dish soap mixed with water, works well.Make sure to wipe away all soap residue with a clean, damp cloth. Let it dry completely.
- Drying Time: Allow the painted surface to dry completely before applying any sealer. Even a little bit of moisture can cause problems. This usually takes at least 24 hours after the last coat of paint.
Moisture is a clear coat’s worst enemy before it cures. If there’s any water trapped between the paint and the sealer, it can create cloudy spots or cause the sealer to fail. Always give your paint ample time to dry completely.This means no dampness whatsoever.
Sanding for Smoothness
Sanding between coats of paint and before sealing is a game-changer. It smooths out any minor imperfections. It also gives the sealer something to grip onto, ensuring it adheres well.
Don’t skip this if you want a professional finish.
- Light Sanding Between Coats of Paint: If you’ve applied multiple coats of paint, lightly sand between each layer. This removes any dust nibs or unevenness.
Painting often leaves tiny bumps or specks of dust. Sanding gently after each paint coat removes these. It makes the surface smoother for the next layer of paint.This leads to a much better final finish. Use a very fine grit sandpaper for this.
- Sanding Before Sealing: For the final prep before sealing, use a fine-grit sandpaper (220 grit or higher). Sand the entire surface lightly. This dulls the shine of the paint and creates a surface for the sealer to adhere to.
Before applying the clear coat, a final light sanding is crucial. This isn’t about removing paint, but about creating a surface texture. A fine-grit sandpaper, like 220 or higher, works best.It scuffs the paint just enough for the sealer to grab onto. This prevents peeling later.
- Wipe Away Sanding Dust: After sanding, it’s vital to remove all dust. Use a tack cloth for this. Tack cloths are sticky and trap fine dust particles that regular cloths might miss.
After sanding, there’s a fine layer of dust. A regular cloth just pushes it around. A tack cloth is specially designed to pick up that fine dust.It’s like magic for getting a perfectly clean surface. Press gently to avoid leaving sticky residue.
Applying Clear Coats Correctly for Best Results
Now comes the exciting part: applying the clear coat! The technique you use can make a big difference. Thin, even coats are always better than one thick, goopy layer.
This ensures a smooth, durable finish that protects your paint without changing its look too much.
Brushing On Clear Coats
Brushing is a common method for applying clear coats. It gives you good control, especially on detailed areas. The key is to use a high-quality brush and apply the product evenly.
- Use the Right Brush: For water-based sealers, use synthetic bristles. For oil-based ones, natural bristles are better. A good quality brush will leave fewer brush marks.
The type of brush you use matters. Synthetic brushes are best for water-based products like polycrylic. They don’t absorb as much liquid.For oil-based products like polyurethane, natural bristle brushes work better. They hold the product well. Always choose a brush that’s the right size for your project.
- Apply Thin, Even Coats: Don’t overload your brush. Apply thin layers, working in one direction. Avoid going back and forth too much, as this can create streaks.
The secret to a smooth finish is thin coats. Dip your brush into the sealer, but don’t load it up. Brush it onto the wood in long, smooth strokes.Try to cover the area without excessive back-and-forth motion. This helps prevent visible brush marks.
- Allow Proper Drying Time Between Coats: Follow the manufacturer’s instructions for drying times. This is usually several hours. Rushing this step can cause the layers to not bond properly.
Patience is key when applying multiple coats. Each layer needs time to dry before you add the next. Check the product label for specific drying times.Usually, it’s a few hours. This waiting period allows the sealer to set correctly.
- Light Sanding Between Coats (Optional but Recommended): Just like with paint, a very light sanding with fine-grit sandpaper (320 grit or higher) after each coat can improve smoothness. Remember to wipe away dust.
For an ultra-smooth finish, you can lightly sand after each coat of clear sealer. Use a very fine sandpaper, like 320 grit. This knocks down any tiny imperfections or dust nibs.It makes the surface even smoother for the next coat. Always clean off the dust afterward.
Using Spray Cans for Application
Spray cans are fast and can give a very smooth finish, especially on detailed items. However, they require practice and good ventilation.
- Shake the Can Well: Shake the spray can vigorously for at least one minute before and during use. This ensures the paint and propellant are mixed properly.
Before you even start spraying, give that can a good shake. You need to hear the little ball inside rattling around. This mixes everything up.Shaking well ensures you get an even spray and the product comes out correctly. Do this often during use.
- Maintain Consistent Distance: Hold the can about 10-12 inches away from the surface. Move the can in a steady, sweeping motion.
Keep the spray can a consistent distance from the wood. Aim for about 10 to 12 inches away. This prevents drips and uneven coverage.Move your hand in a smooth, side-to-side or up-and-down motion. Don’t stop spraying in the middle of a surface.
- Apply Light, Even Coats: Use short bursts of spray. Overlap each pass by about 50%. This builds up the finish gradually and avoids runs.
Think of it like painting a wall with a can. You want to apply thin layers. Don’t spray one spot for too long.Overlap each pass slightly to ensure full coverage. This builds up the finish gradually and prevents heavy spots.
- Work in a Well-Ventilated Area: Always use spray sealers in an open area or with good ventilation. Wear a mask to protect yourself from the fumes.
Spray cans release fumes that aren’t good to breathe. Always work outside or in a very well-ventilated space. Wear a mask designed for paint fumes.This is important for your health and safety.
Protecting Against Common Damage
Once sealed, your painted wood is more resilient. But certain types of clear coats offer better protection against specific threats.
- Water and Stain Resistance: Oil-based polyurethanes and many water-based acrylic sealers offer good protection against spills and moisture. This is vital for kitchen cabinets or bathroom vanities.
If your painted wood might encounter spills or moisture, you need a sealer that repels water. Oil-based polyurethane is excellent for this. Many modern water-based acrylic sealers also provide very good water resistance.They create a barrier that liquid can’t easily penetrate
- Scratch and Abrasion Resistance: Harder finishes like polyurethane provide the best defense against everyday wear and tear. This is important for furniture that gets a lot of use.
Furniture gets bumped, scraped, and rubbed against. A sealer that resists scratches is essential for keeping your paint looking good. Polyurethane, especially oil-based, is known for its toughness.It creates a hard surface that’s difficult to scratch or scuff.
- Heat Resistance: For surfaces like tabletops that might get hot, choose a high-quality, heat-resistant clear coat. Some lacquers and specific acrylics are formulated for this.
If you’re sealing a surface that might have hot items placed on it, like a mug of coffee, choose a heat-resistant sealer. Some finishes can become soft or damaged by heat. Look for products specifically advertised as heat-resistant for these applications.
Real-Life Examples and Scenarios
Seeing how clear coats work in practice can help you decide. Here are a few examples of how different sealers performed.
Case Study 1: Kitchen Table Makeover
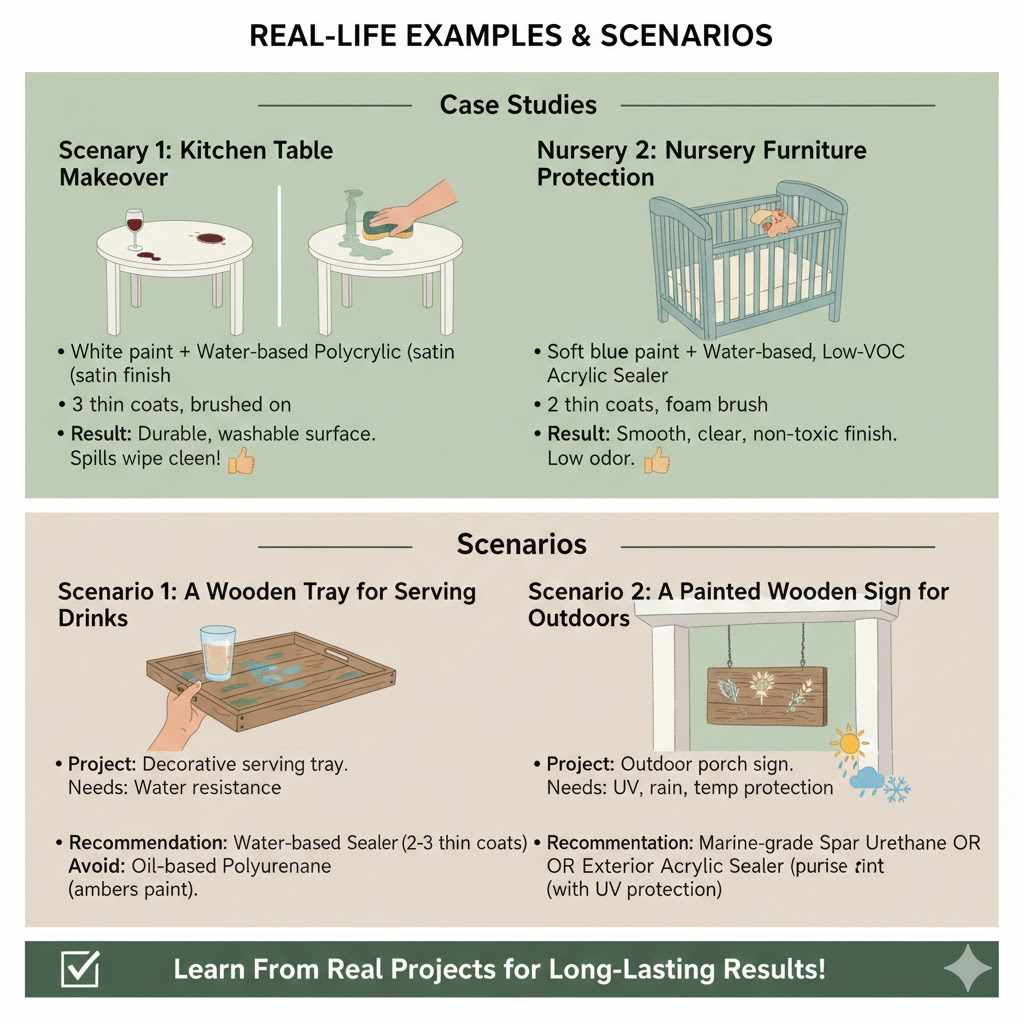
Sarah decided to repaint her old wooden kitchen table a bright white. She was worried about stains and spills from family meals. She chose a water-based polycrylic with a satin finish.
After proper prep, she applied three thin coats with a brush. The result was a durable, washable surface that kept her white paint looking pristine. Even red wine spills wiped away easily.
The satin finish gave a subtle sheen without being too glossy.
Case Study 2: Nursery Furniture Protection
Mark refinished a wooden crib for his baby. He painted it a soft blue. He needed a safe, non-toxic finish that would protect against little hands and toys.
He opted for a water-based, low-VOC acrylic sealer. He applied two thin coats with a foam brush. The finish was smooth, clear, and gave enough protection for everyday use.
It dried quickly, and the low odor meant he could work on it indoors without issue.
Scenario 1: A Wooden Tray for Serving Drinks
You’ve painted a decorative wooden tray. You want it to look good but also be practical for carrying drinks. You need something that can handle occasional condensation from glasses.
A water-based acrylic sealer with good water resistance would be a great choice here. Apply two to three thin coats for a smooth, protective finish. Avoid oil-based polyurethane, as it might slightly amber the paint color.
Scenario 2: A Painted Wooden Sign for Outdoors
You’ve made a beautiful painted sign to hang on your porch. It will be exposed to sun, rain, and temperature changes. You need a sealer that can withstand the elements.
A marine-grade spar urethane or an exterior-grade acrylic sealer with UV protection is recommended. These are designed to resist moisture, UV fading, and temperature fluctuations. Apply several coats for maximum protection.
Frequently Asked Questions
Question: How long does it take for paint on wood to fully cure after sealing?
Answer: Full curing can take anywhere from 7 to 30 days, depending on the product and conditions. While it might feel dry to the touch in hours, it’s still vulnerable to damage for a while. Avoid heavy use or harsh cleaning during this period.
Question: Can I use the same clear coat on all types of paint?
Answer: Generally, water-based clear coats work well over latex and acrylic paints. Oil-based clear coats can sometimes react with latex paints. Always test on an inconspicuous area first, especially if you’re unsure.
Question: What is the best clear coat for painted wood furniture that gets a lot of use?
Answer: For high-traffic furniture, a durable polyurethane, either oil-based for maximum hardness or a high-quality water-based polycrylic, is usually the best choice. Look for finishes that advertise scratch and abrasion resistance.
Question: Will a clear coat change the color of my paint?
Answer: Water-based clear coats generally dry clear and won’t significantly alter paint colors, especially lighter ones. Oil-based products can impart a slight amber or yellow tint, which might be desirable for a warmer look or undesirable for pure white or pastel colors.
Question: Can I spray paint and then seal with a spray can?
Answer: Yes, you can. Using spray paint and then a spray sealer can provide a very smooth, factory-like finish. Ensure you use compatible products and follow proper spray application techniques for best results.
Final Thoughts
Knowing How to Seal Paint on Wood: Best Clear Coats Explained makes a big difference. You learned about different sealers and how to prep your wood. Applying thin coats evenly protects your paint.
Enjoy your beautifully finished and long-lasting painted wood projects.