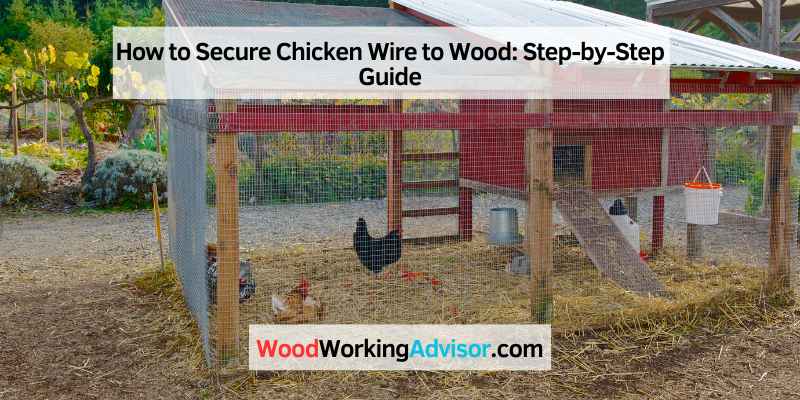
How to Secure Chicken Wire to Wood: Step-by-Step Guide
To secure chicken wire to wood, use a staple gun or tie the wire to the wood with garden ties, cable ties, or twine. Strengthen attachment points by firing two staples in an X shape.
If you’re a chicken keeper, then you know that chicken wire is an essential component of your coop and run. But, once you have the chicken wire, how do you attach it to your wooden frame securely? Fortunately, the solution is simple.
You can use a staple gun to attach the chicken wire to the wooden structure. Make sure that the mesh is taut, but not too tight. If you want to reinforce the attachment points, fire two staples over the weld point where you start and finish the section. With these tips, you can secure your chicken wire to wood and keep your coop safe and secure for your feathered friends.
Materials Needed To Secure Chicken Wire To Wood
To secure chicken wire to wood, there are several materials needed such as garden or cable ties, staples, and mesh. The chicken wire should be attached to wooden material using a staple gun, ensuring the mesh is taut but not overly tight, and fixing the mesh tightly to the wood with staples at least every third hole.
Using pliers to hold the staples will help shield your hand.
When it comes to securing chicken wire to wood, you’ll need a few materials to get the job done. At a minimum, you’ll need the following tools:
Chicken Wire
For this project, you will need a suitable amount of chicken wire. Make sure you measure the area carefully to ensure that you have enough wire to cover the entire space.
Wooden Board
You will also need a wooden board to attach the chicken wire to. The board should be larger than the area you wish to cover and sturdy enough to hold the chicken wire in place.
Staple Gun
A staple gun is the easiest and quickest way to attach the chicken wire to the wooden board. It is recommended that you use a heavy-duty staple gun for this project as regular staple guns may not be strong enough to hold the chicken wire in place.
Zip Ties
If you don’t have a staple gun, you can use zip ties to secure the chicken wire to the wooden board. Zip ties are easy to use, and they can be found in any hardware store.
Pliers
Pliers are a useful tool to have on hand as they can help you tighten the zip ties and cut off any excess material. They can also be used to fix any mistakes you make during the installation process.
When you have all the necessary tools, it’s time to begin securing the chicken wire to the wooden board. Make sure to pull the chicken wire taut as you attach it to the board to prevent it from sagging or ripping. You may also want to consider adding an additional layer of wood over the chicken wire to help secure it in place.
Using A Staple Gun To Secure Chicken Wire To Wood
To securely attach chicken wire to wood, a staple gun can be used for a quick and effortless job. Pulling the mesh taut and using staples at every third hole will ensure a tight grip to the wood.
Chicken wire is an excellent material for creating a fence to keep your chickens safe and secure. However, attaching it to wood can be quite challenging. One of the best tools for securing chicken wire to wood is a staple gun. With the right technique, you can ensure that the chicken wire is attached firmly to the wood, preventing any gaps or spaces that can compromise the safety of your chickens. In this section, we will discuss the steps involved in using a staple gun to secure chicken wire to wood, including preparing the staple gun, applying the chicken wire, and securing the chicken wire.
Preparing The Staple Gun
Before you start securing chicken wire to wood using a staple gun, you need to ensure that the staple gun is prepared properly. Follow these steps to prepare the staple gun:
- Start by loading the staple gun with staples that are the appropriate size for the job.
- Adjust the pressure on the staple gun to ensure that the staples penetrate the wood without causing any damage.
- Test the stapler on a piece of scrap wood to ensure that the pressure is set correctly and the staples are firmly secured to the wood.
Applying The Chicken Wire
Once the staple gun is prepared, it’s time to apply the chicken wire to the wood. To do so, follow these steps:
- Start by unrolling the chicken wire and cutting it to the size you need to match the wood.
- With the backside facing you and the front facing the wood, align the chicken wire so that it covers the wood surface completely.
- Use your hands to flatten and smooth out the chicken wire, ensuring that there are no wrinkles or creases.
Securing The Chicken Wire
With the chicken wire in place, it’s now time to start securing it using the staple gun. Follow these steps to secure the chicken wire to the wood:
- Begin by stapling one corner of the chicken wire to the wood firmly.
- Hold the chicken wire taut and align it flush with the wood as you staple it at regular intervals to the wood.
- Make sure to staple at regular intervals to prevent any gaps, and always pull the chicken wire taut to avoid any looseness.
- When working on corners, fold the chicken wire around the corner and staple it to the wood on the other side.
- If there are any excess chicken wire pieces, cut them off using pliers to prevent any protrusions.
Conclusion
Using a staple gun is one of the most efficient and effective ways of attaching chicken wire to wood. By following these simple steps, you can ensure that your chicken wire fence is tightly secured to the wood, preventing any space or gaps that can leave your chickens vulnerable. With this guide, you can now confidently use a staple gun to attach chicken wire to wood without any worries.
Using Zip Ties To Secure Chicken Wire To Wood
Secure chicken wire to wood using zip ties for a simple and quick solution. Start by attaching the wire to the first stake and continue by attaching it to each stake thereafter. Ensure the chicken wire remains taut throughout the process.
If you are looking for a quick and easy way to secure chicken wire to wood without the use of staples or nails, zip ties can be a great solution. Zip ties are inexpensive and come in a variety of sizes, making them a versatile option for many DIY projects.
Preparing Zip Ties
Before you start securing your chicken wire with zip ties, it’s important to prepare them first. Gather all of your zip ties and make sure they are the appropriate size for your project. If you need to connect multiple zip ties together to make them longer, overlap the ends and attach them securely.
Applying the Chicken Wire
Once your zip ties are ready, apply your chicken wire to the wood. Start by attaching one end of the chicken wire to the wood with a single zip tie. Make sure the wire is stretched taut and secure it to the wood to prevent any sagging. Then continue attaching the chicken wire to the wood by using zip ties every few inches.
Securing the Chicken Wire with Zip Ties
After you have attached the chicken wire to the wood with the zip ties, it’s important to make sure everything is secure. Go back over each zip tie and make sure it is tight, without any slack in the chicken wire. If needed, add additional zip ties to any spots that appear to be loose or sagging.
It’s also a good idea to cut off any excess length from the zip ties with a pair of scissors or wire cutters. This will ensure a clean and neat finish to your project.
In conclusion, using zip ties to secure chicken wire to wood can be a quick and easy solution for many DIY projects. By following these simple steps and taking your time to ensure everything is secure, your project will look great and remain sturdy for years to come.
Securing Chicken Wire To Wood With Wooden Boards And Nails
To secure chicken wire to wood, one effective method is to use wooden boards and nails. Start by attaching the wire to the first stake and use nails to attach the wooden boards on top of the wire. Continue attaching the wire to each stake, placing boards on top and nailing them down until the entire fence is secure.
Chicken wire is a versatile material that is used to create enclosures for chickens and other small animals in the backyard. When you want to secure chicken wire to wood, you need to use wooden boards and nails. This method is simple and effective, and it ensures that the chicken wire will remain in place for a long time. In this article, we will discuss the steps to secure chicken wire to wood with wooden boards and nails.
Preparing the Wooden Boards
Before you can attach the chicken wire to the wooden boards, you need to prepare the boards. Start by cutting the boards to the size that you require. Then, sand the boards to remove any rough edges or splinters. If you are using treated wood, ensure it’s properly dry and not moist.
Applying the Chicken Wire
Once you have prepared the wooden boards, the next step is to apply the chicken wire to the boards. Start by laying the chicken wire over the wood, ensuring that the edges of the chicken wire are flush with the edges of the boards. Then, use a staple gun to staple the chicken wire to the boards at regular intervals to hold it in place.
Securing the Chicken Wire with Nails
After the chicken wire is attached to the wooden boards, you need to secure the chicken wire with nails. Start by placing a nail at one corner of the chicken wire and board, ensuring that it goes through the chicken wire and into the wood. Hammer the nail until it’s secure. Move on to the next corner and repeat the process. Once all four corners are secured, add nails along the edges at regular intervals to ensure that the chicken wire is secure.
Conclusion
Securing chicken wire to wood with wooden boards and nails is an effective method to create enclosures for chickens or other small animals. Start by preparing the wooden boards, laying the chicken wire over the board, stapling the wire to the board, and then securing it with nails. Following these steps will ensure that your chicken wire enclosure is secure and will last for a long time.
Creating A Fence With Chicken Wire And Wooden Posts
Looking to create a sturdy fence with chicken wire and wooden posts? Learn how to secure chicken wire to wood with garden ties, cable ties or twine that are taut but not overly tight. You can also use a staple gun to attach the weld mesh to wooden material, firing two staples in an X shape over the weld point where you start and finish a section.
Creating a fence with chicken wire and wooden posts is a cost-effective and efficient way to secure your yard. Chicken wire is a durable material that can last for years with proper installation. The installation process involves setting up the wooden posts, attaching the chicken wire to the posts, and creating support for the fence.
Setting Up The Posts
The first step in creating a fence with chicken wire and wooden posts is setting up the posts. This involves marking the locations of the posts and digging holes for them. Once the holes are deep enough, place the wooden posts in them and backfill with dirt or concrete. Ensure that the posts are level and secure in the ground.
Attaching The Chicken Wire To The Posts
After the posts are set up, it’s time to attach the chicken wire. You can use a staple gun to attach the chicken wire to the wooden posts. Make sure to pull the mesh taut but don’t overstretch it, as this can cause it to sag over time. Alternatively, you can use garden ties, cable ties, or twine to attach the chicken wire to the posts.
Creating Support For The Fence
The final step in creating a fence with chicken wire and wooden posts is creating support for the fence. You can add horizontal boards to the fence to provide additional support and prevent sagging. To do this, attach the boards to the posts with screws or nails, then attach the chicken wire to the boards. This will create a sturdy and secure fence that can withstand the elements and keep your yard safe.
In conclusion, creating a fence with chicken wire and wooden posts is a straightforward process that requires some planning and preparation. By setting up the posts, attaching the chicken wire, and creating support for the fence, you can create a durable and effective fence that will last for years. With these tips and tricks, you can secure your yard and enjoy peace of mind knowing that your property is protected.
Tips For Securing Chicken Wire To Wood
Securing chicken wire to wood can be tricky, but there are several methods you can try. Use staples to attach the wire to wooden posts or frames, or use garden ties, cable ties, or twine to secure it to stakes.
Make sure to keep the wire taut but not overly tight to prevent damage.
Wearing Gloves
It is always a good idea to wear gloves when working with chicken wire as it can have sharp edges that can cause injury. Wearing gloves will not only protect your hands, but also provide you with better grip, making it easier to work with chicken wire.
Choosing The Right Method
There are various methods for securing chicken wire to wood such as staples, nails, screws, zip ties, or twine. The method you choose will depend on the type of wood, the thickness of the chicken wire and the purpose of the installation. For instance, if you are installing a temporary fence, zip ties will be a better option as compared to using staples which might prove difficult to remove.
Checking For Loose Spots
It is important to check for any loose spots on the chicken wire after installation. These could be areas that were not secured properly or where the wire was not cut properly. Loose spots could allow animals to escape or predators to enter, rendering your fence useless. Ensure that you double-check for loose spots before and after installation.
Using Strong Materials
Chicken wire is a relatively lightweight material and can be easily damaged by animals or weather conditions. Using strong materials such as heavy-duty staples or screws will ensure that the chicken wire is securely fastened to the wood. Additionally, using hard-wearing materials will make sure that the fence lasts for a long time, and you won’t have to frequently change or repair it.
In conclusion, securing chicken wire to wood is not a difficult task, but it does require a bit of care and attention to ensure that it is done correctly. By following these tips, you can make sure that your chicken wire fence is secure and will last longer, providing the necessary protection to your chickens or other animals that you may be raising.
Frequently Asked Questions For How To Secure Chicken Wire To Wood
What Is The Best Thing To Attach Chicken Wire To Wood?
The best way to attach chicken wire to wood is by using a staple gun. It is quick and easy, and you can strengthen the attachment points by firing two staples in an X shape over the weld point where you start and finish a section.
Make sure to pull the mesh taut but don’t overstretch it when attaching to any material.
How Do You Secure Wire Mesh To Wood?
To secure wire mesh to wood, you can use a staple gun to attach the mesh to the wooden material. It is recommended to fire two staples in an X shape over the weld point where you start and finish a section to strengthen the attachment points.
Ensure that the mesh is taut but not overly tight when attaching it to any material.
How Do You Secure Chicken Wire?
To secure chicken wire, start by attaching the wire to the first stake using garden ties, cable ties or twine. Continue attaching the chicken wire to each stake, ensuring it remains taut throughout. You can also use a staple gun to attach the wire to wooden posts, frames, or doors.
Make sure to pull the mesh taut but don’t overstretch it when attaching it to any material. Staples can also be used at least at every third hole to fix the mesh tightly to the wood.
How Do You Attach Chicken Wire To A Frame?
To attach chicken wire to a frame, you can use a staple gun or ties such as cable ties or garden ties. If using staples, make sure to staple every third hole and hold the staples with pliers. Pull the chicken wire taut but do not overstretch it when attaching it to the frame.
Conclusion
There are various effective techniques to secure chicken wire to wood. Whether you choose to use staples, garden ties, or cable ties, ensure the wire is taut but not overly tight. Using a staple gun may be the quickest and easiest way to secure the wire in place.
Remember to shield your hand with pliers when using staples. By utilizing the tips and tricks outlined in this post, you’ll be able to successfully install a chicken wire fence around your garden or chicken coop.