How to Square Plywood on a Table Saw
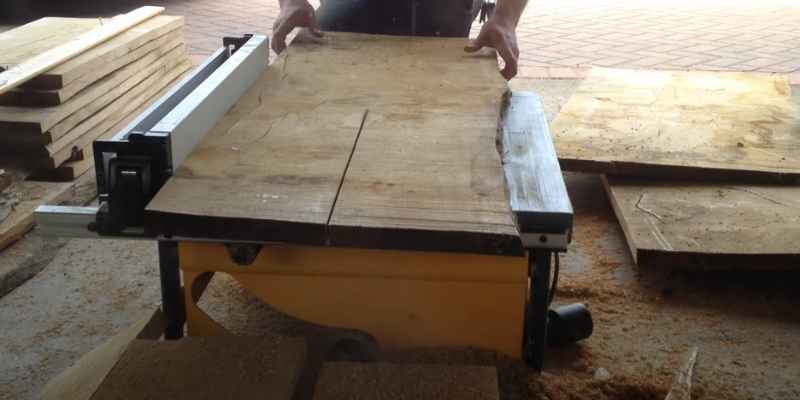
When working with large sheets of plywood, you’ll need to square them up before cutting them to size. The easiest way to do this is with a table saw. Start by setting the blade height to just over half the thickness of the plywood.
Then, make a series of passes through the saw, moving the plywood slightly each time so that you remove a thin strip from all four sides. Once you’ve gone all the way around, your plywood should be perfectly square.
- Set your table saw to make a cut that is half the thickness of the plywood
- Place the plywood on the table saw with the good side down and line up the blade with the edge of the plywood
- Slowly push the plywood through the blade, keeping your hands close to the edges of the plywood so that you can keep it from binding in between the blade and fence
- Once you have cut all four sides of the plywood, turn it over so that the good side is up and measure from corner to corner diagonally across both sides of the plywood.
- The measurement should be precisely equal if you have cut square corners.
3-4-5 Method to Square Plywood
If you’re a woodworker, then you know that one of the most important skills is being able to square up your lumber. And while there are a few different ways to do this, one of the easiest methods is the 3-4-5 method. Here’s how it works: first, find one corner of your lumber and measure out 3 inches from that corner.
Then, at the 4-inch mark, make a second measurement perpendicular to the first. Finally, at the 5-inch mark, make a third measurement perpendicular to the other two. If all of your measurements are equal, then congratulations!
You’ve just squared up your lumber using the 3-4-5 method.
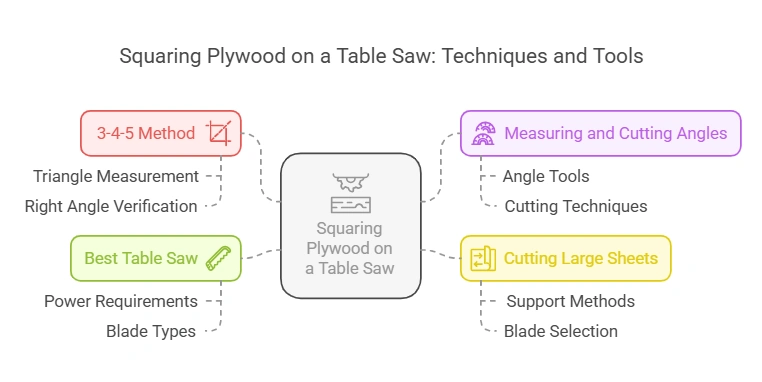
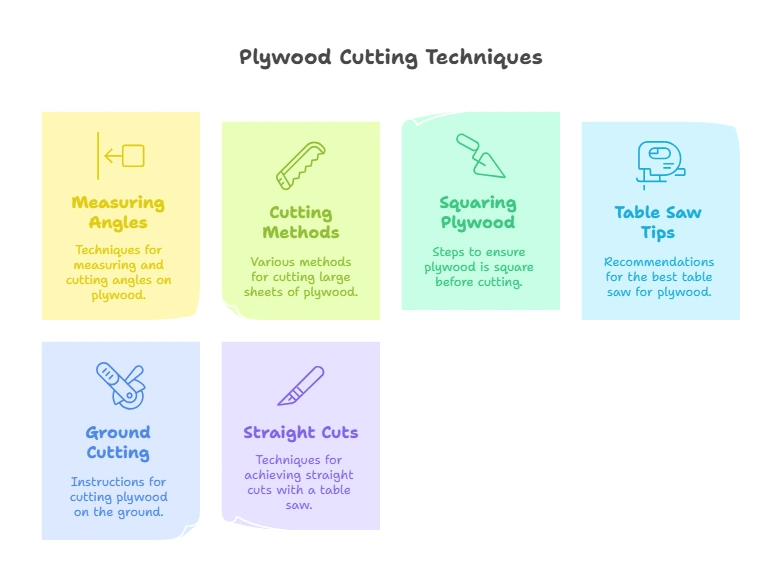
How to Measure And Cut Angles on Plywood
If you’re working with plywood, chances are you’ll need to cut angles at some point. Here’s a quick guide on how to measure and cut curves on plywood. First, use a tape measure to determine your cut angle.
Then, use a speed square or protractor to mark the angle on the plywood. Once the tip is marked, use a circular saw or jigsaw to cut along the line. You can always use a template if you’re not confident in cutting straight lines.
Trace the template’s outline onto the plywood and cut along the line. This method is beneficial if you must make multiple cuts at the same angle. Cutting tips on plywood will become second nature. With a bit of practice
Just take your time and be careful not to rush your cuts.
How to Cut Large Sheets of Plywood on a Table Saw
A table saw is the best tool for the job if you work with large sheets of plywood. Here’s how to set up your table saw and cut large sheets of plywood safely and efficiently. First, ensure your table saw is appropriately set up and secured to a sturdy work surface.
Then, measure and mark your cut lines on the plywood. It’s essential to use a sharp pencil or a marker that will show up clearly on the wood. When ready to cut, slowly feed the plywood into the blade, following your marked line.
Keep your hands close to the saw and use a push stick to keep them clear of the blade. As you get closer to the end of the cut, slow down even more so that you don’t overshoot your mark. Once you’ve made your cuts, clean up any debris from your work area before moving on to other projects.
Cutting Plywood on Table Saw
Most woodworkers will agree that a table saw is one of the most versatile tools in the shop. Not only can you rip lumber and crosscut boards, but with the right blade and jig setup, you can also cut plywood to size on your table saw. This post will show you how to set up your table saw to cut plywood safely and accurately.
We’ll also share tips and tricks for getting the best results. First, let’s talk about blade selection. When cutting plywood, you want to use a sharp, smooth-cutting blade with as many teeth as possible.
A 40-tooth carbide-tipped blade is a good choice for most applications. You might also consider using 80-tooth or 100-tooth knives for excellent cuts on hardwoods or veneered plywood. Next, let’s discuss jigs.
A simple straightedge guide attached to your fence will help you make straight cuts. For crosscuts, you can use a miter gauge or crosscut sled. And if you need to make repeated cuts of the same size, a stop block mounted on your fence is a real-time saver.
Now let’s talk about technique. When making rip cuts, keeping the workpiece flat on the table and against the fence is essential. This will help prevent kickbacks.
For crosscuts, hold the workpiece firmly against the miter gauge or sled. Again, this will help prevent kickbacks. Be sure to use push sticks or other safety devices when necessary to keep your hands away from the blade.
Following these simple tips, cutting plywood on your table saw can be safe and easy!
How to Square Up a Sheet of Plywood
Assuming you want a blog post on how to cut a square piece out of a sheet of plywood: One of the most versatile materials you can have in your workshop is a sheet of plywood. It can be used for everything from building cabinets to creating signs and crafts.
But before using it, you need to know how to square up a sheet of plywood.
Here are four easy steps to follow when squaring up a sheet of plywood:
1. Measure the area where you will be cutting the plywood.
You will need width, height, and two diagonal measurements.
2. Mark the center point of each side with a pencil. Then, draw lines connecting those points so that you have created a large X on the face of the plywood sheet.
3a. If you use a hand saw, place the blade on one of the intersecting lines and start sawing along that line until you reach the other side. Repeat this step for all four lines until you have cut out your square piece of plywood.
3b. If you are using a power saw, set your blade depth to half the thickness of your plywood sheet and make one pass along each line until you have cut through the entire sheet – no need to go back and forth!
4. Once all four cuts are complete, sand down any rough edges with medium-grit sandpaper wrapped around a block sander or by hand if preferred.
. And that’s it – you have successfully squared up your sheet of plywood!
How to Cut Plywood to Shape
If you’re working with plywood, chances are you’ll need to cut it to fit a particular space or shape. Cutting plywood can be tricky, but with the right tools and a little bit of know-how, it’s doable! Here’s what you’ll need:
-A saw. A hand or power saw will work fine; ensure the blade is sharp. -A straight edge.
This can be a ruler, a level, or even just a long piece of scrap wood. You’ll use this to guide your saw and ensure that your cuts are straight. -Clamps (optional).
Clamps can help hold your plywood in place while cutting it if you have them. Now let’s get started!
1. Mark your cut lines on the plywood using a pencil or chalk.
It’s essential to be as accurate as possible here, so take your time and measure twice before making any cuts.
2. Place your straight edge along the line you want to cut, and clamp it down if necessary. 3. Using slow, steady strokes, begin cutting along the line with your saw.
Best Table Saw for Plywood
There are a few things to consider when purchasing a table saw for plywood. First, you must decide what size and type of table saw you need. The two main types are bench-top and floor-standing models.
Benchtop models are smaller and more portable than floor-standing models, but they may not have the power or capacity needed for large projects. The next thing to consider is the blade. You will want an edge that is designed for cutting plywood.
There are many different brands and sizes of blades available, so it is essential to do some research to find the best one for your needs. Once you have decided on the size, type of table, the saw you need, and the right blade, you can start shopping for the best deal. Be sure to compare prices from different retailers, both online and in stores.
It would be best to read customer reviews before making your final purchase decision.
How to Cut Plywood on the Ground
When working with a large piece of plywood, cutting it on the ground is often easier than maneuvering it onto a table saw or other cutting surfaces.
Here’s how to do it:
1. Place the plywood on the ground, making sure it’s in a stable position.
If necessary, use clamps or weights to keep it from moving around.
2. Measure and mark your cut lines with a pencil or chalk. Make sure they’re straight and accurate – this will make your job easier and produce better results.
3. Use a hand, circular, jigsaw, or another power saw to make your cuts along the marked lines. Start at one end and work until the entire piece is cut through. 4. Sand down any rough edges if necessary, then you’re done!

Credit: thepowertoolwebsite.com
How Do I Make Sure Plywood is Square?
When working with plywood, it is essential to ensure that the piece is square. This can be done in a few different ways. One way to check if a piece of plywood is fair is to measure the diagonals.
If the two measurements are equal, then the plywood is considered square. Another way to check for squareness is by measuring from corner to corner on opposite sides of the plywood. These measurements should also be equal if the plywood is square.
If the plywood is not currently square, a few things can be done to make it so. One option is to use a power planer or joiner to create straight and parallel edges on the long sides of the plywood sheet. Once done, the short sides can be trimmed to make 90-degree angles at each corner using a table or circular saw.
Finally, the long and short sides can be aligned by running a belt sander along their length until they meet perfectly in the middle. Once you have checked and double-checked that your plywood is officially square, you can move on to whatever project you had planned on using it for!
How Do You Square a Panel on a Table Saw?
Squaring a panel on a table saw can be done by following these steps:
- Set the table saw’s fence so that it is perpendicular to the blade.
2. Place your panel against the fence, ensuring that the end of the panel is flush with the blade’s edge.
3. Start the table saw and slowly push your panel through, keeping it flush against the fence. 4. Once your panel has been cut through, you should have a perfectly square edge.
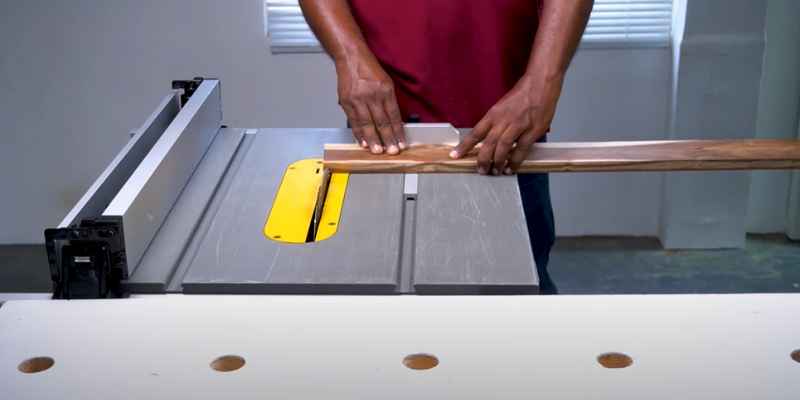
How Do You Cut Plywood Straight With a Table Saw?
If you’re working with plywood, you must be extra careful to ensure your cuts are straight. A table saw is an excellent tool, but it’s essential to follow the proper steps to get a clean, precise amount. First, set up your saw according to the manufacturer’s instructions.
Make sure the blade is sharp and installed correctly. Then, measure and mark your cut line on the plywood. Next, clamp the plywood onto the table saw so it’s secure.
Start the saw and slowly guide it along the cut line. Please keep your hands away from the blade and focus on holding the board steady as it moves through the edge. Once you’ve made your cut, turn off the saw and unclamp the plywood.
It would be best if you now had a nice, straight edge on your plywood piece.
Conclusion
If you’re working with plywood, you’ll need to square it up before you can cut it to size. The easiest way to do this is with a table saw. First, set the blade of your saw to 90 degrees.
Then, make a rip cut along one edge of the plywood. Next, measure the width of the amount – it should be exactly 1/4″. If it’s not, adjust the blade and make another cut.
Once you have a perfectly squared edge, you can use that edge as a reference point for making other cuts. Just line up the edge of the plywood with the fence on your saw and make your cuts accordingly.