
How to Stain Wood Floors Darker: Master the Art of Transforming Your Space
To stain wood floors darker, first, prepare the surface by sanding and cleaning it thoroughly. Then, apply a dark-colored wood stain evenly using a brush or cloth, following the manufacturer’s instructions for drying time and application method.
Understanding Wood Stain
Looking to darken your wood floors? This article provides essential tips on how to effectively stain wood floors darker, offering guidance on techniques and products to achieve your desired result.
Wood stain is a popular choice for homeowners who want to enhance the natural beauty of their wood floors while adding a touch of color. It is a type of finish that is applied to the surface of wood to alter its color and protect it from damage. In this section, we will explore the different types of wood stain and discuss how to choose the right one for your project. So, let’s dive in and understand wood stain in more detail.
What is wood stain?
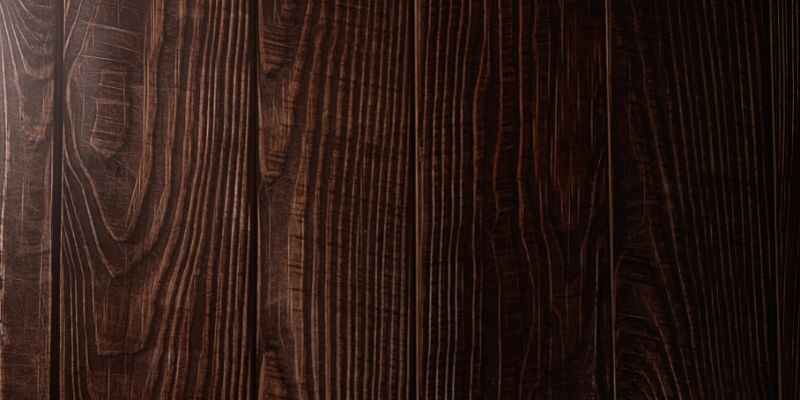
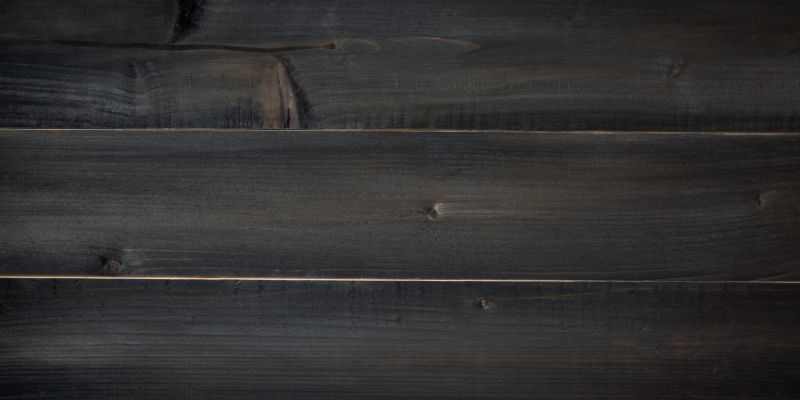
Wood stain is a specially formulated product that is designed to penetrate the surface of wood, providing color while allowing the grain and texture to shine through. It is available in a variety of colors and finishes, allowing you to create the desired look for your wood floors. Unlike paint, which sits on the surface and obscures the natural beauty of the wood, stain seeps into the pores of the wood, enhancing its natural characteristics.
Types of wood stain
There are several types of wood stain available on the market today. Each type offers its own unique advantages and characteristics. Let’s take a closer look at these different types:
1. Oil-based wood stain: This type of wood stain is made by suspending color pigments in oil. Oil-based stain offers a rich, deep color and is easy to work with. It penetrates the wood deeply, providing long-lasting protection. Moreover, it allows for easy reapplication and touch-ups in the future if needed.
2. Water-based wood stain: As the name suggests, water-based wood stain is made by suspending color pigments in water. This type of stain is low in odor, dries quickly, and is easy to clean up. It also offers a wide range of colors and finishes to choose from. Additionally, water-based stain is environmentally friendly and doesn’t emit harmful fumes.
3. Gel wood stain: Gel stain is a thicker consistency stain that is ideal for vertical surfaces or intricate woodwork. It doesn’t drip or run, making it easier to apply to the wood without creating a mess. Gel stain is available in a variety of colors and finishes, giving you more flexibility in achieving the desired look for your wood floors.
Remember to consider factors such as the wood species, desired color, and the overall aesthetic you want to achieve when choosing the right type of wood stain for your project.
Choosing the right wood stain
Choosing the right wood stain is crucial in achieving the desired look for your wood floors. Here are a few steps to help you make the right choice:
1. Determine the desired color: Think about the color you want to achieve. Consider the existing color of your wood floors and whether you want to go darker or lighter. Testing the stain on a small, inconspicuous area of the floor or on a spare piece of wood can help you gauge the final color result.
2. Consider the wood species: Different wood species absorb stain differently, so it’s important to consider this when choosing a wood stain. Consult a stain color chart or seek advice from an expert to ensure the stain you choose complements the natural characteristics of your wood species.
3. Evaluate the finish: Take into account the finish you want for your wood floors. Wood stains are available in matte, satin, semi-gloss, and high-gloss finishes. Each finish imparts a different level of sheen to the wood, so choose the one that matches your desired aesthetic.
4. Test the stain: Before applying the stain to your entire floor, test it on a small area or spare piece of wood. This allows you to assess the color, absorption, and overall look of the stain before committing to it fully.
By considering these factors, you can choose the right wood stain that will enhance the beauty of your floors and bring your vision to life. Now that we have a good understanding of wood stain and its types, let’s move on to the next step: preparing your wood floors for staining.
Preparing Your Wood Floors
Before you can achieve that rich, darker stain on your wood floors, it’s essential to properly prepare them. This involves three crucial steps: cleaning the wood floors, sanding the wood floors, and applying wood conditioner. By following these steps diligently, you’ll ensure a flawless staining process and achieve the desired results.
Cleaning The Wood Floors
The first step towards preparing your wood floors for a darker stain is to clean them thoroughly. This ensures the removal of any surface dirt, grime, or wax that may impede the staining process. Here’s how you can effectively clean your wood floors:
- Start by sweeping or vacuuming the floor to remove loose dust and debris.
- Next, dampen a microfiber mop or cloth with a mild wood floor cleaner. Avoid using excessive water as it can damage the wood.
- Gently mop the entire floor, working in sections if necessary.
- Allow the floor to air dry completely before proceeding to the next step.
Sanding The Wood Floors
Sanding the wood floors is a critical step to ensure a smooth and even surface for the dark stain to adhere to. Here’s how you can sand your wood floors effectively:
- Begin by renting a floor sander from your local hardware store.
- Use a coarse-grit sandpaper (such as 36 or 60 grit) to remove the existing finish and any superficial scratches or imperfections.
- Always sand in the direction of the wood grain to prevent further damage.
- Gradually switch to finer-grit sandpaper (such as 100 or 120 grit) for a smoother finish.
- Thoroughly clean the floor to remove any dust or debris generated during the sanding process.
Applying Wood Conditioner
After cleaning and sanding, it’s crucial to apply a wood conditioner before proceeding to stain your wood floors. Wood conditioner helps to even out the absorption of the stain, preventing blotching or uneven color. Follow these steps to apply wood conditioner effectively:
- Ensure the area is well-ventilated.
- Stir the wood conditioner thoroughly before applying.
- Using a brush or cloth, apply a thin and even layer of the wood conditioner onto the entire surface of the wood floor.
- Allow the conditioner to penetrate the wood for the recommended amount of time specified on the product packaging.
- Wipe off any excess conditioner with a clean cloth.
With your wood floors thoroughly cleaned, sanded, and conditioned, you’re now ready to move on to the exciting part – staining your wood floors darker. Stay tuned for our next blog post on the best techniques for achieving a rich, dark stain!
Applying The Wood Stain
Learn how to achieve a darker hue on your wood floors by expertly applying wood stain. Follow these simple steps to get the perfect finish and enhance the beauty of your floors.
Choosing The Application Method
When it comes to applying wood stain to your floors, there are a few different methods you can choose from. Depending on the size of the project and your desired outcome, you can opt for either a brush, a roller, or a sprayer. Each method has its own advantages and considerations, so it’s important to choose the one that best suits your needs.
Applying The Stain Evenly
Regardless of which application method you choose, it’s vital to apply the wood stain evenly for a seamless and professional finish. To achieve this, start by preparing the surface of your wood floors. Ensure that they are clean and free of any dirt, dust, or debris. This will help the stain adhere properly and ensure a smooth application.
Next, apply the wood stain in manageable sections, working with the grain of the wood. This will help you achieve an even coverage and prevent any streaks, blotches, or uneven patches. Take your time and make sure to apply consistent pressure while moving the brush, roller, or sprayer, ensuring all areas are covered.
Adjusting The Darkness Of The Stain
If you want to achieve a darker shade of stain, it’s possible to adjust the darkness to your liking. Before applying the stain, experiment on a small inconspicuous area or an extra piece of wood to test the desired darkness. If the stain is too light, consider adding additional layers to darken the color.
Another way to control the darkness of the stain is to adjust the drying time between coats. Allowing the stain to dry for a shorter period of time before applying a second coat will result in a lighter shade. Alternatively, if you want a darker hue, let the stain dry for a longer period of time before adding the next coat.
Remember, it’s essential to follow the manufacturer’s instructions and recommendations when adjusting the darkness of the wood stain. This will ensure you achieve the best results and avoid any unwanted surprises.
By following these tips and techniques for applying wood stain to your floors, you’ll be able to achieve a darker, more visually appealing finish. Remember to carefully choose your application method, apply the stain evenly, and adjust the darkness to your desired shade. With a little patience and attention to detail, you’ll be able to transform your wood floors into a stunning feature of your home.
Finishing And Maintaining Dark Stained Wood Floors
After successfully staining your wood floors to achieve a darker finish, it’s important to focus on finishing and maintaining the new look. Applying a protective finish and implementing proper care routines are crucial to ensure the longevity and beauty of your dark stained wood floors.
Applying A Protective Finish
To protect and enhance the appearance of your dark stained wood floors, it’s essential to apply a high-quality protective finish. This finish serves as a barrier against daily wear and tear, spills, and stains.
When selecting a protective finish for your wood floors, consider options such as polyurethane, varnish, or an oil-based sealing product.
Follow these steps to apply a protective finish:
- Clean the surface of your wood floors thoroughly, ensuring all dust and debris are removed.
- Using a brush or a lamb’s wool applicator, apply the protective finish evenly onto the wood floor, working in the direction of the grain.
- Allow the finish to dry completely as per the manufacturer’s instructions.
- Sand the surface lightly to remove any imperfections or roughness.
- Apply additional coats of the protective finish, repeating the process until you achieve the desired level of protection and shine.
Caring For Dark Stained Wood Floors
Proper care is crucial in maintaining the beauty and longevity of your dark stained wood floors. Implement these practices to keep them looking their best:
Regular Cleaning
Perform regular cleaning to remove dirt, dust, and debris that can cause scratches and damage to your wood floors. Here are some tips:
- Sweep or vacuum the floor regularly to eliminate loose dirt and particles.
- Damp mop the floor with a hardwood floor cleaner or a mixture of vinegar and water, being careful not to saturate the wood.
- Wipe up spills immediately to prevent potential stains.
Protective Measures
Implementing protective measures can prevent scratches and damage to your dark stained wood floors, ensuring their longevity:
- Place doormats at entryways to trap dirt and moisture.
- Use furniture pads or felt feet on the legs of your furniture to prevent scratches and dents.
- Avoid dragging heavy objects across the floor; instead, lift and carry them.
Periodic Maintenance
Performing periodic maintenance can help keep your dark stained wood floors in top condition:
- Regularly inspect your wood floors for any signs of damage or wear.
- Reapply a protective finish as needed to maintain the integrity of the original stain.
- Consider buffing or refinishing your wood floors every few years to remove surface scratches and revive their appearance.
Conclusion
To achieve a darker stain on your wood floors, follow these tips and tricks. Start by preparing the surface properly and choosing the right stain color. Apply the stain in thin coats and use a sponge or brush for an even application.
Allow ample drying time between coats and finish off with a protective sealant. With these steps, you can transform your wood floors into a stunning, darker shade that adds warmth and elegance to your space.