How to Straighten Wood Edges: Simple DIY Solutions
To straighten wood edges, use a jointer or a hand plane for a smooth finish. Sand the edges for a polished look that’s ready for your woodworking project.
Straightening wood edges is crucial for achieving precise and professional results in your woodworking projects. Whether you are working on furniture, cabinets, or any other woodworking project, having straight and smooth edges is essential. In this blog post, we will discuss various methods and tools you can use to straighten wood edges effectively.
By following these techniques, you can ensure that your wood pieces fit together seamlessly and create a high-quality end product. Let’s dive into the details of how to straighten wood edges and elevate your woodworking skills.
Introduction To Straightening Wood Edges
When working on a woodworking project, achieving smooth and straight wood edges is essential for ensuring a professional and polished finish. Straightening wood edges is a fundamental skill that every woodworker should master to create high-quality pieces. In this article, we will explore the importance of smooth edges and the tools needed to achieve this.
The Importance Of Smooth Edges
Smooth edges are crucial for creating visually appealing and professional-looking woodwork. They not only enhance the aesthetics of the final product but also contribute to the structural integrity of the piece. Properly straightened edges ensure tight and seamless joints, which are essential for the overall strength and stability of the finished project.
Tools Needed For The Job
When it comes to straightening wood edges, having the right tools is paramount. The following tools are essential for achieving smooth and straight wood edges:
- Jointer: A jointer is a woodworking machine used to create a flat surface along the edge of a board.
- Hand Plane: Hand planes are versatile tools that can be used to straighten and smooth wood edges.
- Router: Routers equipped with a straight bit can be used to trim and straighten wood edges.
- Edge Banding Trimmer: This tool is specifically designed to trim and straighten edge banding on wood surfaces.

Preparation Steps
Before you begin straightening wood edges, it’s crucial to properly prepare and gather the necessary tools and equipment. This will help ensure a smooth and safe process. In this section, we will discuss the essential preparation steps, including selecting the right wood and acquiring the necessary safety gear.
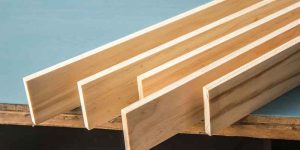
Selecting The Right Wood
Choosing the appropriate wood is a fundamental step in achieving straight and well-finished edges. Here are a few factors to consider when selecting your wood:
- Quality: Opt for high-quality wood that is free from knots, cracks, or other defects. This will make the straightening process easier and result in a more professional outcome.
- Straightness: Look for wood that is as straight as possible. This will minimize the amount of work required to straighten the edges.
- Moisture content: Ensure the wood has an appropriate moisture content. Wood with high moisture can shrink or warp during the straightening process, while wood with low moisture can become brittle and prone to cracking.
Safety Gear And Precautions
When working with wood, it’s essential to prioritize safety. Here are some safety gear and precautions you should take:
- Protective eyewear: Wear safety goggles to shield your eyes from flying wood particles, sawdust, or any other debris that may be produced during the straightening process.
- Ear protection: Utilize earplugs or earmuffs to protect your hearing from the noise generated by power tools or machinery.
- Dust mask: Wear a dust mask to prevent inhalation of fine wood particles or sawdust, especially if you are working in a poorly ventilated area.
- Gloves: Consider wearing gloves to protect your hands from sharp edges or splinters.
- Work area: Ensure your work area is well-lit and free from any obstacles or clutter that may pose a safety hazard. Keep the floor clean to avoid slips and falls.
- Power tool precautions: Familiarize yourself with the proper usage and safety guidelines of any power tools you will be using during the straightening process. Always follow manufacturer instructions and exercise caution.
By following these preparation steps and adhering to proper safety measures, you are setting yourself up for success in straightening wood edges. In the next section, we will dive into the techniques and steps involved in the actual straightening process.
Using A Hand Plane
Straightening wood edges is an essential skill for any woodworker. It’s especially important when you’re working on a project that requires a precise fit or when you’re joining two pieces of wood together. One of the most effective tools for straightening wood edges is a hand plane.
Choosing The Right Hand Plane
Before you start using a hand plane to straighten wood edges, you need to make sure you have the right tool for the job. There are many different types of hand planes, each designed for a specific purpose. When it comes to straightening wood edges, you’ll want to choose a bench plane. A bench plane is a larger hand plane that is designed to be used on a workbench. It’s perfect for straightening long boards and removing any high spots.
Techniques For Effective Planing
Planing is a simple process, but it requires some practice to get it right. Here are some techniques to help you get the best results:
- Start by marking the high spots on the wood with a pencil or chalk. This will help you see where you need to focus your planing.
- Hold the hand plane with both hands, with one hand on the front knob and the other on the rear handle.
- Place the hand plane on the wood, with the blade facing forward. Make sure the blade is parallel to the wood.
- Push the hand plane forward in a smooth, even motion. Use your body weight to apply pressure to the plane.
- When you reach the end of the board, lift the hand plane off the wood and check your progress. If you still have high spots, repeat the process.
- Always work with the grain of the wood. Planing against the grain will result in tear-out and an uneven surface.
By following these techniques, you’ll be able to straighten wood edges quickly and accurately with a hand plane.
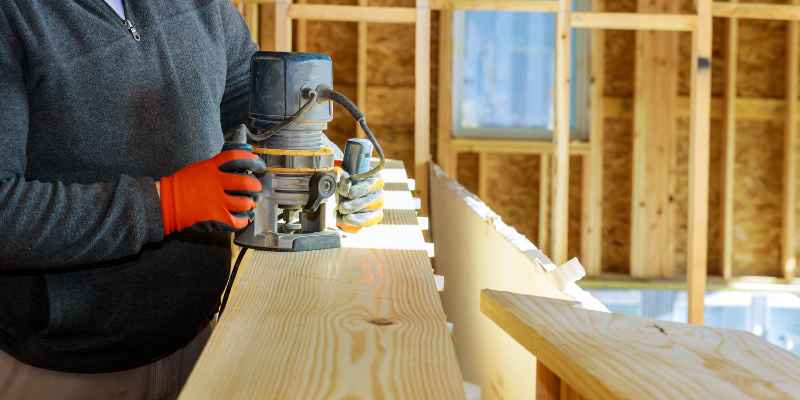
The Router Method
The Router Method is an effective way to straighten wood edges with precision and efficiency.
Setting Up The Router
1. Secure the wood piece on a workbench.
2. Install a straight bit on the router.
3. Adjust the cutting depth for accuracy.
Guides For Straight Edges
1. Attach a straight edge guide to the router.
2. Use clamps to keep the guide in place.
3. Move the router along the edge for a straight cut.
Table Saw Techniques
Achieving straight wood edges with a table saw is a fundamental skill for any woodworker. Begin by selecting the right blade and adjusting the saw’s settings, then use a square and a straight edge to guide the wood through the saw.
When it comes to straightening wood edges, table saw techniques can be highly effective. With the right adjustments and the use of a jig, you can achieve precise and straight cuts. In this section, we will explore two important table saw techniques: adjusting the table saw and creating a jig for straight cuts.
Adjusting The Table Saw
Before you start cutting your wood, it is crucial to ensure that your table saw is properly adjusted. Here are the steps to follow:
- Check the blade alignment: Make sure the blade is parallel to the miter gauge slot. Use a combination square to check the alignment from both the front and the back of the blade.
- Adjust the fence: Align the fence parallel to the blade by measuring the distance between the blade and the fence at the front and back ends. Make any necessary adjustments to ensure consistency.
- Check the blade height: Set the blade height to the desired cutting depth. It should be slightly higher than the thickness of the wood you are working with.
Creating A Jig For Straight Cuts
A jig can greatly assist in achieving straight cuts with your table saw. Here’s how you can create a simple jig:
- Gather your materials: You will need a piece of plywood, a straight board, screws, and a screwdriver.
- Attach the board to the plywood: Position the straight board along the edge of the plywood and secure it in place with screws. Ensure that the board extends past the blade.
- Set the distance: Measure the desired distance from the blade to the edge of the jig. Use a ruler or a measuring tape to achieve accuracy.
- Secure the wood: Place your wood against the jig, aligning the edge with the desired cutting line. Hold the wood firmly against the jig as you make the cut.
By adjusting your table saw and creating a jig for straight cuts, you can achieve precise and professional-looking wood edges. Remember to always prioritize safety when working with power tools and wear appropriate protective gear. Happy woodworking!
Sanding For Perfection
Achieving straight wood edges requires precision sanding for a flawless finish. Follow these steps to ensure perfection: start with coarse sandpaper to remove any imperfections, gradually work your way up to finer grits, and always sand in the direction of the wood grain.
Finish off with a final sanding using a fine grit sandpaper for a smooth and straight edge.
When it comes to straightening wood edges, sanding is an essential step. Sanding helps to smooth out the rough and uneven surfaces, making them even and ready for further processing. However, sanding requires some knowledge and skill to ensure the job is done right. In this post, we will focus on sanding for perfection, covering topics such as choosing the right sandpaper, manual vs. power sanding, and tips for ensuring the best results.
Choosing The Right Sandpaper
Choosing the right sandpaper is crucial when it comes to sanding for perfection. The grit of the sandpaper determines how much wood it will remove and how smooth the surface will be. Generally, a lower grit number means a rougher surface, while a higher grit number means a smoother surface. For wood edges, it’s recommended to start with a lower
, such as 60 or 80, and work up to a higher grit, such as 220. This will ensure that the edges are smooth and free of scratches.
Manual Vs. Power Sanding
Manual sanding involves using sandpaper and your own elbow grease to sand the wood surface. It’s a traditional method that requires patience and skill, but it can produce excellent results. On the other hand, power sanding involves using an electric sander to sand the wood surface quickly and efficiently. While power sanding is faster, it requires more skill and can be more challenging to control. Ultimately, the choice between manual and power sanding comes down to personal preference and the job at hand.
Tips For Ensuring The Best Results
No matter which sanding method you choose, there are some tips you can follow to ensure the best results. Firstly, always sand with the grain of the wood to avoid scratches and uneven surfaces. Secondly, make sure to keep the sandpaper clean and replace it when it becomes worn or clogged. Finally, use a sanding block or pad to ensure even pressure across the entire surface. By following these tips, you can achieve smooth and straight wood edges with ease.
In conclusion, sanding is an essential step in straightening wood edges, and it requires some knowledge and skill to ensure the best results. By choosing the right sandpaper, deciding between manual and power sanding, and following some simple tips, you can achieve the perfect finish for your wood edges.
Troubleshooting Common Issues
To straighten wood edges, start by moistening the concave side, then apply heat using an iron. The steam will swell the fibers, allowing you to flatten the board with clamps. This technique helps fix common wood warping issues effectively.
Dealing With Warped Wood
Warped wood can be straightened using moisture and heat method.
- Soak the concave side in water.
- Apply heat to the convex side.
- Use clamps to hold the wood in place.
Fixing Uneven Edges
Fix uneven edges by planing or sanding the wood surface.
- Mark high spots and plane them down.
- Use a straight edge to check for flatness.
- Sand the edges until they are smooth and even.
Finishing Touches
When it comes to straightening wood edges, paying attention to the finishing touches can make a significant difference in the final outcome. Here we will discuss the essential steps for sealing and protecting wood edges, as well as maintaining your tools to ensure longevity and optimal performance.
Sealing And Protecting Wood Edges
To protect wood edges, seal them with a quality wood sealant to prevent moisture damage and enhance durability.
- Choose a sealant suitable for the wood type.
- Apply a smooth and even coat on the edges.
- Allow sufficient drying time as per the product instructions.
Maintaining Your Tools
Regular maintenance of your tools is crucial to ensure precise and efficient wood straightening.
- Keep blades sharp for clean cuts.
- Regularly clean and lubricate moving parts.
- Store tools in a dry and secure place to prevent damage.
Frequently Asked Questions
How Can I Straighten Wood Edges Without A Jointer?
To straighten wood edges without a jointer, you can use a hand plane, a straightedge and a circular saw, or a router and a straight bit. Hand planes are particularly effective for small projects, while a circular saw and a straightedge are suitable for larger pieces.
What Are The Benefits Of Straightening Wood Edges?
Straightening wood edges ensures a seamless fit for joinery, enhances the overall appearance of the project, and facilitates easier glue-ups. Additionally, straight edges are crucial for creating strong, stable joints, leading to a more durable and professional-looking finished product.
Can I Use A Table Saw To Straighten Wood Edges?
Yes, a table saw equipped with a straight-line rip jig or a jointing attachment can effectively straighten wood edges. This method allows for precise and uniform cuts, resulting in straight and smooth edges that are ready for joining or further refinement.
What Tools Do I Need To Straighten Wood Edges?
To straighten wood edges, you may need tools such as a hand plane, a straightedge, a circular saw, a router, a jointer, or a table saw with a straight-line rip jig or a jointing attachment. The specific tool required depends on the size of the project and the desired level of precision.
Conclusion
Straightening wood edges is an essential skill for woodworking projects. By following the techniques and tips outlined in this guide, you can achieve professional results. Whether you’re a beginner or an experienced woodworker, mastering this process will elevate the quality of your creations and make your projects stand out.