How to Unlock a Ryobi Miter Saw
To unlock a Ryobi Miter Saw, locate the locking pin and release it by pulling it out. Unlocking a Ryobi Miter Saw is a simple process.
First, find the locking pin on the saw, typically located near the handle or base. Once you’ve located the pin, carefully pull it out to unlock the saw. This will allow you to adjust the angle and position of the blade to meet your cutting needs.
By following these steps, you can easily unlock your Ryobi Miter Saw and get back to work quickly.
Understanding The Basic Components Of A Ryobi Miter Saw
When it comes to unlocking your Ryobi Miter Saw, it’s essential to have a clear understanding of its basic components. Each part plays a crucial role in the overall operation of the saw, allowing you to make precise and accurate cuts with ease. In this section, we will provide an overview of the key parts of a Ryobi Miter Saw and explain the importance of each component in unlocking the saw.
Overview Of The Key Parts Of A Ryobi Miter Saw
1. Blade:
The blade is the heart of the miter saw, responsible for cutting through different materials. It is important to choose the right blade for your intended application, whether you are cutting wood, metal, or other materials. The blade can be easily replaced or adjusted, allowing you to optimize your cuts for different projects.
2. Miter Gauge:
The miter gauge enables you to make accurate angled cuts. It consists of a pivoting arm that can be adjusted to the desired angle, allowing you to create precise bevels and miters. The miter gauge is essential for achieving clean and professional-looking cuts, especially when working on intricate woodworking or carpentry projects.
3. Fence:
The fence acts as a guide for your workpiece, ensuring stability and accuracy throughout the cutting process. It is a flat, sturdy surface located at the rear of the miter saw table, against which you can position your material securely. The fence helps prevent the workpiece from shifting or wobbling during cuts, resulting in clean, straight lines.
4. Saw Head and Arm:
The saw head and arm are responsible for holding and operating the blade. They allow you to raise or lower the blade for different cutting depths, as well as tilt the blade for bevel cuts. The saw head and arm are designed to provide stability and precision, enabling you to make intricate and controlled cuts.
5. Dust Collection System:
The dust collection system helps keep your work area clean by capturing and collecting sawdust and debris. It is important to regularly clean and maintain this system to ensure optimal performance and prevent any clogging or buildup that could affect the saw’s functionality.
Explaining The Importance Of Each Component In Unlocking The Saw
Understanding the importance of each component is vital to unlocking the full potential of your Ryobi Miter Saw. By familiarizing yourself with the blade, miter gauge, fence, saw head and arm, and dust collection system, you can confidently adjust and operate the saw to meet your specific cutting needs. Each component contributes to overall precision, stability, and safety, allowing you to unlock the maximum capabilities of your miter saw.
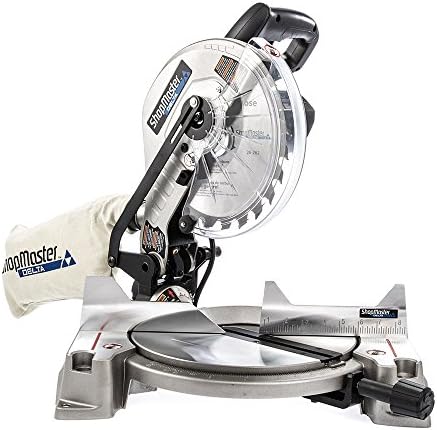
Credit: www.amazon.com
Preparing Your Workspace For Unlocking The Ryobi Miter Saw
Before you start unlocking your Ryobi Miter Saw, it’s crucial to ensure that your workspace is properly prepared. A well-organized and safe workspace can greatly enhance your efficiency and convenience during the unlocking process. In this section, we will discuss the essential steps to create a suitable work area for unlocking your Ryobi Miter Saw.
Choosing The Right Work Area For Safety And Convenience
When it comes to selecting a work area for your Ryobi Miter Saw, safety should be your top priority. Choose a spacious location that offers enough room for you to maneuver freely, allowing you to work comfortably and without any hindrances. Make sure the area is well-lit, clean, and free from any potential hazards that may pose a risk to you or the saw.
Organizing Your Tools And Materials For The Unlocking Process
Organizing your tools and materials beforehand can save you a significant amount of time and frustration. Create a specific area or table dedicated to holding all the necessary tools and equipment required to unlock your Ryobi Miter Saw. Keep them within reach, arranging them in a logical order so you can easily locate each item when needed. This will help streamline your unlocking process and minimize interruptions caused by searching for tools.
Ensuring Proper Lighting And Ventilation In Your Workspace
Proper lighting and ventilation are essential for a safe and efficient workspace. Bright, natural or artificial lighting can improve visibility, allowing you to clearly see the components and mechanisms of the Ryobi Miter Saw. Ensure there are no shadows or areas of poor lighting that could hinder your progress. Additionally, proper ventilation is crucial to keep the air in your workspace clean and free from any potential fumes or debris. Open windows or use fans to maintain a fresh and breathable atmosphere.
Safety Measures To Follow When Unlocking A Ryobi Miter Saw
Unlocking a Ryobi miter saw requires careful attention to safety measures to ensure a secure and accident-free operation. By following the steps outlined below, you can protect yourself and others from potential hazards. Remember, safety should always be the top priority when working with power tools.
Wearing The Necessary Personal Protective Equipment (PPE)
Before starting any work with a Ryobi miter saw, make sure you are equipped with the necessary personal protective equipment (PPE). This includes:
- Safety goggles or protective glasses to shield your eyes from flying debris and dust.
- Ear protection, such as earplugs or earmuffs, to reduce noise-related hearing damage.
- A dust mask or respirator to protect your lungs from inhaling fine particles.
- Sturdy work gloves to improve grip and protect your hands from sharp edges.
Taking Precautions To Prevent Accidental Start-up
Accidental start-up can lead to serious injuries. To avoid this, take the following precautions:
- Disconnect the power: Before unlocking the Ryobi miter saw, unplug it from the power source. This removes the risk of the saw starting unexpectedly.
- Remove the battery: If your Ryobi miter saw is cordless, remove the battery to eliminate any chance of accidental activation.
- Lock the switch: Engage the switch lock feature on the saw to ensure it cannot be accidentally turned on. This provides an additional layer of safety.
Performing A Safety Check On The Miter Saw Before Unlocking It
Prior to unlocking the Ryobi miter saw, perform a safety check to ensure everything is in proper working order:
- Inspect the blade guard: Make sure the blade guard moves freely and covers the blade completely. It should also return to its original position when released.
- Check the blade condition: Examine the blade for any signs of damage, such as missing teeth or cracks. Replace the blade if necessary.
- Verify the fence position: Ensure the fence is properly aligned and securely in place. This will help in achieving accurate and safe cuts.
- Inspect the power cord (if applicable): Look for any fraying or damage to the power cord. If there are any signs of wear, avoid using the saw and arrange for a replacement or repair.
By adhering to these safety measures when unlocking a Ryobi miter saw, you can confidently and safely proceed with your woodworking projects. Remember to always prioritize caution and use common sense in order to minimize the risk of accidents.
Unlocking Methods For Different Models Of Ryobi Miter Saws
The process of unlocking a Ryobi miter saw may vary depending on the model and type of miter saw you are using. Whether you have a sliding miter saw, compound miter saw, or a dual bevel miter saw, understanding the specific unlocking methods can save you time and frustration. In this article, we will walk you through step-by-step guides and provide tips and tricks for unlocking different models of Ryobi miter saws. Let’s dive in!
Step-by-step Guide To Unlocking A Ryobi Sliding Miter Saw
If you own a Ryobi sliding miter saw, this step-by-step guide will help you unlock it effortlessly:
- Start by locating the locking lever or knob. This is usually positioned near the base or handle of the saw.
- Gently pull or push the locking lever or knob to release the lock mechanism. You may need to apply slight pressure depending on the model.
- Once the lock is released, you can freely move the saw arm or blade to your desired position.
- When you have adjusted the saw to your desired setting, secure the lock again by pushing or pulling the lever or knob back into position. Ensure it clicks or locks securely.
- Finally, double-check that the lock is engaged before operating the saw to ensure safety.
Unlocking A Compound Miter Saw: Tips And Tricks
If you are struggling with unlocking a compound miter saw, these tips and tricks can make the process easier:
- Make sure to read the instruction manual specific to your model of Ryobi compound miter saw. It may provide valuable insights and specific instructions for unlocking.
- Look for a locking mechanism near the swivel or tilt controls. It is often in the form of a lever or knob.
- Some compound miter saws may require loosening or tightening a locking knob before adjusting the angle settings. Refer to the manual for clarity on this.
- Apply steady and controlled force when releasing the lock or adjusting the saw. Avoid using excessive force as it may damage the mechanism.
- Always double-check the lock engagement before starting any cutting operation to ensure your safety and accuracy.
Unlocking A Dual Bevel Miter Saw: Common Challenges And Solutions
If you own a Ryobi dual bevel miter saw, you may encounter specific challenges when unlocking it. Here are some common challenges and their solutions:
| Common Challenge | Solution |
|---|---|
| The locking mechanism is jammed or sticky. | Apply a lubricant or light oil to the lock mechanism and gently work it back and forth until it loosens up. |
| The bevel angle adjustment is difficult to unlock. | Check for any debris or sawdust buildup near the bevel adjustment area. Clean it thoroughly, and the unlocking process should become easier. |
| Unlocking the saw requires simultaneous action on multiple parts. | Carefully follow the instructions provided in the manual for unlocking a dual bevel miter saw. Take your time to ensure you engage all required mechanisms correctly. |
By following these solutions, you can overcome common challenges when unlocking your dual bevel miter saw and enjoy smooth and hassle-free operation.
Now that you have learned the unlocking methods for different models of Ryobi miter saws, you can confidently make adjustments and unlock your saw with ease. Remember to always refer to the specific instructions provided in the manual for your saw model to ensure a safe and efficient unlocking process. Happy woodworking!

Troubleshooting Common Issues When Unlocking A Ryobi Miter Saw
Unlocking a Ryobi miter saw is a necessary step before you can make any adjustments or cuts. However, it can be frustrating when you encounter problems during the unlocking process. In this section, we will discuss how to identify potential problems, troubleshoot common issues, and seek professional assistance if necessary.
Identifying Potential Problems During The Unlocking Process
Before delving into troubleshooting techniques for unlocking a Ryobi miter saw, it’s crucial to first identify any potential problems. Here are a few indicators that may suggest an issue:
- The unlocking mechanism feels stiff or unresponsive.
- The locking lever or knob doesn’t disengage or engage as smoothly as it should.
- There is an unusual clicking sound or grinding sensation when attempting to unlock the saw.
- The blade guard doesn’t fully retract, obstructing the unlocking process.
If you experience any of these issues, it’s important to address them promptly to avoid any further complications.
Troubleshooting Techniques For Issues Like Stuck Locks Or Jammed Mechanisms
When faced with stuck locks or jammed mechanisms on your Ryobi miter saw, there are several troubleshooting techniques you can try:
- 1. Lubrication: Apply a small amount of lubricating oil to the lock mechanism and other moving parts. This can often help loosen any stuck components and improve the smoothness of the unlocking process.
- 2. Gentle tapping: Use a soft hammer or a wooden block to gently tap the lock mechanism. This can help dislodge any debris or free up any stuck parts.
- 3. Checking for obstructions: Inspect the miter saw closely, ensuring that there are no visible obstructions or debris preventing proper unlocking. Clean any debris found, and make sure the blade guard is fully retracted.
- 4. Adjusting tension: Check if there is a tension adjustment knob or screw on the saw. If so, make small adjustments to see if it helps resolve the unlocking issue.
These troubleshooting techniques should help resolve common issues encountered during the unlocking process. However, if the problem persists or seems more complex, it may be time to seek professional assistance.
Seeking Professional Assistance For Complex Unlocking Problems
If you have tried the troubleshooting techniques mentioned above and still cannot unlock your Ryobi miter saw, it’s recommended to seek professional assistance. Professional technicians have the expertise and tools needed to diagnose and fix complex unlocking problems.
When contacting a professional, provide them with specific details about the issue you’re facing and any troubleshooting steps you have already taken. This will help them understand the problem better and provide an efficient solution.
Remember, avoiding or neglecting complex unlocking problems can potentially result in further damage to your saw or compromise your safety. It’s always better to let a professional handle such issues to ensure a safe and functional miter saw.
Frequently Asked Questions For How To Unlock Ryobi Miter Saw
How Do I Unlock My Ryobi Miter Saw?
To unlock your Ryobi Miter Saw, locate the locking pin or lever near the base of the saw. Push or pull the pin or lever to release the locking mechanism. This will allow you to adjust the angle or position of the saw blade freely.
Why Is My Ryobi Miter Saw Jammed And How Can I Unlock It?
If your Ryobi Miter Saw is jammed, it may be due to sawdust or debris obstructing the blade or the locking mechanism. To unlock it, first, unplug the saw and clear away any debris. Then, check the locking pin or lever and ensure it is properly engaged or disengaged according to the instructions in the user manual.
Is There A Specific Technique To Unlock A Ryobi Miter Saw?
Unlocking a Ryobi Miter Saw requires a simple technique. First, locate the locking pin or lever near the base of the saw. Next, firmly push or pull the pin or lever, depending on the model, to release the lock. This will allow you to adjust the saw to your desired angle or position.
Always refer to the user manual for specific instructions.
Conclusion
Unlocking your Ryobi Miter Saw is an essential skill for any DIY enthusiast or professional carpenter. By following the step-by-step guide outlined in this blog post, you have learned the necessary techniques to safely unlock and operate your saw. Remember to always prioritize safety, read the user manual, and consult with professionals if needed.
With your unlocked Ryobi Miter Saw, you are ready to take on any cutting task with confidence and precision. Happy sawing!