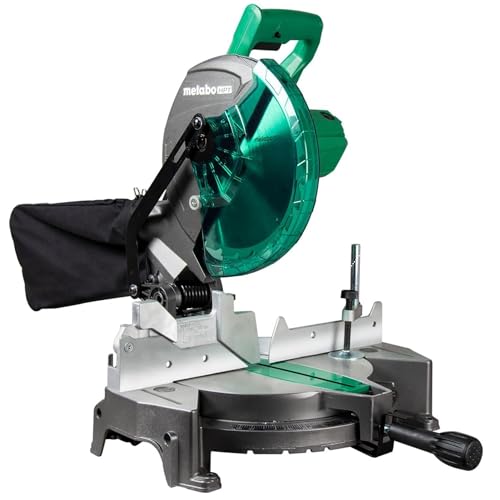
How to Unlock a Ryobi Miter Saw
Unlocking a Ryobi Miter Saw can be done easily by following these simple steps. A Ryobi Miter Saw is a versatile and essential tool for any woodworking project.
However, to use it effectively, you need to know how to unlock it. Whether you are a professional carpenter or a DIY enthusiast, understanding the unlocking process is crucial for your safety and convenience. We will provide you with a step-by-step guide on how to unlock a Ryobi Miter Saw so that you can make precise and accurate cuts without any hassle.
By the end of this guide, you will have the knowledge and confidence to unlock your Ryobi Miter Saw and get the job done efficiently. So let’s get started!
Understanding The Locking Mechanism
Unlocking a Ryobi Miter Saw becomes easier when you understand its locking mechanism. Discover the step-by-step process to release the saw and effortlessly tackle your cutting tasks.
Exploring The Purpose Of The Miter Saw Lock
The miter saw lock is a crucial feature that ensures the stability and accuracy of your cuts while using your Ryobi miter saw. This lock mechanism securely holds the saw in place, preventing any accidental movement and ensuring consistent precision cuts.
By understanding how the locking mechanism functions, you can maximize its benefits for efficient and accurate woodworking tasks.
How The Lock Prevents Accidental Movement
The primary role of the miter saw lock is to prevent any unintended movement during your cutting process. Here’s how this mechanism achieves this:
- Stabilizes the saw: The lock firmly secures the miter saw in position, eliminating any potential wobbling or shifting that could compromise your safety or mess up your cuts.
- Locks the blade angle: When activated, the miter saw lock keeps the blade at a specific angle chosen by the user, ensuring the precise execution of each cut without any unwanted deviations.
- Fixes the bevel angle: In addition to holding the blade angle, the lock also stabilizes the bevel angle (tilting the blade sideways) of the miter saw. This ensures consistent and accurate beveled cuts without any unexpected adjustments.
Key Components Of The Locking Mechanism
To comprehend the functioning of the miter saw lock, let’s break down its key components:
- Locking lever: The main control of the lock mechanism, this lever securely engages or releases the lock. By pushing or pulling this lever, you can activate or deactivate the miter saw lock as needed.
- Locking pin: This pin, coupled with the locking lever, securely holds the miter saw in place. When engaged, the pin latches onto specific grooves or teeth, ensuring a stable position.
- Locking knob: In some models, a locking knob is present to enhance the locking mechanism. This knob allows you to fine-tune the tightness of the lock, providing additional control over the stability of the miter saw.
How The Lock Affects Your Cutting Precision
The miter saw lock significantly impacts your cutting precision by maintaining stability and consistency. Consider the following points:
- Accuracy: With the lock engaged, the miter saw remains stationary throughout your cutting process, eliminating any accidental shifts that could result in uneven cuts.
- Repeatability: Once you’ve set the desired angles, the lock ensures that you can consistently replicate those angles for subsequent cuts. This repeatability is crucial for achieving uniformity in your workpieces.
- Safety: By preventing any unintended movement, the lock enhances safety during your woodworking tasks. You can focus on your cuts without concerns about the saw sliding or tipping unexpectedly.
Understanding the locking mechanism of your Ryobi miter saw is essential for unlocking its full potential. By employing the miter saw lock, you can achieve accurate, repeatable, and safe cuts, providing you with the precision required for your woodworking projects.
The Consequences Of Incorrect Unlocking
Unlocking a Ryobi Miter Saw incorrectly can lead to serious consequences. Learn how to unlock it properly to avoid safety hazards and potential damage to the tool.
Unlocking a Ryobi miter saw may seem like a simple task, but it’s critical to follow the proper procedure to avoid potential risks and damages. In this section, we will delve into the dangers of unlocking the miter saw improperly and the importance of adhering to the correct unlocking procedures.
The Dangers Of Unlocking The Miter Saw Improperly:
- Misalignment: Incorrectly unlocking the miter saw can lead to misalignment of the cutting blade, resulting in inaccurate cuts and compromised project outcomes.
- Kickback: Improper unlocking may trigger kickback, where the workpiece violently jerks back towards the user. This can cause severe injuries and damage to the saw or workpiece.
Potential Damage To The Saw Or Workpiece:
- Blade damage: Unlocking the miter saw incorrectly can cause the blade to strike the material aggressively, leading to untimely wear and tear or even blade chipping.
- Workpiece damage: The improper unlocking of the miter saw may cause the workpiece to shift or get caught, resulting in splintering, rough cuts, or ruined projects.
Risks To Personal Safety:
- Hand injuries: Incorrect unlocking can expose your hands to unnecessary hazards, such as accidental contact with the blade or other moving parts of the saw.
- Eye injuries: Inadequate unlocking might cause unexpected material movement or blade contact, resulting in flying debris that can harm your eyes.
- Overall safety hazards: Improperly unlocking the miter saw can compromise your general safety, leaving you vulnerable to accidents that can cause serious harm.
Importance Of Following Proper Unlocking Procedures:
- Precision and accuracy: By following the appropriate unlocking procedures, you ensure that the miter saw is ready to deliver precise and accurate cuts, enhancing the quality of your work.
- Longevity of the saw: Adhering to proper unlocking methods prolongs the lifespan of your Ryobi miter saw, reducing the need for premature repairs or replacements.
- Personal well-being: Following the correct unlocking procedures prioritizes your safety, significantly minimizing the risk of work-related injuries and accidents.
Remember, unlocking a Ryobi miter saw should be taken seriously to ensure the best results and maintain a safe working environment. Always follow the manufacturer’s instructions and exercise caution when operating the saw.

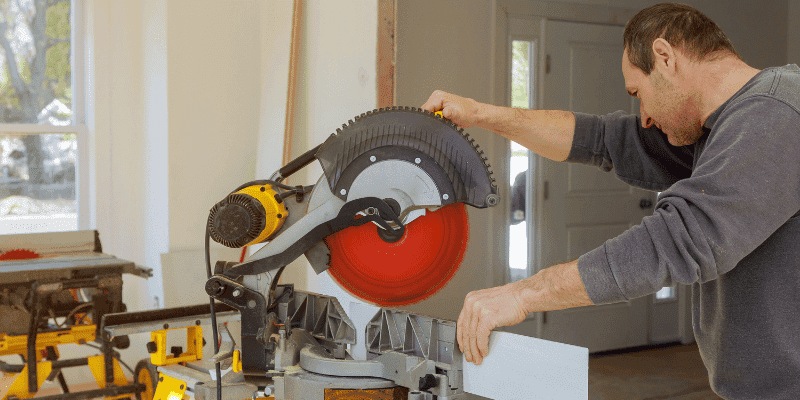
Step-By-Step Guide To Unlocking Your Ryobi Miter Saw
Learn how to unlock your Ryobi Miter Saw step-by-step with this comprehensive guide. Follow the instructions carefully to effortlessly unlock your saw and start using it for your woodworking projects.
Familiarizing Yourself With The Saw’S Control Panel
Before unlocking your Ryobi Miter Saw, it is important to familiarize yourself with the control panel. Understanding the various features and mechanisms will make the unlocking process much easier. Here are the key components you need to know:
- Blade guard: This is a safety feature that covers the blade and automatically retracts when you lower the saw to make a cut.
- Miter gauge: Located at the bottom front of the saw, the miter gauge allows you to adjust the angle of the cut.
- Bevel scale: Located on the saw’s control panel, the bevel scale enables you to adjust the bevel angle for compound cuts.
- Locking lever or button: This mechanism prevents the saw’s head from rotating and needs to be disengaged to unlock the miter saw.
Locating The Unlocking Mechanism
Now that you are familiar with the control panel, let’s find the unlocking mechanism on your Ryobi Miter Saw. The unlocking mechanism can vary depending on the model, but it is typically located in one of the following areas:
- Rear of the saw: Some models have a locking lever or button at the rear of the saw that needs to be released to unlock the miter saw head.
- Front of the saw: Other models feature a locking lever or button on the front of the saw near the control panel.
Refer to your saw’s user manual or look for any labels or indicators that point towards the unlocking mechanism.
Method 1: Unlocking The Miter Saw With A Lever Or Button
In this method, we will use a lever or button to unlock the miter saw head. Follow these steps:
- Locate the locking lever or button: Check the rear or front of the saw for the locking lever or button.
- Engage the lever or press the button: Depending on your saw, you may need to push the lever or press the button to disengage the lock.
- Release the lock: Once the locking lever is disengaged or the button is pressed, the miter saw head should be unlocked. You can now freely rotate it to the desired angle for your cut.
Method 2: Unlocking The Miter Saw Using A Release Knob Or Pin
If your Ryobi Miter Saw doesn’t have a lever or button, it may have a release knob or pin. Here’s how to unlock the miter saw using this method:
- Locate the release knob or pin: Look for a release knob or pin near the control panel or the rear of the saw.
- Rotate or pull the knob/pin: Depending on your saw, you may need to rotate the knob or pull the pin to release the miter saw head.
- Confirm unlocking: Once the knob is rotated or the pin is pulled, the miter saw head should unlock. Verify that it can freely rotate to the desired angle.
Common Troubleshooting Tips For Unlocking Difficulties
In case you encounter any difficulties when unlocking your Ryobi Miter Saw, try these troubleshooting tips:
- Ensure the saw is powered off: Make sure the saw is not running or connected to a power source before attempting to unlock it.
- Lubricate the unlocking mechanism: If the lever or button feels stiff, apply a small amount of lubricant to make it easier to disengage.
- Check for any obstructions: Inspect the saw’s head and surrounding area for any debris or objects that may be hindering the unlocking process.
- Consult the user manual: If you are still having trouble unlocking the miter saw, refer to the user manual for model-specific instructions or contact Ryobi customer support for assistance.
Remember, always prioritize safety when working with power tools, so take your time and be cautious throughout the unlocking process.
Unlocking Method 1: Lever Or Button
Unlocking the Ryobi Miter Saw is made easy with Method 1: Lever or Button. Follow these simple steps to unlock and use the saw efficiently.
Identifying The Specific Lever Or Button To Unlock:
- Look for a lever or button located near the base or handle of the Ryobi miter saw. This lever or button is designed specifically for unlocking the saw and allowing you to make adjustments.
- Some models may have a lever located on the side of the saw, while others may have a button on the front. Take a moment to familiarize yourself with the specific location on your particular model.
Understanding The Motion Required To Unlock The Saw:
- Once you’ve located the lever or button, you’ll need to understand the motion required to unlock the Ryobi miter saw.
- In most cases, you’ll need to push or pull the lever in a specific direction. This could be towards yourself or away from yourself.
- If there is a button, you may need to press and hold it while simultaneously adjusting the saw.
- Refer to the user manual or manufacturer’s instructions for your specific model to ensure you unlock the saw correctly.
Tips For A Smooth Unlocking Experience:
- Before attempting to unlock the saw, ensure that it is fully powered off and unplugged for safety.
- Apply gentle yet firm pressure when using the lever or button. Avoid using excessive force to prevent any damage.
- Take your time to fully understand the unlocking process before proceeding. Rushing could lead to accidental mistakes or mishandling of the saw.
- If you’re uncertain about the unlocking procedure, consider watching tutorial videos or seeking guidance from experienced users or professionals.
- Regular cleaning and maintenance of the lever or button mechanism will help ensure smooth operation. Remove any dust or debris that may hinder its functionality.
Additional Precautions Or Considerations:
- It’s essential to wear appropriate personal protective equipment, such as safety glasses and gloves, when operating or adjusting the Ryobi miter saw.
- Always follow the manufacturer’s instructions for unlocking the saw to avoid potential injuries or damage to the tool.
- If you encounter any difficulties or abnormalities during the unlocking process, cease operation immediately and consult the user manual or contact customer support for assistance.
- Remember to engage the necessary safety features, such as blade guards and blade locks, when the saw is not in use to prevent accidents.
- Regularly inspect the lever or button for any signs of wear or damage. If you notice any issues, address them promptly to maintain the saw’s functionality and safety.
Remember to refer to your specific model’s user manual for detailed instructions on unlocking your Ryobi miter saw, as the exact process may vary slightly. With these tips and precautions in mind, you’ll be able to unlock your saw with ease and confidence.
Unlocking Method 2: Release Knob Or Pin
To unlock a Ryobi Miter Saw, you can use Method 2, which involves releasing the knob or pin. This simple technique allows you to easily adjust the settings of your saw for ultimate precision and efficiency.
Locating The Release Knob Or Pin On Your Ryobi Miter Saw:
The release knob or pin is an essential component of your Ryobi miter saw that allows you to unlock and adjust the cutting angle with ease. Here’s how to locate it:
Understanding The Function Of The Release Knob Or Pin:
Before unlocking your Ryobi miter saw, it’s important to understand how the release knob or pin works. Here are a few key points to keep in mind:
- The release knob or pin is designed to securely lock the cutting angle in place during operation.
- When the knob or pin is engaged, the blade and the cutting head remain fixed at a specific angle.
- By releasing the knob or pin, you can freely adjust the cutting angle according to your specific project requirements.
Step-By-Step Process For Unlocking Using The Knob Or Pin:
Unlocking your Ryobi miter saw is a straightforward process. Follow these steps to release the knob or pin:
- Locate the release knob or pin: Depending on the model, you’ll find the release knob or pin in different positions. It is generally located near the cutting head assembly.
- Identify the locking mechanism: Once you’ve located the release knob or pin, take note of the locking mechanism it engages with. This could be a latch, lever, or another type of locking mechanism.
- Release the locking mechanism: Use your hand to rotate or pull the release knob, or press the release pin, depending on the specific mechanism. This action will disengage the lock and allow the cutting angle to be adjusted.
- Adjust the cutting angle: With the release knob or pin disengaged, you can now freely adjust the cutting angle of your Ryobi miter saw to your desired position.
- Lock the cutting angle: Once you’ve set the desired cutting angle, firmly press down on the release knob or pin to engage the locking mechanism. This will secure the cutting head in place.
Special Considerations For Different Models Of Ryobi Miter Saws:
While the process of unlocking the Ryobi miter saw remains consistent, there may be slight variations depending on the model you own. Here are some special considerations to keep in mind:
- Some models may have a release knob that requires rotating clockwise or counterclockwise, while others may have a push-button release pin.
- Ensure that you consult your specific model’s user manual for precise instructions on locating and unlocking the release knob or pin.
- If you encounter any difficulties or have questions, it’s recommended to reach out to Ryobi’s customer support for assistance.
Unlocking your Ryobi miter saw using the release knob or pin provides you with the convenience to adjust the cutting angle effortlessly. By following the step-by-step process and considering any special considerations for your specific model, you’ll be sure to unlock the full potential of your Ryobi miter saw for precise and accurate cuts.
Best Practices For Unlocking And Operating Your Miter Saw
Unlocking and operating your Ryobi miter saw is made simple with these best practices. Learn how to effortlessly unlock your miter saw and safely use it for all your woodworking tasks.
Unlocking and operating a Ryobi miter saw may seem straightforward, but there are a few key practices that can help ensure a smooth and efficient process. From establishing a routine for unlocking and locking the saw to taking safety measures, and maintaining the unlocking mechanism, these best practices will help you make the most of your tool.
Let’s dive in:
Establishing A Routine For Unlocking And Locking The Saw:
- Check power supply and switch off: Before unlocking the miter saw, ensure that the power supply is disconnected to avoid any accidents.
- Inspect the locking mechanism: Take a moment to examine the locking mechanism and ensure that it is in proper working condition.
- Follow the manufacturer’s instructions: Refer to the user manual for specific instructions on unlocking and locking your Ryobi miter saw.
- Develop a consistent routine: Establish a step-by-step process for unlocking and locking the saw to ensure consistency and efficiency.
Safety Measures To Take Before And After Unlocking:
- Wear appropriate safety gear: Prioritize safety by wearing protective goggles, gloves, and ear protection.
- Clear the surrounding area: Remove any objects or debris that may obstruct your work area, reducing the risk of accidents.
- Secure work materials: Make sure your workpiece is properly secured to minimize the chance of kickback.
- Double-check adjustments: Verify that the bevel and miter angles are set correctly before operating the saw.
- Always start with a test cut: Before diving into your project, make a test cut on scrap material to ensure accurate and safe operation.
Maintaining The Unlocking Mechanism For Smooth Operation:
- Regular cleaning: Keep the unlocking mechanism clean by removing dust and debris that accumulate over time.
- Lubricate moving parts: Apply a suitable lubricant to the unlocking mechanism to prevent friction and ensure smooth operation.
- Inspect for wear and tear: Periodically check for any signs of wear on the unlocking mechanism and make any necessary repairs or replacements promptly.
- Follow maintenance guidelines: Refer to the user manual for maintenance guidelines specific to your Ryobi miter saw.
Improving The Overall Efficiency Of Your Work Process:
- Plan ahead: Take the time to plan your project and measure your work materials properly to avoid unnecessary delays.
- Use a reliable work surface: Ensure that your miter saw is set up on a stable and secure workbench or stand for optimal stability.
- Optimize your setup: Adjust the saw’s height, position, and lighting to create a comfortable and efficient working environment.
- Practice your technique: Regularly practice your cutting technique to improve accuracy and efficiency over time.
- Clean and organize your workspace: Maintain a clutter-free work area to avoid distractions and enhance your overall workflow.
Following these best practices will not only help you unlock and operate your Ryobi miter saw safely but also enhance your woodworking experience. Remember, practice makes perfect, so keep honing your skills and enjoy the precision and efficiency offered by your miter saw.
Troubleshooting Common Unlocking Issues
Having trouble unlocking your Ryobi Miter Saw? Solve common unlocking issues effortlessly with these handy troubleshooting tips. Unlock your tool with ease and get back to work in no time.
Identifying Potential Problems When Unlocking The Miter Saw:
- The miter saw is jammed and does not unlock easily.
- The unlocking mechanism feels stiff or unresponsive.
- The miter saw fails to unlock completely, leaving it in a partially locked position.
Understanding The Causes Of These Issues:
- Sawdust and debris buildup in the locking mechanism, hindering smooth unlocking.
- Lack of regular maintenance and lubrication, causing friction in the unlocking mechanism.
- Misalignment or damage to the locking components, leading to difficulties in unlocking.
Tips For Resolving Common Unlocking Difficulties:
- Clearing the locking mechanism: Remove any sawdust and debris from the locking components using compressed air or a brush. Ensure all parts move freely.
- Lubricating the unlocking mechanism: Apply a suitable lubricant to the locking mechanism, following the manufacturer’s instructions. This helps reduce friction and allows for smoother unlocking.
- Checking for misalignment or damage: Inspect the locking components for any misalignment or damage. If necessary, adjust or replace these parts as per manufacturer guidelines.
When To Seek Professional Assistance:
- If the troubleshooting tips mentioned above do not resolve the unlocking issues, it is advisable to consult a professional or contact the manufacturer for further assistance.
- Professional assistance is recommended if there is visible damage or if the unlocking mechanism appears broken or faulty.
- Safety should always be a priority, and professional guidance ensures proper repair without the risk of accidents during operation.
Remember, regular maintenance and care can prevent unlocking difficulties, prolong the life of your Ryobi miter saw, and ensure optimal performance. By addressing common unlocking issues promptly, you can continue using your miter saw efficiently and safely for all your woodworking projects.
Frequently Asked Questions Of How To Unlock Ryobi Miter Saw
How Do You Release A Miter Saw Lock?
To release a miter saw lock, locate the lock button or lever and press or release it.
How Do You Unlock An Angle Saw?
To unlock an angle saw, locate the lock button or lever and release it, allowing the saw to rotate freely.
How Do You Move The Angle On A Ryobi Miter Saw?
To move the angle on a Ryobi miter saw, adjust the bevel knob according to your desired angle.
Why Is My Ryobi Miter Saw Not Cutting Straight?
Possible short answer: Your Ryobi miter saw may not be cutting straight due to alignment issues and blade problems.
Conclusion
To recap, unlocking your Ryobi Miter Saw is a straightforward process that can save you time and frustration. By following the steps outlined in this blog post, you can ensure that your saw is securely locked and ready for use.
Remember to always prioritize safety and follow the manufacturer’s instructions when working with power tools. Taking the time to properly unlock and lock your miter saw will not only extend its lifespan but also prevent any potential accidents or injuries.
With practice, you’ll become proficient in this task, allowing you to make precise cuts and tackle your woodworking projects with confidence. So, don’t hesitate to unlock your Ryobi Miter Saw and start creating amazing projects today!