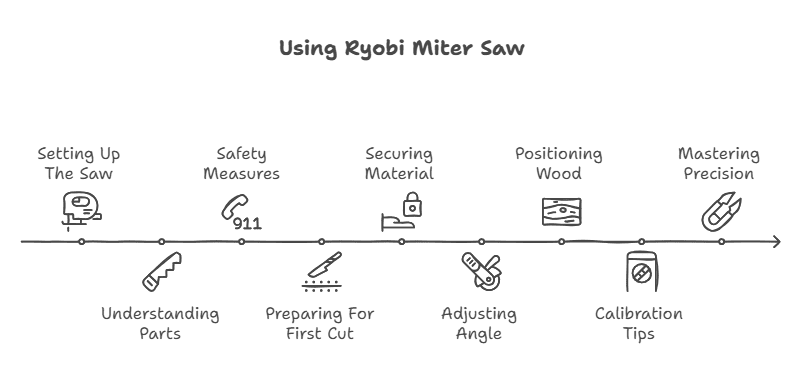
How to Use a Ryobi Miter Saw: Setup and Cutting Basics
To use a Ryobi miter saw, place the saw on a flat surface and plug it in. Then, adjust the angle and position of the saw blade based on your cutting needs.
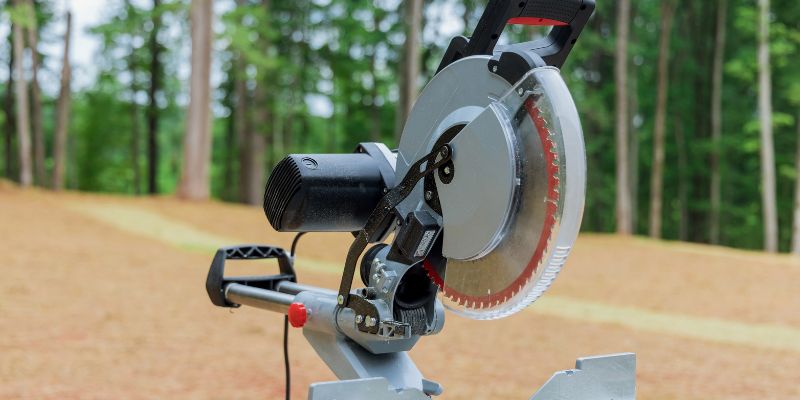
A Ryobi miter saw is a versatile and essential tool for making precise angled cuts in wood, metal, and other materials. Whether you’re a DIY enthusiast or a professional woodworker, understanding how to properly use a Ryobi miter saw is crucial for achieving accurate and efficient results.
In this guide, we will walk you through the essential steps and techniques for using a Ryobi miter saw, including setting up the saw, adjusting the cutting angles, and maximizing safety. With the right knowledge and practice, you can master the art of using a Ryobi miter saw to tackle a wide range of cutting projects with confidence and precision.
Unpacking Your Ryobi Miter Saw
As you prepare to embark on your woodworking journey, unboxing and setting up your new Ryobi Miter Saw is the first step in ensuring a smooth and safe operation. The process of unpacking your miter saw involves unpacking it from the box, identifying its parts, understanding their purposes, and taking necessary safety precautions. In this segment, we will delve into the steps of setting up the saw for the first time, understanding the different parts and purposes, and the essential safety measures before its use.
Setting Up The Saw For The First Time
After unboxing your Ryobi Miter Saw, it is essential to set it up correctly for optimal performance. Here are the steps involved in setting up your miter saw:
- Place the miter saw on a stable and level surface to ensure safety and accuracy during operation.
- Check if the blade guard is securely attached and the arbor bolt is tightened before use to prevent any potential hazards.
- Properly secure the workpiece using clamps or other appropriate fastening methods to maintain stability during cutting.
Understanding The Different Parts And Purposes
Familiarizing yourself with the components of your Ryobi Miter Saw ensures efficient and safe operation. Here are the essential parts and their purposes:
| Part | Purpose |
|---|---|
| Blade Guard | Protects the operator from the spinning blade during operation. |
| Fence | Provides a guide for making straight and precise cuts. |
| Miter Gauge | Allows the adjustment of the blade angle for making angled cuts. |
Safety Measures Before Use
Prior to operating the miter saw, it’s crucial to adhere to the following safety measures:
- Wear appropriate safety gear, including safety goggles, ear protection, and a dust mask to protect against flying debris and noise.
- Disconnect the saw from the power source when changing blades or performing maintenance.
- Keep the work area clean and free of obstructions to prevent potential accidents or injuries.
Preparing For The First Cut
As you prepare for your first cut with a Ryobi miter saw, it’s crucial to ensure that you have the necessary elements in place. Properly securing your material, adjusting the saw’s angle and bevel, and positioning the wood correctly are key steps for achieving precise and accurate cuts.
Securing Your Material
Before making any cuts, it’s essential to secure your material firmly in place. Utilize clamps or a sturdy workbench to prevent the piece from shifting during cutting. This not only enhances safety but also promotes accuracy in your cuts.
Adjusting The Saw’s Angle And Bevel
Ensuring that the saw’s angle and bevel are set correctly is crucial for achieving the desired cut. Use the saw’s bevel adjustment to tilt the blade to the required angle. Additionally, the miter gauge allows for precise angle adjustments, enabling you to make accurate cuts for various projects.
Positioning The Wood Correctly
Properly positioning the wood on the miter saw is vital for achieving accurate cuts. Ensure that the wood is firmly pressed against the fence and the base of the saw. This helps maintain stability and precision during the cutting process.
Calibration And Maintenance Tips
When it comes to using a Ryobi Miter Saw, proper calibration and maintenance play a vital role in ensuring accurate cuts and prolonging the tool’s lifespan. Understanding how to check and adjust the blade alignment, maintaining the saw for longevity, and knowing when to replace the blade are essential aspects that users should be familiar with.
How To Check And Adjust The Blade Alignment
Correct blade alignment is crucial for achieving precise cuts. Follow these steps to check and adjust the blade alignment on your Ryobi Miter Saw:
- Ensure the saw is unplugged and the blade is fully lowered.
- Use a combination square to check the alignment of the blade to the table.
- If adjustment is needed, refer to the user manual for specific instructions on making adjustments to the saw’s alignment.
Proper Cleaning For Longevity
Regular cleaning and maintenance are essential for ensuring the longevity of your Ryobi Miter Saw. Here are some tips for proper cleaning:
- After each use, remove sawdust and debris from the blade guard, the cutting area, and the dust collection system.
- Check and clean the air vents to prevent dust buildup that can affect the motor’s performance.
- Use a soft brush or compressed air to clean hard-to-reach areas.
When To Replace The Blade
Knowing when to replace the blade on your Ryobi Miter Saw is crucial for maintaining cutting precision and safety. Keep the following factors in mind when determining if it’s time for a blade replacement:
- Blade dullness: If the blade no longer cuts smoothly and leaves splintered edges, it may be time for a replacement.
- Material damage: Inspect the blade for any signs of wear, such as chipped or warped teeth, which can affect cutting quality.
- Frequent use: If you use the saw frequently, the blade may need to be replaced more often to maintain optimal performance.
Mastering Precision With Ryobi Miter Saw
When it comes to mastering precision in your woodworking projects, having the right tools is essential. The Ryobi Miter Saw is a game-changer when it comes to achieving accuracy and efficiency in your cuts. By learning and employing the right techniques and utilizing its advanced features, you can elevate your woodworking game and achieve immaculate precision with every cut.
Techniques For Accurate Measurement
Accurate measurement is the cornerstone of precise woodworking. When using the Ryobi Miter Saw, it’s important to follow these techniques for accurate measurement:
- Use a high-quality tape measure to ensure precise measurements.
- Mark the cut line with a sharp pencil or utility knife for precision.
- Utilize the saw’s laser guide to accurately align the cut line with the blade.
Tips For Cutting Different Material Types
Understanding the properties of the materials you’re cutting is crucial for achieving precise cuts. Here are some tips for cutting different material types efficiently:
- Wood: Use a fine-toothed blade for smooth cuts and adjust the cutting speed based on the density of the wood.
- Metal: Choose a blade designed for metal cutting and securely clamp the material to prevent vibrations.
- Plastic: Use a blade with fine teeth to prevent chipping and cracking, and adjust the speed for clean cuts.
Advanced Features Of Ryobi Miter Saw For Precision
The Ryobi Miter Saw comes equipped with advanced features that enhance precision and accuracy:
| Feature | Advantage |
|---|---|
| Laser guide | Provides a visual reference for precise alignment of the cut line. |
| Dual bevel capability | Allows for bevel cuts in both directions, enhancing versatility and precision. |
| Positive stops | Facilitate accurate angle adjustments for consistent and precise cuts. |
Using Ryobi Miter Saw: Ultimate Guide And Tips
When it comes to making precise and accurate cuts, the Ryobi Miter Saw is an essential tool for any woodworking project. Whether you are a DIY enthusiast or a professional carpenter, mastering the art of using a miter saw can significantly elevate the quality of your work. In this ultimate guide, we will walk you through the step-by-step process of making your first cut with a Ryobi Miter Saw, common mistakes to avoid, and tips for optimizing your workflow to achieve faster and more efficient results.
Step-by-step Guide To Making Your First Cut
Making your first cut with a Ryobi Miter Saw can be a daunting task, but with the right approach, it can be a smooth and precise process. Below is a step-by-step guide to help you through the process:
- Securely clamp the piece of wood you wish to cut to the miter saw’s fence, ensuring it is stable and immobile during the cutting process.
- Adjust the miter and bevel angles according to your desired cut, ensuring the saw blade is aligned with your cutting line.
- Activate the saw and slowly lower the blade onto the wood, maintaining a firm grip on the saw handle to guide the cut smoothly.
- After completing the cut, release the saw trigger, allow the blade to come to a complete stop, and then carefully lift it away from the wood.
Common Mistakes To Avoid While Using The Saw
While using a Ryobi Miter Saw, it’s crucial to be aware of common mistakes that can compromise the quality of your cuts and even pose safety risks. Here are some key mistakes to avoid:
- Failure to secure the workpiece properly, leading to movement during cutting.
- Not adjusting the bevel and miter angles accurately, resulting in inaccurate cuts.
- Forcing the cut by pushing the blade too quickly, which can cause splintering and kickback.
- Ignoring safety precautions such as not wearing protective gear or keeping fingers too close to the blade.
Optimizing Your Workflow For Faster Results
To maximize the efficiency of your work while using a Ryobi Miter Saw, consider the following tips for optimizing your workflow:
- Organize your work area by having all necessary tools and materials within reach to minimize interruptions.
- Use stop blocks and clamps to ensure consistent and accurate cuts, saving time on measuring and marking for each piece.
- Regularly maintain and sharpen the saw blade to ensure clean and efficient cuts without putting excessive strain on the motor.

Advanced Projects And Techniques
When it comes to taking your woodworking skills to the next level, advanced projects and techniques become essential. With the Ryobi miter saw, you can unlock a whole new realm of possibilities for your projects. Whether you are looking to create complex cuts and joints, utilize the laser guide for intricate work, or efficiently handle repetitive cuts and batch work, the Ryobi miter saw offers the precision and features required for more advanced woodworking tasks.
How To Create Complex Cuts And Joints
Creating complex cuts and joints with the Ryobi miter saw requires careful planning and precise execution. One technique involves the usage of various accessories like dado blades or specialized jigs to achieve intricate joinery. By adjusting the miter and bevel angles in combination with stop blocks, woodworkers can craft complex cuts and joints with the utmost precision and accuracy.
Utilizing Laser Guide For Intricate Work
The laser guide feature on the Ryobi miter saw proves to be invaluable for intricate work. It helps woodworkers achieve accurate cuts by providing a clear visual reference point. By aligning the laser guide with the intended cutting path, users can achieve precise cuts, especially when working with smaller or delicate pieces of wood.
Tips For Repetitive Cuts And Batch Work
When handling repetitive cuts or batch work, efficiency is paramount. By utilizing stop blocks and setting up a proper work area, woodworkers can streamline their workflow. Additionally, using a well-configured worktable or workstation and employing clamps to secure the workpiece can enhance accuracy and consistency during repetitive cutting tasks.
Frequently Asked Questions On How To Use Ryobi Miter Saw
What Safety Precautions Should I Take When Using A Ryobi Miter Saw?
When using a Ryobi Miter Saw, always wear safety goggles, hearing protection, and follow all recommended safety guidelines in the user manual. Ensure proper blade guard and dust collection system are in place for safe operation.
How Do I Adjust The Miter And Bevel Angles On A Ryobi Miter Saw?
To adjust the miter angle, loosen the miter lock handle, set the angle using the scale, and tighten the handle. For bevel adjustments, release the bevel lock and tilt the blade to the desired angle, then lock it back in place securely.
What Type Of Blades Are Suitable For A Ryobi Miter Saw?
Ryobi Miter Saws are compatible with various types of blades including crosscut, combination, and trim blades. Select a blade with the appropriate tooth count and material compatibility for your specific cutting needs.
Can I Use A Ryobi Miter Saw To Cut Metal?
Ryobi Miter Saws are primarily designed for cutting wood. While some models may be capable of cutting light non-ferrous metals with specialized blades, it’s important to refer to the user manual and use caution when cutting metal with a miter saw.
Conclusion
Mastering the use of a Ryobi miter saw can significantly improve your woodworking skills. With consistent practice and attention to safety precautions, you can achieve precise and efficient cuts for your projects. By following the tips and techniques outlined in this guide, you can maximize the potential of your Ryobi miter saw and elevate your craftsmanship to the next level.