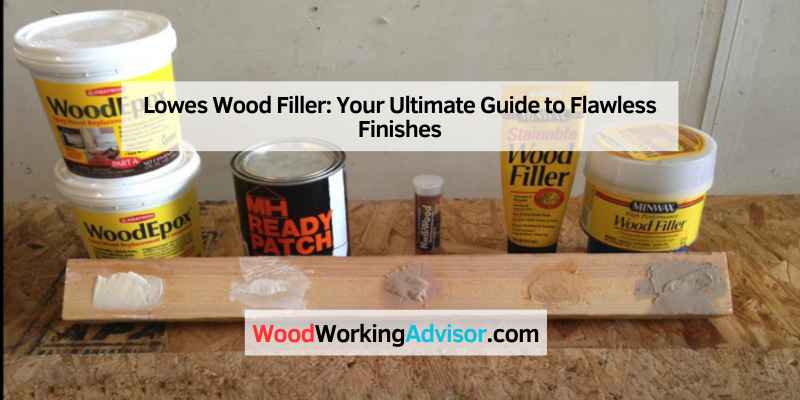
Lowes Wood Filler: Your Ultimate Guide to Flawless Finishes
Lowe’s wood filler is a versatile product designed for repairing and filling holes, cracks, and defects in wood surfaces. It dries quickly and can be sanded, stained, or painted for a seamless finish.
Wood filler is essential for maintaining and restoring wooden surfaces. Whether you’re working on furniture, cabinets, or flooring, it provides a reliable solution for unsightly imperfections. Lowe’s offers various wood fillers suited for different types of projects, ensuring you find the right match for your needs.
The application is straightforward, making it accessible for both DIY enthusiasts and professional woodworkers. Once applied, it forms a durable bond with the wood, preventing future damage. With proper use, Lowe’s wood filler can enhance the aesthetic appeal and longevity of your wood surfaces.
Introduction To Lowes Wood Filler
Lowes Wood Filler is essential for any woodworking project. It repairs and restores wood surfaces effectively. This product fills gaps, cracks, and holes in wood. It makes your projects look polished and professional.
The Role Of Wood Filler In Woodworking
Wood filler serves several important purposes in woodworking:
- Seamless Repairs: It hides imperfections in wood.
- Improved Appearance: It enhances the final look of projects.
- Strengthening: It adds stability to damaged areas.
Using wood filler can save time and effort. It allows for smoother finishes and better paint adhesion. Whether fixing furniture or crafting new pieces, wood filler is a must-have.
Why Choose Lowes For Your Wood Filler Needs
Choosing Lowes for wood filler offers many advantages:
| Feature | Benefit |
|---|---|
| Quality Products | Reliable and durable wood filler options. |
| Variety | Different types for all woodworking projects. |
| Expert Advice | Knowledgeable staff to assist with choices. |
Lowes provides quality and convenience. You can find everything you need in one place. This makes woodworking projects easier and more enjoyable.
Types Of Wood Filler Available At Lowes
Lowes offers a variety of wood fillers to meet your project needs. Each type has unique properties and uses. Choose wisely to ensure a perfect finish.
Water-based Vs. Solvent-based Options
Wood fillers come in two main types: water-based and solvent-based. Here’s a quick comparison:
| Feature | Water-Based | Solvent-Based |
|---|---|---|
| Drying Time | Quick drying | Longer drying time |
| Cleanup | Soap and water | Mineral spirits |
| Odor | Low odor | Stronger odor |
| Durability | Less durable | Highly durable |
- Water-Based Fillers: Ideal for indoor projects.
- Solvent-Based Fillers: Best for outdoor or heavy-duty repairs.
Color-matched And Stainable Varieties
Lowes provides color-matched and stainable wood fillers. These options help blend repairs seamlessly with wood surfaces.
Here are some key points:
- Color-Matched Fillers: Pre-tinted to match specific wood types.
- Stainable Fillers: Accepts stains, allowing for custom finishes.
Choose a filler that matches your wood. This ensures a smooth and clean look. Whether it’s a small crack or a larger hole, the right choice makes a difference.
Selecting The Right Wood Filler
Choosing the correct wood filler is essential for a successful project. A good wood filler repairs and prepares surfaces for finishing. Understanding your wood type and project needs is crucial.
Assessing Wood Type And Project Requirements
Different wood types require specific fillers. Here are some common wood types:
- Pine: Soft and easy to work with.
- Oak: Hard and durable, needs strong filler.
- Maple: Dense, requires a smooth finish.
Consider the project requirements:
- Interior vs. Exterior: Exterior fillers must withstand weather.
- Type of Repair: Cracks need different fillers than holes.
- Size of Damage: Larger repairs may need epoxy fillers.
Matching Wood Filler To Your Finish
Wood fillers come in various colors and textures. Choose a filler that blends with your wood finish:
| Wood Type | Recommended Filler Color |
|---|---|
| Pine | Light Yellow or Clear |
| Oak | Golden or Medium Brown |
| Maple | White or Light Brown |
Testing the filler before application is wise. Apply it to a scrap piece of wood. Check how it looks after drying.
Ensure the filler matches the final finish. Stains and paints change the appearance. Choose a filler that complements your project.
Preparation For Application
Preparing your surface is essential before using Lowes Wood Filler. Proper preparation ensures a smooth finish and strong adhesion. Follow these steps for the best results.
Surface Cleaning And Sanding
Start by cleaning the surface thoroughly. Remove dirt, dust, and grease. Use a damp cloth or sponge for this task.
- Wipe the area with a damp cloth.
- Use a mild detergent if necessary.
- Let the surface dry completely.
Next, sand the area. Sanding helps the filler adhere better.
- Choose medium-grit sandpaper (around 120-grit).
- Sand the surface until smooth.
- Clean away any dust with a cloth.
Applying Primer For Enhanced Adhesion
Applying a primer is a smart move. It improves adhesion and seals the wood. Follow these simple steps:
| Step | Action |
|---|---|
| 1 | Choose a high-quality primer suitable for wood. |
| 2 | Apply the primer with a brush or roller. |
| 3 | Allow the primer to dry fully. |
After priming, your surface is ready for Lowes Wood Filler. Enjoy a clean and durable finish!
Application Techniques For Best Results
Using Lowes Wood Filler effectively requires proper techniques. This ensures smooth and lasting repairs. Follow these tips for the best outcomes.
Tools For Applying Wood Filler
Having the right tools makes a big difference. Here are essential tools you need:
- Putty Knife: Ideal for spreading and smoothing.
- Sandpaper: Use fine grit for a smooth finish.
- Paint Stirrer: Mix the filler for even consistency.
- Gloves: Protect your hands while working.
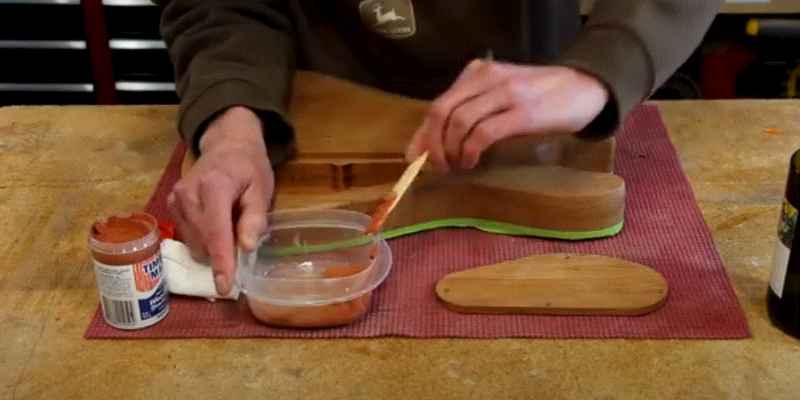
Smoothing And Spreading For An Even Surface
Achieving a smooth surface is key. Follow these steps:
- Start by cleaning the area. Remove dirt and dust.
- Apply the wood filler with the putty knife. Fill all gaps.
- Spread the filler evenly. Use long, gentle strokes.
- Let it dry completely. Follow the manufacturer’s drying time.
- Sand the surface. Use fine sandpaper for a perfect finish.
Check for any rough spots. Reapply filler if necessary. Repeat sanding for smoothness.
Drying And Curing Process
The drying and curing process for Lowes Wood Filler is crucial for achieving strong, lasting results. Proper understanding helps ensure successful projects. Let’s explore how it works.
Understanding Drying Times
Drying time refers to how long it takes for the wood filler to become firm. Different conditions affect these times:
- Temperature: Warmer temperatures speed up drying.
- Humidity: High humidity slows down drying.
- Application Thickness: Thicker applications take longer to dry.
Here’s a quick overview of typical drying times for Lowes Wood Filler:
| Application Thickness | Drying Time |
|---|---|
| Thin Layer | 15-30 minutes |
| Medium Layer | 30-60 minutes |
| Thick Layer | 1-2 hours |
Factors Influencing Curing
Curing is different from drying. It involves the chemical process that makes the filler strong. Several factors influence curing:
- Temperature: Warmer temperatures promote faster curing.
- Moisture: The right moisture level aids curing.
- Air Flow: Good air circulation helps curing.
For best results, follow these tips:
- Apply in a well-ventilated area.
- Keep the room warm and dry.
- Avoid thick applications to enhance curing.
Understanding these factors helps achieve optimal results with Lowes Wood Filler.
Sanding And Finishing
Sanding and finishing are crucial steps in using Lowes Wood Filler. Proper techniques ensure a smooth and polished surface. This enhances the overall look of your wood projects.
Achieving A Smooth Finish
To achieve a smooth finish with Lowes Wood Filler, follow these steps:
- Allow the filler to dry completely. This typically takes a few hours.
- Use sandpaper with a grit of 120 to 220. Start with coarser grit.
- Sand gently in circular motions. Avoid excessive pressure.
- Check for imperfections. Reapply filler if necessary.
- Finish sanding with finer grit for a smooth surface.
Use a vacuum or a damp cloth to remove dust after sanding. This prepares the surface for finishing.
Protective Coatings Over Wood Filler
Applying protective coatings enhances durability and appearance. Consider these options:
| Coating Type | Benefits | Application Method |
|---|---|---|
| Polyurethane | Water-resistant and durable | Brush or spray |
| Varnish | Provides a glossy finish | Brush or roller |
| Stain | Adds color and protects | Cloth or brush |
| Sealer | Prevents moisture damage | Brush or spray |
Choose the right coating based on your project needs. Always follow manufacturer instructions for best results.
Troubleshooting Common Issues
Using Lowes Wood Filler can lead to great results. However, issues may arise. Here, we address common problems and solutions.
Avoiding And Fixing Cracks Or Shrinkage
Cracks and shrinkage are common in wood fillers. They can occur due to drying too fast or not applying enough product. Follow these tips to avoid and fix these issues:
- Choose the Right Filler: Select a high-quality wood filler.
- Apply in Thin Layers: Spread the filler thinly. This helps prevent cracks.
- Control Temperature: Keep the workspace at a stable temperature.
- Moisten the Surface: Lightly dampen the area before applying filler.
If cracks appear after drying, use this method to fix them:
- Sand the area smooth.
- Reapply the wood filler in thin layers.
- Allow proper drying time between layers.
Touching Up After Initial Application
Sometimes, you may need to touch up the filler after it dries. This can enhance the final look. Follow these steps for effective touch-ups:
- Inspect the Area: Check for any imperfections.
- Sand Lightly: Smooth out rough patches gently.
- Reapply Filler: Use a small amount of wood filler.
- Blend Well: Feather the edges to match the surrounding wood.
After touch-up, allow it to dry completely. Sand again for a smooth finish. This ensures a seamless look.
Creative Uses For Wood Filler
Wood filler is not just for repairs. It offers many creative possibilities. From enhancing furniture to artistic projects, wood filler can transform your work. Explore innovative ways to use this versatile product.
Beyond Repairs: Decorative Applications
Wood filler can add beauty to your projects. Here are some decorative uses:
- Filling Gaps: Use it to fill gaps in wood joints.
- Surface Smoothing: Create a smooth surface on rough wood.
- Textured Finishes: Apply it for unique textures on furniture.
- Craft Projects: Enhance your DIY crafts with wood filler.
These applications allow you to elevate your woodworking. The right wood filler can enhance the aesthetics of any piece.
Mixing Wood Filler With Dyes Or Pigments
Customizing wood filler is easy. Mixing it with dyes or pigments creates unique colors. Here’s how:
- Choose Your Color: Select a dye or pigment.
- Mix: Combine the dye with the wood filler.
- Test: Apply a small amount to check color.
- Apply: Use it to fill holes or gaps.
This technique allows for personalized finishes. You can match the wood filler to your project’s color scheme.
| Color Options | Recommended Dyes/Pigments |
|---|---|
| Natural Wood | Water-Based Stain |
| Dark Walnut | Dark Brown Dye |
| Cherry Red | Red Pigment |
| Golden Oak | Yellow Dye |
Mixing wood filler with colors opens new design possibilities. Personalize your projects and make them unique.
Maintenance And Longevity
Proper care ensures the durability and effectiveness of Lowes Wood Filler. With the right maintenance, you can extend its life and keep your projects looking great. Regular checks can prevent the need for frequent repairs.
Tips For Preserving Wood Filler Finishes
- Keep it Dry: Moisture can weaken the filler.
- Apply a Sealant: Use a sealant over the filler to protect it.
- Avoid Direct Sunlight: UV rays can cause fading and damage.
- Regular Cleaning: Wipe surfaces gently to remove dust.
When To Reapply Or Repair
Identify signs that indicate the need for reapplication:
- Cracking: Look for cracks in the filler.
- Peeling: Check if the filler is peeling away.
- Color Fading: Notice any significant color changes.
- Surface Damage: Inspect for scratches or dents.
Reapply when you notice these signs. Timely repairs keep your surfaces smooth and attractive.
Environment And Safety Considerations
Using Lowes Wood Filler requires attention to safety and environmental impact. Knowing how to choose the right product is crucial. Eco-friendly options can protect both health and nature. Always prioritize safety while working with wood fillers.
Eco-friendly And Non-toxic Options
Lowes offers several eco-friendly wood fillers. These products are safe for indoor use. They contain fewer harmful chemicals. This makes them ideal for homes with children and pets.
- Water-Based Fillers: These are less toxic and easy to clean.
- Natural Ingredients: Some fillers use plant-based materials.
- Low-VOC Options: These emit fewer volatile organic compounds.
| Type of Filler | Eco-Friendly Feature |
|---|---|
| Water-Based | Low toxicity |
| Natural Fillers | Plant-based materials |
| Low-VOC | Fewer harmful emissions |
Proper Ventilation And Protective Gear
Even with safe products, proper ventilation is important. Open windows and doors while working. This helps reduce fumes in the air.
Using protective gear is equally vital:
- Face Mask: Protects against inhaling dust and fumes.
- Gloves: Prevents skin irritation from the filler.
- Goggles: Shields eyes from splashes and debris.
Follow these guidelines for a safer experience. Your health and the environment benefit from proper precautions.
Conclusion: Achieving Professional Results
Using Lowes Wood Filler can transform your projects. With the right techniques, you can achieve a smooth, professional finish. Follow these best practices to get the best results.
Recap Of Best Practices
- Choose the Right Filler: Select based on your project needs.
- Prep the Surface: Clean and sand the area before application.
- Apply Evenly: Use a putty knife for smooth application.
- Sand Smooth: Once dry, sand the surface to perfection.
- Finish with Paint: Match the wood color for a seamless look.
Inspiration For Future Projects
Explore various projects using Lowes Wood Filler:
- Furniture Restoration: Revive old chairs or tables.
- Cabinet Refinishing: Update kitchen or bathroom cabinets.
- Deck Repair: Fix cracks and holes in outdoor spaces.
- Wooden Toys: Create smooth finishes for children’s toys.
Discover the versatility of wood filler. Your creativity can shine through with every project!
Frequently Asked Questions
What Is Lowes Wood Filler Used For?
Lowes Wood Filler is primarily used for repairing damaged wood surfaces. It effectively fills cracks, holes, and imperfections. This product is ideal for furniture, doors, and cabinets. Once dried, it can be sanded, painted, or stained, providing a seamless finish.
It’s a must-have for DIY enthusiasts and professionals alike.
How To Apply Lowes Wood Filler?
To apply Lowes Wood Filler, start by cleaning the surface thoroughly. Use a putty knife to apply the filler into the damaged area. Smooth it out to match the surrounding wood. Allow it to dry completely before sanding. Finally, paint or stain the area as desired for a perfect finish.
Is Lowes Wood Filler Waterproof?
Lowes Wood Filler is not completely waterproof. However, it can withstand some moisture once painted or sealed. For outdoor projects, consider using a waterproof sealant after application. This will enhance its durability and protect against moisture damage. Always check the product specifications for best results.
How Long Does Lowes Wood Filler Take To Dry?
Typically, Lowes Wood Filler takes about 24 hours to dry completely. Drying time may vary based on temperature and humidity levels. For quicker projects, thin layers will dry faster. Always allow sufficient time before sanding or applying paint for optimal results.
Check the packaging for specific drying instructions.
Conclusion
Choosing Lowe’s wood filler can greatly enhance your woodworking projects. Its easy application and strong adhesion make it a reliable choice. Whether you’re repairing furniture or filling gaps, this product delivers excellent results. Trust Lowe’s wood filler to achieve a smooth finish and restore your wood surfaces effectively.
Enjoy your crafting!