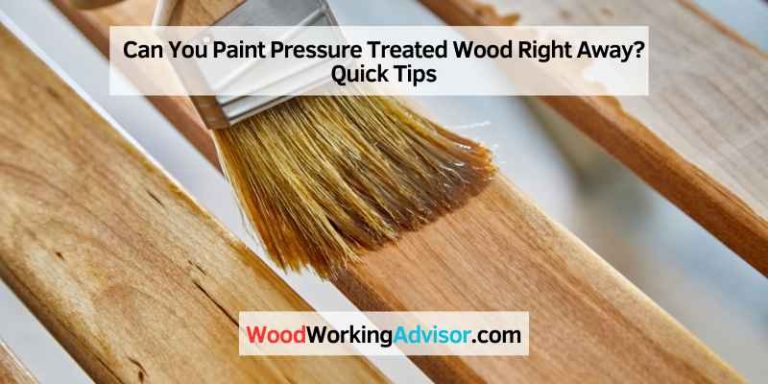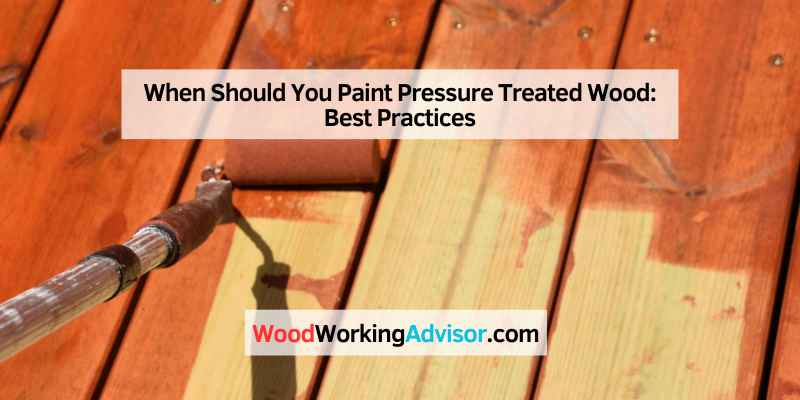
When Should You Paint Pressure Treated Wood: Best Practices
You should paint pressure treated wood after it has dried for three to four months. Painting too soon can cause adhesion issues and warping of the boards.
It’s crucial to use the correct type of paint and primer for the best results. Painting pressure treated wood requires proper timing and preparation. Knowing when to paint is essential to ensure the longevity and durability of the finish. The process of painting pressure treated wood involves specific considerations to achieve the best results.
Understanding the optimal timing for painting, the suitable type of paint and primer, and the necessary preparation steps is crucial for a successful outcome. Let’s delve into the details to ensure your pressure treated wood is painted at the right time and in the right way.
Introduction To Pressure Treated Wood
Painting pressure treated wood requires proper timing to ensure the best results. It is recommended to wait three to four months for the wood to dry before painting. This allows the wood to absorb water on the surface and be ready for paint.
When painting, use a water-based high-quality exterior latex paint for the best outcome. By following these guidelines, you can achieve a beautiful and long-lasting finish on your pressure treated wood.
Pressure treated wood is a popular choice for outdoor projects due to its durability and resistance to rot and insects. The wood is treated with chemicals that penetrate deep into the grain, making it less susceptible to decay. However, painting pressure treated wood can be tricky, and it is important to wait for the wood to dry properly before applying paint or stain.
Characteristics
Pressure treated wood is easy to recognize due to its greenish hue, which is caused by the chemicals used to treat the wood. The wood is also heavier than untreated wood due to the moisture content. It is important to note that pressure treated wood should not be burned, as the chemicals used to treat the wood can release harmful toxins.
Common Uses
Pressure treated wood is commonly used for outdoor projects such as decks, fences, and retaining walls. It is also used for structural framing in buildings, as the treated wood is resistant to moisture and pests. However, it is important to use the proper fasteners and hardware when working with pressure treated wood, as the chemicals can corrode certain metals.
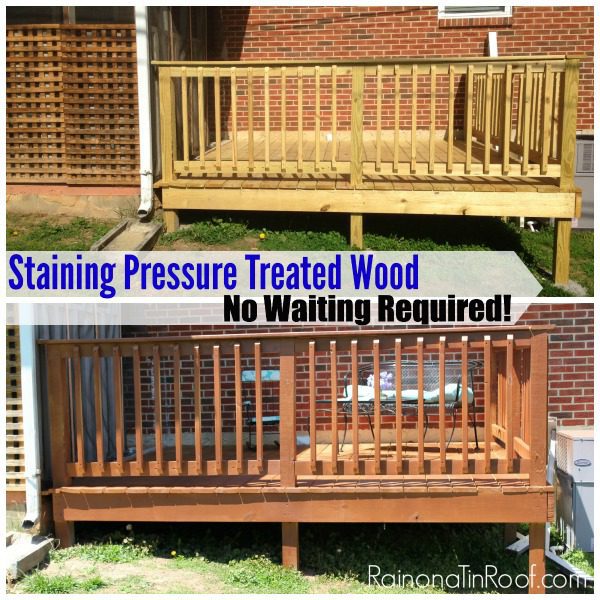
If you are planning to paint or stain pressure treated wood, it is important to allow the wood to dry properly before applying any coatings. This can take several months, depending on the climate and the level of exposure to the elements. Once the wood has dried, it is recommended to use a high-quality exterior latex paint or stain that is formulated for use on pressure treated wood.
In conclusion, pressure treated wood is a durable and long-lasting option for outdoor projects. However, it is important to take the proper precautions when working with this type of wood, and to wait for it to dry properly before applying any coatings. With the right care and maintenance, pressure treated wood can provide many years of use and enjoyment.
The Importance Of Timing
Painting pressure treated wood is a task that requires careful timing. It’s best to wait for the wood to dry completely before applying any paint or stain. This can take anywhere from a few weeks to several months depending on the climate and weather conditions.
Using a high-quality exterior latex paint is recommended for the best results.
Why Wait Before Painting?
Painting pressure treated wood is an important step to enhance its durability and aesthetics. However, it is crucial to wait before applying paint to ensure the wood is ready. Rushing the process can lead to paint failure, adhesion issues, and even warping of the boards.
Moisture Content And Wood Readiness
Pressure treated wood needs time to dry before painting. The moisture content of the wood plays a vital role in determining its readiness for paint. It is recommended to allow the wood to dry for three to four months after treatment. During this time, the wood absorbs water from the surface and reaches a point where it is ready to be painted.
Using the correct type of paint and primer is essential for a successful paint job on pressure treated wood. Water-based high-quality exterior latex paint is the ideal choice for both structures and furniture made from pressure treated wood.
By waiting for the right time to paint pressure treated wood, you ensure better adhesion, longer-lasting results, and avoid potential issues. Patience and proper preparation are key to achieving a beautiful and durable finish on your pressure treated wood projects.
Testing Moisture Levels
To determine the right time to paint pressure treated wood, test the moisture levels by sprinkling water on the surface or using a moisture meter. If the wood repels water, it’s ready for painting. Waiting for the moisture levels to decrease, typically three to four months, ensures better adhesion and prevents warping.
Before painting pressure treated wood, it is important to test the moisture levels to ensure that the wood is ready for paint or stain. Testing the moisture levels helps to prevent paint failure, premature painting, and adhesion issues. There are two common methods to test the moisture levels in pressure treated wood: the water sprinkle test and using a moisture meter.
Water Sprinkle Test
The water sprinkle test is a simple and effective way to determine if the wood is ready for painting. To perform this test, sprinkle a few drops of water onto the wood surface. If the water beads up and sits on top of the wood, it indicates that the wood is still too wet and needs more time to dry. However, if the water is absorbed into the wood, it means that the wood is dry enough for painting.
Using A Moisture Meter
Another method to test the moisture levels in pressure treated wood is by using a moisture meter. A moisture meter is a handheld device that measures the moisture content of the wood. It provides a more accurate reading compared to the water sprinkle test. To use a moisture meter, simply press the pins or sensors of the meter into the wood surface and wait for the reading. The moisture meter will display the percentage of moisture in the wood. Ideally, the moisture content should be below 15% for painting.
By testing the moisture levels of pressure treated wood, you can ensure that the wood is dry enough to hold paint or stain effectively. This step is crucial to prevent paint failure and achieve a long-lasting finish. Once the wood has passed the moisture test, you can proceed with painting or staining using a water-based high-quality exterior latex paint, which is the best type of paint for pressure-treated wood.
Selecting The Right Paint And Primer
When it comes to painting pressure treated wood, selecting the right paint and primer is crucial for achieving a long-lasting and professional finish. The correct products will not only enhance the appearance of the wood but also provide protection against the elements.
Best Paint Types For Treated Wood
When choosing paint for pressure treated wood, it is recommended to opt for a water-based, high-quality exterior latex paint. This type of paint is specifically designed to withstand outdoor conditions and adhere well to the surface of the wood. It provides excellent coverage and durability, ensuring that your painted pressure treated wood will maintain its beauty for years to come.
Primer Selection Tips
Applying a primer before painting is essential to ensure proper adhesion and improve the longevity of the paint job. Here are some tips to consider when selecting a primer for pressure treated wood:
- Choose a primer that is specifically formulated for use on pressure treated wood. These primers are designed to penetrate the wood surface, providing a strong foundation for the paint to adhere to.
- Opt for a primer that is compatible with the type of paint you plan to use. This will help to ensure optimal adhesion and compatibility between the primer and paint layers.
- Consider using a primer with mildew and mold resistance properties, especially if the pressure treated wood is exposed to high humidity or damp conditions. This will help prevent the growth of unsightly and damaging mold or mildew on the painted surface.
By following these tips and selecting the right paint and primer, you can ensure a successful and long-lasting paint job on your pressure treated wood. Remember to allow the wood to dry thoroughly before painting, as applying paint to damp wood can lead to adhesion issues and premature paint failure.
Pre-painting Preparation
To ensure a successful paint job, it’s crucial to allow pressure-treated wood to dry thoroughly before painting. Typically, it can take three to four months for the wood to dry out completely, allowing the paint to adhere properly. Rushing this process can lead to paint failure and potential warping of the wood.
Surface Cleaning
Before you start painting pressure treated wood, it’s crucial to clean the surface thoroughly. The wood may have been treated with chemicals to protect it from rot and insects, but that doesn’t mean it’s free from dirt and debris. Use a stiff-bristled brush or a pressure washer to remove any dirt, grime, or loose wood fibers. If you’re using a pressure washer, be careful not to apply too much pressure, as this can damage the wood surface.
Sanding And Smoothing
Once the surface is clean and dry, it’s time to sand and smooth it. Sanding helps to remove any rough spots and splinters, making the surface easier to paint. Start with a coarse sandpaper, such as 80 grit, and work your way up to a finer grit, such as 220. Be sure to sand with the grain of the wood to avoid scratches. After sanding, wipe the surface clean with a damp cloth to remove any dust.
Priming
Priming is an essential step in painting pressure treated wood. It helps the paint to adhere to the surface and prevents the wood from absorbing too much paint. Use a high-quality primer that’s compatible with pressure treated wood. Apply a thin, even coat of primer with a brush or roller, following the manufacturer’s instructions. Allow the primer to dry completely before applying the paint.
Painting
When it comes to painting pressure treated wood, it’s best to use a high-quality, exterior latex paint. This type of paint is durable and can withstand the elements. Apply the paint with a brush or roller, again following the manufacturer’s instructions. Be sure to apply a thin, even coat, and allow the paint to dry completely before applying a second coat.
In conclusion, pre-painting preparation is crucial when it comes to painting pressure treated wood. Surface cleaning, sanding and smoothing, and priming are all essential steps that will help ensure a smooth, long-lasting finish. By following these steps, you can ensure that your pressure treated wood looks great and lasts for years to come.
Application Tips And Techniques
Pressure treated wood is a popular choice for outdoor projects such as decks, fences, and furniture. But when it comes to painting or staining pressure treated wood, timing is everything. In this article, we’ll discuss the best time to apply primer and paint, as well as some painting best practices to ensure a long-lasting finish.
Applying Primer
Before painting pressure treated wood, it’s important to apply a primer. The primer helps the paint adhere to the wood and prevents it from soaking in too much, which can cause the paint to peel or flake. The best primer to use on pressure treated wood is an oil-based primer.
When applying the primer, make sure to follow these tips:
- Clean the wood thoroughly before applying the primer.
- Apply the primer in thin, even coats.
- Allow the primer to dry completely before painting.
Painting Best Practices
Once the primer is dry, it’s time to apply the paint. Here are some painting best practices to ensure a long-lasting finish:
- Use a high-quality paint that is specifically formulated for pressure treated wood.
- Apply the paint in thin, even coats.
- Allow each coat to dry completely before applying the next coat.
- Avoid painting in direct sunlight or on hot, humid days.
- Apply a second coat of paint for added protection and durability.
By following these application tips and techniques, you can ensure that your pressure treated wood project will look great for years to come.
Post-painting Care
Once you have successfully painted your pressure treated wood, it is important to take proper care of it to ensure its longevity and maintain its appearance. Here are some essential post-painting care tips:
Drying Time And Conditions
Allowing the paint to dry completely is crucial before subjecting the pressure treated wood to any use or exposure. The drying time can vary depending on various factors, such as temperature, humidity, and the type of paint used.
It is generally recommended to wait for at least 24 to 48 hours for the paint to dry completely. However, it is important to check the specific instructions provided by the paint manufacturer for accurate drying times.
Moreover, it is essential to ensure that the drying conditions are optimal. Make sure the painted wood is kept in a well-ventilated area with proper air circulation. Avoid exposing the freshly painted wood to direct sunlight or extreme weather conditions, as this can affect the drying process and the overall quality of the paint job.
Maintenance Tips
Maintaining your painted pressure treated wood will help prolong its lifespan and keep it looking its best. Here are some maintenance tips to consider:
- Regular Cleaning: Clean the painted wood periodically to remove any dirt, dust, or debris that may accumulate on the surface. Use a mild detergent and a soft brush or cloth to avoid scratching the paint.
- Inspect for Damage: Regularly inspect the painted surface for any signs of damage, such as peeling or chipping paint. If you notice any issues, promptly address them to prevent further damage.
- Touch-Up Painting: Over time, the paint on pressure treated wood may fade or wear off in certain areas. To maintain a consistent appearance, consider touch-up painting those areas as needed.
- Protective Coatings: Applying a clear protective coating, such as a varnish or sealant, can provide an extra layer of protection to the painted surface. This can help enhance durability and prevent moisture penetration.
- Regular Inspections: Keep an eye on the overall condition of the painted wood. Regular inspections will allow you to identify any potential issues early on and take appropriate action.
By following these post-painting care tips, you can ensure that your pressure treated wood remains in excellent condition and retains its aesthetic appeal for years to come.
Common Mistakes To Avoid
When painting pressure treated wood, one common mistake to avoid is doing it too soon. It’s crucial to allow the wood to dry thoroughly before applying any paint or stain. Rushing the process can lead to adhesion issues and even cause the boards to warp.
Patience is key to achieving a long-lasting finish.
Painting Too Soon
One of the most common mistakes people make when it comes to painting pressure treated wood is doing it too soon. It’s important to give the wood enough time to dry before applying any paint or stain. Rushing the process can lead to paint failure and adhesion issues, which means your paint job won’t last as long as it should. It’s like trying to apply a sticker to a damp piece of paper – it might stick for a little while, but it won’t last.
To avoid this mistake, it’s crucial to let the pressure treated wood dry thoroughly. Typically, pressure-treated lumber can take three to four months to dry completely. During this time, the wood will absorb water on the surface, and once it’s dry, it will be ready for paint. Patience is key when it comes to painting pressure treated wood.
Incorrect Paint Choice
Another mistake to avoid is using the wrong type of paint on pressure treated wood. To ensure a successful and long-lasting paint job, it’s essential to use the correct paint and primer specifically designed for exterior use on treated wood.
The best paint choice for pressure treated wood is a water-based, high-quality exterior latex paint. This type of paint is specifically formulated to withstand the outdoor elements and provide excellent adhesion to the wood surface. It is suitable for both structures and furniture made from pressure treated wood.
Using the wrong type of paint can result in poor adhesion, premature peeling, and a shorter lifespan for your paint job. So, make sure to choose the right paint for your pressure treated wood to ensure a durable and beautiful finish.
By avoiding these common mistakes of painting too soon and using the incorrect paint choice, you can ensure a successful and long-lasting paint job on pressure treated wood. Remember to give the wood enough time to dry thoroughly before painting and use a water-based, high-quality exterior latex paint for the best results. By following these guidelines, you can enjoy a beautifully painted pressure treated wood surface that will stand the test of time.

Frequently Asked Questions
What Happens If You Paint Treated Wood Too Soon?
Painting pressure treated wood too soon can lead to paint failure and adhesion issues. It’s like applying a sticker to damp paper – it won’t last long. Additionally, premature painting can cause the boards to warp. Wait for the wood to dry and use the correct paint and primer.
How Long Should Pressure Treated Wood Sit Before Painting?
Wait for three to four months for pressure-treated wood to dry before painting. Use water-based exterior latex paint for best results.
What Kind Of Paint Do You Use On Pressure Treated Wood?
For pressure treated wood, use a high-quality water-based exterior latex paint for best results. Ensure the wood has dried for three to four months before painting.
How Long Do You Have To Wait To Stain Pressure Treated Wood?
New pressure treated wood needs to dry after construction before it can be stained or sealed. This process can take many months depending on your deck’s sun exposure and the weather patterns after construction is complete. It’s recommended to wait three to four months for moisture levels to go down in pressure-treated wood before painting or staining.
Make sure to use the correct type of paint and primer on your wooden surface.
Conclusion
Painting pressure-treated wood requires patience and proper preparation. Waiting for the wood to dry and using the right type of paint and primer are crucial. Rushing the process can lead to paint failure and adhesion issues. By following the recommended guidelines, you can ensure a durable and visually appealing finish for your pressure-treated wood projects.