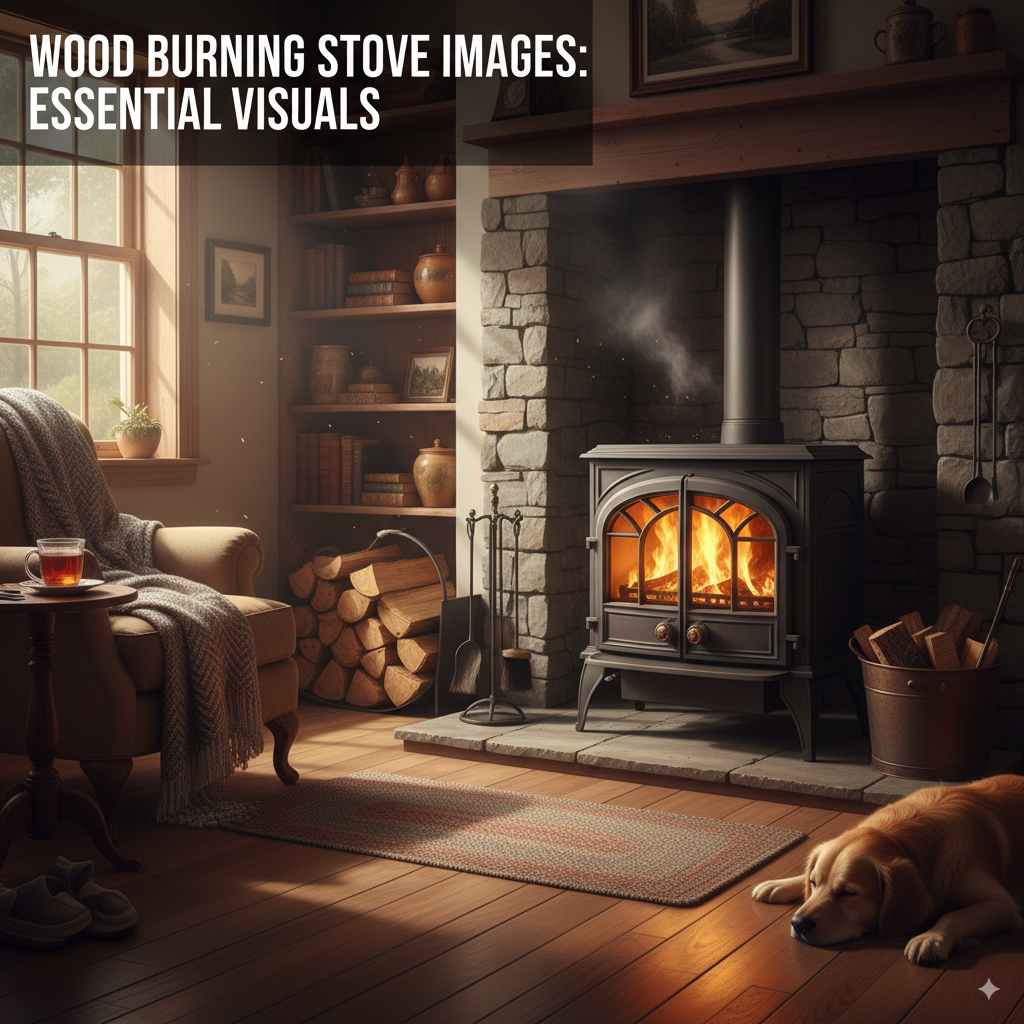
Wood Burning Stove Images: Essential Visuals
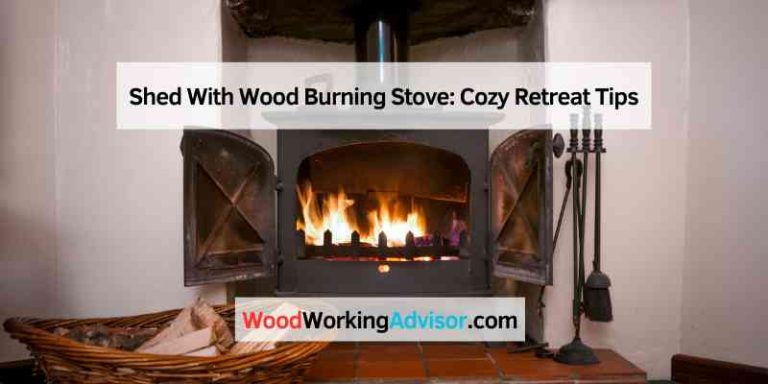
Wood burning stove images are crucial for understanding stove design, features, and installation. Seeing detailed photos helps beginners choose the right stove, visualize its placement, and prepare for safe operation. This guide provides essential visual insights for your wood burning stove project.
Hey there, woodworking enthusiasts and smart homeowners! Md Meraj here. Are you looking to add a cozy warmth and rustic charm to your home with a wood burning stove? It’s a fantastic idea! But sometimes, all the technical details can feel a bit overwhelming, especially when you’re just starting out. You might find yourself staring at product descriptions and wondering, “What does that actually look like?” That’s where seeing the right pictures comes in! Getting a good look at wood burning stove images isn’t just for decoration; it’s your secret weapon to making smart choices. We’ve all been there, scratching our heads over diagrams. Don’t worry, I’m here to walk you through it step-by-step, making it super clear and easy. Get ready to see exactly what you need to know!
Why Wood Burning Stove Images Matter for Beginners
Choosing and installing a wood burning stove might seem like a big project, but it doesn’t have to be complicated. With the right visuals, you can quickly grasp key aspects that might otherwise be confusing. Images act like a friendly helper, pointing out important features you might miss in text-only descriptions.
Seeing a wood burning stove in a photograph can:
- Clarify the stove’s size and proportions in a real-world setting.
- Show how different parts of the stove connect and function.
- Help identify the type of flue system needed and how it attaches.
- Illustrate proper clearances from combustible materials.
- Give you ideas for hearth and surround designs.
- Demonstrate the aesthetic appeal of different stove finishes and styles.
For beginners, this visual understanding is incredibly valuable. It builds confidence and helps avoid costly mistakes. Plus, it makes the entire process more exciting as you start to picture your new, cozy heating solution!
Understanding the Different Parts of a Wood Burning Stove Through Images
Let’s break down what you’ll typically see in wood burning stove images. Knowing these parts will help you understand how they work and what to look for when making your choice.
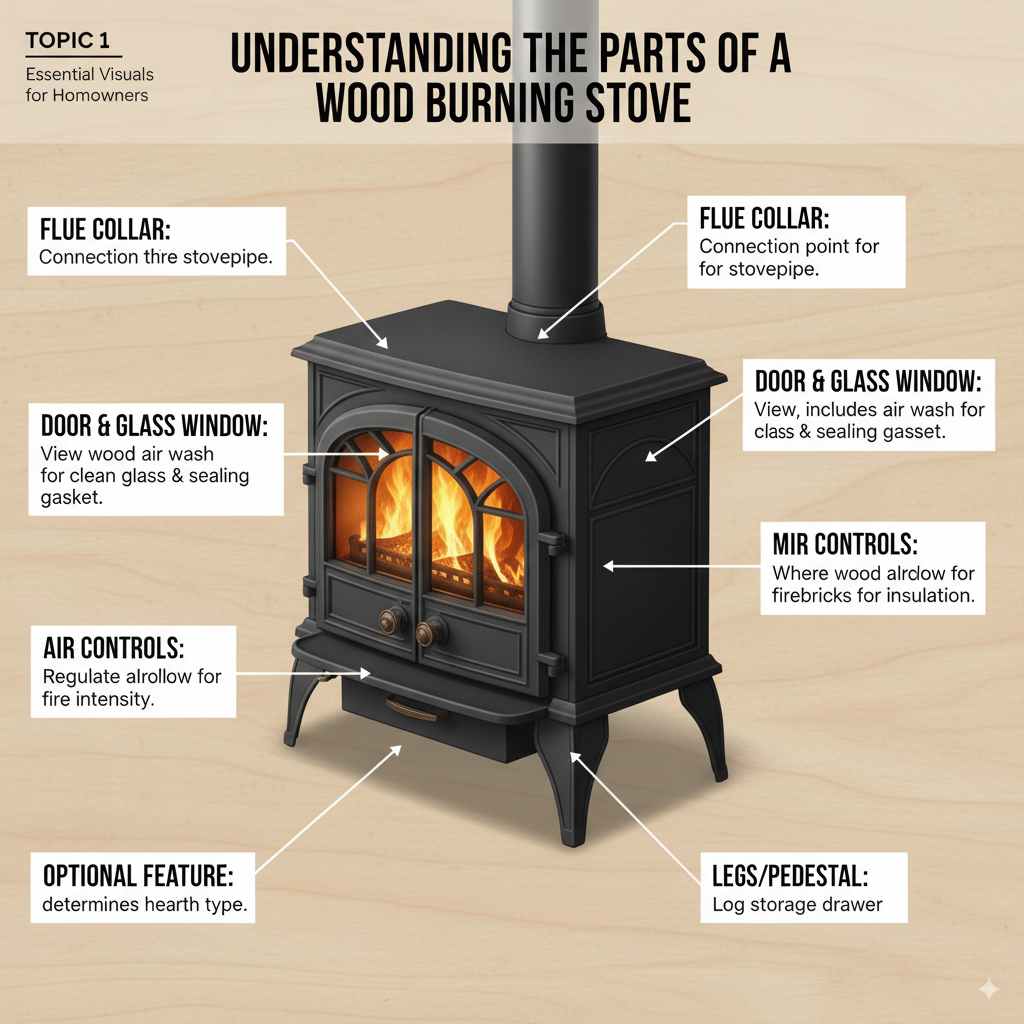
The Main Body (Firebox)
This is the heart of the stove where the fire burns. Images will show you the firebox’s internal construction, often lined with firebricks for insulation and durability. You’ll see the grate, if present, for airflow, and the primary air control. Understanding the firebox shape in visuals can hint at how efficiently it will burn wood.
The Door and Glass Window
Most modern stoves feature a door with a glass window, so you can watch the beautiful flames. Images will highlight the door’s sealing mechanism (gaskets) and how it opens and closes. You can also see the secondary air wash system, which helps keep the glass clean by directing air over it.
Air Controls
These are crucial for managing the fire. In pictures, you’ll see them typically as small levers or knobs on the stove. Understanding their placement through images helps you know where to adjust airflow for starting a fire, maintaining a steady burn, or damping it down.
The Flue Collar
This is where the stovepipe connects to vent smoke and gases outside. Images show its location (usually on top or the back) and size. You can often see how easily a stovepipe might attach, which is important for installation planning.
Legs or Pedestal
Wood burning stoves sit on something to keep them elevated from the floor. Images will clearly show whether a stove has simple legs or a pedestal base. This affects the overall look and the type of hearth required.
Optional Features
Some stoves have additional features visible in photos, like log storage drawers, warming shelves, or wood-burning cooktops. These are great to spot early on if they are important to you.
Types of Wood Burning Stoves: Visual Differences
Not all wood burning stoves look the same! Different types are designed for different needs and aesthetics. Looking at images can help you quickly distinguish between them.
Traditional Stoves
These often have a classic, cast-iron look, sometimes with decorative accents. Images might show ornate detailing, a very robust build, and a simpler, functional design. They evoke a timeless, country feel.
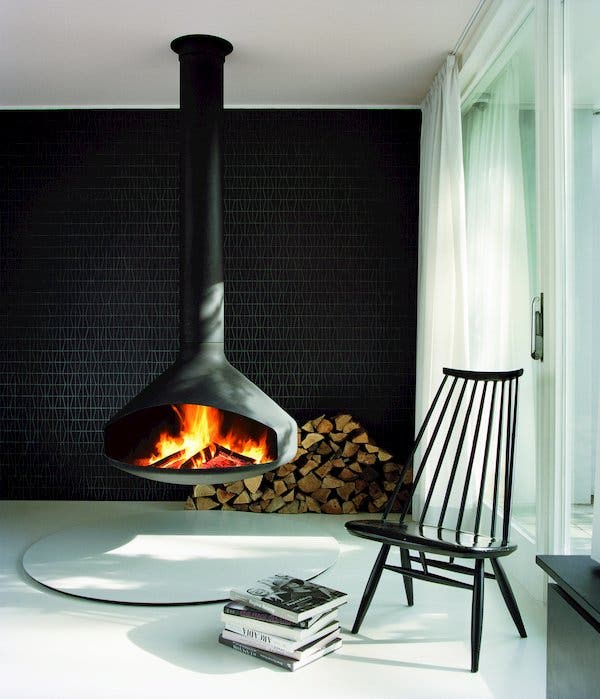
Modern Stoves
Characterized by clean lines, minimalist design, and often a larger glass viewing area. Images of modern stoves highlight sleek steel finishes, geometric shapes, and a contemporary aesthetic that fits well in modern homes.
Multi-Fuel Stoves
Similar in appearance to wood burning stoves, but capable of burning other solid fuels like coal or peat. Images usually don’t visually distinguish them from wood stoves unless there’s a specific grate for coal. The key difference is internal design, but visually, they appear very similar in photos.
Enamel-Coated Stoves
These stoves have a smooth, glossy finish in various colors. Images of enameled stoves showcase their vibrant appearance and how they can act as a decorative element in a room. The finish can range from matte to high-gloss.
Installation Visuals: What to Watch For
Proper installation is critical for safety and efficiency. Wood burning stove images are invaluable for understanding the requirements.
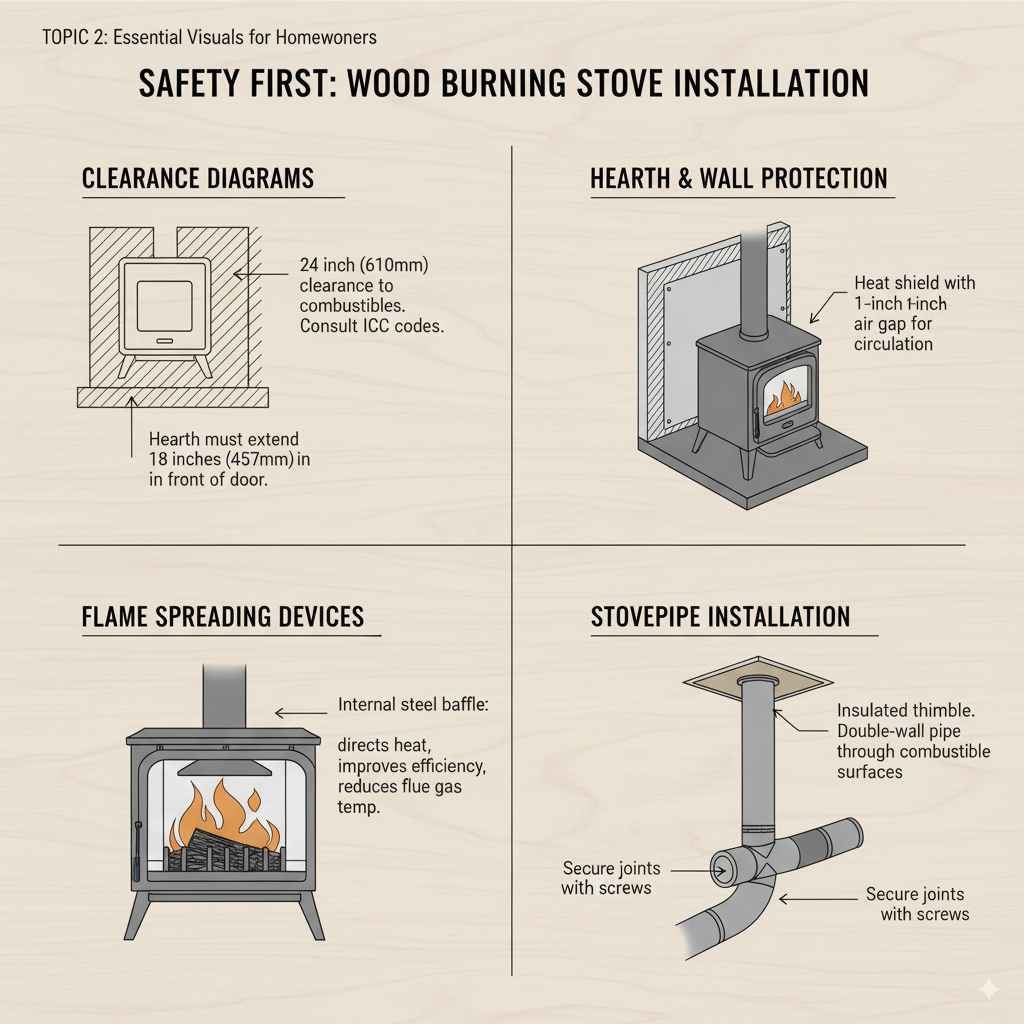
Clearances
This is perhaps the most important visual aspect. Installation manuals and diagrams, often accompanied by photos, clearly show the minimum distances the stove must be from walls, furniture, and anything flammable. Images should illustrate these safety zones. Organizations like the National Fire Protection Association (NFPA) provide essential safety guidelines, and good stove images will reflect these principles.
Hearth and Wall Protection
You’ll see images of stoves placed on non-combustible hearths made of stone, tile, or brick. They also show heat shields or protective panels on walls behind and to the sides of the stove. These visuals help you understand the necessary protective measures.
Flue and Chimney Connections
Photos of installed stoves clearly depict how the stovepipe (connecting from the stove collar to the chimney) is routed. You can see angled pieces, straight runs, and how connections are sealed. This helps you visualize the ventilation system and its complexity.
Riser/Chimney Heights
While harder to show definitively in a single image, good installation photos can imply the need for proper chimney height for adequate draft, often showing the chimney extending well above nearby rooflines. Consulting resources like the EPA’s residential wood heater program can offer insights into efficient and safe venting.
Aesthetic Considerations: Stoves in Their Environment
Beyond functionality, how does a wood burning stove look in a room? Images offer endless inspiration.
Stove Size and Placement in Room
Pictures showing stoves in various room sizes help you gauge what scale might suit your space. A tiny stove can look lost in a large living room, while a massive stove can overpower a small cottage. Visuals provide context.
Style Matching
You can see how different stove styles (traditional, modern, rustic) complement various interior designs. An ornate cast-iron stove looks great in a farmhouse setting, while a sleek steel stove might be perfect for a minimalist loft.
Hearth and Surround Combinations
Images are excellent for demonstrating different hearth materials (stone, tile, concrete) and surround finishes (brick, tile, drywall). You can see how these elements work together to create a cohesive look and provide crucial fire safety.
Color and Finish Options
Wood burning stoves come in various finishes like black cast iron, enamel colors (red, cream, blue), and brushed steel. Images allow you to compare these finishes and see how they interact with light and the room’s décor.
Table: Common Wood Burning Stove Features and What Images Show
To make it even clearer, here’s a table highlighting common features and how images help you identify them:
| Feature | What Images Typically Show | Beginner’s Benefit |
|---|---|---|
| Firebox Material & Lining | Shows firebricks, cast iron, or steel construction. May hint at durability. | Helps understand heat retention and longevity. |
| Door Design | Clear view of door, hinge type, latch mechanism, and glass size. | Assesses ease of use and viewing flame quality. |
| Air Controls | Location and type (lever, knob) of primary and secondary air inlets. | Identifies how to manage the fire for optimal burning. |
| Flue Collar Size & Location | Position (top/rear) and diameter of the connection point for stovepipe. | Crucial for planning flue system installation. |
| Ash Pan/Grate | Visible if present, showing how ash is managed. | Helps understand maintenance requirements (emptying ash). |
| Baffle Plate | Partial internal view, often visible near the top of the firebox. | Indicates a feature for improved combustion efficiency. |
Creating Your Own Visual Reference Guide
As you research, start collecting images that appeal to you or highlight features you find important. This can be as simple as saving pictures from websites or creating a Pinterest board.
Steps to Building Your Visual Guide:
- Identify Your Needs: Are you looking for a purely functional stove or one that’s a statement piece? Do you have a large or small room?
- Browse Manufacturer Websites: Most stove makers have galleries of their products in various settings.
- Look at Retailer Sites: Online stores often have multiple photos of each stove from different angles.
- Explore Home Renovation Blogs and Magazines: See how stoves are integrated into real homes.
- Save “Installation Examples”: Look for photos that show proper clearances, hearths, and flue setups.
- Pay Attention to Details: Note the kind of wood being burned, the color of the flames, and the overall ambiance.
This proactive approach makes the selection and planning process much more visual and less intimidating.
Safety First: What to Look for in Safety-Related Images
Safety is paramount when installing and operating a wood burning stove. Images are powerful tools for understanding safety requirements.
Clearance Diagrams
Many manuals include diagrams that look like floor plans, showing specific distances required between the stove and combustible surfaces. These are essential. Always cross-reference with the manufacturer’s manual and local building codes. For instance, understanding the requirements outlined by the International Code Council (ICC) is vital for compliant installations.
Hearth and Wall Protection Details
Look closely at images showing the construction of hearths. Are they thick enough? Do they extend far enough in front of the stove opening? Similarly, observe how wall protection is installed – is it flush, or is there an air gap behind it? This air gap is crucial for many heat shields, as it allows air to circulate and cool the wall.
Flame Spreading Devices
Some stoves use internal baffles or external decorative shields. Images can show these features, which help direct heat into the room and also reduce the temperature of the flue gases exiting the stove, contributing to cleaner burning and preventing overheating of the chimney system. A well-designed baffle, often visible through the door in good photos, can significantly improve efficiency.
Stovepipe Installation
Pay attention to how stovepipes are connected. Images should show double-wall insulated pipe where needed, proper sealing at joints, and secure wall pass-throughs if the pipe goes through a wall or ceiling. Never use single-wall pipe through combustible materials; it requires specific clearances or insulated thimble components.
Frequently Asked Questions (FAQ)
Q1: How can I tell if a wood burning stove image shows a safe installation?
Look for clearly defined clearances around the stove. You should see ample space between the stove and any walls, furniture and combustibles as per the manufacturer’s guidelines. Also, observe the hearth; it should be non-combustible and extend sufficiently. The stovepipe connection should look robust and properly sealed.
Q2: What’s the difference between cast iron and steel wood burning stoves, visually?
Cast iron stoves often have a more traditional, sometimes ornate look with visible seams where the cast sections are bolted together. They can appear thicker and more solid. Steel stoves typically have cleaner, sleeker lines, fewer visible seams, and a smoother finish. Images will clearly show these distinct appearances.
Q3: Can images help me understand how to light a fire in a wood burning stove?
While images can’t show the process like a video, they can illustrate the location of air controls needed for starting the fire. You can also see how the firebox is arranged, helping you visualize where to place kindling and logs for optimal airflow.
Q4: When looking at stove images, what does secondary combustion mean?
Visually, secondary combustion is often indicated by small holes or vents in the back or sides of the firebox, near the top. These are for introducing pre-heated air to burn off uncombusted gases, making the stove more efficient and cleaner burning. Images may show these details inside the firebox.
Q5: How important is the size of the viewing glass in wood stove images?
The size of the viewing glass is largely an aesthetic choice and relates to how much you want to see the flames. Larger glass offers a better view but can sometimes lead to more heat loss. Images will clearly show the proportions of the glass relative to the stove, helping you decide on your preference.
Q6: Are there any visual cues in images that suggest a stove is energy-efficient?
Look for features often highlighted in product photos: a clean glass (suggests good airwash), a visible baffle plate inside the firebox (for secondary burn), and advanced air control systems. While not definitive without specs, these visual cues often point to more efficient designs.
Q7: What should I look for in an image of a stovepipe system?
Images of stovepipes should show proper use of appropriate pipe types (e.g., double-wall insulated pipe where clearance is limited), secure connections between sections, and how the pipe is supported. If the pipe passes through a wall or ceiling, you should see a proper thimble or insulated wall pass-through, not just a hole.
Conclusion: Your Vision for a Warmer Home
Seeing is truly believing, especially when it comes to bringing a wood burning stove into your home. By carefully examining wood burning stove images, you gain a practical understanding of their design, function, and installation needs. You can move beyond confusing jargon and visualize exactly how a stove will look, operate, and safely integrate into your living space.
Remember to use these visuals as a starting point. Always consult the official product manuals for detailed specifications and safety clearances, and check your local building codes. With the confidence that comes from clear visuals and a bit of planning, you’re well on your way to enjoying the comforting warmth and beautiful ambiance that a wood burning stove can bring. Happy heating!