Metal Stencils for Wood Burning: Why Metal Beats Paper or Plastic
Metal stencils survive the heat of a wood-burning pen because metal conducts that heat away almost as fast as the tip delivers it – paper chars and plastic melts under the same contact. That single material difference is why a $16 stainless steel stencil set can outlast a stack of paper templates, and it changes how you should pick, place, and trace one.
If you have ever burned through a paper stencil halfway through a name plaque, or watched a plastic template curl and melt against the tip, the fix is not a steadier hand – it is switching to a stencil material that can actually take the heat. Metal stencils for wood burning (pyrography) let you trace clean, repeatable letters, numbers, and patterns without babysitting the stencil itself. Here is how they work, why metal is the material that matters, and how to get crisp results the first time.
What a Metal Stencil for Wood Burning Actually Does
BEST LETTER & NUMBER STENCIL SET
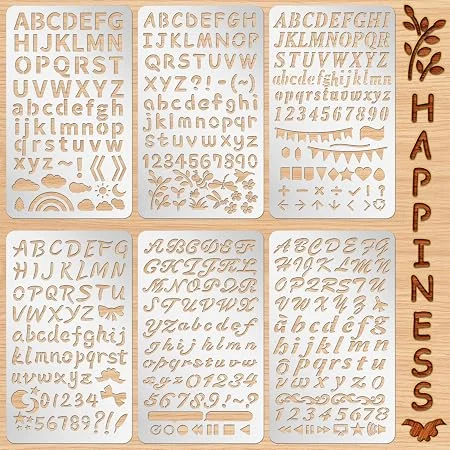 |
Lewtemi 6-Pc Metal Wood Burning Stencils – $16.14 The stainless steel letter, number, and symbol set we would reach for first – the same 0.2-0.3mm gauge that holds up to repeated wood-burning heat without warping.
|
A metal stencil is a thin sheet, usually stainless steel or aluminum, with a design cut all the way through it. You lay it flat on the wood, hold or clamp it in place, and run a heated wood-burning tip along the cutout edges. The metal acts as a guide rail: as long as the tip stays against the metal wall of the cutout, the burned line follows the exact shape of the opening instead of wobbling with your hand.
That guide-rail behavior is the whole appeal. A steady freehand line takes years of practice; tracing the inside edge of a metal cutout takes about five minutes to learn. The stencil does the precision work, and you control speed and pressure.
Why Metal Survives the Heat and Paper or Plastic Does Not
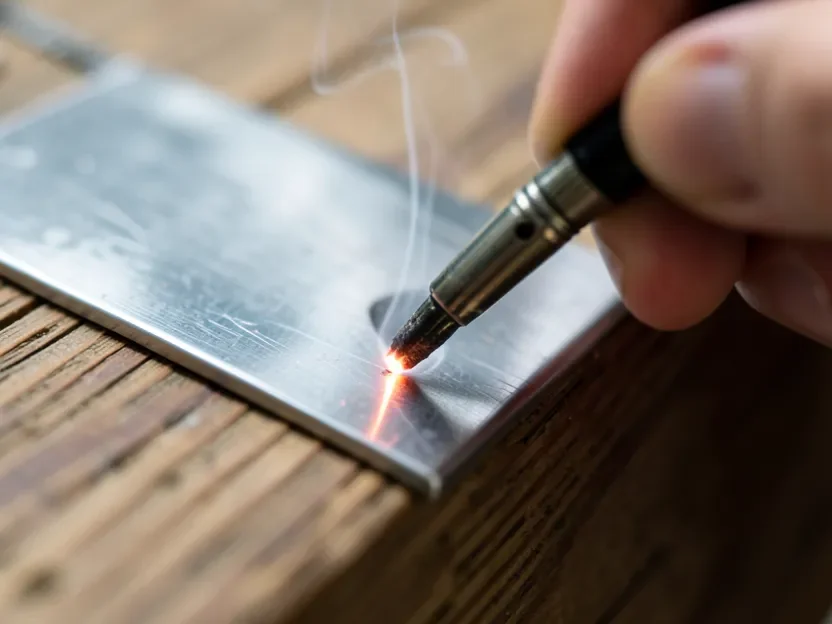
This is the part most stencil guides skip entirely: the reason metal works is thermal conductivity, not just “hardness.” A typical solid-point wood-burning pen runs somewhere around 600 to 950 degrees Fahrenheit at the tip. Paper reaches its ignition point at roughly 451 degrees Fahrenheit – well below that – so a few seconds of direct contact is enough to char through it or set it smoldering. Thin plastic and acrylic stencils fail even sooner, softening or melting anywhere from about 150 to 300 degrees Fahrenheit depending on the plastic.
Stainless steel and aluminum are a different story. Steel melts around 2,500 degrees Fahrenheit and aluminum around 1,220 degrees Fahrenheit – both far above anything a hobby wood-burning tip produces. More importantly, metal is an excellent thermal conductor: instead of the heat staying concentrated at the single point the tip is touching, it spreads out across the whole sheet almost instantly. Paper and plastic are poor conductors, so heat pools right where the tip lands until the material fails. That is the actual mechanism – not “metal is tougher,” but “metal moves the heat away faster than it can build up,” which is also why a metal stencil can feel warm to the touch after a session while a paper one would already be ash.
Choosing the Right Metal Stencil
Not every metal stencil is built the same way, and the differences affect both how long it lasts and how fine a detail it can hold.
| Stencil Type | Best For |
|---|---|
| Thin stainless steel (0.2-0.3mm) | Lettering, numbers, fine detail work – flexes slightly to sit flat on uneven wood |
| Brass | Repeated heavy use; resists bending and holds a crisp edge over time |
| Heavier steel or aluminum sheet | Large patterns, outdoor signage, projects that will be re-traced many times |
| Laser-cut designs | Intricate, multi-part patterns where a hand-cut stencil could not hold the detail |
Thickness is the main trade-off. A very thin stencil hugs curved or slightly warped wood better, but it can bend out of shape if you press too hard while tracing. A thicker one holds its shape indefinitely but will not sit flush on anything but a flat board. For most home projects, a stencil in the 0.2 to 0.3mm range is the easiest to work with.
Tools You Will Need Beyond the Stencil
The stencil is only one piece of the setup. You also need:
- A wood-burning pen (solid-point or wire-nib): solid-point pens hold a steady temperature and are easier for stencil tracing than wire-nib units, which cool faster on contact.
- Painter’s tape or small clamps: to keep the stencil from shifting mid-line. A shift of even a millimeter shows up as a visible kink in the burned edge.
- Safety glasses: stencil edges can throw small sparks of char, especially on resinous wood like pine.
- A ventilated workspace or small fan: pyrography smoke is an irritant with extended exposure, not just an odor.
- Scrap wood of the same species: for setting your pen’s temperature before you touch the real piece.
Preparing the Wood Surface
Sand the surface with progressively finer grit, finishing around 220-grit, and always sand with the grain rather than across it. Cross-grain scratches show through a light stain later even if you cannot see them now. Wipe the dust off with a dry cloth or tack cloth – not a wet one, since raised grain from moisture will fight your stencil’s flat contact.
Softwoods like pine and basswood burn cleanly and are the easiest starting point. Open-grained hardwoods such as oak can cause the line to wander slightly along the grain, so if you are new to stencil work, practice on pine first and save the oak for once you have the technique down.
Tracing the Design Step by Step
- Position the stencil and secure it with tape or a clamp on at least two sides.
- Set your pen’s temperature on scrap wood first – too hot and the line spreads wider than the cutout; too cool and it drags instead of gliding.
- Rest the tip against the inside wall of the metal cutout, not floating in the middle of the opening.
- Move at a slow, even pace. The metal edge is your guide – let it steer the line rather than steering with your wrist.
- Finish one complete letter or shape before moving to the next, so heat does not build up unevenly across the stencil.
- Let the piece cool for a minute before lifting the stencil, so the burned line finishes setting cleanly.
Finishing and Preserving the Piece
Once you are happy with the design, brush away any char dust with a soft brush before sealing – sealing over loose char can trap a gray haze in the finish. A clear matte or satin spray sealant applied in thin, even coats protects the burned lines from handling oils and moisture without darkening the wood. Let each coat dry fully before the next, and keep finished pieces out of direct sunlight, which fades both stain and the burned contrast over time.
Project Ideas Worth Trying
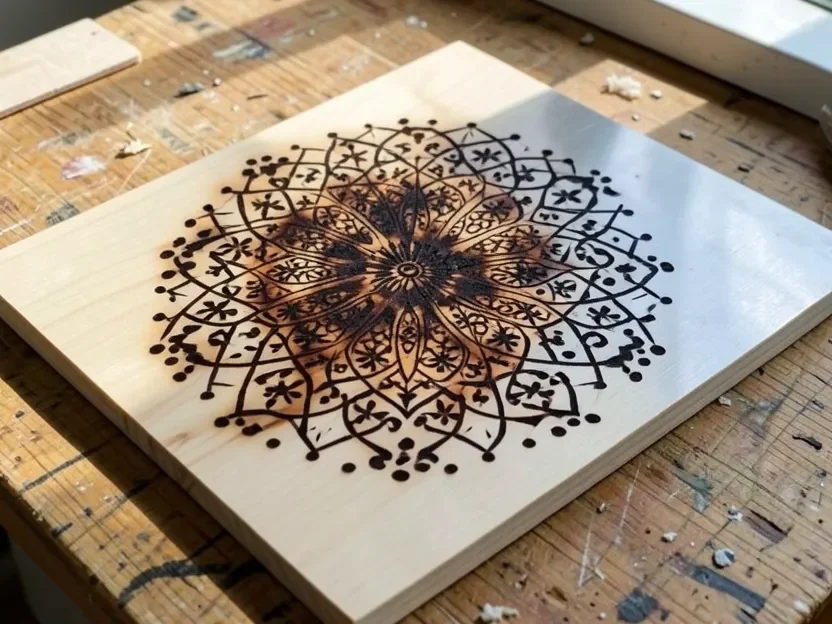
Letter and number stencils are the obvious starting point for personalized wooden signs, but they are just as useful for coasters, cutting boards, and gift tags where a repeated monogram needs to look identical every time. Geometric and mandala-style metal stencils are worth trying once you are comfortable with straight lines, since the stencil handles the symmetry that would be nearly impossible to burn freehand. For holiday and seasonal decor, a single well-made stencil set can be reused across dozens of ornaments or signs, which is where the higher upfront cost over paper templates pays for itself.
Frequently Asked Questions
Why do metal stencils work for wood burning when paper and plastic do not?
Metal conducts heat away from the tip’s contact point almost instantly, spreading it across the whole sheet instead of letting it concentrate. Paper ignites around 451 degrees Fahrenheit and plastic softens as low as 150 degrees, both well under a wood-burning tip’s typical 600 to 950 degree range – so they fail almost immediately on contact where metal simply gets warm.
What metal thickness should I look for in a wood burning stencil?
For most hobby projects, 0.2 to 0.3mm stainless steel is the easiest to work with – thin enough to lie flat against slightly uneven wood, but rigid enough to hold its cutout shape through repeated use. Thicker steel or brass is worth the extra cost for large signs or stencils you plan to reuse dozens of times.
How do I keep a metal stencil from shifting while I trace it?
Secure at least two sides with painter’s tape or small clamps before you start burning, and re-check the edges after every few letters. A shift of even a millimeter mid-design shows up as a visible kink where the line jumps, since the stencil is your only guide for the shape.
Can I make my own metal stencil for wood burning?
Yes. Start with thin aluminum or steel sheet and cut your design with a laser cutter, rotary tool, or sharp craft knife, then file or sand the cut edges smooth. Rough edges will transfer as a slightly ragged burned line, so smoothing the cutout is worth the extra few minutes.
The Bottom Line
A metal stencil for wood burning is not just a sturdier version of a paper template – it survives because its thermal conductivity keeps heat from ever building up enough to damage it, the same property that makes it feel warm rather than smoldering after a long session. Pick a thickness that matches your project, secure it well, trace along the metal edge rather than fighting your own hand, and a single stencil set will outlast dozens of paper ones.
Sponsored / affiliate links. As an Amazon Associate I earn from qualifying purchases. I may earn additional commission from eligible campaigns.