Wooden Roses How to Make
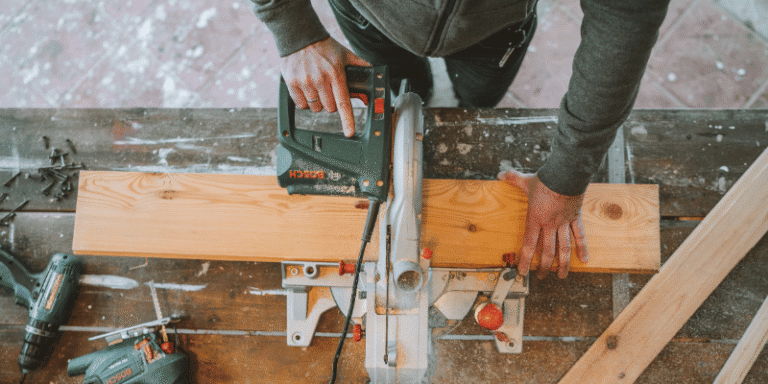
Different colors of wood can be used to create beautiful roses. The steps below will show you how to make a wooden rose. First, gather your supplies.
You will need a block of wood at least 6 inches long and 2 inches wide, a saw, sandpaper, paint or stain, and glue. Next, use the saw to cut the wood block into six equal pieces. These will be the rose petals.
Wooden roses are a fun and easy way to add a touch of whimsy to any decor. Here’s how to make your own:
- Start by cutting thin strips of wood veneer or balsa wood into petal shapes.
If you’re using balsa wood, sand the edges smoothly, so they don’t snag on anything.
2. Stack the petals together and glue them at the base. You can use hot glue or craft glue for this step.
3. Once the petals are glued together, wrap a wire around the base and twist it tightly to secure it. This will act as the stem for your rose.
4. Fluff out the petals and arrange them however you like!
You can even paint or stain your wooden roses if you want to get creative.
Credit: www.instructables.com
What are Wooden Roses Made Of?
Wooden roses are often made from a type of wood called poplar. This wood is lightweight and has a fine grain that can be sanded down to create a smooth surface. Poplar is also easy to stain or paint, making it a versatile material for creating wooden roses.
Other woods that are sometimes used to make wooden roses include birch, maple, and cherry. These woods are similar to poplar in terms of weight and grain, but each has unique color and character. Birch is the lightest of the three kinds of wood, while cherry is the darkest.
Maple falls somewhere in the middle, with a creamy white coloration. No matter the wood you choose, you’ll need to cut it into thin strips using a saw. You can then glue these strips together to form the rose shape.
Once the glue dries, you can sand down any rough edges and finish the rose with paint or stain.
How are Wooden Flowers Made?
Wooden flowers are a popular decoration for both indoor and outdoor use. They can be made from various kinds of wood, including cedar, pine, and maple. The wood type will affect the finished product’s color and grain.
To make wooden flowers, start by cutting thin strips of wood into petal shapes using a scroll saw or jigsaw. Next, glue the petals together in layers to form the flower shape. Once the glue is dry, paint or stain the flower as desired.
Finally, add a wire stem and leaves if desired. Wooden flowers are a beautiful way to decorate your home or yard. With time and effort, you can create stunning floral arrangements that will last for years!
How Do You Make Wood Shaving Roses?
If you love the look of roses but don’t want to deal with the thorns, wood-shaving roses are a great alternative! You can make them yourself with just a few simple supplies. Here’s what you’ll need:
– A block of wood (we used basswood, but any type will work)
– A sharp knife or box cutter
– Sandpaper
– Wood glue – Paint (optional) And here’s how you do it:
1. Start by cutting your wood block into thin slices – they should be about 1/4″ thick. If they’re too thick, they won’t curl as nicely.
2. Once all your slices are cut, use sandpaper to smooth out any rough edges.
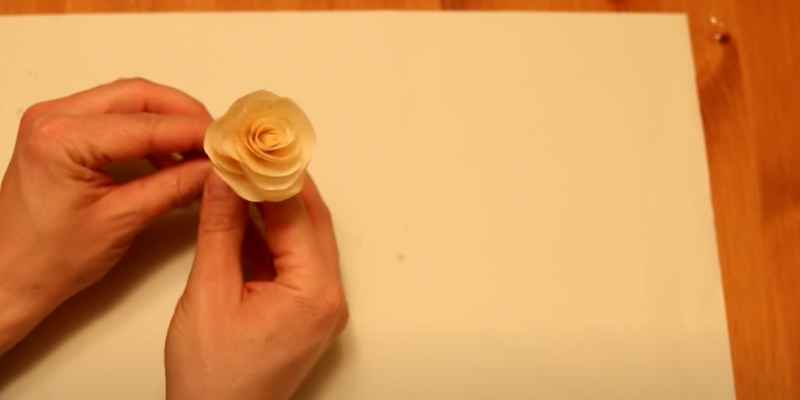
3. Now it’s time to start curling! Take one slice of wood, starting at one end, and begin rolling it up tightly. Continue until the entire slice is rolled up into a rose shape.
Repeat with remaining slices of wood.
4 . Once all your roses are rolled, apply a small amount of glue to the bottom of each one and attach them to a piece of scrap paper or cardboard (this will help them keep their shape while drying).
Let dry for 24 hours or until completely dry and hardened.
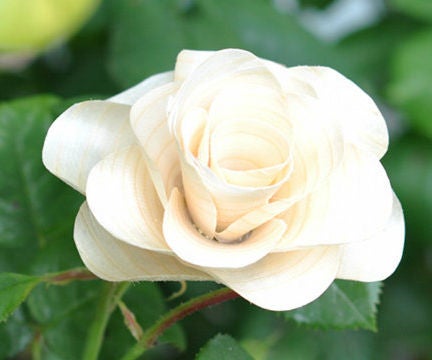
5. If desired, paint your roses in any color you like! We went with a classic red, but feel free to get creative. Allow the paint to dry completely before displaying your beautiful wood-shaving roses!
How Do You Make a Wood Flower Bouquet?
Assuming you would like a tutorial on how to make a wood flower bouquet: What You’ll Need: -1/4 inch thick plywood (preferably birch or poplar)
-Jigsaw with a scroll saw blade -High-grit sandpaper (100+)
-Stain or paint of your choice (optional)
-Floral wire -Wire cutters -Hot glue gun and glue sticks
-Fake flowers Instructions:
- Cut your plywood into different-sized circles using a jigsaw and scroll saw blade.
The amount and size of circles will depend on the size of your final bouquet. Try to make each ring unique in shape for added interest.
2. Once all your pieces are cut, sand them down using high grit sandpaper until they are smooth.
If you plan on staining or painting your flowers, do so now according to the instructions on your chosen product. Allow plenty of time for drying before moving on to the next step.
3. To assemble your flowers, start threading the floral wire through the center of each plywood circle.
Leave about 6 inches of wire at the end so you can easily attach it to the stems later.
4. Using hot glue, attach fake flowers to each plywood circle, covering up the wired centers as much as possible. Be sure to use enough glue to keep everything secure when handled later.
5. Once all your flowers are assembled, create stems by wrapping green floral wire around itself several times until it’s about 18 inches long. Attach each branch to a flower by tightly twisting the wires and trimming off any excess wire with wire cutters.
6. Finally, arrange all your flowers in a vase or container of your choice and enjoy!
How to Make Wooden Flower Petals
Wooden flower petals are easy to make and add a touch of natural beauty to any arrangement. Here’s how to make your own. Start by tracing the outline of a petal onto a piece of wood.
Then, use a jigsaw to cut out the shape. Next, sand the edges of the petal until they’re smooth. Now it’s time to stain or paint the petals.
You can use whatever color you like, but we think white or pastel shades look best. Once the paint is dry, apply a sealant layer to protect the finish. To attach the petals to stems, use hot glue or wire loops.
And that’s it! Your wooden flower petals are ready to use in any arrangement you like.
How to Make Large Wooden Flowers
Wood flowers are a beautiful way to add a touch of nature to your home décor. They can be used as accents in vases or as standalone pieces. Large wooden flowers can be made using various materials, including wood slices, branches, and bark.
Here are some tips on how to make large wooden flowers:
- Choose the correct type of wood. For example, hardwoods like oak and maple are suitable for large flowers because they’re strong and won’t bend easily.
Softer woods like cedar and redwood are better suited for smaller flowers.
2. Cut the wood into thin slices or strips using a saw or jigsaw. The thickness of the pieces will determine the size of the finished flower petals.
3. To create the center of the flower, use a small piece of branch or bark cut into a circle or oval shape. For larger blooms, you may need to glue two pieces together.
4. To assemble the petals, start by gluing one slice or strip to the centerpiece.
Then continue adding petals around it until you’ve reached your desired size and look. You can curl the edges of the petals inward to give them a more realistic appearance.
5. Once the petals are in place, let the glue dry completely before displaying your wooden flower masterpiece!
Wood Rose Plant
Wood Rose plants are stunning, unique houseplants that offer many benefits. Not only do they look beautiful with their delicate, wood-like roses, but they also help purify the air and boost your mood. Here are some tips on how to care for your Wood Rose plant:
Place your Wood Rose in a bright spot but out of direct sunlight. These plants need lots of light to bloom, but too much sun will scorch their leaves. Water your Wood Rose when the top inch or so of soil is dry.
Allow the water to drain before putting the plant back in its pot. Overwatering is one of the most common problems with these plants, so be sure not to let them sit in water. Fertilize your Wood Rose every few weeks during the growing season (spring and summer).
Use a well-balanced fertilizer and follow the directions on the package. Too much fertilizer can damage the roots and leaves of these delicate plants. Wood Roses are relatively low-maintenance plants but can be susceptible to pests and diseases if not properly cared for.
Be sure to inspect your plant regularly for any signs of problems and take action immediately if you see anything out of the ordinary.
Tapioca Sheets for Flowers
Tapioca sheets are a great way to add texture and interest to your floral arrangements. They are thin, translucent sheets made from the starch of the cassava root. When soaked in water, they become pliable and can be molded into shapes or used as a covering for flower petals.
Tapioca sheets have a slightly sweet flavor and can be tinted with food coloring to create different effects. You can find them at most craft stores or online. Here are some tips for using tapioca sheets in your floral designs:
-Soak the sheets in water for about 30 minutes before using. This will make them pliable and easier to work with. -Cut the sheets into strips or shapes using scissors.
If you want to curl the strips, you can wrap them around a pencil or other cylindrical object. -Attach the strips or shapes to flower petals using glue or double-sided tape. Be sure to smooth out any wrinkles or creases so that the finished product looks clean and professional.
-For an added touch, dust the tapioca sheet with glitter or shimmer powder before attaching it to the flowers.
Conclusion
Wooden roses are a beautiful and unique decoration for any home. They can be made from wood, but the most popular type is birch. The first step is to cut the wood into thin slices, about 1/4 inch thick.
Next, use a drill to make a small hole in the center of each slice. Once all the holes are drilled, thread a wire through each one. To give the roses some color, paint them with acrylic paint or use a wood stain.
Allow the paint or stain to dry before adding leaves or other decorations.