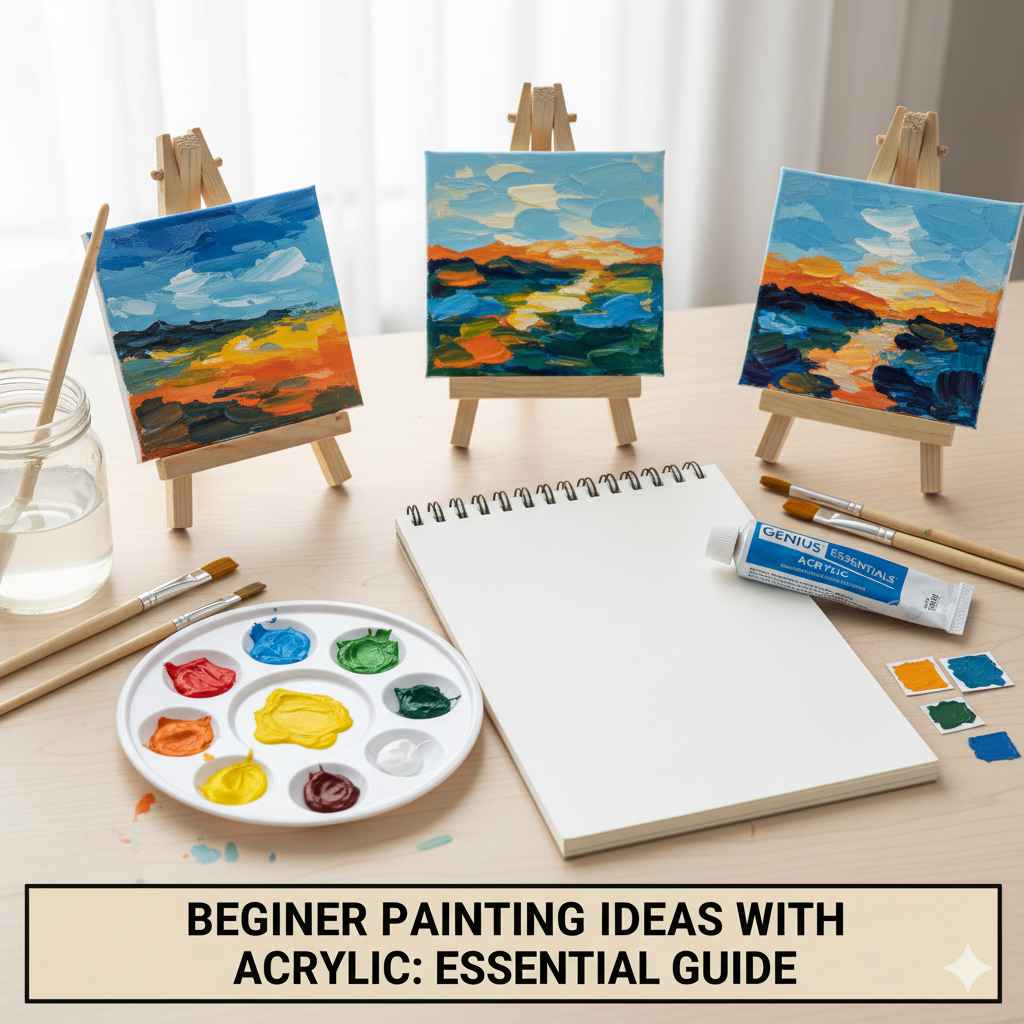
Beginner Painting Ideas With Acrylic: Essential Guide
Don’t know where to start with acrylic painting? This guide offers simple, engaging beginner painting ideas with acrylics that focus on easy techniques, fundamental concepts, and confidence-building projects. Learn what you need and try fun, achievable art today.
Welcome to the wonderful world of acrylic painting! It’s completely understandable if you’re looking at a blank canvas and a set of colorful paints and feeling a little unsure about where to begin. Acrylics are fantastic for beginners because they dry quickly and can be used in so many ways, like watercolors or oils. But all those possibilities can sometimes feel a bit overwhelming. Don’t worry, though! We’re going to walk through some super-simple yet satisfying painting ideas that will help you get comfortable with your brushes and paints. You’ll be creating your own art in no time, and it’s going to be a lot of fun. Get ready to discover how easy and rewarding acrylic painting can be!
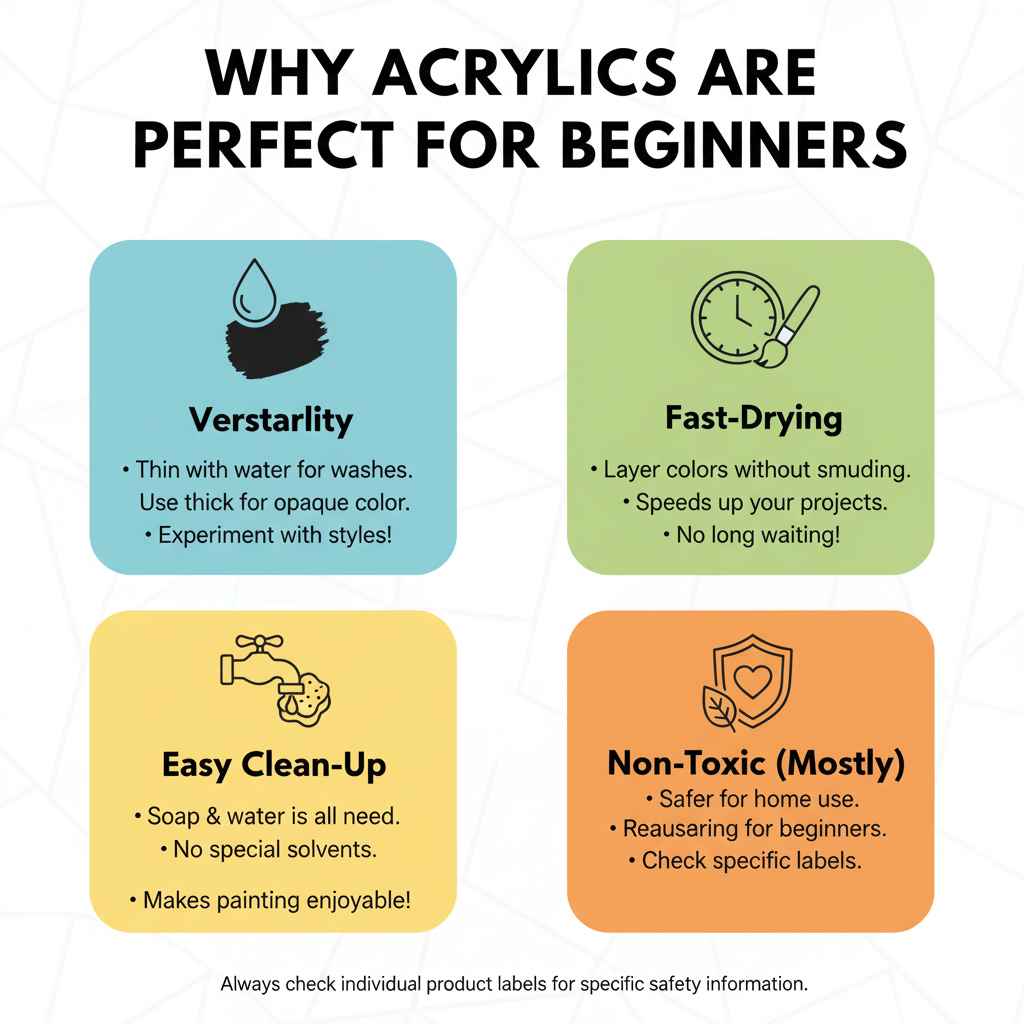
Why Acrylics are Perfect for Beginners
Acrylic paints are a favorite among new artists for several great reasons. Their versatility is a huge plus. You can thin them with water to get translucent washes, similar to watercolors, or use them straight from the tube for thick, opaque coverage like oil paints. This adaptability means you can experiment with many different styles right from the start. Plus, they dry incredibly fast! This is a lifesaver for beginners because it means you can layer colors without smudging your previous work, speeding up your painting process. No more waiting for hours for a layer to dry!
Another significant advantage is their cleanup. Unlike oil paints, which require special solvents, acrylics clean up easily with just soap and water. This makes the whole painting process much more enjoyable and less of a chore. The paints are also generally non-toxic, which is reassuring for anyone working in a home environment. These qualities combine to make acrylics an accessible, forgiving, and exciting medium for anyone dipping their toes into the art world.
Getting Started: Your Essential Acrylic Painting Toolkit
Before we dive into the fun ideas, let’s make sure you have the basic supplies. You don’t need to break the bank to get started. A few key items will set you up for success. Think of this as your starter kit – you can always add more as you explore your artistic journey.
Must-Have Supplies for Beginner Acrylic Painting
- Acrylic Paints: Start with a basic set. Look for a set that includes primary colors (red, yellow, blue), black, and white. These will allow you to mix almost any color you can imagine. Brands like Arteza, Liquitex Basics, or even craft store brands can be great for beginners.
- Brushes: You don’t need a huge collection. A few synthetic brushes in different sizes are perfect. Aim for a round brush (for details and lines) and a flat brush (for broader strokes and filling spaces). A medium size (like a #8 or #10) for each shape is a good start.
- Surfaces: Canvas panels or stretched canvases are popular and readily available. For practice, even thick paper designed for acrylics or watercolor paper (at least 140lb/300gsm) will work nicely.
- Palette: This is where you mix your paints. A simple plastic palette, a ceramic plate, or even wax paper taped to a board will do. Disposable palettes or a “stay-wet” palette (which keeps paints moist longer) are also good options.
- Water Container: Two jars or cups are ideal – one for rinsing your brush and one for clean water to thin your paints.
- Paper Towels or Cloth Rags: Essential for drying your brushes, wiping up spills, and creating texture.
- Easel (Optional): Not strictly necessary for beginners, but an easel can help you work at a comfortable angle and see your painting more easily. You can also prop your canvas against a stack of books.
- Protective Gear: An apron or old clothes are a good idea to protect your clothing.
Beginner Painting Ideas with Acrylic: Simple & Fun Projects
Now for the exciting part! These ideas are designed to be easy to follow, help you practice fundamental techniques, and give you that wonderful feeling of accomplishment. We’ll focus on simple subjects and straightforward approaches.
1. The Monochromatic Landscape
This exercise is brilliant for understanding values (lightness and darkness) and color mixing without the complexity of multiple hues. Monochromatic means painting with variations of a single color.
What you’ll need:
- One tube of a single color, like Ultramarine Blue or Sap Green.
- White acrylic paint.
- Your brushes, water, palette, and surface.
How to do it:
- Mix your darks: Use your chosen color straight from the tube for your darkest areas (e.g., the base of a mountain, deep shadows).
- Create mid-tones: Gradually add small amounts of white paint to your chosen color to create lighter variations. Mix several shades.
- Paint your scene: Start blocking in shapes. Use your darkest mix for the furthest elements or deepest shadows. Use your lighter mixes for closer objects or areas hit by light.
- Layer and blend: Build up your landscape with these different shades. You can aim for a simple mountain range against a sky, or rolling hills. Pay attention to how the light and shadow define the forms. The goal is to create depth using only shades of one color.
Why it’s great for beginners: It forces you to focus on light and shadow, which are fundamental to creating form and realism. You learn how to create lighter shades by adding white, a crucial skill for acrylic painting.
2. Abstract Color Blocks
Abstract art is all about shapes, colors, and composition. This project lets you play with color harmony and clean lines.
What you’ll need:
- A few colors of your choice (a complementary pair, like blue and orange, or a triad like blue, yellow, red can be fun).
- Plenty of white paint.
- Painter’s tape.
- Brushes and surface.
How to do it:
- Plan your layout: Lightly sketch out some geometric shapes or lines on your canvas. These can be squares, rectangles, triangles, or even irregular polygons.
- Tape it off: Carefully apply painter’s tape along the lines of your shapes. Press the tape down firmly to prevent paint bleeding.
- Fill with color: Paint inside each taped-off section with different colors. You can paint them solid or mix shades to create lighter/darker versions for depth.
- Let it dry: Allow the paint to dry completely. This is important!
- Peel the tape: Slowly and carefully peel off the painter’s tape. You should have crisp, clean lines separating your color blocks.
Why it’s great for beginners: It’s forgiving! Mistakes in color mixing aren’t as noticeable in abstract work. The use of painter’s tape guarantees sharp edges, giving you a professional-looking result even with simple shapes.
3. Simple Still Life: Fruit Bowl
A classic for a reason! Painting still life helps you observe shapes, colors, and light in the real world and translate them onto your canvas.
What you’ll need:
- A few pieces of fruit (apples, oranges, bananas are great as they have simple shapes and vibrant colors).
- A simple background object or cloth.
- Your full range of paints, brushes, etc.
How to do it:
- Set up your scene: Arrange your fruit on a table. Pay attention to how the light falls on them – notice the highlights and shadows.
- Sketch the shapes: Lightly sketch the basic outlines of the fruit and any background elements onto your canvas. Don’t focus on tiny details, just the main forms.
- Block in base colors: Use the general color of each fruit as a base layer. For an apple, this might be a reddish-orange. For an orange, it’s orange. Use relatively thin paint for this initial layer.
- Add shadows: Mix a darker shade of your base color (e.g., add a touch of blue or brown to red for a darker apple). Apply this to the shadowed areas of the fruit and the cast shadow.
- Add highlights: Mix a lighter shade of your base color (add white or a touch of yellow). Apply this to the areas where the light hits the fruit most directly.
- Refine and blend: Use smaller brushes to add details and refine the shapes and transitions between light and shadow. You can use wet-on-wet blending (applying wet paint next to wet paint) or layer dry over dry to build up form.
Why it’s great for beginners: It teaches observation skills. You learn to see colors and shapes accurately and how light affects them. Starting with spheres and simple curves is less intimidating than complex subjects.
4. Easy Sky & Clouds
The sky is a dynamic and beautiful subject that offers endless practice opportunities for blending.
What you’ll need:
- Sky colors: Blue (various shades), White. You might add a touch of yellow or pink for a sunrise/sunset.
- A larger brush for blending.
- Surface, water, palette.
How to do it:
- Base color: Start with a wash of your lightest sky color (e.g., a pale blue or white mixed with a hint of blue) at the top, fading to a lighter shade towards the horizon.
- Add darker blues: Introduce slightly darker blues higher up or in areas where you want more depth.
- Blend, blend, blend: While the paint is still wet, use a clean, slightly damp brush to gently blend the colors together. Use horizontal strokes for a sunset/sunrise, or sweeping motions for a bright day. The key is to soften the transitions.
- Create clouds: For fluffy clouds, use white paint. You can dab it on with a brush, or even use the edge of a paper towel. Add touches of grey (mixing blue and white with a tiny bit of brown or black) into the cloud shadows to give them form.
- Refine: Add a few wispy clouds or some brighter highlights where the sun might be hitting.
Why it’s great for beginners: Skies are forgiving. Even if your blending isn’t perfect, it often looks artistic. It’s an excellent way to practice soft transitions and learn how different blues can create different moods.
5. Dot Art & Pattern Exploration
Dot art is incredibly therapeutic and requires very little complex drawing skill. It’s all about repetition and color combinations.
What you’ll need:
- A variety of acrylic paint colors.
- A surface (canvas, paper, or even a wooden object).
- A round bristled brush (for uniform dots) or even the back of a paintbrush handle/pencil eraser for perfect circles.
How to do it:
- Choose a background: You can paint a simple solid background color first and let it dry, or work directly on a white or toned surface.
- Plan your pattern: Decide if you want to create a radial pattern (like a mandala), a geometric grid, or a more free-flowing arrangement of dots.
- Start dotting: Dip your brush or dotting tool into the paint, making sure not to overload it. Apply the dots in your chosen pattern. Try varying the size of the dots for interest.
- Experiment with color: Play with color combinations. You can create analogous schemes (colors next to each other on the color wheel) or contrasting (complementary) colors.
- Build layers (optional): Once some dots are dry, you can add smaller dots on top or around them to create depth and complexity.
Why it’s great for beginners: It’s relaxing and repetitive. You don’t need to worry about realistic drawing. The focus is on color and pattern, which are essential elements of design. You can achieve intricate-looking results with simple tools.
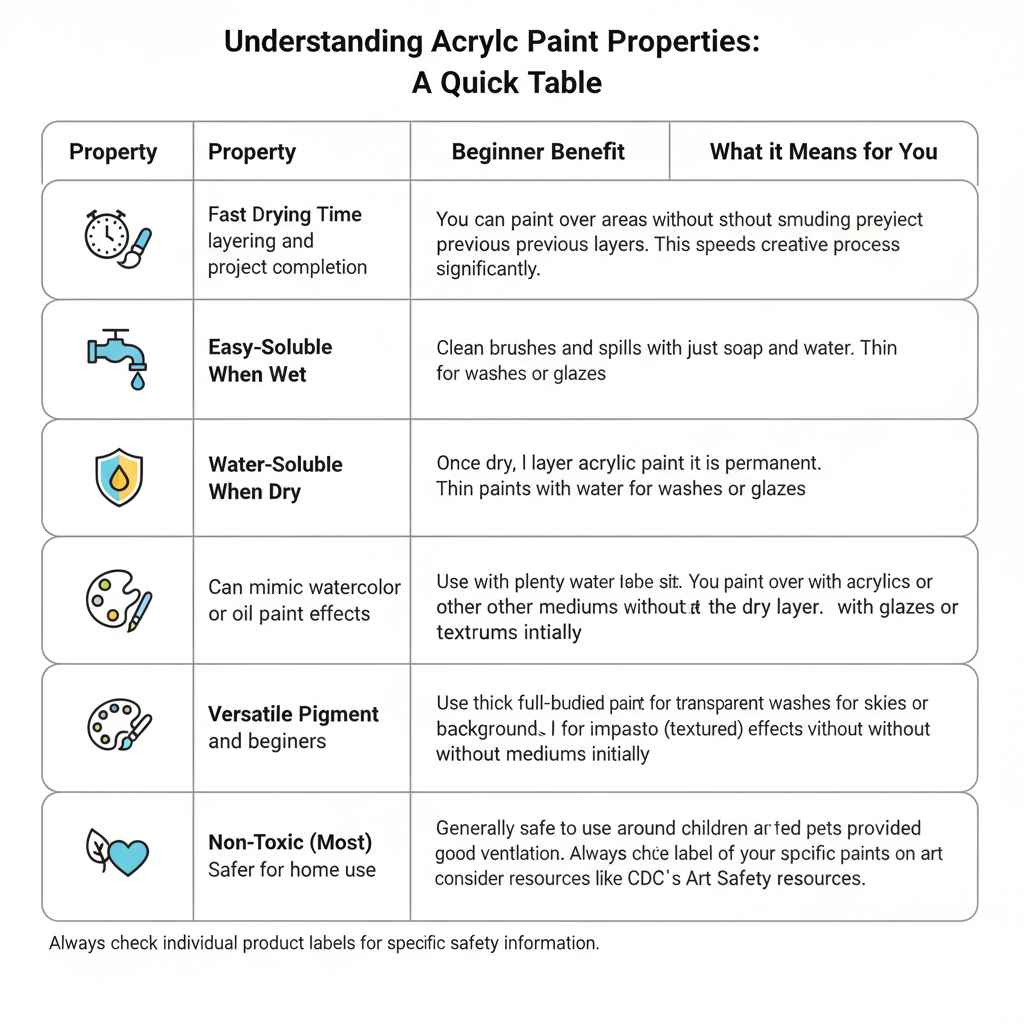
Understanding Acrylic Paint Properties: A Quick Table
Knowing how acrylics behave will help you feel more confident. Here’s a look at some key properties and how they benefit beginners:
| Property | Beginner Benefit | What it Means for You |
|---|---|---|
| Fast Drying Time | Allows for quick layering and project completion. | You can paint over areas without smudging previous layers. This speeds up the creative process significantly. |
| Water-Soluble When Wet | Easy cleanup and versatile application. | Clean brushes and spills with just soap and water. Thin paints with water for washes or glazes. |
| Waterproof When Dry | Creates durable layers that won’t lift. | Once dry, a layer of acrylic paint is permanent. You can paint over it with acrylics or even other mediums without disturbing the dry layer. Experiment with glazes or textures on top. |
| Versatile Pigment | Can mimic watercolor or oil paint effects. | Use with plenty of water for transparent washes for skies or backgrounds. Use thick, full-bodied paint for impasto (textured) effects without mediums initially. |
| Non-Toxic (Most) | Safer for home use and beginners. | Generally safe to use around children and pets provided good ventilation. Always check the label of your specific paints. For more information on art safety, consider resources like CDC’s Art Safety resources. |
Note: Always check the specific product labeling for toxicity information. Professional-grade paints may contain more pigments and fewer fillers, but student-grade paints are excellent for learning.
Tips for Success: Building Your Confidence
Starting something new can always feel a bit daunting, but remember that every artist was once a beginner. Here are some tips to help you enjoy the process and build your confidence:
- Don’t Fear the Blank Canvas: It’s not an empty void; it’s an opportunity! Start with a light sketch or a simple wash of color to break the intimidating whiteness.
- Embrace “Mistakes”: In acrylics, what might seem like a mistake can often be turned into something interesting. Fast drying allows you to paint over areas you’re not happy with. Acrylics are very forgiving!
- Experiment with Color Mixing: Dedicate some time just to mixing colors. See what happens when you add a tiny bit of red to green, or how much yellow you need to make orange lighter. This is a foundational skill.
- Start Small: You don’t need to tackle a giant mural. Begin with small canvases or panels. This reduces pressure and allows you to complete projects more quickly, giving you a sense of accomplishment.
- Copy What You Like (for practice): Find an artist whose style you admire or a simple image online and try to recreate it. This is a fantastic way to learn techniques and understand how colors and forms are built. Be sure to keep it for personal practice and not to claim it as your own original work.
- Watch Tutorials: YouTube is a treasure trove of beginner acrylic painting tutorials. Seeing someone else demonstrate techniques can be incredibly helpful.
- Focus on One Element at a Time: Don’t try to master everything at once. On one painting, focus on getting your colors mixed right. On another, focus on brushstrokes.
Frequently Asked Questions (FAQ) About Beginner Acrylic Painting
Q1: What is the easiest thing to paint with acrylics for a beginner?
A1: Simple shapes like fruit, abstract color blocks, easy landscapes (like just the sky with clouds), or mandala-style dot art are generally the easiest and most rewarding for beginners. They focus on basic color application and composition without requiring complex drawing skills.
Q2: How much acrylic paint do I actually need to buy?
A2: For a beginner, a small set of student-grade acrylics is plenty. Aim for colors like Titanium White, Mars Black, Cadmium Red (hue), Cadmium Yellow (hue), and Ultramarine Blue. These primaries plus black and white let you mix a wide range of colors needed for most beginner projects.