Can Cherry Pits Be Planted? Your Best Proven Guide
Yes, you can absolutely plant cherry pits and grow a new tree. The key is a process called cold stratification, where you mimic winter conditions by keeping the clean pit in a moist, cold environment (like your refrigerator) for 2–3 months before planting it in soil. This simple step is essential to break the pit’s dormancy and trigger germination.
Have you ever enjoyed a delicious, sweet cherry and wondered, “Could I grow a tree from this little pit?” It’s a common thought, and I’m here to tell you that the answer is a big, resounding yes! Many people think it’s too complicated, but it’s one of the most rewarding projects you can do. It doesn’t require any special skills, just a bit of patience and the right steps.
Growing a cherry tree from a pit is a wonderful way to connect with nature and maybe, just maybe, enjoy your very own homegrown cherries in a few years. In this guide, I’ll walk you through everything, step-by-step. We’ll make it simple, clear, and fun. Let’s get our hands dirty and turn that tiny pit into a beautiful cherry tree.
First Things First: Understanding Your Cherry Pit
Before we jump into planting, it’s helpful to know a little about the pit itself. A cherry pit is a seed, protected by a hard outer shell. Inside that shell is a tiny embryo just waiting for the right conditions to sprout and grow into a tree. However, not all cherry pits are created equal.
Pits from store-bought cherries can sometimes be a bit of a gamble. These cherries might come from trees treated to prevent sprouting, or they may have been refrigerated for long periods, which can affect their viability. For the best chance of success, try using pits from fresh, locally grown cherries, maybe from a farmers’ market or even a neighbor’s tree (with permission, of course!). Pits from ripe, healthy fruit will always give you a better starting point.
It’s also important to remember that the tree grown from a pit might not produce the exact same type of cherry you ate. This is because many commercial cherries are hybrids. Your new tree will be a unique individual, which is part of the fun! It could be similar to the parent, or it could be a delightful surprise.

The Secret Ingredient for Success: Cold Stratification
If there’s one “secret” to growing a cherry tree from a pit, this is it: cold stratification. It sounds fancy, but it’s a very simple concept. Nature is smart. A cherry pit that falls to the ground in summer knows it needs to wait until after winter to sprout. If it sprouted right away, the tiny seedling would be killed by the first frost.
To survive, the pit goes into a dormant state. It needs to experience a long period of cold, moist conditions to break this dormancy. This process is called stratification. We are simply going to mimic Mother Nature’s winter indoors to trick the pit into thinking it’s time to grow.
Without this cold treatment, your cherry pit will likely just sit in the soil and do nothing. It’s the single most important step in the entire process, and don’t worry—it’s super easy to do.
What You Will Need
Gathering your supplies beforehand makes everything go smoothly. Here is a simple checklist of what you’ll need:
- Fresh, ripe cherries (about 10–15 pits to increase your chances)
- A bowl of warm water
- A soft brush or paper towel
- A resealable plastic bag or a small container with a lid (like a yogurt cup)
- A paper towel or a small amount of peat moss or sand
- A permanent marker
- A small pot (about 4-6 inches wide) with drainage holes
- Good quality potting mix
Your Step-by-Step Guide to Planting a Cherry Pit
Ready to get started? Let’s walk through this together. Follow these simple steps, and you’ll be well on your way to growing your very own cherry tree.
Step 1: Clean and Prepare the Pits
First, enjoy your cherries! Once you’ve eaten the fruit, it’s time to clean the pits. Any leftover fruit pulp can lead to mold, which will ruin the seed.
- Gather your pits in a small bowl.
- Pour warm water over them and let them soak for a few minutes to loosen any stubborn fruit bits.
- Use a soft brush (an old toothbrush works great) or a paper towel to gently scrub each pit until it’s completely clean.
- Rinse them one last time under cool water.
- Lay the clean pits out on a paper towel in a sunny spot to dry for a day or two. Don’t let them dry out for weeks—just long enough for the surface to be dry to the touch.
Step 2: Start the Cold Stratification Process
Now it’s time to give your pits their “winter nap.” This is the stratification step we talked about. The goal is to keep them cold and moist for about 10-12 weeks.
- Moisten a paper towel. It should be damp, not dripping wet. Squeeze out any excess water.
- Place your dried cherry pits onto the damp paper towel.
- Fold the paper towel over to cover the pits.
- Slide the paper towel with the pits inside into a resealable plastic bag. Don’t seal it completely; leave a tiny opening for a little air exchange. Alternatively, you can put them in a small container with a lid.
- Use a permanent marker to write the date on the bag or container. This helps you keep track of how long they’ve been chilling.
- Place the bag in your refrigerator. The vegetable crisper drawer is usually a perfect spot.
Now, you wait. Check on them every couple of weeks to make sure the paper towel is still moist. If it’s drying out, add a few drops of water. You also want to check for any signs of mold. If you see a moldy pit, remove it so it doesn’t spread to the others.
| Date | Action | Notes |
|---|---|---|
| August 1st | Clean pits and place in refrigerator | Mark the calendar for 10-12 weeks from this date. |
| August 15th | Check for moisture and mold | Paper towel is still damp. No mold visible. |
| September 1st | Check for moisture and mold | Added a few drops of water to the towel. |
| October 20th | Check for sprouting | Pits have been in the cold for over 10 weeks. Look for a tiny root emerging. |
Step 3: Planting Your Sprouted Pit
After about 10 to 12 weeks, it’s time to check for success. Carefully open your bag and inspect the pits. You might see that some of them have cracked open and a tiny root is starting to emerge. Success! If none have sprouted, don’t worry. Give them a few more weeks. If they still haven’t sprouted, they may still be viable, so it’s worth planting them anyway.
- Fill a small pot with good-quality potting mix. Moisten the soil so it’s damp but not waterlogged.
- Plant two or three of the healthiest-looking pits in each pot. Plant them about an inch deep. Planting a few gives you a better chance that at least one will grow into a strong seedling.
- Place the pot in a warm, sunny location, like a south-facing windowsill. Cherry seedlings love sunlight.
- Keep the soil consistently moist. Water it whenever the top inch of soil feels dry to the touch.
Within a few weeks, you should see a tiny green seedling push its way through the soil. Congratulations, you’ve grown a cherry tree!
Step 4: Caring for Your Young Cherry Tree
Your little seedling is delicate and needs your care to grow strong. Here’s what to do:
- Light: Give it plenty of light. If you don’t have a sunny window, you can use a grow light to help it along.
- Water: Keep the soil moist but never soggy. Overwatering can lead to root rot, which is a common problem for seedlings.
- Thinning: If more than one seedling sprouts in your pot, you’ll need to choose the strongest one and carefully snip the others at the soil line. This gives the strongest seedling all the resources it needs to thrive.
- Transplanting: Once your seedling is about 6-8 inches tall and has a few sets of healthy leaves, it may be ready for a larger pot. When all danger of frost has passed in the spring, you can start hardening it off to prepare it for a move outdoors. This means placing it outside in a sheltered spot for an hour on the first day, then gradually increasing the time it spends outside over a week or two.
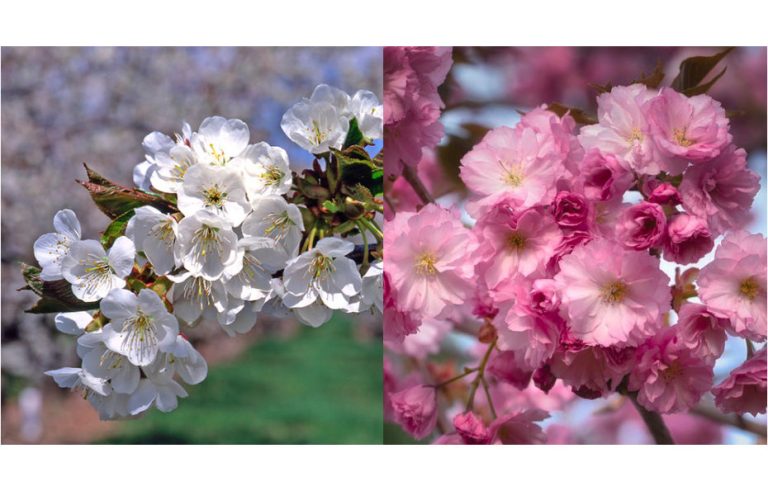
Choosing a Cherry Variety: Sweet vs. Tart
While you won’t know for sure what kind of cherries your tree will produce, most edible cherries fall into two categories: sweet and tart. Knowing a little about them can help you decide what you might prefer to grow if you have a choice of pits.
According to experts at the University of Minnesota Extension, stone fruits like cherries can be very rewarding for home gardeners. Sweet cherries are generally best for fresh eating, while tart cherries are prized for pies, jams, and cooking.
| Feature | Sweet Cherries (e.g., Bing, Rainier) | Tart Cherries (e.g., Montmorency, Morello) |
|---|---|---|
| Taste | Sweet, rich, and juicy | Sour, tangy, and acidic |
| Best Use | Eating fresh | Baking (pies), jams, sauces, drying |
| Tree Size | Can grow very large (up to 35 feet) | Generally smaller and more manageable (up to 20 feet) |
| Pollination | Often require another cherry tree nearby for pollination | Usually self-pollinating (one tree can produce fruit on its own) |
For a beginner, a tree from a tart cherry pit might be a bit easier, as they are often more resilient and self-pollinating. But don’t let that stop you from trying to grow a sweet cherry tree if that’s what you love!
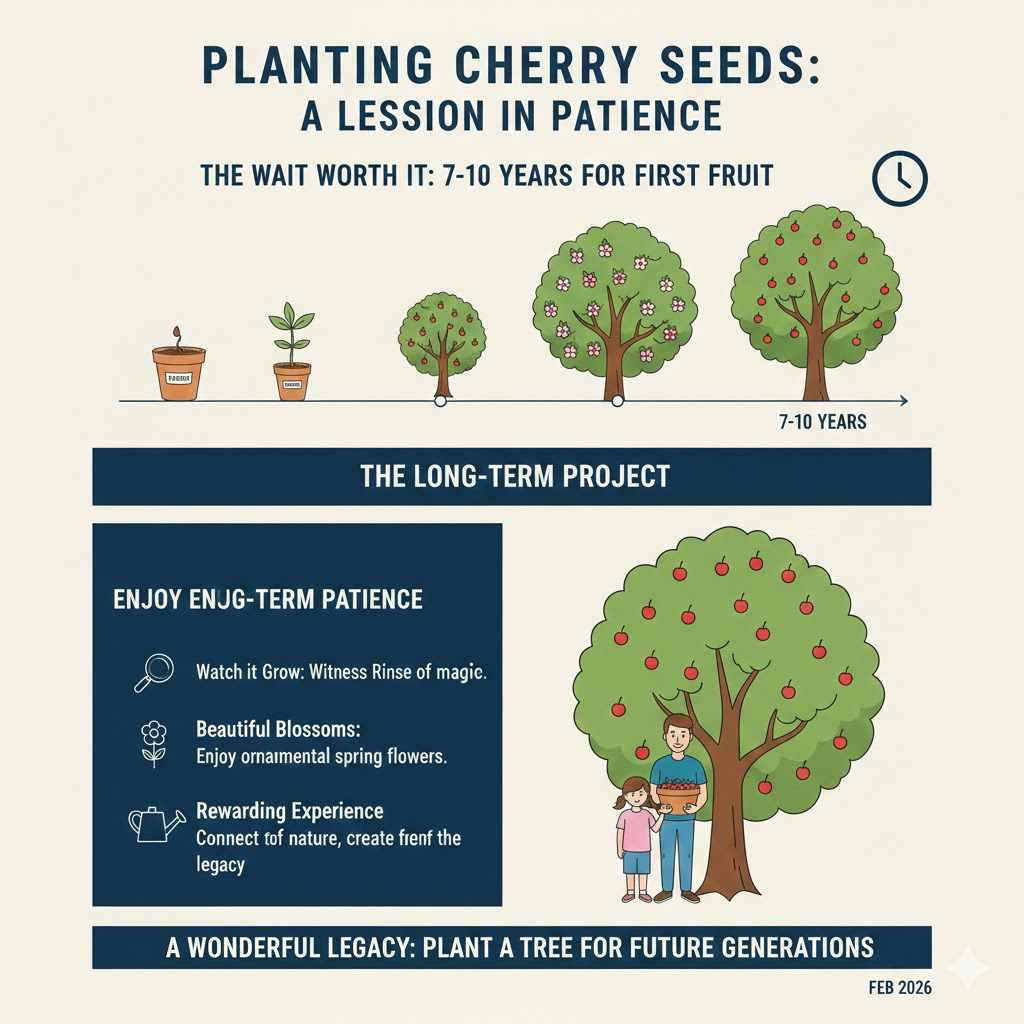
A Lesson in Patience: How Long Until You Get Fruit?
This is a marathon, not a sprint. Growing a tree from a pit is an incredibly rewarding experience, but it requires patience. A cherry tree grown from seed can take anywhere from 7 to 10 years before it’s mature enough to produce its first fruit.
Think of it as a long-term project. You get to watch something you started from a tiny pit grow into a beautiful, thriving tree. The journey is just as enjoyable as the destination. While you wait for fruit, you’ll have a lovely ornamental tree that will produce beautiful blossoms each spring.
Frequently Asked Questions (FAQ)
1. Can I just plant a cherry pit directly in my garden?
You can, but your chances of success are much lower. Planting a pit outdoors in the fall allows nature to do the cold stratification for you over the winter. However, the pit is exposed to squirrels, mice, and changing weather conditions. Controlling the process in your refrigerator gives you a much better and more reliable germination rate.
2. Will my new tree produce the same cherries I ate?
Probably not. Most cherries you buy are from grafted trees, which means they are cloned to produce a specific type of fruit. A tree grown from a pit is genetically unique, like a child. The fruit may be similar, smaller, or completely different. It’s a fun surprise!
3. How long does it take for a cherry tree grown from a pit to produce fruit?
Patience is key! It typically takes between 7 and 10 years for a cherry tree grown from seed to become mature enough to flower and produce fruit. Enjoy the process of watching your tree grow from a tiny seedling.
4. Do I need two cherry trees to get fruit?
It depends on the type. Tart cherry trees are usually self-fertile, meaning you only need one tree to get fruit. Many sweet cherry varieties, however, require a different cherry variety nearby for cross-pollination. Since you won’t know the exact genetics of your seed-grown tree, planting two or three trees is a good idea if you have the space.
5. Why didn’t my cherry pit sprout?
There are a few possible reasons. The pit might not have been viable to begin with (common with some store-bought fruit), it may have dried out too much, or it may not have been stratified for long enough. This is why it’s always a good idea to start with 10-15 pits to increase your odds of getting at least a few to sprout.
6. What’s the best time of year to start this process?
Late summer or early fall is the perfect time. If you start the stratification process in August or September, your pits will be ready to plant indoors in pots by November or December. This gives your seedlings the whole winter to grow strong inside before you move them outdoors in the spring.
7. My pit molded in the fridge. What did I do wrong?
Mold is usually caused by too much moisture or leftover fruit pulp on the pit. Make sure your pits are scrubbed completely clean before you start. Also, ensure your paper towel is damp, not soaking wet. If you see a spot of mold, it’s best to throw that pit away to prevent it from spreading.
Conclusion: Your Gardening Adventure Awaits
So, can cherry pits be planted? You now know the answer is a definite yes. With a bit of cleaning, a period of cold and moist stratification in your fridge, and some tender loving care, you can watch a simple pit transform into a living, growing tree.
This is more than just a gardening project; it’s an exercise in patience and a beautiful connection to the food we eat. Don’t be discouraged if your first attempt doesn’t work—gardening always involves a little trial and error. Grab some fresh cherries, save those pits, and give it a try. You have nothing to lose and a beautiful, and possibly fruitful, tree to gain. Happy planting!