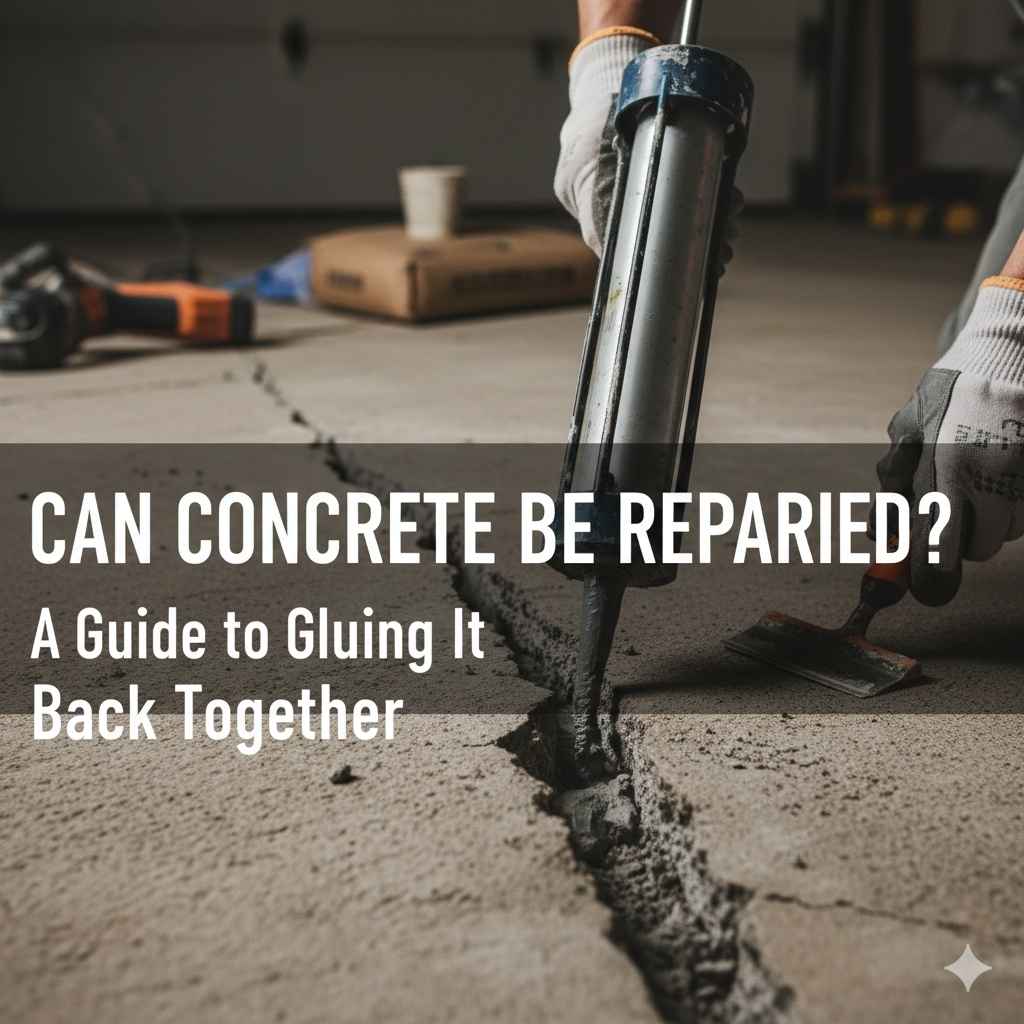
Can Concrete Be Repaired? A Guide to Gluing It Back Together
Lots of people ask, Can You Glue Concrete Back Together Successfully? It seems tricky, right? You might think it’s impossible, or worry about making a mess. Don’t sweat it! We’ll explore this together and find out what works best. We’ll explore step-by-step how to tackle this common project, making it easy to fix cracks and breaks. Get ready to learn!
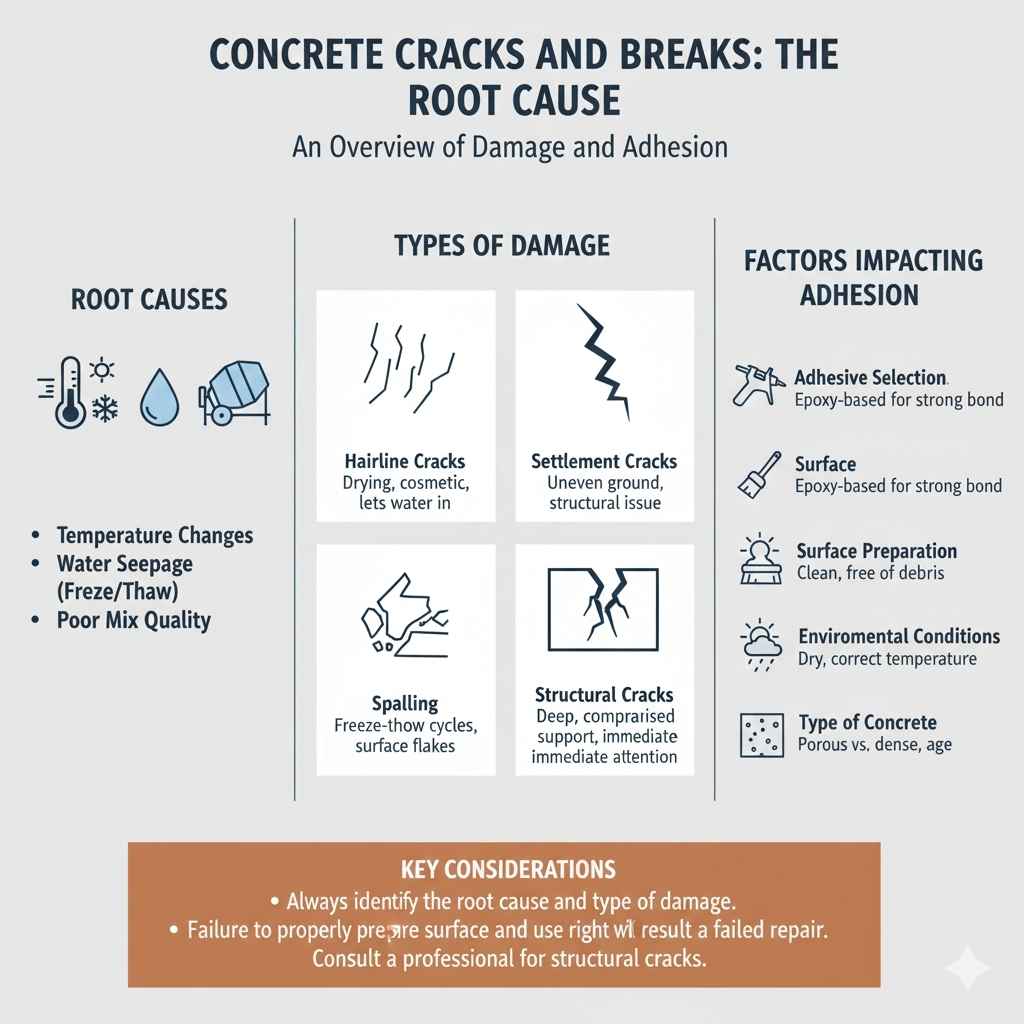
Concrete Cracks and Breaks: The Root Cause
Concrete, though tough, isn’t invincible. It cracks and breaks for various reasons. Temperature changes are a big factor. Concrete expands in heat and shrinks in cold, leading to stress. Water also plays a significant role. If water seeps into the concrete and freezes, it expands, causing cracks. The quality of the original concrete mix matters, too. If it’s not mixed correctly, or the wrong type of cement is used, it can be weak. Also, the ground underneath can shift and move, causing cracks.
Understanding Different Types of Concrete Damage
Not all concrete damage is the same. There are different types of damage, each requiring a different approach. Surface cracks are shallow and often caused by weathering. These are usually cosmetic, but still need addressing. Cracks that go all the way through the concrete are more serious, as they can compromise the structure’s integrity. Spalling happens when the surface flakes or breaks off, often due to freezing and thawing. Identifying the type of damage helps you figure out the best way to fix it.
- Hairline Cracks: These are thin, barely visible cracks, often caused by the concrete drying. They don’t usually affect structural strength but can let water in over time.
- Settlement Cracks: These cracks are wider and appear when the ground beneath the concrete settles unevenly. They indicate a bigger issue.
- Spalling: This happens when the surface of the concrete flakes away. It’s often caused by freeze-thaw cycles and can worsen over time.
- Structural Cracks: These are serious cracks that run deep and could be a sign of compromised structural support. Immediate attention is needed.
Factors Impacting Concrete Adhesion
Several factors will impact whether concrete can be effectively glued. The type of adhesive is important. Some adhesives are made for concrete, and some aren’t. Surface preparation is critical. The concrete surfaces must be clean and free of loose debris. Humidity and temperature also play a role. Adhesives work better in specific conditions. Finally, the size and type of the break or crack matter. Bigger breaks need different approaches than small cracks.
- Adhesive Selection: Using the right adhesive is key. Epoxy-based adhesives are often the best choice for concrete because they create a very strong bond.
- Surface Preparation: Cleaning the concrete surface is a must. You will want to get rid of any dust, dirt, or loose particles to help the adhesive stick well.
- Environmental Conditions: Concrete glue does best in a dry environment with the right temperature range. Extreme temperatures or humidity can interfere with the curing process.
- Type of Concrete: The type of concrete will make a difference. Older or more porous concrete might need more prep work than newer, denser concrete.
Choosing the Right Adhesive for Gluing Concrete
Picking the correct adhesive is vital when fixing concrete. The best choice is often an epoxy-based adhesive, as it forms a very strong bond. There are different kinds of epoxy, and some are better than others for specific jobs. You can also explore cement-based adhesives, but they might not be as strong. When picking an adhesive, consider its strength, how easy it is to use, and whether it’s suitable for outdoor use or weather exposure.
Examining Epoxy Adhesives in Depth
Epoxy adhesives are popular for gluing concrete. They consist of two parts: resin and hardener. When combined, they start a chemical reaction that creates a strong bond. Epoxy is known for its incredible strength and ability to stick to concrete. It’s also resistant to water and chemicals, making it suitable for outdoor use. Various types of epoxy are available, each offering different set times and strengths. Some epoxy adhesives can even be used underwater. Make sure to check the instructions for use.
- Strength: Epoxy is famous for its incredible strength. It can hold heavy loads and resist strong forces.
- Durability: Epoxy adhesives are resistant to water, weather, and chemicals, making them ideal for outdoor uses.
- Versatility: They come in a variety of types, including options designed for wet conditions or fast curing times.
- Ease of Use: Most epoxy adhesives are easy to mix and apply, making them suitable for beginners.
Comparing Adhesive Options: Beyond Epoxy
While epoxy is often the go-to, other adhesive choices exist for concrete repair. Cement-based adhesives are a different possibility, useful for filling cracks and bonding concrete. They may not be as strong as epoxy but can be easier to find and work with. Polyurethane adhesives offer flexibility and are suitable for applications where some movement is expected. Acrylic adhesives can also be used but may not be as durable for heavy-duty use. Consider the specific needs of your project when choosing.
| Adhesive Type | Strengths | Weaknesses | Best For |
|---|---|---|---|
| Epoxy | Very strong, durable, water-resistant | Can be more expensive, requires careful mixing | Heavy loads, outdoor use |
| Cement-Based | Easy to use, often more affordable | Not as strong as epoxy, less water-resistant | Filling cracks, general repairs |
| Polyurethane | Flexible, good for movement | Strength varies | Areas with expected movement, expansion joints |
| Acrylic | Good for general purpose | Less durable than epoxy or polyurethane | Smaller repairs, indoor use |
How to Prepare Concrete for Gluing and Repair
Getting ready is very important before gluing concrete. The surfaces need to be perfectly clean and prepped. You’ll need to remove any loose material like dirt, dust, or old adhesive. A wire brush and a concrete grinder can be helpful tools. Depending on the damage, you might need to make the surface a bit rough to help the adhesive stick. Once the surface is clean and prepared, you’ll be ready to apply the adhesive.
Surface Cleaning and Debris Removal
A clean surface is crucial for any adhesive to work well. Begin by removing all loose debris. Use a wire brush to get rid of any dirt, rust, or loose concrete. If there’s oil or grease, you will need a degreaser. Next, rinse the area with water and let it dry completely. For deep cracks or damaged areas, you might need to use a concrete grinder to smooth the edges and remove any weak material. This ensures that the adhesive has a solid surface to stick to.
- Wire Brushing: Remove loose particles, rust, and any weak concrete. This step ensures a clean surface.
- Washing and Drying: Clean the area with water and a mild detergent, especially if there’s any oil or grease. Let the concrete dry completely.
- Concrete Grinding: Use a concrete grinder to smooth any rough edges or remove any damaged concrete. This will help with the bond.
- Dust Removal: Use a shop vacuum to clear away any remaining dust from cleaning or grinding. This ensures a clean surface.
Achieving the Correct Surface Texture for Bonding
Sometimes, just cleaning isn’t enough. You may also need to change the surface texture. Slightly roughening the concrete can improve the adhesive’s grip. This can be done by using a wire brush or a concrete grinder. This roughening creates tiny pores where the adhesive can grip and create a stronger bond. The idea is to create a slightly rough surface. The right texture is like getting a good grip – it means that the adhesive can bond better.
- Wire Brush: For smaller projects, a wire brush can be used to lightly roughen the surface.
- Concrete Grinder: A concrete grinder is helpful for larger areas. It removes a thin layer of concrete and creates a rough surface.
- Sandblasting: This is a very effective way to prepare the surface. It uses high-pressure sand to clean and roughen the concrete.
- Etching with Acid: Some products contain acid that slightly etches the concrete surface. Always follow the manufacturer’s instructions.
Gluing Concrete Back Together Successfully: A Step-by-Step Guide
Let’s find out how to glue concrete together. First, ensure your area is clean and ready. Then, mix your adhesive according to the manufacturer’s instructions. Apply the adhesive to both surfaces of the break, and carefully bring the pieces together. Hold them in place. This can be done with clamps, tape, or weights. Let the adhesive dry completely. This might take a few hours or even a full day, depending on the adhesive and the environment. Afterward, you can remove the clamps or tape and inspect your work.
Applying Adhesive to the Broken Surfaces
Properly applying the adhesive is the next step. Following the instructions on the adhesive is key. Mix the adhesive thoroughly, usually a two-part mixture, until it is a consistent color. Apply the adhesive to both surfaces of the concrete, ensuring complete coverage. If you are dealing with a crack, use a caulk gun to squeeze the adhesive deeply into the crack. For larger breaks, use a trowel or putty knife to spread the adhesive evenly. This step is about getting full coverage. The bond’s strength depends on it.
- Mixing the Adhesive: Mix the adhesive thoroughly. Make sure it’s completely combined. Read the directions for the ideal ratio.
- Applying to Both Surfaces: Apply adhesive to both sides of the break. You want to cover both surfaces so that there is no air.
- Crack Application: For cracks, inject the adhesive deep into the crack, making sure it fills the entire space. A caulking gun is often helpful.
- Larger Breaks: For larger areas, spread the adhesive evenly using a trowel or putty knife. A consistent layer is important.
Securing the Pieces: Clamping, Taping, and Supporting
After applying the adhesive, the pieces must be held in place while it dries. The method you use will depend on the size and shape of the concrete. Clamps are very useful for holding things tightly together. Tape can be used for smaller jobs. Weights can also be used if the pieces are flat and stable. The most important thing is to make sure the pieces stay put during the curing process. This is the moment when the adhesive hardens. How well you do this affects the final strength and appearance.
- Clamps: Clamps can offer firm pressure. Make sure the clamps are distributed evenly to prevent uneven bonding.
- Tape: Tape is helpful for smaller pieces or if clamps are not an option. Make sure to use strong tape.
- Weights: Place heavy objects on top of the concrete to hold it together. Ensure the weight is evenly distributed.
- Support Structures: For larger or oddly shaped pieces, you might need to create a temporary support structure.
Post-Repair Steps and Finishing Touches
Once the adhesive has fully dried, it’s time to assess your work. You’ll remove the clamps or tape and carefully inspect the repair. If there’s any excess adhesive, you will want to get rid of it. You may also want to use a concrete filler or patching compound to smooth out any uneven spots or cracks. After that, you can consider painting or sealing the repaired area for protection and a finished look. Finishing touches make the repair look seamless.
Removing Excess Adhesive and Smoothing Surfaces
After the adhesive has fully cured, there might be excess adhesive around the repair. You will need to remove it. This will make the repair look cleaner and better. Use a putty knife or scraper to carefully trim off any excess adhesive. Be careful not to damage the concrete. If you notice any small gaps or uneven surfaces, use a concrete filler or patching compound to smooth them out. These small improvements will improve the overall look.
- Scraping Excess: Carefully remove any excess adhesive. A sharp putty knife or scraper can help to do this. Be careful not to damage the surface.
- Filling Gaps: Use a concrete filler or patching compound to fill any small gaps or cracks.
- Sanding: Once the filler has dried, you can lightly sand the area to get a smooth, even surface.
- Cleaning: Wipe away any dust or debris from sanding to prepare the surface for any finishing touches.
Protecting and Beautifying the Repaired Concrete
To finish the job, you might want to protect and make the repaired concrete look nice. One option is to paint the repaired area, which can match the original concrete and protect it from the elements. Applying a concrete sealer will protect the repair from water damage, stains, and wear and tear. Choose a sealer that’s appropriate for the location of your concrete. If the repair is in a high-traffic area, you will need a durable sealer. These extra steps will keep your repair looking good for longer.
- Painting: Painting can make the repair blend in with the original concrete. Choose a paint that is designed for concrete.
- Concrete Sealer: Concrete sealers protect against water, stains, and wear. They help the repair last.
- Choosing the Right Sealer: Select a sealer suitable for the conditions. Choose an exterior sealer for outdoor use and a durable sealer for high-traffic areas.
- Regular Maintenance: Regularly inspect and reapply sealant as necessary. This helps extend the life of your repair.
Real-Life Examples of Concrete Gluing Success
Many examples show that gluing concrete works well in the real world. A common one involves repairing cracks in sidewalks and driveways. Homeowners often fix these cracks to stop water damage and maintain the look of their property. Another example is repairing concrete steps, making them safe and stable again. Successful repairs help buildings and structures last longer.
- A homeowner repaired a large crack in their driveway using epoxy adhesive. After cleaning the crack and applying the adhesive with a caulk gun, they used clamps to hold the pieces together. After a day, they removed the clamps and the driveway looked as good as new.
- A construction company used a specialized concrete adhesive to repair a broken concrete pillar supporting a porch roof. After thoroughly cleaning the broken faces and applying a high-strength adhesive, they secured the pillar with heavy-duty clamps. The repair was strong and withstood the elements.
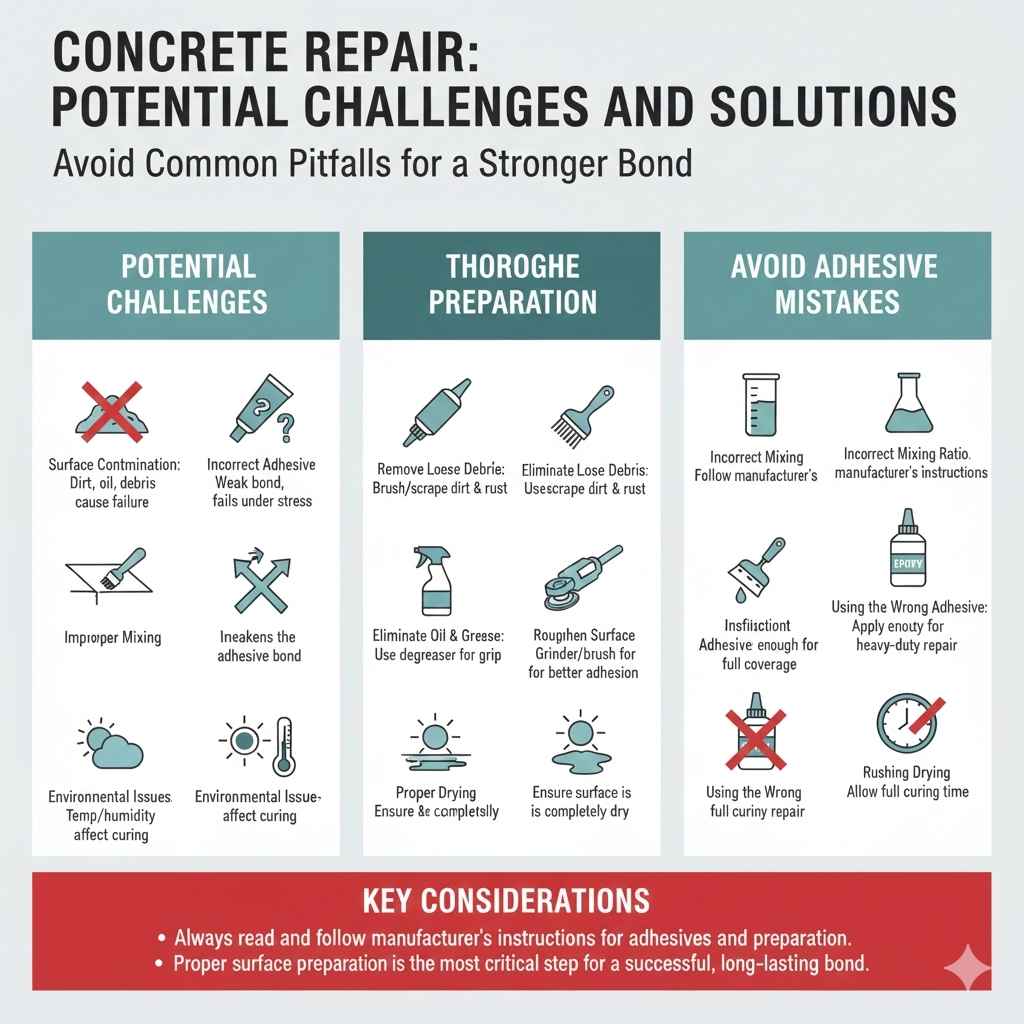
Potential Challenges and How to Avoid Them
While gluing concrete is often effective, you should know about potential challenges. One issue is improper surface preparation, which can cause the adhesive to fail. Using the wrong adhesive can also lead to issues. For instance, using a low-quality adhesive on a high-stress area can result in the bond breaking. To avoid these issues, always prepare the surface correctly, choose the right adhesive for the job, and follow all instructions carefully.
- Surface Contamination: Always make sure the surface is free of dirt, oil, and loose debris. Clean the area.
- Incorrect Adhesive Choice: Choose an adhesive suitable for the project. For example, use epoxy for heavy-duty repairs.
- Improper Mixing: Mix the adhesive correctly, following the manufacturer’s directions. Insufficient mixing may weaken the bond.
- Environmental Issues: Be mindful of temperature and humidity during the curing process. Extreme conditions can impact the bond.
The Importance of Thorough Surface Preparation
Good surface preparation is the most important step in gluing concrete. You must completely clean the surfaces to be joined. Remove any loose particles, oil, grease, or paint. The best way to accomplish this is to use a wire brush and a concrete grinder. Make the surfaces slightly rough for the adhesive to grip better. Taking the time to prepare the surfaces properly ensures that the adhesive can strongly bond to the concrete. This is the foundation of a successful repair.
- Removing Loose Debris: Use a wire brush or scraper to remove all loose particles, rust, and dirt. A clean surface is key.
- Eliminating Oil and Grease: Use a degreaser to remove any oil, grease, or other contaminants. This helps the adhesive to grip.
- Roughening the Surface: Use a wire brush or concrete grinder to slightly roughen the surface, improving the adhesive bond.
- Proper Drying: Ensure the surface is completely dry after washing to help the adhesive perform.
Common Adhesive Mistakes to Sidestep
Avoid common mistakes to get the best results. One mistake is not mixing the adhesive correctly. Always follow the manufacturer’s instructions. Another issue is applying too little or too much adhesive. Using the proper amount ensures a good bond without causing a mess. A final mistake is rushing the drying process, as you should allow enough time. By being careful and following these guidelines, you can ensure a successful and long-lasting concrete repair.
- Incorrect Mixing Ratio: Always follow the manufacturer’s instructions for mixing the adhesive. Incorrect mixing can ruin the bond.
- Insufficient Adhesive: Applying too little adhesive can cause a weak bond. Ensure complete coverage of the surfaces.
- Using the Wrong Adhesive: Select an adhesive suitable for the project and environment. Epoxy is generally recommended.
- Rushing the Drying Process: Allow the adhesive the proper time to fully cure. Don’t rush the process, as this can weaken the bond.
Frequently Asked Questions
Question: Can I use super glue on concrete?
Answer: It’s best not to use super glue on concrete. Super glue is typically designed for small, non-porous materials and won’t form a strong, lasting bond with concrete. Using the proper concrete-specific adhesives is more effective.
Question: What’s the best adhesive for gluing concrete to wood?
Answer: For gluing concrete to wood, an epoxy adhesive is usually the best choice. Epoxy forms a strong bond that works well with both materials. Look for an epoxy made for construction projects.
Question: How long does concrete adhesive take to dry?
Answer: Drying times can vary depending on the adhesive and environment. Most epoxy adhesives take anywhere from 24 to 72 hours to fully cure. Check the manufacturer’s instructions for specific times and recommendations.
Question: Can I glue concrete in wet conditions?
Answer: It’s generally not recommended to glue concrete in wet conditions. Moisture can prevent the adhesive from bonding properly. It’s best to apply adhesive to clean, dry surfaces for the best results.
Question: What is the strongest concrete glue?
Answer: The strongest concrete glue is often an epoxy-based adhesive. Epoxies offer excellent strength and durability, making them ideal for heavy-duty repairs.
Final Thoughts
So, Can You Glue Concrete Back Together Successfully? Absolutely! With the right approach and supplies, fixing cracks and breaks is possible. From understanding the root causes of damage to selecting the best adhesive and preparing the surfaces, you now have the steps to fix your concrete. You’ve explored the importance of surface preparation, the best adhesive options like epoxy, and how to properly apply and secure the pieces.
Remember to take your time, and follow the instructions carefully. By applying these steps, you’ll not only restore the look of your concrete but also maintain its function. Get started, and watch your concrete regain its strength and appearance!