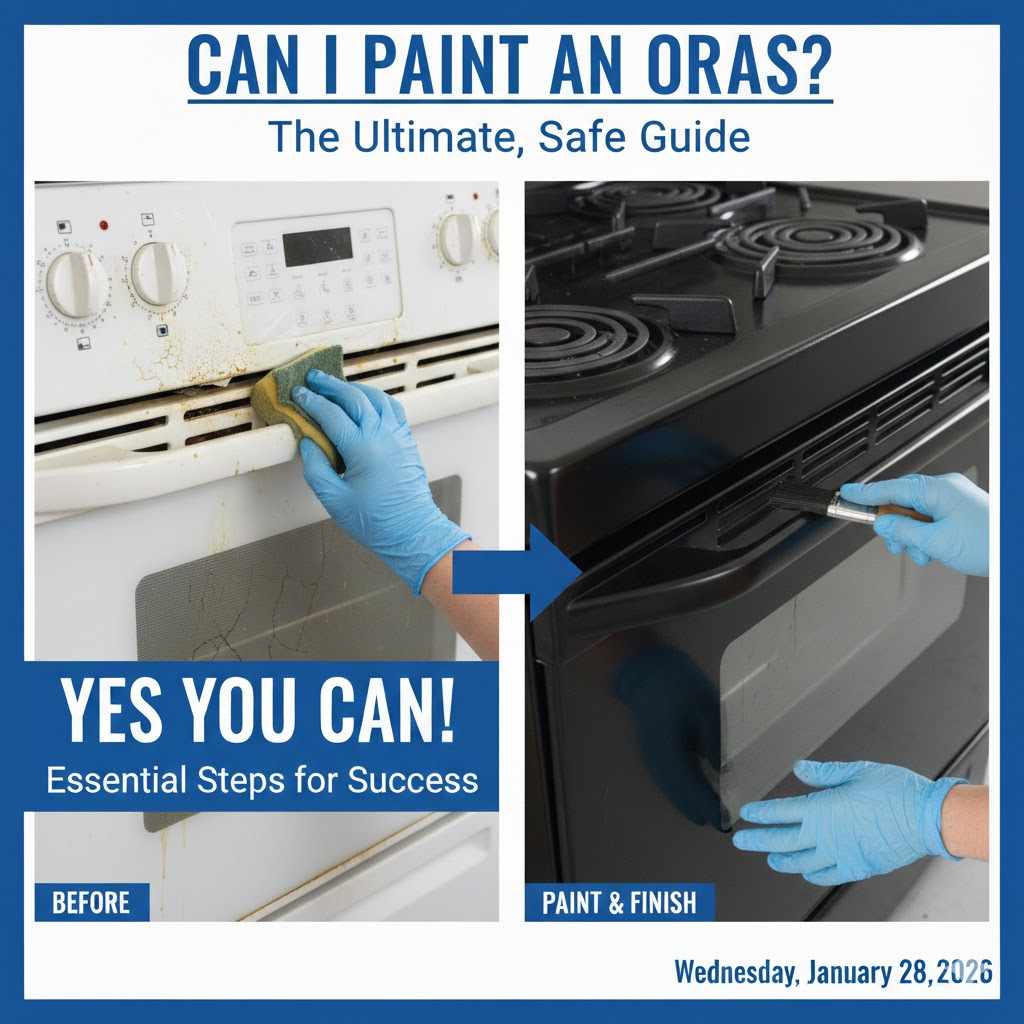
Can I Paint An Oven? The Ultimate, Safe Guide
Yes, you can absolutely paint the exterior of an oven, but you must use a specific high-heat or appliance epoxy paint. Do not use regular latex or spray paint, as it cannot withstand the temperatures and will peel, crack, and release unsafe fumes. Never paint the inside of an oven or any surface that makes direct contact with flames or food.
Does your old oven stick out like a sore thumb in your updated kitchen? Maybe it’s a perfectly functional appliance, but its dated color just doesn’t fit your style. You might wonder if you have to spend hundreds or even thousands on a new one. I’m here to tell you there’s a much simpler, budget-friendly solution.
Painting your oven is a fantastic DIY project that can completely transform its look. But it’s not as simple as grabbing any can of paint. It requires the right materials and a few careful steps to ensure a safe, beautiful, and long-lasting finish. Don’t worry, I’m going to walk you through everything you need to know, from picking the perfect paint to applying it like a pro. Let’s get that oven looking brand new again!
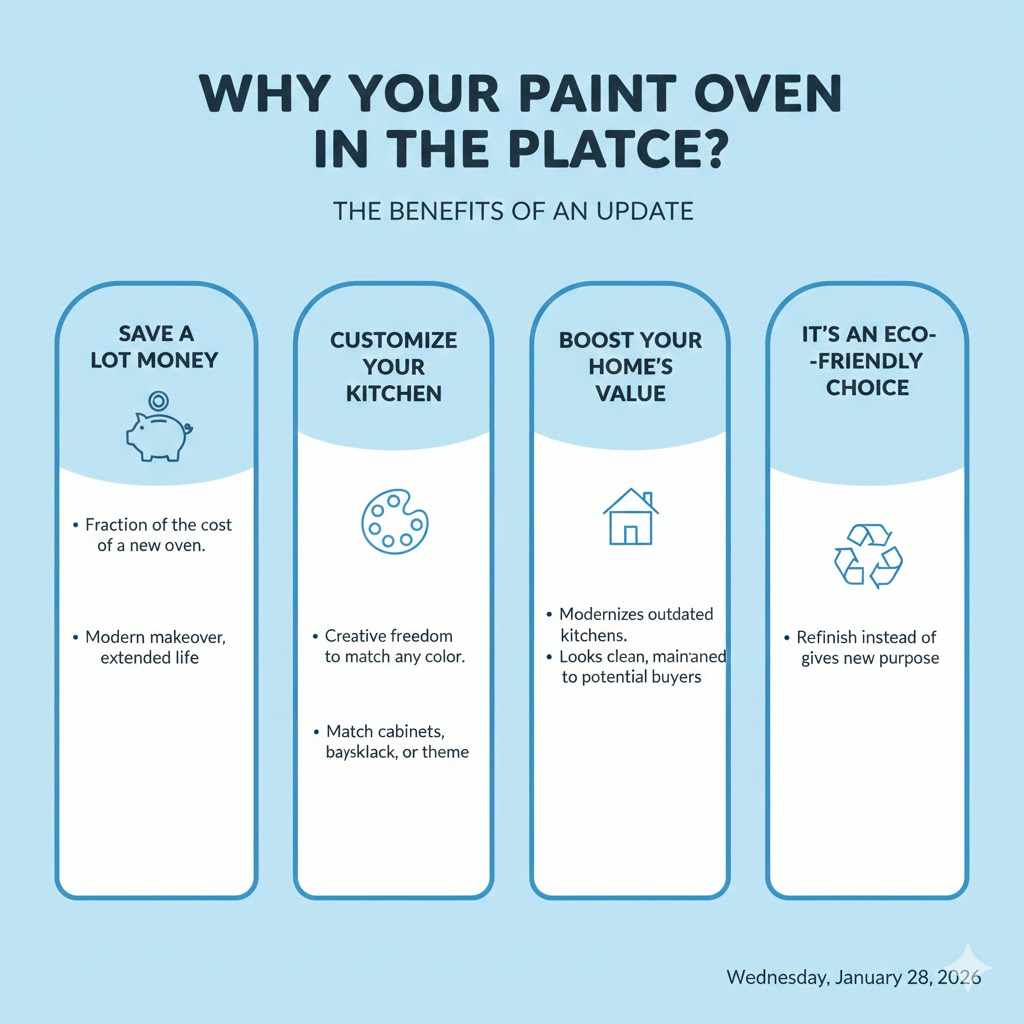
Why Paint Your Oven in the First Place?
Before we roll up our sleeves, let’s talk about why this is such a great project. Giving your oven a fresh coat of paint isn’t just about changing its color; it’s a smart move for several reasons.
- Save a Lot of Money: A new oven can be a major expense. For a fraction of the cost, you can give your current appliance a modern makeover and extend its life, saving your hard-earned cash for other projects.
- Customize Your Kitchen: Finding an oven in the exact color you want can be difficult, if not impossible. Painting it yourself gives you the creative freedom to match your cabinets, backsplash, or overall kitchen theme perfectly.
- Boost Your Home’s Value: An outdated appliance can make a whole kitchen look old. A freshly painted oven looks clean, modern, and well-maintained, which can be a small but significant detail if you’re looking to sell your home.
- It’s an Eco-Friendly Choice: Why send a perfectly good appliance to the landfill? Refinishing your oven is a sustainable choice that reduces waste and gives an old item a new purpose.
The Golden Rule: You MUST Use the Right Paint
This is the most important part of the entire project. If you remember one thing, let it be this: you cannot use regular wall paint or standard spray paint on an oven. It simply won’t work and can be dangerous. You need a paint specially formulated to handle high temperatures.
What is High-Heat Appliance Paint?
High-heat paint, often sold as “Appliance Epoxy” or “High-Heat Enamel,” is designed to withstand temperatures ranging from 200°F (93°C) all the way up to 1200°F (650°C) or more, depending on the formula. It creates a hard, durable finish that resists chipping, scratching, and of course, heat.
Regular paint would bubble, peel, and melt when the oven heats up. Worse, it could release toxic fumes into your home and kitchen, which is a serious health hazard. Always check the label on the paint can to confirm its temperature rating and ensure it’s suitable for appliances.
Types of High-Heat Paint
You’ll generally find two types of high-heat paint at your local hardware store. Each has its pros and cons, and the best choice depends on your comfort level and the finish you want.
| Paint Type | Pros | Cons | Best For |
|---|---|---|---|
| Spray Paint (Aerosol) |
|
| Beginners who want a professional, smooth look and have a well-ventilated space to work in. |
| Brush-On Paint |
|
| Touching up small areas or for those who prefer working with a brush and have more patience. |
Safety First! Your Non-Negotiable Prep Steps
As with any DIY project, safety is our top priority. We’re working with an electrical appliance and paint fumes, so a few precautions are essential. Don’t skip these steps!
- Unplug the Oven: Before you do anything else, unplug the oven from the wall. For a gas oven, you must turn off the gas supply line. Consult your appliance manual or a professional if you’re unsure how to do this safely. This is non-negotiable.
- Ventilation is Your Best Friend: High-heat paints have strong fumes. Work in a very well-ventilated area. Open all windows and doors. If you can, move the oven into a garage or outdoor space to paint. Use fans to circulate air and direct fumes outside.
- Wear Your PPE (Personal Protective Equipment): Protect yourself. Always wear a respirator mask designed for paint fumes, not just a simple dust mask. Goggles will protect your eyes from overspray, and gloves will keep your hands clean.
Your Project Checklist: Tools & Materials
Having everything ready before you start makes the process smooth and enjoyable. Here’s what you’ll need:
- High-Heat Appliance Epoxy Paint (Spray or Brush-on)
- High-Heat Primer (Recommended)
- Degreaser or a heavy-duty kitchen cleaner
- Sponges or microfiber cloths
- Fine-grit sandpaper (220-grit is perfect)
- Painter’s tape
- Drop cloths or plastic sheeting
- Respirator mask
- Safety goggles
- Gloves
How to Paint Your Oven Exterior: A Step-by-Step Guide
Ready to give that oven a new life? Just follow these steps carefully, and you’ll get a result you can be proud of. Take your time—patience is the key to a great finish.
Step 1: Prepare Your Workspace and Oven
First, make sure the oven is unplugged and the gas is off. Carefully slide the oven away from the wall so you can access the sides. Lay your drop cloths down on the floor and cover any nearby counters or cabinets to protect them from paint. Give yourself plenty of room to work around the appliance.
Step 2: A Deep Clean is Crucial
Paint needs a perfectly clean surface to stick to. Years of cooking can leave a thin layer of grease on an oven, even if it looks clean. Spray a generous amount of degreaser all over the exterior surfaces you plan to paint. Let it sit for a few minutes, then scrub thoroughly with a sponge. Wipe everything down with a clean, damp cloth and let it dry completely. Don’t skip this—grease is the number one enemy of a good paint job!
Step 3: Scuff and Sand for a Better Grip
Most ovens have a glossy, smooth finish. Paint has a hard time gripping onto shiny surfaces. Take your fine-grit sandpaper and lightly scuff all the surfaces you intend to paint. You’re not trying to remove the old finish, just dulling it down. This creates tiny grooves for the new paint to grab onto. When you’re done, wipe away all the sanding dust with a clean, dry cloth.
Step 4: Mask Off What You Don’t Want to Paint
This is where your patience will pay off. Use painter’s tape to carefully cover anything you don’t want painted. This includes handles, knobs, control panels, logos, and the glass on the oven door. Be precise! Press the edges of the tape down firmly to prevent any paint from seeping underneath.
Step 5: Apply a High-Heat Primer
While some appliance paints say they don’t require primer, I always recommend using one. A high-heat primer will help the paint adhere better and will give you a more uniform color, especially if you’re making a drastic color change (like painting a black oven white). Apply a thin, even coat of primer and let it dry completely according to the manufacturer’s instructions on the can.
Step 6: It’s Time to Paint!
Now for the fun part! If you’re using spray paint, shake the can vigorously for at least a minute. Hold the can about 10-12 inches away from the surface and apply the paint in light, sweeping motions. It’s much better to apply 2-3 light coats than one thick, heavy coat. A heavy coat will lead to drips and an uneven finish. Let the paint dry for the recommended time between coats (check the can).
If you’re using a brush-on paint, use a high-quality brush to apply a thin, even coat. Try to use long, smooth strokes in the same direction to minimize brush marks. Let it dry completely before applying a second coat if needed.
Step 7: Cure the Paint for a Durable Finish
This final step is essential for creating a tough, long-lasting finish. The paint needs to be “cured” with heat. After the paint is completely dry to the touch (wait at least 24 hours to be safe), remove all the painter’s tape. Open your kitchen windows for ventilation. Turn your oven on to a low temperature, around 250°F (120°C), for about 30 minutes. You may notice a slight paint smell—this is normal and it’s the paint curing. After 30 minutes, turn the oven off and let it cool down completely. For a full, safe curing process, it’s always best to follow the instructions provided on your specific paint can, as requirements can vary. The Environmental Protection Agency (EPA) offers great advice on proper ventilation during projects that involve fumes.
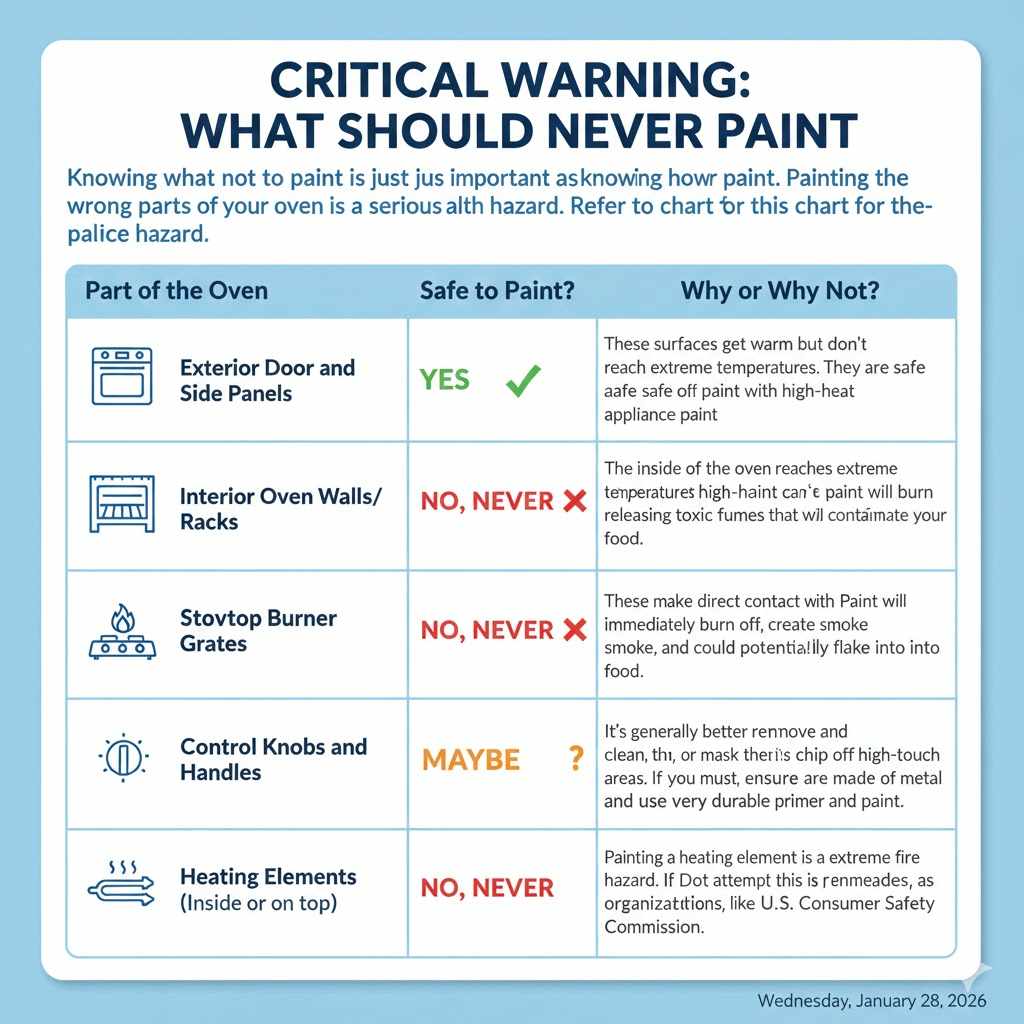
Critical Warning: What You Should NEVER Paint
Knowing what not to paint is just as important as knowing how to paint. Painting the wrong parts of your oven is a serious fire and health hazard. Refer to this chart for a clear guide.
| Part of the Oven | Safe to Paint? | Why or Why Not? |
|---|---|---|
| Exterior Door and Side Panels | Yes | These surfaces get warm but don’t reach extreme temperatures. They are safe to paint with high-heat appliance paint. |
| Interior Oven Walls/Racks | NO, NEVER | The inside of the oven reaches extreme temperatures that even high-heat paint can’t handle. The paint will burn off, releasing toxic fumes that will contaminate your food. |
| Stovetop Burner Grates | NO, NEVER | These make direct contact with flames. Paint will immediately burn off, create smoke, and could potentially flake into your food. |
| Control Knobs and Handles | Maybe | It’s generally better to remove and clean them, or mask them off. Paint can easily chip off high-touch areas. If you must, ensure they are made of metal and use a very durable primer and paint. |
| Heating Elements (Inside or on top) | NO, NEVER | Painting a heating element is an extreme fire hazard. Do not attempt this under any circumstances. Appliance safety is paramount, as emphasized by organizations like the U.S. Consumer Product Safety Commission. |
Frequently Asked Questions (FAQ)
Can I use regular spray paint like Krylon or Rust-Oleum 2X on my oven?
No. You must use a paint specifically labeled as “High-Heat” or “Appliance Epoxy.” Regular spray paint is not designed to withstand the temperatures of an oven and will fail quickly, releasing unsafe fumes.
How long does the oven paint take to dry and cure?
The paint will usually be dry to the touch in about an hour, but it is not fully hardened. You should wait at least 24 hours before handling it or proceeding to the heat-curing step. The full curing process, where the paint reaches its maximum hardness, happens when you heat the oven as described in the final step.
What if my newly painted oven gets a scratch or chip?
Don’t worry! This is an easy fix. Lightly sand the chipped area with fine-grit sandpaper, wipe it clean, and apply a very light touch-up coat of the same high-heat paint. It’s a good idea to keep a little leftover paint for this very reason.
Is it safe to paint a microwave oven?
Yes, you can paint the exterior casing of a microwave using appliance paint, following the same cleaning and sanding process. However, you must NEVER paint the inside of a microwave. You should also take care to mask off all vents to prevent paint from getting into the electronic components.
What colors does high-heat appliance paint come in?
While the selection isn’t as vast as regular paint, the options have grown over the years. You can typically find classic appliance colors like white, black, bisque, and stainless steel. Some brands also offer more modern colors like red, blue, or other trendy shades.
How do I clean my newly painted oven?
Once the paint is fully cured, it will be quite durable. Clean the exterior with a soft cloth and a mild, non-abrasive cleaner. Avoid using harsh chemical solvents or abrasive scouring pads, as they could dull or scratch the finish.
A Beautiful Finish You Can Be Proud Of
And there you have it! Your old, dated oven now has a fresh, modern look that perfectly suits your kitchen—and you did it yourself. By taking the time to prepare the surface, choosing the right paint, and following the steps carefully, you’ve not only saved money but also completed a project that makes a real impact.
Remember, the keys to success are patience and preparation. A good cleaning, a light sanding, and thin, even coats of the correct high-heat paint will give you a durable, professional-looking finish every time. Now, step back and admire your hard work. You’ve earned it!