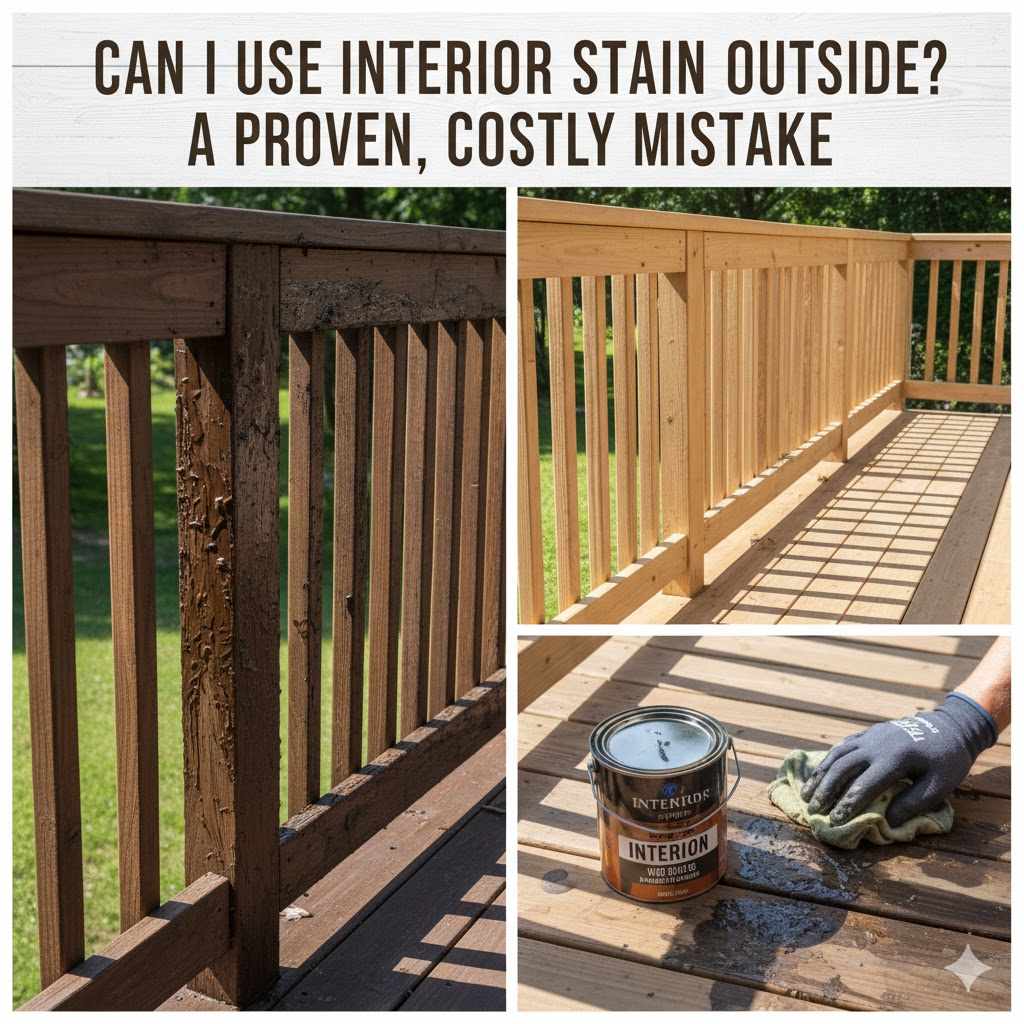
Can I Use Interior Stain Outside? A Proven, Costly Mistake
Using interior stain outside is a costly mistake. Interior stains lack the UV inhibitors, mildewcides, and flexible binders needed to protect wood from sun, moisture, and temperature changes. It will quickly fade, peel, and crack, leading to wood damage and requiring a complete stripping and refinishing project down the road.
Hello, fellow makers! Md Meraj here, your guide in the wonderful world of woodworking. Today, we’re tackling a question I see all the time. You’re in the garage, ready to finish that beautiful new deck chair. You spot a can of leftover interior stain from your bookshelf project. The color is perfect! A little voice whispers, “Can I just use this outside?”
It’s a tempting shortcut, I get it. We all want to save time and money. But as a woodworker who has seen the sad results, I’m here to tell you that this is one shortcut you should never take. Using an interior stain on an outdoor project is setting yourself up for disappointment and a lot more work later.
Don’t worry, though. Understanding the difference is simple, and choosing the right product is easy once you know what to look for. In this guide, we’ll walk through exactly why interior stains fail outdoors and how to properly protect your exterior wood projects so they look beautiful for years to come.
Why Interior Stain Is the Wrong Choice for Outdoor Projects
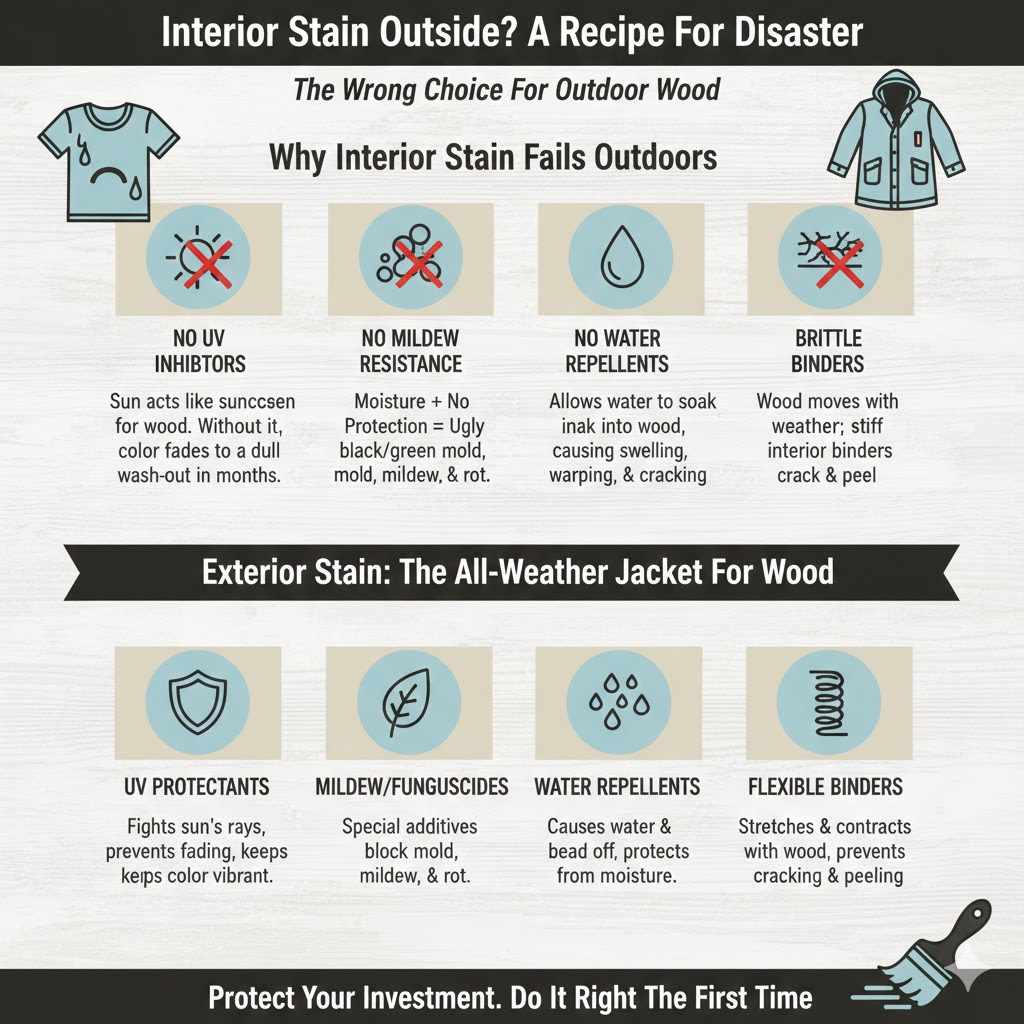
Imagine wearing your favorite cotton t-shirt in a rainstorm. It might offer a tiny bit of protection for a minute, but it will quickly get soaked, stretched out, and leave you cold. It simply wasn’t designed for that weather. Interior stain on outdoor wood is exactly the same.
Interior products are formulated for a stable, protected environment. Your home doesn’t have rainstorms, freezing nights, or the sun’s relentless UV rays beating down on your furniture. Outdoor wood, on the other hand, faces a constant battle with the elements. To survive, it needs a finish that acts like a high-tech, all-weather jacket.
Here are the key ingredients interior stains are missing:
- UV Inhibitors: Think of this as sunscreen for your wood. The sun’s ultraviolet (UV) rays are incredibly destructive. They break down the wood fibers and the color pigments in the stain. Interior stains have little to no UV protection, which means they will fade to a dull, washed-out color in just a few months.
- Mildewcides and Fungicides: Outdoor environments are full of moisture, which is the perfect breeding ground for mold, mildew, and fungus. These can cause ugly black or green stains and eventually rot your wood. Exterior stains contain special additives that prevent these organisms from growing.
- Water Repellents: While stain isn’t a complete sealer, exterior formulas are designed to help repel water, causing it to bead up and roll off the surface. Interior stains don’t have this property and can allow moisture to soak into the wood, leading to swelling, warping, and cracking.
- Flexible Binders: Wood is a natural material that expands and contracts with changes in temperature and humidity. Exterior stain binders are designed to be more flexible, moving with the wood to prevent cracking and peeling. Interior stain binders are harder and more brittle, so they crack when the wood moves.
The Real Cost: What Happens When You Use Interior Stain Outside?
Using the wrong stain isn’t just a minor error; it creates a chain reaction of problems that are much harder and more expensive to fix than doing it right the first time. It’s a classic example of “pay now or pay much more later.” Let’s break down the timeline of what you can expect to see.
Within a Few Months: Rapid Fading
The first sign of trouble will be the color. That rich walnut or deep cedar tone you loved will begin to look pale and bleached. The sun’s UV rays will break down the pigments in the interior stain relentlessly. The areas that get the most direct sun will fade the fastest, leaving your project with an uneven, blotchy appearance.
Within the First Year: Peeling and Flaking
As moisture gets into the wood and the temperature changes, the wood will expand and contract. The hard, inflexible binder in the interior stain can’t handle this movement. You’ll start to see small cracks appear in the finish. Soon, those cracks will turn into peeling and flaking, exposing the bare wood underneath. It will look like a bad sunburn peeling off the skin of your project.
Within One to Two Years: Mold, Mildew, and Wood Damage
Once the stain peels, bare wood is exposed to the elements. Without mildewcides, mold and mildew will quickly take hold, creating ugly, persistent black and green spots that can be very difficult to remove. Worse, the constant exposure to moisture will begin to damage the wood itself. The wood fibers will break down, leading to softness, rot, and structural weakness. At this point, you’re no longer just fixing a finish; you may be looking at repairing or replacing the wood itself.
The “cost” isn’t just the wasted can of stain. The real cost is:
- Your Time and Labor: You will have to spend an entire weekend (or more) stripping, sanding, and cleaning the failed finish. This is a messy, frustrating, and labor-intensive job.
- Extra Materials: You’ll need to buy chemical strippers, sanding discs, wood cleaners, and safety gear, adding to the expense.
- The Final Finish: You will still have to buy the correct exterior stain you should have used in the first place.
- Potential Wood Repair: If rot has set in, you may need wood filler or even new boards to repair the damage.
Understanding the Science: Interior vs. Exterior Stain at a Glance
To really see why these products are not interchangeable, let’s look at their core components. While they both have pigments (for color) and a solvent (the liquid that carries the ingredients), the crucial differences are in the binders and additives.
| Component | Interior Stain | Exterior Stain |
|---|---|---|
| Pigments | Standard pigments for color, with a focus on deep penetration for rich tones. Not designed for UV resistance. | Specialized UV-resistant pigments (often metallic oxides) that resist fading and protect the wood underneath. |
| Binders | Typically a hard, brittle resin (like alkyd or polyurethane) that creates a durable shell for indoor wear and tear. | A more flexible resin (like a long-oil alkyd or acrylic) that can expand and contract with the wood as temperature and humidity change. |
| Additives | Few, if any. Focus is on quick drying and ease of application. | Packed with essential additives: UV inhibitors, mildewcides, fungicides, and water repellents to fight the elements. |
| Purpose | Enhance the beauty of wood in a stable, climate-controlled environment. Offers minimal protection. | Protect wood from sun, rain, snow, and biological growth in an unstable outdoor environment. |
What Makes Exterior Stains So Tough? The Secret Ingredients
Exterior stain is a marvel of chemical engineering, with each ingredient playing a critical role in protecting your outdoor projects. Think of it as a specialized team where every member has a job to do.
1. UV Absorbers and Blockers
This is the most important defense against the sun. As the U.S. Forest Service explains, UV radiation degrades wood on a cellular level. Exterior stains use two forms of protection. UV absorbers are compounds that soak up UV radiation and convert it into harmless heat. UV blockers, often made from finely ground metal oxides, physically block and reflect the rays away from the wood surface, just like a mirror. More opaque (solid color) stains offer the best UV protection because they have a higher concentration of these pigments.
2. Mildewcides and Fungicides
These are biocides specifically formulated to kill or inhibit the growth of mildew and fungus spores. When moisture is present, these spores can activate and begin feeding on the wood, causing discoloration and decay. The mildewcides in exterior stain create an inhospitable surface, stopping these organisms before they can get a foothold.
3. Water Repellents
While an exterior stain isn’t a waterproof film like paint, it contains waxes and oils that help the wood shed water. This property, known as hydrophobicity, causes water to bead up on the surface instead of soaking in. By keeping the wood drier, it helps prevent swelling, cracking, and provides a less friendly environment for mildew to grow.
4. Flexible Resins (Binders)
This is the backbone of the stain. The binders in exterior stains are engineered for elasticity. A piece of wood on a sunny deck can go from 60°F in the morning to over 120°F in the afternoon sun, causing it to expand. At night, it cools and shrinks. This constant movement would shatter a rigid interior finish. The flexible binders in exterior stains stretch and move with the wood, maintaining their protective bond without cracking.
The Right Way: How to Properly Stain Your Outdoor Wood Project
Now that you know why the right product is so important, let’s go through the simple, rewarding process of doing it correctly. Following these steps will give you a beautiful, long-lasting finish that you can be proud of.
Step 1: Choose the Right Exterior Stain
Head to the paint store and look for products explicitly labeled “Exterior” or “Deck & Siding.” You’ll have a few choices:
Oil-Based vs. Water-Based: Oil-based stains penetrate deeper and are often more durable, but they have strong fumes and longer dry times. Water-based (acrylic) stains are easier to clean up, dry faster, and have better color retention, but may not last quite as long as premium oil stains. Both are excellent choices when formulated for exterior use.
Transparency:
Transparent/Toner: Shows the most wood grain but offers the least UV protection. Best for new, beautiful wood like cedar or redwood and needs re-coating more often.
Semi-Transparent: Adds rich color while still allowing wood grain to show through. A great balance of appearance and protection.
Solid Color (Opaque): Looks more like paint, completely covering the wood grain. Offers the maximum UV protection and durability, making it ideal for older wood or high-traffic areas.
Step 2: Prepare Your Wood Surface
This is the most important step for a professional-looking result. A great finish can’t stick to a dirty surface. For new wood, a light sanding with 120-grit sandpaper is usually enough to open up the pores to accept the stain. For older, weathered wood, you’ll need to clean it thoroughly with a deck cleaner to remove dirt, grayed fibers, and any old finish. After cleaning, let the wood dry completely for at least 24-48 hours.
Step 3: Check the Weather Forecast
Stain needs to be applied in the right conditions. Avoid applying it in direct, hot sunlight, as it can cause the stain to dry too quickly before it has a chance to penetrate the wood. Ideal temperatures are between 50°F and 90°F. Most importantly, ensure there is no rain in the forecast for at least 24 hours after application to allow it to cure properly.
Step 4: Apply the Stain
Stir your stain thoroughly, but don’t shake it! Shaking can create air bubbles that can dry on the surface. Apply a thin, even coat using a quality natural bristle brush (for oil-based) or a synthetic brush (for water-based). You can also use a paint pad or roller. Always apply the stain in the direction of the wood grain. Work in small, manageable sections, maintaining a “wet edge” to avoid lap marks. Wipe off any excess stain that hasn’t soaked into the wood after 10-15 minutes (check the can for specific instructions).
Step 5: Let It Cure
Resist the urge to use your newly stained project right away! The stain needs time to cure, not just dry to the touch. This curing process is when the finish hardens and gains its full protective properties. Follow the manufacturer’s instructions, but generally, allow 24-48 hours before light foot traffic and up to 72 hours before placing heavy furniture on it.
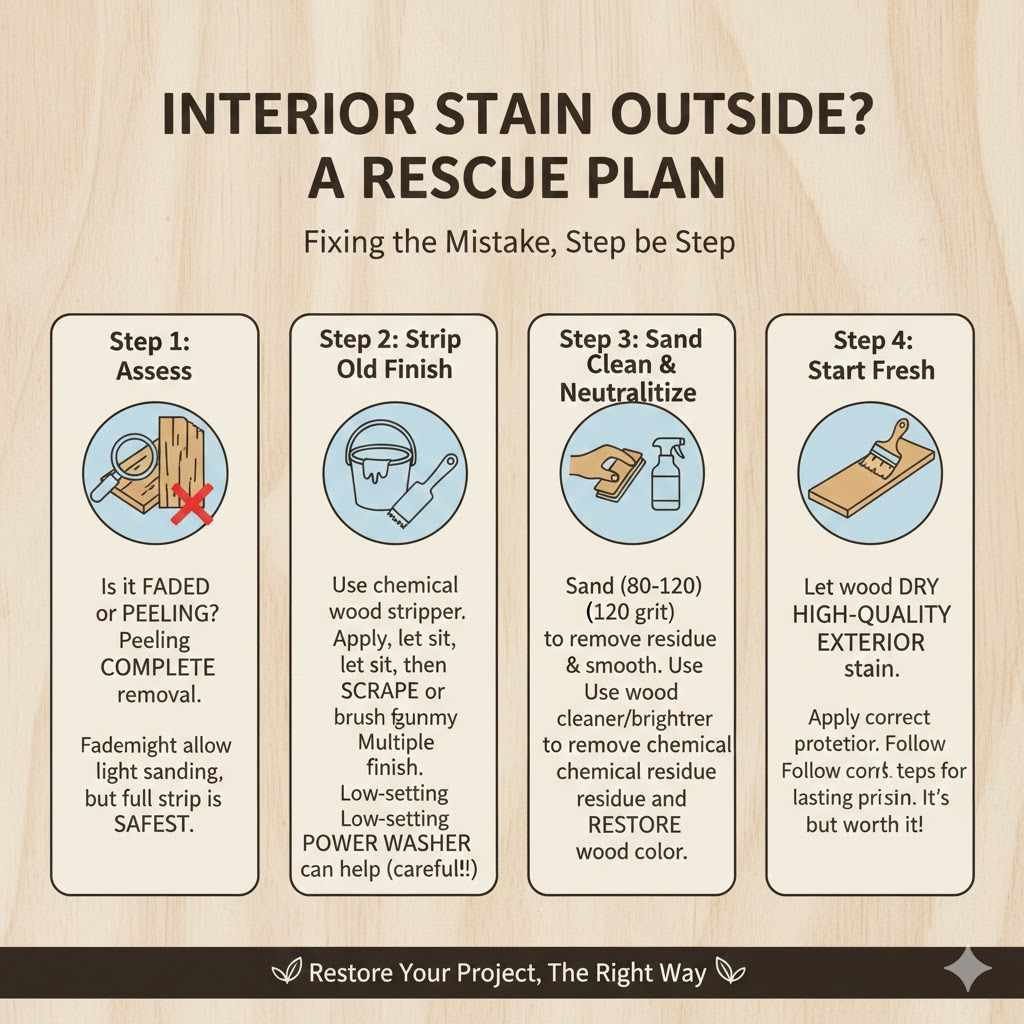
Help! What If I Already Used Interior Stain Outside? A Rescue Plan
If you’re reading this article after having already made the mistake, don’t panic. It’s fixable, but it will take some work. The key is to completely remove the failed finish before starting over.
Step 1: Assess the Situation
Is the stain just faded? Or is it actively peeling, cracking, and flaking? If it’s already peeling, you must strip it all off. If it’s just faded but still intact (which is rare), you might be able to get away with a thorough cleaning and light sanding before applying a compatible exterior product, but complete removal is the safest bet.
Step 2: Strip the Old Finish
This is the tough part. You’ll need a chemical wood stain stripper. Apply the stripper according to the manufacturer’s directions, let it sit, and then use a scraper or stiff brush to remove the gummy, softened finish. You may need multiple applications. A power washer on a low setting can also help, but be careful not to damage the wood.
Step 3: Sand, Clean, and Neutralize
After stripping, the wood will need to be sanded to remove any remaining bits of finish and to create a smooth surface. Start with a lower grit like 80-grit and finish with 120-grit. After sanding, it’s a good idea to use a wood cleaner or brightener. These products help remove any chemical residue from the stripper and restore the wood to its natural, beautiful color.
Step 4: Start Fresh
Let the wood dry completely. Once it is clean, dry, and back to its raw state, you’re ready to start over. Now you can follow the correct steps outlined in the previous section to apply a high-quality exterior stain. It will be a lot of work, but your project will be properly protected and look fantastic when you’re done.
Frequently Asked Questions (FAQ)
Can I just put an exterior clear coat, like polyurethane, over the interior stain?
This is another tempting but flawed idea. The underlying interior stain will still fade rapidly from UV rays passing through the clear coat. As the interior stain fails and flakes underneath, it will take the expensive exterior clear coat with it, causing widespread peeling. You must use an exterior-rated product from the very start.
How long will interior stain last outside before it starts to fail?
In a location with direct sun and rain, you can expect to see significant fading within 3-6 months. Peeling and flaking often begin within the first year. In a more sheltered, covered location, it might last a bit longer, but it will inevitably fail much sooner than a proper exterior stain.
Is there a big price difference between interior and exterior stains?
Yes, exterior stains are generally more expensive per can. This is because of the costly specialty additives like UV inhibitors and mildewcides. However, the true cost of using interior stain outside is far higher when you factor in the labor and materials required to strip and refinish the project prematurely.
What happens if I used an oil-based interior stain? Can I put a water-based exterior stain over it?
No, you cannot put a water-based product directly over an oil-based one without complete removal first. If you’ve made a mistake and used an oil-based interior stain, you must strip it completely before applying a new coat of anything, whether it’s an oil-based or water-based exterior stain.
Are “Indoor/Outdoor” stains a good option?
Some products are marketed as “Indoor/Outdoor.” While they can work, they are often a compromise and may not have the same robust protection as a dedicated exterior formula. For a project that will face significant sun and moisture, it is always best to choose a product designed specifically for exterior use.
Can I mix interior and exterior stain together to use up leftovers?
No, this is not recommended. The chemical formulas are different and may not be compatible, leading to a clumpy, unusable mess. Even if they do mix, you will be diluting the essential protective additives of the exterior stain, compromising its performance and durability.
What about staining a project for a covered porch?
Even on a covered porch, wood is exposed to indirect UV light, drastic temperature swings, and blowing rain. While it’s more protected than a deck in the open sun, it still needs the full protection of an exterior stain to prevent fading, peeling, and mildew growth over time.
Your Woodworking Deserves the Best Protection
In woodworking, just like in anything else, doing the job right the first time is always the easiest and most rewarding path. The momentary convenience of using that leftover can of interior stain is simply not worth the frustration and hard work it will cause down the line.
Your beautiful outdoor projects represent your time, your skill, and your creativity. They deserve a finish that is tough enough to protect them from the elements so they can be enjoyed for many seasons. By choosing a quality exterior stain and following the proper preparation and application steps, you’re not just staining wood—you’re preserving your hard work and ensuring your craftsmanship shines through for years to come.
So, the next time you’re tempted to take that shortcut, remember this guide. Put the interior stain back on the shelf, make a trip to the hardware store for the right product, and give your outdoor project the all-weather jacket it needs to thrive. Happy building!