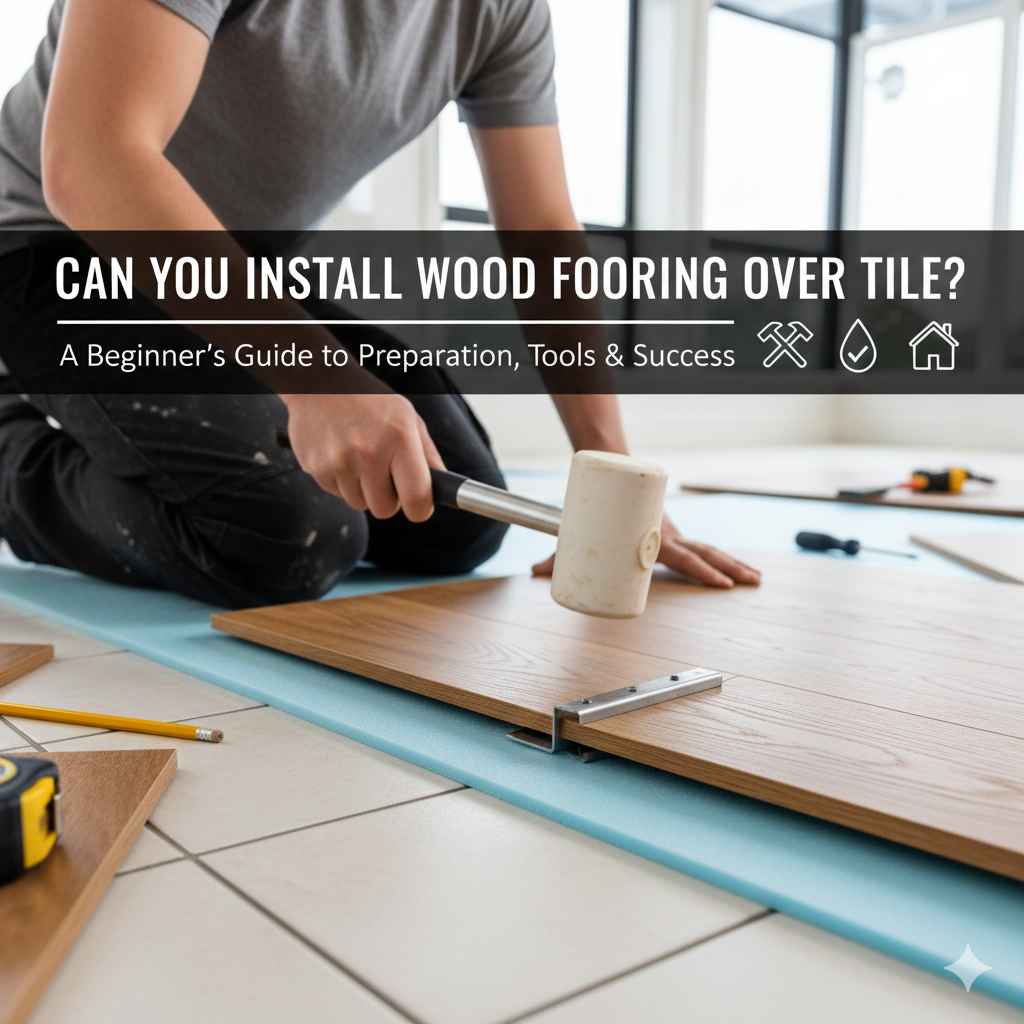
Can You Install Wood Flooring Over Tile? A Beginner’s Guide
Thinking about updating your floors? You might be wondering, Can You Install Wood Flooring Over Tile? It’s a common question, especially for those new to home improvement. While it seems simple, there are some things you need to know to make sure the job goes smoothly. Don’t worry, this guide will break everything down into easy-to-follow steps. We’ll explore the main considerations to help you succeed. Let’s get started!
Can You Install Wood Flooring Over Tile
Before jumping into any project, checking your existing floor is a smart move. This initial assessment sets the stage for success. Knowing the state of your tile is the first step when considering wood flooring. Are there any loose tiles? Are there any cracks or uneven spots? This evaluation helps prevent problems like squeaky floors or uneven surfaces once the new flooring is installed. It ensures that the wood flooring will have a stable base, which is very important for a long-lasting and great-looking outcome.
Tile Condition Assessment
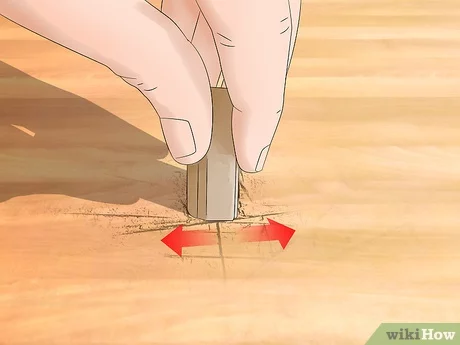
Inspecting your existing tile is more than just a surface look. Check for loose tiles by walking on the floor and listening for any movement or hollow sounds. Tap on each tile with a rubber mallet. A solid sound means the tile is securely bonded to the subfloor. A hollow sound could mean the tile is loose or there’s a problem with the adhesive. Also, inspect for cracks. Small cracks might seem harmless, but they can spread and cause bigger issues. Larger cracks mean the tile isn’t stable. These problems need to be fixed before installation.
- Loose Tiles: Loose tiles will move under the new floor and can cause it to crack or shift. This is not a strong base to work with. Removing and re-adhering those is the first step.
- Cracked Tiles: Cracks indicate a compromised tile. These tiles should be replaced as they can affect the new floor’s integrity. Also, water might seep through.
- Uneven Surface: High or low spots can lead to an uneven wood floor, making it look bad and creating a hazard.
- Moisture Issues: A moisture test will tell you if there are water issues from below.
In a study by the National Wood Flooring Association, it was found that approximately 30% of wood floor failures are directly linked to issues with the subfloor. This emphasizes the importance of a thorough assessment.
Leveling Your Floor
An even floor is essential for successful wood floor installation. Unevenness can lead to issues such as squeaks, cracks, and premature wear. Small differences can be handled, but large variations will show once the wood flooring is in place. Leveling your tile floor ensures that the wood flooring sits smoothly, creating a professional-looking and durable result. This often involves using self-leveling compounds to address any dips or bumps. It’s an important preparation step to maximize the lifespan of the wood floor.
- Measuring for Level: Use a long level to find any high or low spots on the tile. Also, a laser level will show the bumps that need to be addressed.
- Addressing Small Imperfections: For small imperfections, use a self-leveling compound. Follow the manufacturer’s instructions for mixing and application.
- Filling Low Spots: Low spots need filling with a leveling compound. This needs to dry before proceeding.
- Addressing Large Issues: Large variations might need more complex fixes, possibly involving grinding down high spots or adding a thicker leveling layer.
Moisture Testing Methods
Moisture is the silent enemy of wood flooring. Excess moisture can cause the wood to warp, buckle, or grow mold. Testing for moisture before installing wood flooring over tile is a key step to prevent problems. There are a few different testing methods. These tests help determine the level of moisture present in the tile and subfloor. These steps guarantee the long life and beauty of the wood flooring. Here’s a brief look at methods.
- Moisture Meter: A moisture meter is a device used to measure the moisture content of the tile. It is a quick and easy way to check moisture.
- Calcium Chloride Test: This test involves placing a small amount of calcium chloride on the floor and covering it with a plastic sheet. After a specified time, the calcium chloride is checked for moisture absorption.
- Plastic Sheet Test: This simple test involves taping a plastic sheet to the floor and checking for condensation after a few days. This test helps detect if moisture is rising from the subfloor.
- Relative Humidity Test: This test measures the relative humidity of the air close to the tile. If the humidity is high, it could mean there’s an unseen moisture issue.
Choosing the Right Wood Flooring
Picking the right wood flooring is critical for a good look. Different types of wood flooring have different benefits. Considering your budget and your preferences is important. From solid hardwood to engineered wood, each type has its own strengths and weaknesses. Choosing the right type will not only enhance the look of your room but also ensure a long-lasting installation. Choosing wisely means the difference between a great floor and a headache.
Solid Hardwood vs. Engineered Wood
The choice between solid hardwood and engineered wood often boils down to performance, look, and the specific needs of the installation. Solid hardwood is a single piece of solid wood. It provides a classic look and can be sanded and refinished many times. Engineered wood is constructed from multiple layers of wood, with a top veneer of hardwood. This makes engineered wood more stable and less prone to moisture damage. Understanding the differences will help you make a choice that is best for your project.
| Feature | Solid Hardwood | Engineered Wood |
|---|---|---|
| Construction | Single piece of solid wood | Multiple layers with a top hardwood veneer |
| Moisture Resistance | More susceptible to moisture | More stable, better with moisture |
| Installation | Can be nailed or glued | Can be glued, floated, or clicked together |
| Refinishing | Can be sanded and refinished multiple times | Limited refinishing potential based on veneer thickness |
| Cost | Generally more expensive | Often more affordable |
Engineered wood flooring sales have increased by about 15% in the last five years. This shows it’s a popular choice.
- Solid Hardwood Advantages: Classic look, long life if cared for, many refinishing options.
- Solid Hardwood Disadvantages: Sensitive to moisture and temperature changes, cost.
- Engineered Wood Advantages: More stable, versatile installation methods, more cost-effective.
- Engineered Wood Disadvantages: Can be refinished, but limited, depending on the veneer thickness.
Selecting the Wood Species and Style
The wood species and style you select play a big role in the overall look and performance of your wood flooring. Consider the look of your room when choosing a wood species. Maple and birch give a light and bright feel, while oak and walnut offer a warmer and richer look. The style of the wood – whether it’s plank, herringbone, or parquet – will also influence the space’s vibe. Each style brings a distinct visual element, so consider the overall design. By choosing the right wood species and style, you can transform the feel of your room.
- Wood Species: Select a species based on your design preferences and durability needs.
- Wood Grade: Different grades of wood are available. The grade impacts the look and the number of knots and character marks.
- Plank Width: Wider planks can make a room look bigger.
- Finish: The finish protects the wood and affects its appearance. Consider matte, satin, or gloss finishes.
- Style: Consider your overall interior design.
Installing Wood Flooring Over Tile: The Installation Process
The installation of wood flooring over tile can be an accessible project with the right approach. Knowing each step is important to ensure a successful outcome. Correct steps lead to a professional result and a long-lasting floor. Preparation, the proper tools, and attention to detail are key during installation. Here’s a step-by-step guide to get you going. The process ensures both a great look and the longevity of your wood flooring.
Preparing the Tile Surface for Installation
Before installing your wood flooring, the tile surface needs proper preparation. This includes cleaning the tile, fixing any damage, and making sure it’s level. Cleaning the surface removes dirt and debris to guarantee the adhesive works effectively. Addressing cracks or loose tiles ensures that the new flooring has a stable base. Leveling the surface creates a flat surface for installation. These are critical steps that contribute to the overall quality and durability of the installation. Properly preparing the tile is the first step toward a beautiful and long-lasting wood floor.
- Cleaning the Surface: Sweep, vacuum, and mop the tile to remove dust, dirt, and any debris. Let the tile dry.
- Repairing Damage: Fix any cracks or loose tiles. Replace any tiles that are severely damaged.
- Leveling the Surface: Use a self-leveling compound to fill in any low spots or to make the surface even.
- Allowing Time to Cure: Let the leveling compound dry. Follow the manufacturer’s directions for drying times.
Choosing the Right Adhesive and Installation Method
Picking the right adhesive and installation method is critical for success. The adhesive must be compatible with both the wood flooring and the tile, creating a secure bond. Common methods include using a specific wood flooring adhesive. The right method is determined by the type of wood flooring and the overall conditions of your project. If you select the right products and techniques, it will ensure a strong and lasting connection between your new wood floor and the existing tile. A well-selected adhesive and method set the stage for a lasting result.
- Types of Adhesives: Select a wood flooring adhesive that is made for gluing wood flooring to tile. This adhesive will provide a strong and lasting bond.
- Spread Rate: Follow the adhesive manufacturer’s instructions for the correct spread rate.
- Trowel: Use the right size trowel for the adhesive.
- Installation Method: Determine if you’re gluing, floating, or using a mechanical fastening method.
Step-by-Step Installation Guide
Follow a clear, step-by-step approach to install wood flooring over tile. This will guarantee a successful outcome. Each step contributes to the finished floor’s look and lifespan. From preparation to the final touches, accuracy and patience are important. This straightforward approach provides confidence. Here is a guide to assist you in this project.
- Surface Preparation: As outlined earlier, thoroughly clean, repair, and level the tile surface.
- Acclimation: Before installing, let the wood flooring acclimate to the room’s conditions. This will prevent gaps or warping.
- Layout and Planning: Plan the layout of your flooring to minimize waste and create a visually appealing result.
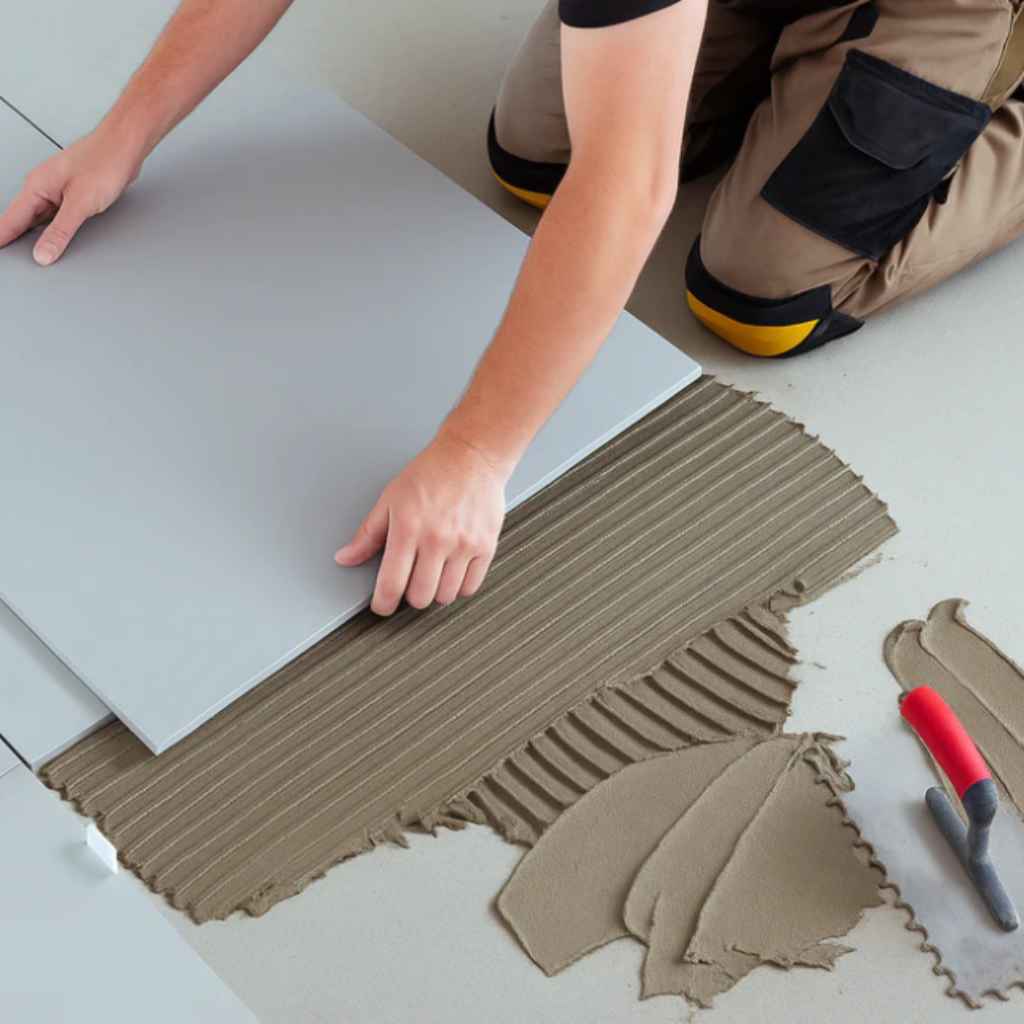
- Applying Adhesive: Spread the adhesive evenly across the prepared surface using the recommended trowel.
- Installing the Flooring: Carefully position and place the first row of wood flooring, ensuring it is straight and correctly aligned.
- Securing the Flooring: Use spacers to keep the correct distance between the planks. Use weights, if needed.
- Cutting and Fitting: Accurately cut and fit the planks around the edges and around any obstacles.
- Finishing Touches: Install the baseboards or trim and transition pieces.
- Cleaning: Clean the floor and inspect your work.
In a study by the Consumer Product Safety Commission, it was reported that more than 60,000 injuries occur annually in residential homes due to slips and falls. This makes it crucial to guarantee the proper installation.
Addressing Common Challenges
When installing wood flooring over tile, some difficulties may arise. Be ready to handle some of the situations. Moisture, uneven surfaces, and existing damage are some of the typical issues. Knowing how to handle these challenges will enable you to complete a successful project. With patience and persistence, you can handle these problems and achieve a beautiful and functional wood floor.
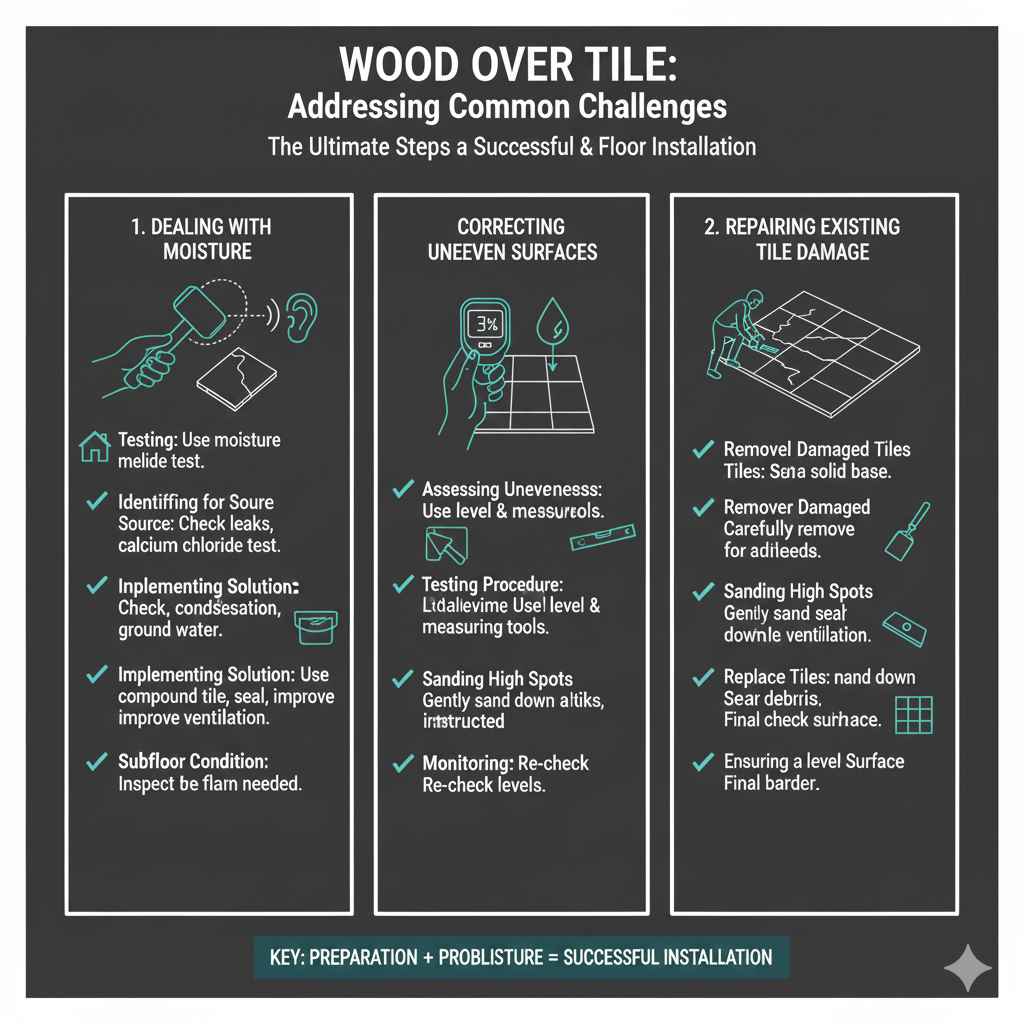
Dealing With Moisture Issues
Moisture is a significant concern during wood floor installations. Excess moisture can cause the wood to expand, warp, or mold. Identifying and solving these moisture issues is important. If you detect excessive moisture, it’s very important to address this prior to installation. Moisture control measures will prevent future damage and guarantee the longevity of your wood flooring. Moisture problems can ruin the look and the life of a new floor.
- Testing: Do a moisture test of the tile and subfloor. Use a moisture meter or perform a calcium chloride test.
- Identifying the Source: Determine where the moisture is coming from. Could be leaking pipes, condensation, or ground water.
- Implementing Solutions: Use a vapor barrier or seal the tile to stop the moisture. Also, consider improving ventilation to reduce humidity.
- Monitoring: Check the moisture levels again after implementing these solutions.
Correcting Uneven Surfaces
An even surface is key for wood floor installation. Uneven surfaces can cause issues such as squeaks, cracks, or a bouncy feeling. Correcting these surface issues will ensure the stability and the look of the floor. Uneven spots must be addressed to get a professional look and a long-lasting installation. Using self-leveling compounds and careful preparation is the key to creating a perfect surface.
- Assessing the Unevenness: Use a level and measuring tools.
- Applying Self-Leveling Compounds: Apply the compound as instructed. Follow the mixing instructions.
- Sanding High Spots: Gently sand down any high spots.
- Checking for Correctness: Re-check the surface.
Repairing Existing Tile Damage
Before installing wood flooring over tile, fixing existing tile damage is a must. Broken, chipped, or loose tiles can cause problems, affecting the new wood floor’s stability. Thoroughly inspecting the tile and taking the necessary steps is essential. Careful repair work provides a solid foundation. These efforts guarantee the long life and great look of your wood floor.
- Removing Damaged Tiles: Carefully remove the damaged tiles using a chisel and hammer.
- Cleaning the Subfloor: Clean the area.
- Replacing Tiles: Replace the damaged tiles.
- Ensuring a Level Surface: Make sure the
Frequently Asked Questions
Question: Can I install wood flooring directly over any type of tile?
Answer: Not always. The tile needs to be in good condition, and you need to ensure it’s level and free of any major damage. Also, you need to consider the type of wood flooring and the adhesive used.
Question: Do I need a moisture barrier when installing wood flooring over tile?
Answer: Usually, yes. A moisture barrier is very important to prevent moisture from the tile from affecting the wood flooring. This extends the life of the flooring.
Question: How much does it cost to install wood flooring over tile?
Answer: Costs vary widely. Factors include the type of wood flooring you choose, the size of the room, and the labor costs. It’s often cheaper to install the flooring yourself.
Question: What’s the best way to clean wood flooring installed over tile?
Answer: It’s important to sweep or vacuum regularly to remove dirt and debris. Always use the recommended cleaning products for your wood flooring type. Avoid excess water.
Question: Can I install wood flooring over tile myself, or do I need a pro?
Answer: It’s possible to do it yourself, especially with engineered wood. It’s important to have some experience and to follow the instructions carefully. If you are unsure, hire a pro.
Final Thoughts
Can You Install Wood Flooring Over Tile? Absolutely! It’s a doable project that can change the look of your home. You need to assess your existing tile, choose the correct wood flooring, and follow the steps. Remember to carefully prepare the surface, pick the right adhesive, and deal with any issues. By preparing the space and carefully following the guidelines, you will create a beautiful floor. The reward will be a new wood floor that you’ll be happy with for years. So, gather your tools, and begin your project today.