Can You Paint Over Water Based Stain: Proven Best Tips
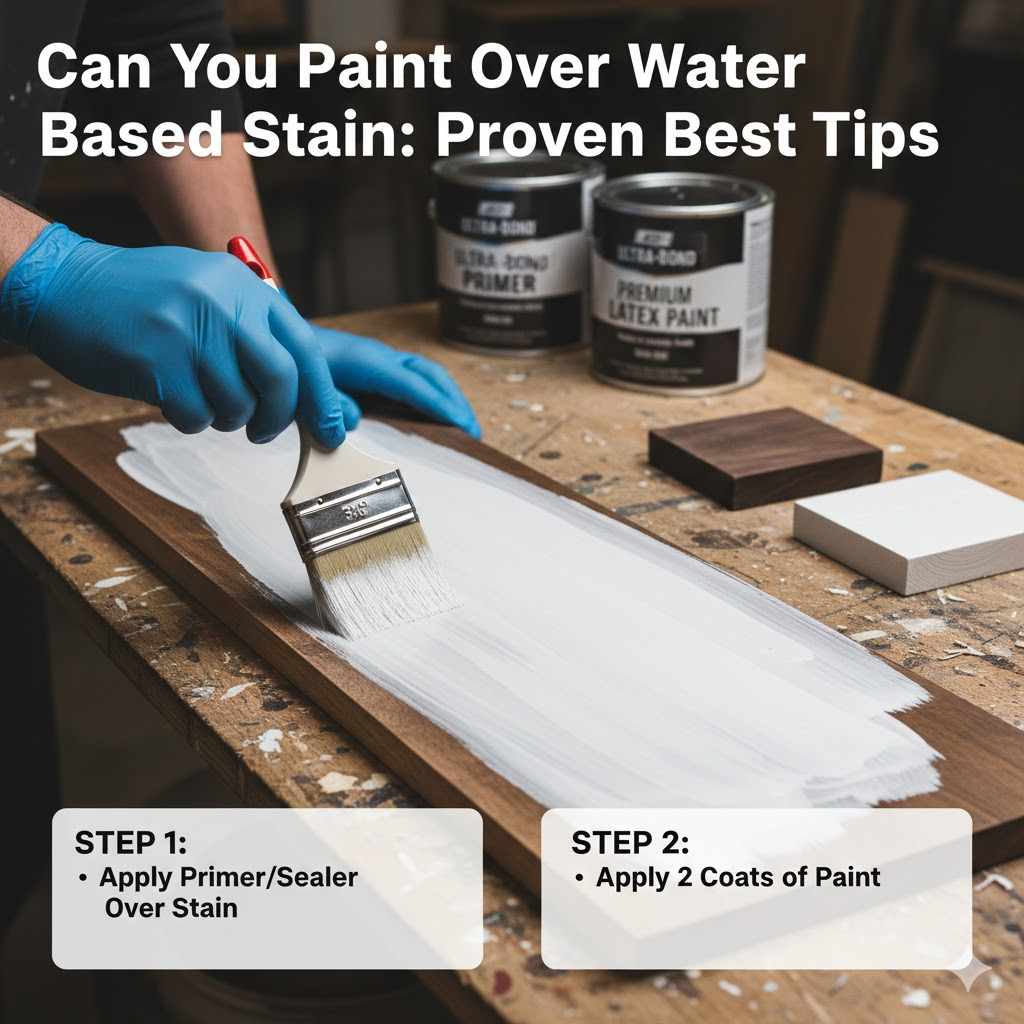
Yes, you can absolutely paint over water-based stain. The key to a beautiful, long-lasting finish is proper preparation. You must clean the surface well, lightly sand it to create grip, and use a high-quality stain-blocking primer before painting. This simple process guarantees your new paint will stick perfectly and the old stain won’t show through.
Have you ever looked at a piece of stained furniture and thought, “I love the shape, but the color just doesn’t work anymore”? It’s a common feeling. Maybe that oak table looked great a decade ago, but now you’re dreaming of a fresh, modern color. You might worry that you have to strip all that old finish off, which is a messy and difficult job.
Well, I have great news for you! You can give that piece a brand-new life with paint, and you don’t need to be a professional to do it. The secret isn’t stripping, it’s preparing. In this guide, I’ll walk you through every simple step, from cleaning the surface to applying that final perfect coat of paint. Let’s get started!
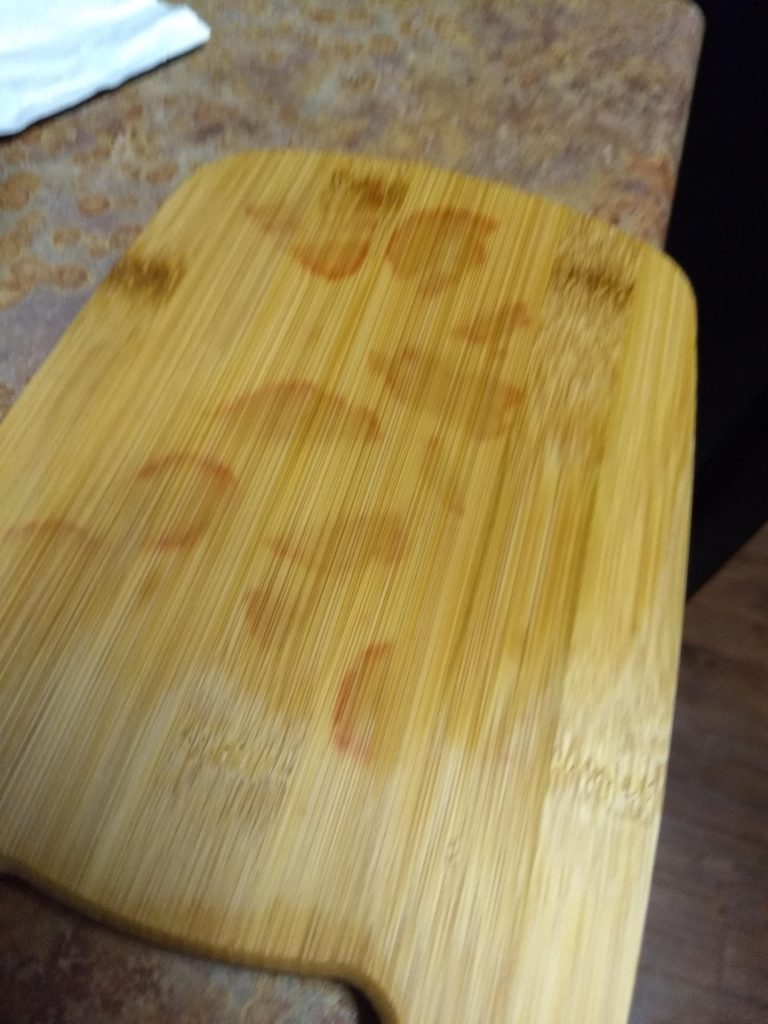
Painting over a stained surface seems tricky, but it’s one of the most rewarding DIY projects you can tackle. It completely transforms a piece of wood without the harsh chemicals and endless scraping of stripping. The main challenge is making sure the new paint sticks to the old finish and that the old color doesn’t slowly seep through your fresh paint, a problem known as “bleed-through.
Don’t worry, though. The process I’m about to show you solves both of these problems. By focusing on a little prep work, you set yourself up for a factory-smooth finish that will last for years.
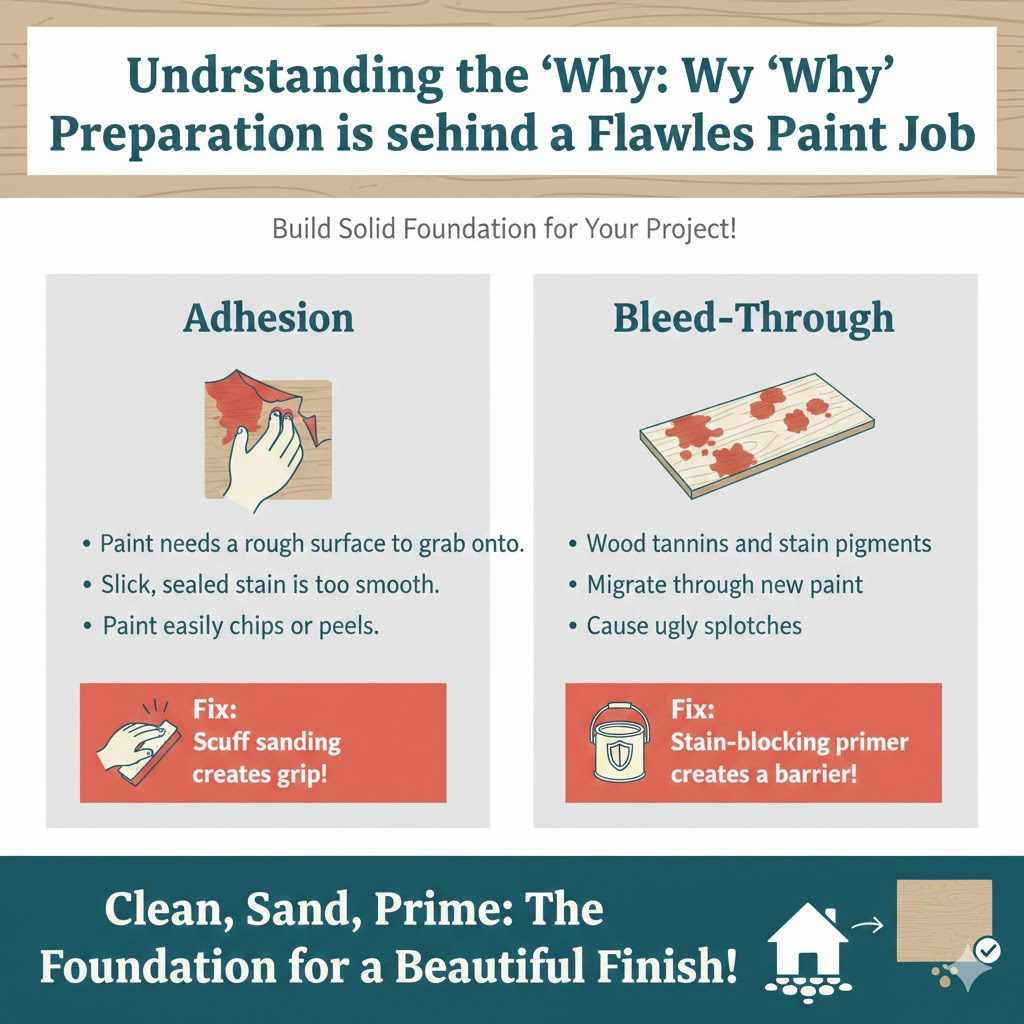
Understanding the “Why”: Why Preparation is Everything
Before we grab our brushes, let’s quickly understand why we need to do these prep steps. Water-based stains are designed to soak into the wood pores, coloring the fibers. Some stains also have a light topcoat or sealer mixed in.
- Adhesion: Paint needs a slightly rough surface to grab onto. A sealed or smooth stained surface is too slick, and paint can easily peel or chip off. Scuff sanding creates a texture for the paint to grip.
- Bleed-Through: Wood contains natural color compounds called tannins. Stains also have pigments. If you paint directly over them, these colors can get dissolved by the new paint and migrate up through it, causing ugly brown or pinkish splotches. A stain-blocking primer creates a barrier to stop this from happening.
Think of it like building a house. You wouldn’t build walls without a solid foundation. In our project, cleaning, sanding, and priming are the foundation for our beautiful paint job.
Your Toolkit: Gathering Supplies for the Job
Having everything ready before you start makes the project go smoothly. You don’t need fancy tools, just the right ones for the job. Here is what you’ll need:
- Cleaning Supplies: A degreasing cleaner (like a TSP substitute or just dish soap and warm water), clean rags, and a bucket.
- Safety Gear: Gloves, dust mask, and safety glasses are a must.
- Sandpaper: Medium-grit (around 180-220 grit) sandpaper or a sanding sponge.
- Tack Cloth or Microfiber Cloth: To remove all the sanding dust.
- Primer: A high-quality stain-blocking primer. I strongly recommend a shellac-based or oil-based primer for the best results.
- Paint: Your choice of color in a quality latex or acrylic enamel paint.
- Brushes and Rollers: A high-quality paintbrush for cutting in edges and a small foam roller for large, flat surfaces to get a smooth finish.
- Drop Cloths: To protect your floors and workspace.
Step-by-Step: How to Paint Over Water-Based Stain Perfectly
Follow these steps carefully, and I promise you’ll be proud of the result. Take your time with the prep work—it’s the part that truly matters.
Step 1: Clean the Surface Thoroughly
First things first, we need a perfectly clean surface. Over the years, furniture collects dust, grease, and grime, even if it looks clean. Paint and primer cannot stick to dirt.
- Mix your cleaner with warm water according to the instructions on the package. If you’re using dish soap, a few drops in a bucket of water is plenty.
- Dip a clean rag in the soapy water, wring it out, and wipe down the entire piece of furniture. Pay extra attention to areas that get touched a lot, like drawer pulls or tabletops.
- Rinse with a new rag dampened with plain water to remove any soap residue.
- Let the piece dry completely. This might take an hour or two. Don’t rush this step!
Step 2: Scuff Sand for Grip
Now it’s time to give the primer something to hold onto. We are not trying to remove the stain, just dulling the finish. This is called “scuff sanding.”
- Using your 180 or 220-grit sandpaper, lightly sand the entire surface. Move in the direction of the wood grain.
- You don’t need a lot of pressure. The goal is to get rid of the shine and make the surface feel slightly rough, almost chalky.
- Run your hand over the surface. If it feels smooth and dull, you’ve done it right.
Step 3: Remove Every Speck of Dust
Sanding creates a fine layer of dust that can ruin your paint finish. It’s crucial to remove all of it.
- First, use a vacuum with a brush attachment to get rid of the bulk of the dust.
- Next, wipe the entire surface with a tack cloth or a slightly damp microfiber cloth. A tack cloth is sticky and specially designed to pick up fine dust.
- Once you’re done, the surface should be perfectly clean and ready for primer.
Step 4: The Magic Step – Apply Stain-Blocking Primer
This is the most important step for a professional-looking and durable paint job. Do not skip this! A good stain-blocking primer seals in the old stain and gives your new paint a perfect base to stick to.
For painting over any stain, even water-based, I always recommend an oil-based or shellac-based primer. They are far superior at blocking stains and tannins. Water-based stain-blocking primers have gotten better, but oil and shellac are still the champions. Since these primers have strong odors, be sure to work in a well-ventilated area. The U.S. Environmental Protection Agency (EPA) provides great information on the importance of ventilation when working with products containing Volatile Organic Compounds (VOCs).
| Primer Type | Pros | Cons | My Recommendation |
|---|---|---|---|
| Shellac-Based Primer | Incredible stain and odor blocking. Dries very fast. Sticks to almost anything. | Very strong fumes. Requires denatured alcohol for cleanup. | The best choice for dark stains, knotty pine, or any wood that might bleed tannins. It’s my go-to problem solver. |
| Oil-Based (Alkyd) Primer | Excellent adhesion and good stain blocking. Creates a very durable base. | Strong fumes and slow drying time. Requires mineral spirits for cleanup. | A reliable workhorse for furniture, cabinets, and trim. Great for high-traffic pieces. |
| Water-Based Stain-Blocking Primer | Low odor and easy soap-and-water cleanup. Dries fairly quickly. | May not be strong enough to block heavy stains or tannins effectively. | A good option for light-colored stains where bleed-through is less of a risk. Choose a high-quality brand. |
Apply a thin, even coat of your chosen primer with a brush or roller. Don’t worry if it looks a little streaky; its job is to seal and bond, not to look perfect. Let it dry completely according to the can’s instructions. This could be anywhere from one hour to several hours.
Step 5: Lightly Sand the Primer
Once the primer is fully dry, it might feel a little rough. Giving it a very quick, light sanding will make your paint finish feel as smooth as glass.
- Use your 220-grit sandpaper and very light pressure.
- You just want to knock down any bumps or high spots.
- Wipe away the dust with your tack cloth again.
Step 6: Apply Your First Coat of Paint
Finally, the fun part! Now you get to see your vision come to life.
- Stir your paint thoroughly. Don’t shake it, as this creates air bubbles.
- Using your high-quality brush, apply paint to the detailed areas and corners first. This is called “cutting in.”
- For the large, flat surfaces, use a small foam roller to get a beautiful, even finish without brush marks.
- Apply a thin, even coat. A thick coat can lead to drips and a longer drying time. It’s better to do two thin coats than one thick one.
Step 7: Apply the Second Coat (and Topcoat if Needed)
Let the first coat of paint dry completely. Check the paint can for recommended recoat times.
- Apply a second thin coat of paint the same way you applied the first. This second coat will deepen the color and ensure full, even coverage.
- Most high-quality modern paints have a durable finish and don’t require a topcoat. However, for a high-traffic surface like a tabletop or kitchen cabinets, adding a coat or two of a water-based polyurethane (like Polycrylic) will give you extra protection and peace of mind.
- Let the entire piece cure. Even if the paint feels dry to the touch in a few hours, it takes several days (sometimes up to 30) to fully harden, or “cure.” Be gentle with it during this time to avoid scratches or dents.
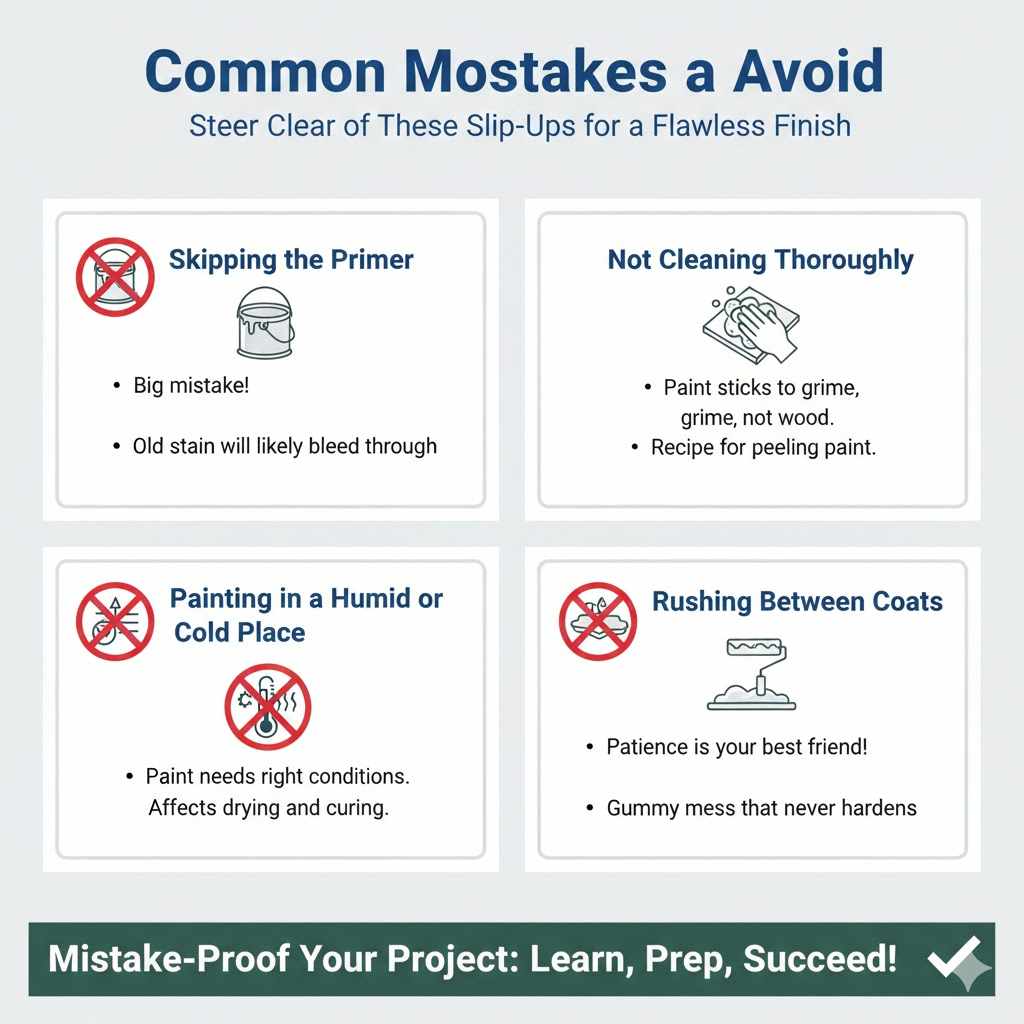
Common Mistakes to Avoid
Even seasoned DIYers can make mistakes. Here are a few common ones to watch out for:
- Skipping the Primer: This is the biggest mistake you can make. Your paint will likely chip, and the old stain will probably bleed through over time.
- Not Cleaning Thoroughly: Painting over grease or dirt means your paint is sticking to the grime, not the wood. It’s a recipe for peeling paint.
- Painting in a Humid or Cold Place: Paint needs the right conditions to dry and cure properly. Follow the temperature and humidity recommendations on your paint can.
- Rushing Between Coats: If you apply a second coat before the first one is dry, you can create a gummy mess that never hardens correctly. Patience is your best friend!
Frequently Asked Questions (FAQ)
1. Do I absolutely have to sand before painting over a water-based stain?
Yes, but it’s not as hard as it sounds. A quick 10-15 minute “scuff sand” with 220-grit sandpaper is all you need. This quick step is crucial for giving the primer a surface to grip, ensuring your paint job lasts for years without chipping or peeling.
2. What kind of paint is best to use over a primed stain?
Once you have a good coat of stain-blocking primer on, the world is your oyster! A high-quality water-based latex or acrylic enamel paint is an excellent choice for furniture. They are durable, have low odor, and clean up easily with water. Look for a paint with a satin or semi-gloss finish for better durability.
3. How do I know if my old stain is water-based or oil-based?
Here’s an easy trick. Find an inconspicuous spot on the piece and dab a cotton ball with rubbing alcohol on it. If some color comes off onto the cotton ball, the stain is likely water-based. If nothing comes off, try the same test with mineral spirits. If color comes off now, it’s likely an oil-based stain.
4. Will the wood grain show through the paint?
It depends on the wood and the thickness of your paint. On wood with a heavy grain, like oak, you might see a faint texture of the grain through the paint. Some people love this look! If you want a perfectly smooth surface, you may need to apply a wood grain filler after sanding but before priming.
5. Can I use a water-based primer since the stain is water-based?
You can, but I often recommend oil-based or shellac-based primers for the most reliable results. They create a much stronger barrier against stain and tannin bleed-through. If you choose a water-based primer, make sure it is specifically labeled as a “stain-blocking” or “stain-killing” formula.
6. What if my paint job chips or scratches?
Don’t panic! It’s an easy fix. Lightly sand the damaged area with 220-grit sandpaper, wipe away the dust, and then use a small artist’s brush to dab on a bit of the primer, followed by a little of your topcoat paint. Let it dry, and it will blend right in.
Conclusion: You Can Do This!
Painting over a water-based stain isn’t just possible—it’s a straightforward project that can completely transform your home. The fears of chipping paint and color bleed-through can be put to rest with a simple, proven process: Clean, Scuff, Prime, and Paint.
By taking the time to prepare your surface correctly, you are not just painting a piece of furniture; you are giving it a new story and a durable, beautiful finish that you can be proud of. So go find that dated piece of furniture, grab your supplies, and start creating something new. Your home will thank you for it, and you’ll gain the confidence that comes from a job well done.
Happy painting!