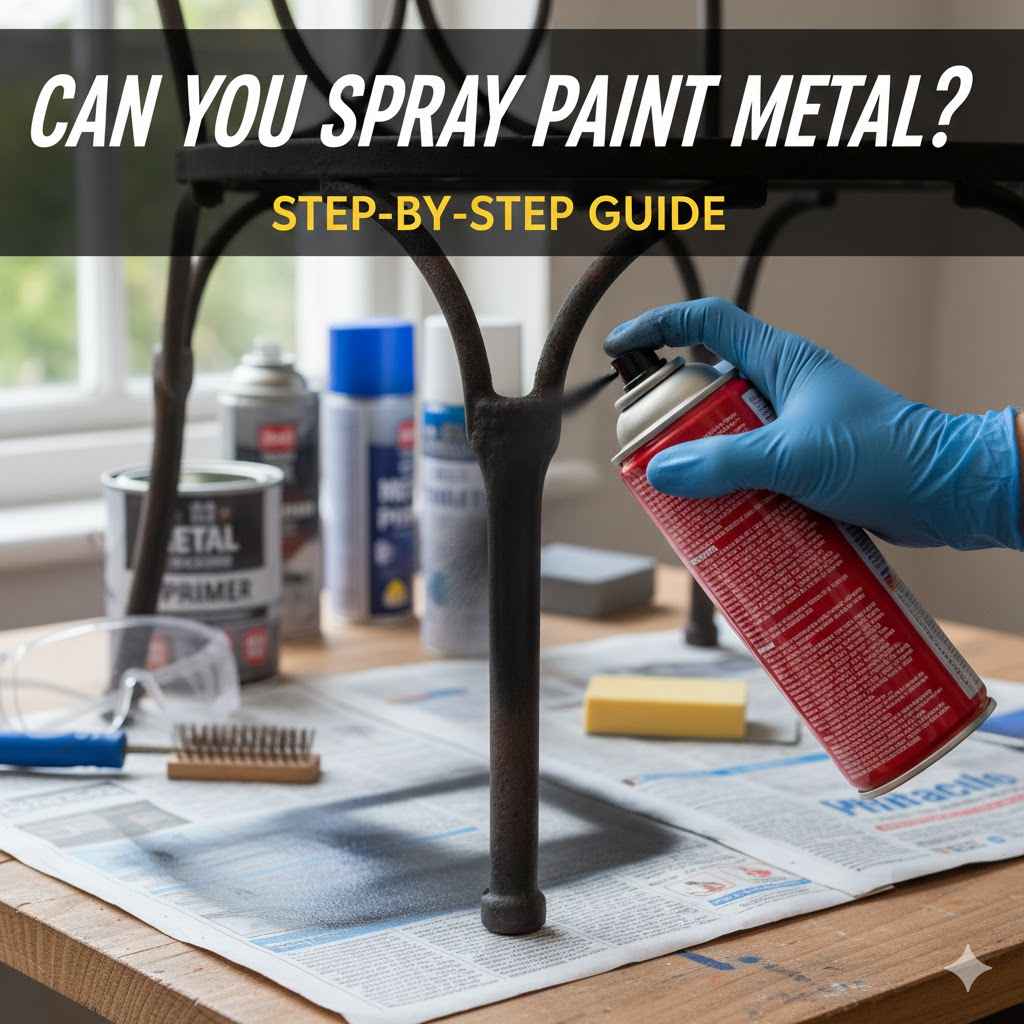
Can You Spray Paint Metal? Step-By-Step Guide
Many people wonder, “Can You Spray Paint Metal?” and if it’s a good idea. It can seem a bit tricky for beginners, especially if you want the paint to stick well and look smooth. You might worry about rust or peeling paint.
Don’t worry, this guide makes it super simple. We will walk you through exactly what to do, step-by-step, so you can get great results. Get ready to transform your metal items with a fresh coat of spray paint.
Can You Spray Paint Metal Yes Here’s How
Absolutely, you can spray paint metal! It’s a fantastic way to refresh old furniture, add color to garden decor, or even give a new look to household items. Spray painting metal is accessible for most DIYers, but achieving a durable and attractive finish requires careful preparation and the right techniques.
This section lays out the foundational knowledge for success.
When you spray paint metal, you’re essentially applying a thin, even layer of paint that adheres to the metal’s surface. The challenge lies in ensuring this adhesion is strong and long-lasting. Without proper steps, paint can chip, peel, or even lead to rust forming underneath.
This guide aims to demystify the process.
We will cover everything from choosing the right paint to the final protective coat. You’ll learn about surface preparation, primer selection, application techniques, and important safety tips. By the end, you’ll feel confident tackling your own spray painting projects on metal surfaces.
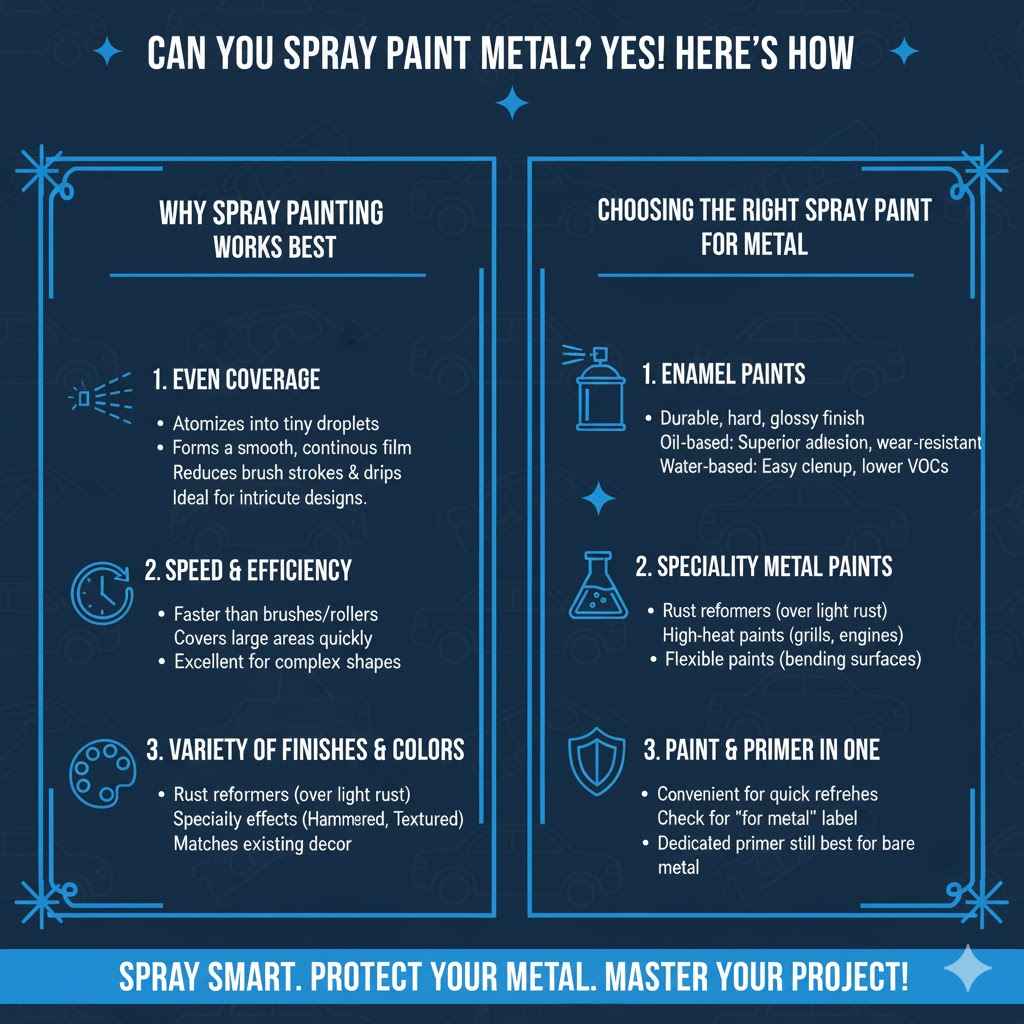
Why Spray Painting Metal Works Best
Spray painting is ideal for metal because it allows for a smooth, uniform finish that’s hard to achieve with brushes or rollers on uneven or detailed metal surfaces. The aerosol can disperses the paint evenly, reducing brush strokes and drips. This method is also efficient for covering large or complex shapes.
The effectiveness of spray painting metal hinges on the paint’s ability to bond with the surface. Special primers and paints are formulated to create a strong chemical bond, preventing flaking. Understanding these formulations is key to a lasting job.
Here are some reasons spray painting is a great choice for metal:
Even Coverage
Spray paint atomizes, meaning it breaks down into tiny droplets. These droplets are propelled by the propellant in the can, creating a fine mist. When this mist lands on the metal surface, it forms a continuous film without the ridges or overlaps often seen with brush or roller application.
This results in a professional-looking, uniform color that looks smooth to the touch and to the eye. It’s particularly beneficial for items with intricate designs or hard-to-reach areas where a brush might struggle to apply paint evenly.
Speed and Efficiency
Compared to traditional painting methods, spray painting is significantly faster. You can cover a large area in a short amount of time. This is because you’re not meticulously applying paint stroke by stroke.
The aerosol delivery system allows for broad strokes and quick coverage. This makes it an excellent option for larger projects or when you need to complete a task efficiently, such as refreshing a metal patio set before a party.
Variety of Finishes and Colors
The market offers an extensive range of spray paints specifically designed for metal. You can find paints in various sheens, from matte and satin to gloss and metallic. There are also specialized finishes like hammered metal, textured, or antique effects.
This variety allows for creative expression and the ability to match existing decor or achieve unique aesthetic goals. Whatever look you’re going for, there’s likely a spray paint option available.
Choosing the Right Spray Paint for Metal
Not all spray paints are created equal, and using the wrong type can lead to poor adhesion, rust, or an unfinished look. For metal, it’s essential to select paints that are formulated to bond strongly to non-porous surfaces and offer protection against corrosion.
Look for paints labeled “for metal,” “all-surface,” or specifically “direct-to-metal” (DTM). These contain additives that promote adhesion and often include rust inhibitors. Primer is usually a separate, but crucial, step.
Here’s a breakdown of paint types and what to consider:
Enamel Paints
Enamel spray paints are a popular choice for metal. They are known for their durability and hard, glossy finish that resists chipping and scratching. Oil-based enamels generally offer superior adhesion and resistance to wear and tear compared to water-based options, making them ideal for high-traffic items or outdoor applications.
However, they can have stronger fumes and require mineral spirits for cleanup. Latex or acrylic enamels are easier to clean up with water and have lower VOCs (Volatile Organic Compounds), making them a more user-friendly option for indoor use or for those sensitive to fumes.
Specialty Metal Paints
Beyond standard enamels, there are specialized spray paints for metal. These include rust reformers that can be applied directly over light rust, converting it into a stable, paintable surface. There are also high-heat paints for items like grills or engine parts, and flexible paints for surfaces that might bend or flex.
Choosing a specialty paint ensures the product is engineered to handle the specific demands of the metal item you are painting.
Paint and Primer in One Products
Many brands offer “paint and primer in one” spray cans. While convenient, it’s important to check if they are specifically designed for metal. For bare metal or heavily prepped surfaces, a dedicated metal primer is often still recommended for the best adhesion and rust prevention.
These products can work well for items that have been previously painted and are in good condition, providing a quick refresh. Always read the product label carefully to ensure it’s suitable for your metal project.
Preparing Your Metal Surface For Spray Paint
Surface preparation is arguably the most critical step in spray painting metal. Skipping or rushing this stage is the most common reason for paint failure, leading to peeling, chipping, and rust. A clean, smooth, and properly primed surface ensures the paint has something to grip onto and provides a barrier against the elements.
Think of it like building a house; a strong foundation is essential. For spray painting metal, that foundation is a well-prepared surface. This involves cleaning, degreasing, and often sanding or priming.
We’ll cover the essential steps to get your metal ready:
Cleaning and Degreasing Metal
Before any sanding or priming, the metal surface must be completely free of dirt, dust, grease, oil, and any other contaminants. These substances will prevent the primer and paint from adhering properly. Even fingerprints can leave behind oils that compromise the finish.
For effective cleaning, use a strong degreaser or a soap and water solution. If using soap and water, choose a dish soap that cuts through grease effectively. After washing, rinse the item thoroughly with clean water to remove all soap residue.
Then, dry the item completely. Moisture trapped on the surface can lead to rust later on.
Here are key cleaning steps:
Wipe Down with Degreaser
Use a dedicated metal degreaser or isopropyl alcohol (rubbing alcohol). Apply it to a clean cloth or paper towel and wipe down the entire surface. This will lift any oily residue, wax, or grime.
Work in small sections and use fresh cloths as needed to avoid spreading contaminants. This step is crucial for ensuring the paint can bond directly to the metal, not to a layer of grease.
Wash with Soap and Water (If Needed)
For heavily soiled items, a thorough wash with warm, soapy water is recommended. Use a mild detergent or dish soap and a sponge or soft brush. Scrub gently to remove dirt and grime.
After washing, rinse the item thoroughly with clean water. Make sure no soap residue remains, as this can also interfere with paint adhesion.
Dry Thoroughly
This is a vital step that many overlook. After washing and rinsing, dry the metal completely. Use clean, lint-free cloths.
If the item has nooks and crannies, you can use a hairdryer or compressed air to ensure all moisture is removed. Letting the item air dry on its own might not be sufficient, especially in humid conditions.
Sanding the Metal Surface
Sanding is important for two main reasons: to remove any loose paint, rust, or imperfections, and to create a slightly roughened surface (a “key”) that primer and paint can grip. The degree of sanding needed depends on the metal’s current condition.
For bare, new metal, a light scuff-sanding is usually enough. If there’s rust or old, flaking paint, you’ll need to sand more aggressively to remove these issues entirely. Always sand in a well-ventilated area, and consider wearing a dust mask.
Follow these sanding guidelines:
Light Sanding (For New or Smooth Metal)
If your metal is new, smooth, or has a very thin layer of existing paint that is in good condition, you’ll want to lightly scuff the surface. Use fine-grit sandpaper, typically 180-220 grit. The goal here isn’t to remove material but to dull the shiny surface and create microscopic scratches.
These scratches provide better adhesion for the primer. Wipe away all dust with a tack cloth or damp cloth after sanding.
Heavy Sanding (For Rust or Peeling Paint)
If you find rust spots or areas where paint is peeling or bubbling, you need to sand these areas down to bare metal. Start with a coarser grit sandpaper, like 80-120 grit, to remove the rust and old paint. Once you’ve reached clean metal, switch to a finer grit (180-220) to smooth out the surface and prepare it for primer.
It’s crucial to remove all rust because it will likely return if left underneath new paint.
Using Sanding Blocks or Power Sanders
For flat surfaces, a sanding block helps you apply even pressure. For more complex shapes or larger areas, you might consider an orbital sander. However, be careful not to over-sand or create uneven patches, especially on softer metals.
For very delicate or intricate items, hand sanding is often the best approach to maintain control.
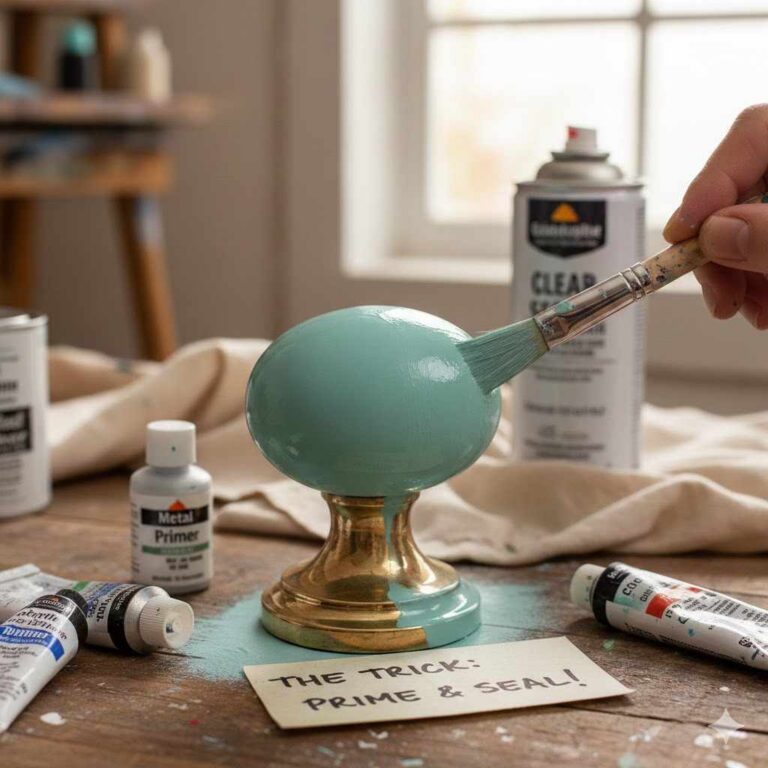
Applying a Metal Primer
Primer is the bridge between your metal surface and the topcoat of paint. For metal, a specialized primer is essential. It helps the paint adhere better, provides a uniform base color, and most importantly, offers protection against rust and corrosion.
There are several types of primers for metal, including bonding primers, rust-inhibiting primers, and self-etching primers. Choose one appropriate for your project and the type of metal you’re working with.
Here’s how to prime effectively:
Select the Right Primer
For most general metal projects, a good quality rust-inhibiting spray primer is ideal. If you have stubborn rust that you couldn’t remove completely, a rust-converter primer or rust-reform primer might be a better choice. For very smooth or galvanized metal, a bonding primer designed for slick surfaces is recommended.
Always check the product label to ensure it’s suitable for metal and the conditions it will be exposed to.
Apply Thin, Even Coats
Shake the primer can vigorously for at least one minute after the mixing ball starts rattling. Hold the can about 8-12 inches away from the surface. Apply the primer in light, even coats using a steady back-and-forth motion.
Overlap each stroke slightly. Avoid applying too much primer at once, as this can lead to drips and an uneven finish.
Allow Proper Drying Time
Let each coat of primer dry completely according to the manufacturer’s instructions. This typically ranges from 15-30 minutes for spray primers. Proper drying allows the primer to cure and form a solid base.
Some primers may recommend light sanding with very fine-grit sandpaper (320-400 grit) between coats for an ultra-smooth finish, but this is often optional.
The Spray Painting Metal Process Step-By-Step
With your metal surface perfectly prepared and primed, you’re ready for the main event: applying the spray paint. This stage requires attention to detail and technique to achieve a smooth, durable, and professional-looking finish. Remember that consistency in your application is key to avoiding streaks, drips, or uneven coverage.
We’ll guide you through each spray painting step, from shaking the can to applying multiple coats for the best results. Following these instructions will help you achieve a beautiful outcome on your metal projects.
Applying the First Coat of Spray Paint
Shake the spray paint can thoroughly for at least one minute after the mixing ball begins to rattle. This ensures the paint pigments and solvents are well combined for consistent color and flow. Hold the can upright and about 8-12 inches away from the metal surface.
Start spraying before you reach the edge of the object and continue spraying past the edge. This technique helps prevent pooling and drips at the start and end of your passes. Move your arm in a smooth, consistent motion, slightly overlapping each stroke with the previous one.
Here’s how to apply your first coat:
Proper Can Shake and Distance
A thorough shake is crucial. If you don’t shake it enough, the paint might not spray properly, leading to an uneven texture or color. Holding the can at the correct distance (8-12 inches) is also important.
Too close, and you risk drips and runs. Too far, and you’ll get a dry, uneven spray pattern that looks dusty.
Steady, Sweeping Strokes
Use a consistent speed and pressure. Move your hand and arm in a fluid, sweeping motion across the surface. Do not stop spraying in the middle of the surface; start and stop your spray outside the object.
This technique is often called “off-edge spraying” and is vital for a smooth, professional look.
Light Coats Are Better
It’s always better to apply multiple thin coats of paint than one thick, heavy coat. Thin coats dry faster, adhere better, and are less likely to run or drip. A single heavy coat may look like it’s covering well initially, but it’s more prone to imperfections and failure over time.
Patience is key for a quality finish.
Building Up Layers of Paint
After the first coat has been applied, resist the urge to immediately add another. Allowing adequate drying time between coats is essential for proper adhesion and to prevent the paint from becoming gummy or lifting. The recommended drying time will be on the paint can, but generally, you’ll want to wait 15-30 minutes.
Each subsequent coat should be applied in the same manner as the first: thin, even, and with consistent motion. This layering builds up the color opacity and creates a durable finish.
Here’s how to build successful layers:
Wait for Dry to Touch
Before applying the next coat, ensure the previous coat is “dry to touch.” This means it’s no longer wet or tacky to the touch. If you press lightly with your finger, it shouldn’t leave an imprint or stick. This typically takes about 15-30 minutes for most spray paints.
Rushing this step can cause the paint layers to mix unevenly, leading to a weak bond and potential bubbling.
Apply Subsequent Coats
Apply the second, third, and any subsequent coats in the same light, even manner as the first. Continue to use steady, sweeping motions and overlap your strokes. The number of coats needed will depend on the paint color and the desired opacity.
Darker colors might require fewer coats than lighter colors, especially if you’re covering a dark surface with a light paint.
Assess Coverage and Adjust
After a few coats, step back and assess the coverage. Are there any thin spots? Is the color uniform?
If needed, apply another light coat. Most projects will require 2-3 coats for full coverage and durability. Avoid applying more than 4-5 coats unless absolutely necessary, as too many layers can sometimes lead to issues with flexibility or adhesion.
Applying a Protective Clear Coat
Once you’ve achieved the desired coverage and the final color coat is dry, it’s time to add a protective clear coat. This step is crucial, especially for items that will be handled frequently, exposed to the elements, or need extra durability. A clear coat seals the paint, provides scratch resistance, and adds a uniform sheen.
You can choose from different finishes for your clear coat, such as matte, satin, or gloss, to complement your paint color and desired look. Ensure the clear coat you choose is compatible with spray paint.
Follow these steps for your clear coat:
Choose the Right Clear Coat
Select a clear coat spray that is compatible with your base paint. Many brands offer clear coats designed for automotive or general use. Acrylic lacquers or polyurethanes in spray can form are common choices for durability.
Ensure the finish (matte, satin, gloss) matches your aesthetic goals. A gloss clear coat will enhance the vibrancy of colors, while a matte finish will reduce shine.
Allow Base Coat to Cure Sufficiently
While the base coat needs to be dry to touch before recoating, it’s often beneficial to let it cure for a longer period before applying a clear coat, especially if you want maximum durability. Some manufacturers recommend waiting 24 hours or even longer for the base coat to fully harden. Check the paint can for specific curing recommendations.
Apply Clear Coats Sparingly
Apply the clear coat in the same manner as the color coats: thin, even passes, 8-12 inches away, with overlapping strokes. You typically only need 1-2 light coats of clear coat. Too many layers of clear coat can sometimes yellow over time or create a thick, plastic-like finish.
The goal is protection and enhancement, not bulk.
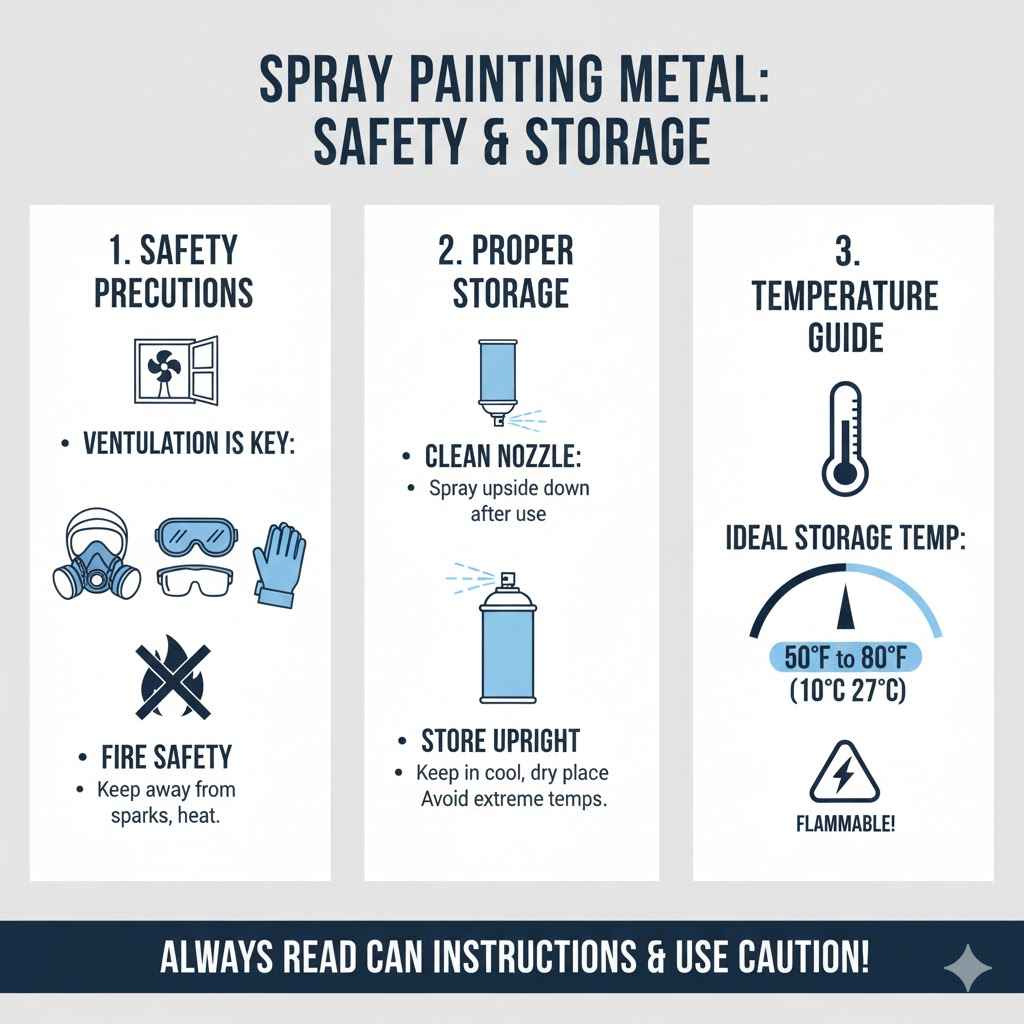
Safety Precautions For Spray Painting Metal
Spray painting involves chemicals and fine particles that can be harmful if not handled properly. Prioritizing safety ensures a pleasant and healthy experience. Always read the safety instructions on your spray paint cans and take appropriate precautions.
Working with spray paint requires a well-ventilated area, personal protective equipment, and awareness of flammability. Your health and safety are paramount, so don’t skip these vital steps.
Here are essential safety measures:
Ventilation is Key
Always spray paint in a well-ventilated area. This means outdoors or in a garage with the door wide open. Good ventilation helps disperse the fumes from the solvents and propellants, preventing them from building up to dangerous levels.
It also helps the paint dry faster by allowing moisture to escape. If you must spray indoors, ensure there are multiple open windows and consider using fans to circulate air.
Wear Protective Gear
A respirator mask is highly recommended, especially if you are sensitive to fumes or spraying in an enclosed space. It filters out the fine paint particles and chemicals. Safety glasses are also important to protect your eyes from any stray spray or debris.
Gloves will keep your hands clean and prevent skin irritation from the paint solvents. Wear old clothing that you don’t mind getting paint on.
Fire Safety
Spray paint cans are highly flammable due to the propellants they contain. Keep them away from open flames, sparks, heat sources, and smoking. Do not puncture or incinerate the cans, even when they are empty.
Store leftover paint in a cool, dry place away from ignition sources. Be aware of static electricity, as it can also ignite flammable vapors.
Storing Leftover Spray Paint
If you have leftover spray paint, proper storage is essential to ensure it remains usable for future projects. Incorrect storage can cause the paint to dry out, clog the nozzle, or lose its effectiveness.
A few simple steps can preserve your leftover paint.
Clean the Nozzle
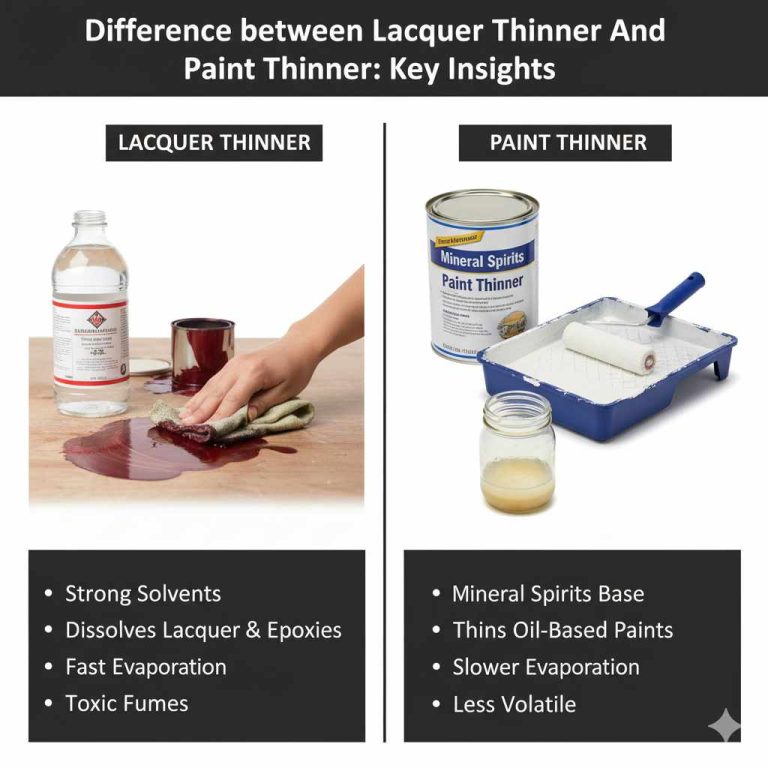
Immediately after finishing painting, turn the can upside down and spray for a few seconds until only clear propellant comes out. This clears any paint from the nozzle and prevents it from drying and clogging. If the nozzle does clog, you can try soaking it in lacquer thinner, but it’s often easier to buy a replacement nozzle.
Seal the Can Tightly
Store in a Cool, Dry Place
Store the cans upright in a cool, dry location, away from direct sunlight and heat sources. A shed, basement, or garage can be suitable, provided temperatures don’t consistently drop below freezing or rise excessively. Ideal storage temperatures are typically between 50°F and 80°F (10°C to 27°C).
Frequently Asked Questions
Question: How long does spray painted metal last
Answer: The lifespan of spray painted metal varies greatly depending on the preparation, the type of paint used, and the environmental conditions. Properly prepped and painted metal, especially with a good primer and clear coat, can last anywhere from a few years to over a decade outdoors. Indoor items might last even longer.
Factors like UV exposure, moisture, and physical wear will impact durability.
Question: Can I spray paint rusty metal
Answer: Yes, you can spray paint rusty metal, but it requires specific preparation. You must first remove as much loose rust as possible through sanding. Then, use a rust-inhibiting primer or a rust-converter primer specifically designed for this purpose.
Applying paint directly over rust without proper treatment will likely lead to future rust issues.
Question: Do I need to sand metal before spray painting
Answer: Yes, sanding is almost always recommended. For new or smooth metal, light scuff-sanding creates a surface for the primer and paint to adhere to. For old metal with existing paint or rust, sanding is crucial to remove imperfections and create a uniform surface.
Always clean the surface thoroughly after sanding to remove dust.
Question: Can I spray paint galvanized metal
Answer: Yes, you can spray paint galvanized metal, but it requires special care. Galvanized metal has a zinc coating that can sometimes prevent paint from adhering properly. It’s best to clean the surface thoroughly and then use a metal etching primer or a bonding primer designed for slick surfaces.
Some suggest letting new galvanized metal weather for several months before painting.
Question: What’s the best way to avoid drips when spray painting metal
Answer: Drips happen when too much paint is applied at once or when the can is held too close to the surface. To avoid drips, use light, even coats. Hold the can about 8-12 inches away and use smooth, sweeping motions, starting and stopping your spray off the edge of the object.
If a drip occurs, let it dry, then gently sand it smooth and reapply a light coat.
Wrap Up
You’ve learned that yes, you can spray paint metal! This step-by-step guide covered cleaning, priming, applying paint in thin layers, and adding a protective clear coat. By following these simple instructions, you can achieve a professional and lasting finish on your metal projects.
Get started and enjoy your newly transformed items.