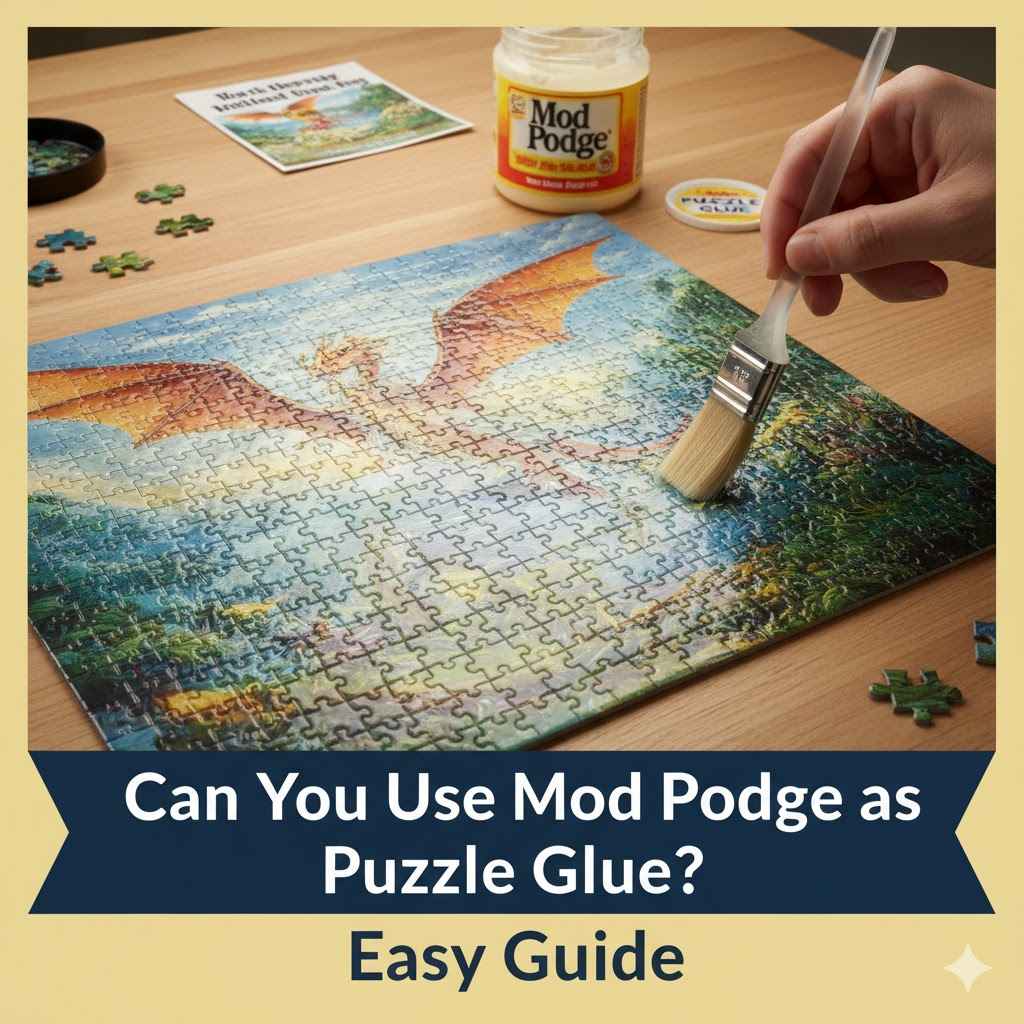
Can You Use Mod Podge as Puzzle Glue? Easy Guide
Wondering if Mod Podge works for your puzzles? It’s a question many crafters and puzzlers ask when they finish a tough jigsaw and want to keep it forever. You might be a little unsure if it’s the right choice, and that’s totally okay!
This guide will make it super simple. We’ll walk you through exactly how to use Mod Podge on your puzzles. Get ready to learn a quick and easy way to seal your masterpieces, and we’ll show you what to do next.
Can You Use Mod Podge as Puzzle Glue? Easy Guide makes it achievable for everyone.
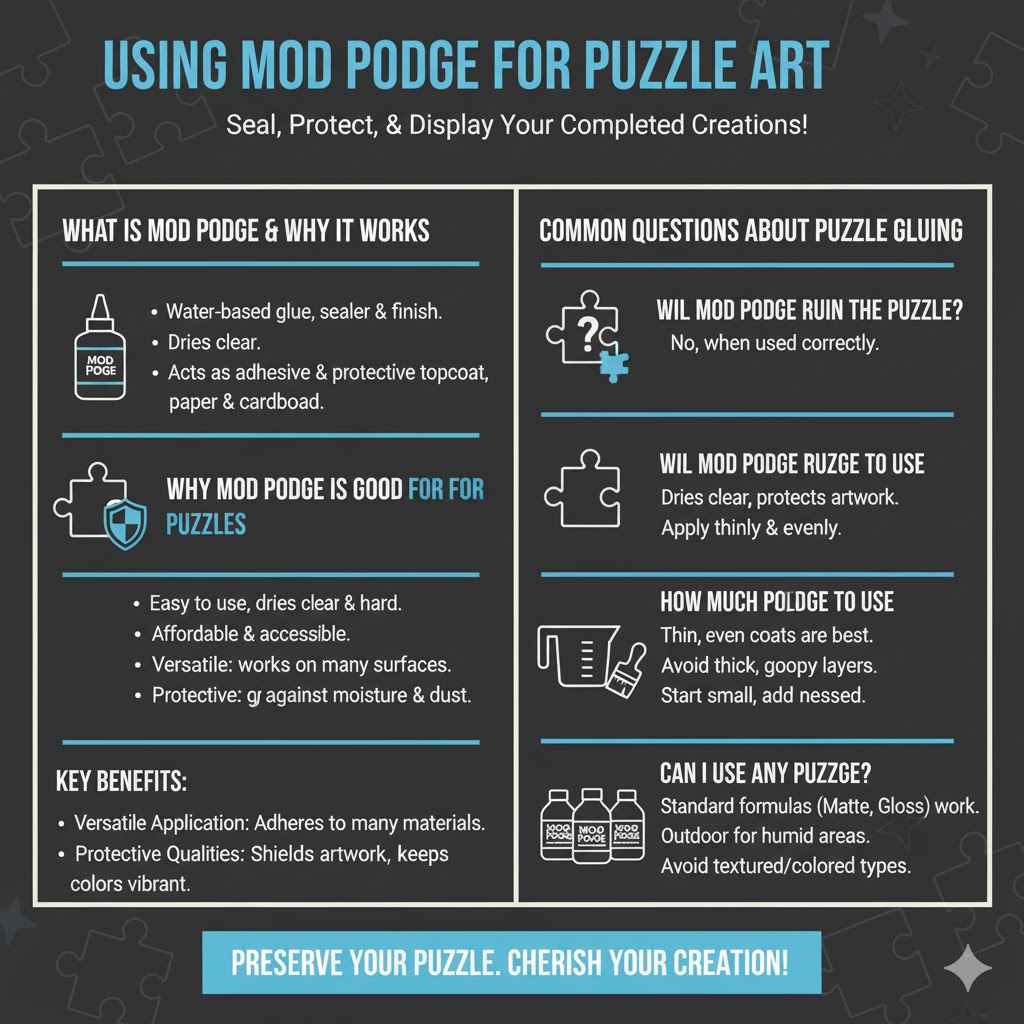
Using Mod Podge For Puzzle Art
Many people love to turn their completed puzzles into permanent decorations. They want to hang them on the wall, frame them, or even give them as gifts. This process involves sealing the puzzle so all the pieces stay together and the image is protected.
Mod Podge is a popular choice for this because it’s a glue, sealer, and finish all in one. It’s readily available and comes in different finishes like matte, satin, and gloss. This section will explain why Mod Podge is a go-to option and what makes it a good fit for sealing puzzles.
We will cover the basic idea of what Mod Podge does and why it’s often recommended for this kind of craft project.
What Is Mod Podge Exactly
Mod Podge is a water-based craft glue that dries clear. It’s made by Plaid Crafts and has been around for a long time. Think of it as a three-in-one product.
It acts as a glue to stick things down, a sealer to protect surfaces, and a finish to give a nice look. It comes in many different forms, like Mod Podge Gloss, Mod Podge Matte, Mod Podge Satin, and even special types like Glitter Mod Podge or Outdoor Mod Podge. For puzzle projects, the standard formulas are usually perfect.
Its flexibility allows it to work well on paper and cardboard, which are the common materials for puzzles.
When you use Mod Podge on a puzzle, it soaks into the cardboard slightly. This helps to bind the puzzle pieces together from the top. It also creates a protective layer over the printed image.
This layer prevents the picture from fading or peeling over time. Plus, it gives the puzzle a finished look, whether you choose a shiny gloss or a more subtle matte finish. It’s a craft staple for a reason.
Why Mod Podge Is Good For Puzzles
Mod Podge is often recommended for sealing puzzles because it’s designed to be easy to use and effective. It dries clear, so it won’t cover up the beautiful image on your puzzle. It also dries hard, which is great for keeping those tiny puzzle pieces from shifting or falling apart.
It’s affordable and easy to find at most craft stores or online. This makes it accessible for anyone wanting to preserve their puzzle.
Another key advantage is its versatility. You can use it on many different surfaces, including paper, fabric, wood, and, of course, puzzle cardboard. When applied correctly, it creates a strong bond that holds the puzzle pieces securely.
This makes it ideal for transforming your completed puzzle into a piece of art you can display. It’s a simple solution to a common puzzler’s desire to preserve their hard work.
Versatile Application
Mod Podge’s ability to adhere to a wide range of materials is a major plus for crafters. While this article focuses on puzzles, its general adhesive properties mean it can be used for many other projects too. This makes it a staple in many craft boxes because of its multipurpose nature.
You can use it for decoupaging napkins onto furniture, applying glitter to ornaments, or sealing painted surfaces. This versatility means that if you buy a jar of Mod Podge for your puzzle, you’ll likely find many other uses for it around your home.
Protective Qualities
Beyond just gluing, Mod Podge acts as a protective coating. For puzzles, this means the artwork on the top surface is shielded. It provides a barrier against moisture and dust, which can damage the puzzle over time.
This protection helps to keep the colors vibrant and the image crisp for years to come. It’s like giving your puzzle a clear, durable shield against the elements and everyday wear and tear.
Common Questions About Puzzle Gluing
When you decide to glue a puzzle, you might have a few common questions. One big one is about the best product to use. Many people ask, “Can I use Mod Podge as puzzle glue?” They wonder if it will work as well as specialized puzzle glues.
Another question is how much to use and how to apply it so it doesn’t mess up the puzzle image. People also want to know if it will make the puzzle pieces look different or if it’s hard to get an even coat. This section will address these common worries.
We will aim to answer your questions clearly.
Will Mod Podge Ruin The Puzzle
A common worry is that Mod Podge might damage the puzzle’s image. This is especially true if you use too much or the wrong kind. However, when used correctly, Mod Podge is safe for puzzles.
It’s designed to dry clear and form a protective layer without obscuring the artwork. The key is to apply it evenly and in thin coats. If you use a water-based formula and don’t oversaturate the puzzle, it will preserve the picture beautifully.
The different finishes allow you to choose how you want your puzzle to look after it’s sealed.
How Much Mod Podge To Use
The amount of Mod Podge you need depends on the size of your puzzle and how many coats you plan to apply. Generally, you don’t need a lot for each coat. A thin, even layer is much better than a thick, goopy one.
Too much Mod Podge can seep between the pieces, making them stick together permanently in a messy way, or it can pool and create an uneven surface. It’s better to start with a small amount on your brush and add more if needed, ensuring you spread it thinly.
Can I Use Any Mod Podge
For most puzzles, standard Mod Podge formulas like Matte, Gloss, or Satin work perfectly. These are water-based and dry clear, making them ideal for sealing puzzle images. If your puzzle is going to be outdoors or in a very humid area, you might consider Mod Podge Outdoor.
However, for indoor display, the regular versions are more than sufficient. Avoid Mod Podge formulas with added textures or strong colors unless that’s a specific effect you’re going for. The main goal is to seal and protect without altering the look of your puzzle.
Step-By-Step Guide To Using Mod Podge On Puzzles
Now that you know Mod Podge is a great option, let’s walk through how to use it. This step-by-step guide will make the process easy and straightforward. You’ll be able to create a beautifully preserved puzzle ready for display in no time.
Follow these simple instructions for the best results. We will cover everything from preparation to the final touches. This guide focuses on practicality and ease of use.
Preparation Is Key
Before you start applying Mod Podge, make sure your puzzle is perfectly assembled and complete. It’s best to do this on a flat surface that you don’t mind getting a little messy, like a sturdy table or a protected craft mat. You might want to work on the side of the puzzle that is facing up.
Some people like to cover the puzzle with a thin layer of saran wrap before starting. This is to prevent the puzzle from sticking to the surface you’re working on.
Make sure all the puzzle pieces are pressed together firmly. Any gaps or loose pieces will be sealed in place. You will need your chosen Mod Podge product, a soft-bristled paintbrush or foam applicator, and some newspaper or a drop cloth to protect your work area.
Having everything ready makes the process smooth and enjoyable. Good preparation helps avoid mistakes and ensures a professional finish.
Gather Your Supplies
Having all your materials organized before you begin is essential for a smooth crafting session. You will need your completed jigsaw puzzle, your chosen Mod Podge formula (Matte, Gloss, or Satin are good choices), and a good quality, soft-bristled paintbrush or a foam applicator. A wide brush works best for covering larger areas evenly.
You will also need something to protect your work surface, such as newspaper, a drop cloth, or an old towel.
A shallow dish or tray can be helpful for pouring out a small amount of Mod Podge to work with. This prevents you from dipping your brush directly into the main container repeatedly, which can introduce contaminants. Finally, have some paper towels or a damp cloth handy for any small spills or for cleaning your brush afterward.
Ensure The Puzzle Is Complete
This might seem obvious, but it’s crucial. You need to have the entire puzzle laid out and all the pieces fitted together perfectly. If you apply Mod Podge to a puzzle with missing pieces or pieces that are slightly askew, those imperfections will be sealed permanently.
Take your time to ensure every edge meets cleanly and every piece is firmly in place. Gently press down on all the pieces to make sure they are as flat and connected as possible before you apply any glue.
Consider working on a surface that is slightly larger than your puzzle. This gives you room to maneuver your brush and protects the edges of the table or craft mat. If your puzzle is very large, you might need to move it carefully to a different surface to let it dry completely.
Some crafters even use a thin piece of cardboard cut to the puzzle’s size as a base to help with moving it.
Applying The First Coat
Once your puzzle is ready and your supplies are gathered, you can begin applying the Mod Podge. Pour a small amount of Mod Podge into your shallow dish. Dip your paintbrush or foam applicator into the Mod Podge, but don’t overload it.
You want a thin, even coat. Start applying the Mod Podge to the puzzle in smooth, overlapping strokes. Work from one edge of the puzzle to the other.
Try to cover the entire surface of the puzzle with a thin, even layer. Pay attention to the spaces between the puzzle pieces. You want the Mod Podge to fill these slightly without creating puddles.
If you see any thick spots or drips, gently brush them out. The goal is a smooth, consistent finish. It’s better to apply two thin coats than one thick one.
Using A Brush Or Foam Applicator
The tool you use for applying Mod Podge can make a difference in the final look. A soft-bristled paintbrush is excellent for getting into all the nooks and crannies between the puzzle pieces. A foam applicator, like a foam brush, offers a very smooth, streak-free finish and is great for covering larger areas quickly.
Whichever you choose, ensure it is clean and dry before you begin.
When applying, use long, even strokes. If you’re using a brush, try to follow the direction of the puzzle image’s lines or patterns if possible for a more natural look. With a foam applicator, gentle pressing and gliding motions work best.
Avoid scrubbing, as this can push the Mod Podge too deep between the pieces or damage the puzzle’s surface.
Achieving An Even Coat
Achieving an even coat is vital for a professional-looking puzzle seal. Start by pouring a small amount of Mod Podge onto your brush or applicator. Gently spread it across the puzzle surface.
As you move the brush, overlap your strokes slightly. This ensures that there are no missed spots or thin areas. If you notice any areas where the Mod Podge looks thicker, gently spread it out.
It’s also important not to let Mod Podge pool in any one spot. If you see a puddle forming, use your brush to spread it thinly over a larger area. The goal is a light sheen, not a thick, wet layer.
After the first coat is applied, let it dry completely before applying a second coat. This will help build up a strong, even seal without making the puzzle too wet.
Drying Time And Second Coat
After applying the first coat of Mod Podge, it’s essential to let it dry thoroughly. Drying times can vary depending on the humidity and temperature of your room, but it usually takes about 20-30 minutes for the surface to feel dry to the touch. However, for the Mod Podge to fully cure and become durable, it needs much longer, often several hours or even overnight.
Rushing this process can lead to sticky spots or an uneven finish.
Once the first coat is completely dry, you can apply a second coat. This second layer adds extra strength and protection to your puzzle. Apply it just like the first coat, ensuring it’s thin and even.
Some people prefer to apply a third coat for maximum durability, especially if the puzzle will be handled often. Always allow each coat to dry completely before applying the next.
Allowing Adequate Drying
Patience is key when it comes to drying Mod Podge. While it may look dry on the surface after about 30 minutes, it’s still curing underneath. For best results, allow at least 2 to 4 hours of drying time between coats.
If your home is particularly humid, this drying time might need to be extended. You can tell it’s dry when it no longer feels tacky to the touch and has a uniform sheen.
Ensure the puzzle is in a well-ventilated area while it dries. This helps the Mod Podge cure properly and reduces any lingering smell. Avoid placing anything on top of the drying puzzle, as this can cause it to stick or distort.
Leaving it undisturbed is the best way to ensure a smooth, hard finish.
Applying Subsequent Coats
After the initial coat has dried thoroughly, you can apply additional coats for added protection and a smoother finish. The second coat seals the first one and further strengthens the bond between the puzzle pieces. If you want a really robust finish, especially for puzzles that might be framed and hung, consider a third coat.
Apply each subsequent coat in the same way as the first: thin, even, and overlapping strokes.
Each layer of Mod Podge builds upon the last, creating a durable, protective shell for your puzzle. Ensure you’re still watching for any pooling or drips, even on the second and third coats. A properly sealed puzzle will have a smooth surface that feels solid and unified, no matter how many pieces it originally contained.
This layered approach guarantees longevity and a professional appearance.
Finishing Touches And Drying
Once you have applied all desired coats of Mod Podge and they have dried completely, your puzzle is almost ready. You might notice a slight raised texture from the Mod Podge. If you want an ultra-smooth finish, you can gently sand the surface with very fine-grit sandpaper (like 220 grit or higher) after the final coat has fully cured.
Be very careful not to sand too hard, as you could damage the puzzle image.
After any optional sanding, wipe away any dust with a clean, dry cloth. Then, you can apply one final, very thin coat of Mod Podge to seal in any sanding dust and give it a perfectly uniform finish. Let this final coat dry completely.
The total curing time for Mod Podge can take up to 72 hours, so it’s best to leave the puzzle undisturbed during this period to ensure maximum durability.
Optional Smoothing
For those who desire an extra-smooth finish, a light sanding can be done. After the final coat of Mod Podge has dried for at least 24 hours, you can carefully use a very fine-grit sandpaper (220 grit or higher). Gently buff the surface in smooth, even strokes.
The goal here is not to remove Mod Podge, but to lightly smooth out any minor imperfections or brush strokes.
After sanding, it’s crucial to wipe away all dust. Use a soft, dry cloth or a slightly damp cloth to remove any residue. This step ensures that no dust particles are sealed into the surface.
A final, thin layer of Mod Podge applied after sanding will then create a perfectly smooth, professional-looking finish that looks almost like a varnished surface.
Full Curing Time
While your puzzle might feel dry to the touch within hours, Mod Podge needs time to fully cure. This curing process makes it as hard and durable as possible. Full curing typically takes about 72 hours, or three days.
During this time, avoid handling the puzzle excessively or placing heavy objects on it. It’s important for the Mod Podge to harden completely.
Once fully cured, your puzzle will be much more resistant to damage. It will be strong enough to frame or display without the pieces falling apart. Respecting the full curing time ensures that your hard work in preserving your puzzle will last for a long time.
It’s the final step in creating a lasting piece of art from your jigsaw.
Troubleshooting Common Issues
Even with careful application, sometimes issues can pop up when using Mod Podge on puzzles. Don’t worry if this happens! Most problems are easy to fix.
This section will cover some common issues and provide simple solutions. Knowing how to handle these little bumps in the road will help you achieve a great result every time. We want to ensure your project turns out just as you imagined.
Dealing With Bubbles
Bubbles can sometimes appear under the Mod Podge layer. This often happens if the Mod Podge is applied too thickly or if air gets trapped during application. If you notice a bubble while the Mod Podge is still wet, gently use your brush to smooth it out.
If the Mod Podge has already started to dry and you see a bubble, you can try to carefully prick it with a fine needle and then smooth the area down.
For bubbles that are more stubborn or appear after drying, you might need to gently sand the area once the Mod Podge is fully cured. After sanding, apply a thin, new coat of Mod Podge over the area to re-seal it. If the bubble is large, you might need to live with it or carefully lift the piece and reapply Mod Podge underneath, which is more difficult.
Prevention is key: always apply thin coats and use smooth strokes.
When Mod Podge Is Too Thick
Applying Mod Podge too thickly is one of the most common mistakes. This can lead to a sticky surface, a cloudy finish, or an uneven texture. If you notice you’ve applied too much while it’s still wet, the best thing to do is to carefully use your brush to spread it out into a thinner layer.
Work quickly to spread the excess Mod Podge over a larger area or gently wick some of it away with a paper towel.
If the Mod Podge has already dried and is too thick, it can be harder to fix. You might be able to gently sand down the thick areas once fully cured. However, be very cautious not to sand through the Mod Podge and damage the puzzle image.
Applying another thin coat after sanding might help to even it out. The key takeaway is to always aim for thin, even coats from the start.
Sticky Or Tacky Surfaces
A common problem is a sticky or tacky surface after Mod Podge application. This usually means the Mod Podge hasn’t dried or cured completely. It can also happen if you applied the Mod Podge too thickly or if the humidity is very high.
Ensure you are allowing adequate drying and curing time between coats and after the final coat.
If the surface remains tacky after 24-48 hours, you can try applying a very thin layer of cornstarch or baby powder. Gently dust it over the tacky area and then brush it off. This can help absorb some of the moisture causing the tackiness.
Then, apply another thin layer of Mod Podge over the area once it feels less tacky. Sometimes, a final coat of Mod Podge that has been applied very thinly can resolve this issue.
Dealing With Streaks And Brush Marks
Streaks and visible brush marks can detract from the finished look of your puzzle. These often occur when the Mod Podge isn’t applied evenly or when the brush is too dry or too wet. To avoid streaks, use smooth, overlapping strokes and ensure your brush is consistently loaded with a thin amount of Mod Podge.
If you notice streaks after the Mod Podge has dried, you might be able to gently sand down the raised lines with very fine-grit sandpaper. After sanding, wipe away all dust and apply a final, thin coat of Mod Podge to create a uniform finish. Using a foam applicator can also help achieve a smoother, streak-free finish compared to a bristle brush.
Preventing Streaks
To prevent streaks, think about your application technique. Load your brush with a moderate amount of Mod Podge – not too much, not too little. Apply it in smooth, even strokes.
Overlap each stroke with the one before it by about half. Try to work in one consistent direction, or follow the grain of the puzzle image if possible. If you are using a bristle brush, make sure the bristles are flexible and not stiff.
Working in good light also helps you see where you’ve applied Mod Podge and where you might have missed. If you notice a streak while the Mod Podge is still wet, use your brush to gently blend it out. Remember that thin coats are easier to manage and less likely to show streaks than thick, heavy applications.
Smoothing Brush Marks
If brush marks are already visible after drying, don’t panic. For a puzzle that you intend to frame, minor brush marks might not be noticeable once it’s behind glass. However, if you want a perfectly smooth finish, you can try gently sanding the dried Mod Podge with very fine-grit sandpaper (220 grit or higher).
Be extremely careful not to sand too hard, as this can damage the puzzle’s surface or image.
After sanding, wipe away all dust thoroughly. You can then apply another thin coat of Mod Podge. This new coat will fill in any areas where sanding might have removed a bit too much and will create a smooth, unified surface.
A foam applicator is often better for achieving a smooth finish without noticeable brush marks in the first place.
Edge Sealing And Protection
Sometimes, the edges of the puzzle can fray or lift slightly, especially with older puzzles. Mod Podge is great for sealing these edges. When applying your coats, make sure to brush a little Mod Podge over the outer edges of the puzzle as well.
This will help to hold them down and prevent them from peeling away.
For added durability, especially if the puzzle will be handled a lot or moved around, consider reinforcing the edges. You can do this by applying an extra thin coat of Mod Podge along the very outside edge. If you plan to frame the puzzle, this extra seal will help protect it from wear and tear during framing and from dust getting in.
Securing Loose Edges
If you notice any puzzle pieces with lifting or fraying edges, Mod Podge can help secure them. Apply a small amount of Mod Podge directly to the lifted edge using a fine paintbrush. Gently press the edge down onto the puzzle surface.
You may need to hold it in place for a few moments until it starts to adhere.
It’s also beneficial to paint a thin layer of Mod Podge around the entire perimeter of the puzzle once it’s assembled. This reinforces the outer edges and helps prevent them from separating or fraying over time, especially if the puzzle is going to be framed or handled regularly. This extra step adds significant durability to the edges.
Protecting The Entire Puzzle
The primary purpose of using Mod Podge is to protect the puzzle. It shields the artwork from fading, moisture, and dust. By applying even coats over the entire surface and extending slightly over the edges, you create a durable, protective barrier.
This barrier ensures that your puzzle can be displayed for years to come without showing signs of wear and tear.
The Mod Podge finish also makes the puzzle easier to clean. If it gets dusty, you can gently wipe it down with a soft, dry cloth. This protective coating transforms a temporary pastime into a lasting piece of decorative art.
It’s a simple way to give your completed puzzle a professional and enduring finish that truly showcases your accomplishment.
Alternatives To Mod Podge For Puzzles
While Mod Podge is a popular and effective choice for sealing puzzles, it’s good to know that other options exist. Some crafters might prefer different products based on their availability, desired finish, or specific project needs. This section will briefly explore some common alternatives that can achieve a similar result, helping you choose the best method for your puzzle project.
Understanding these options gives you more control over your crafting outcomes.
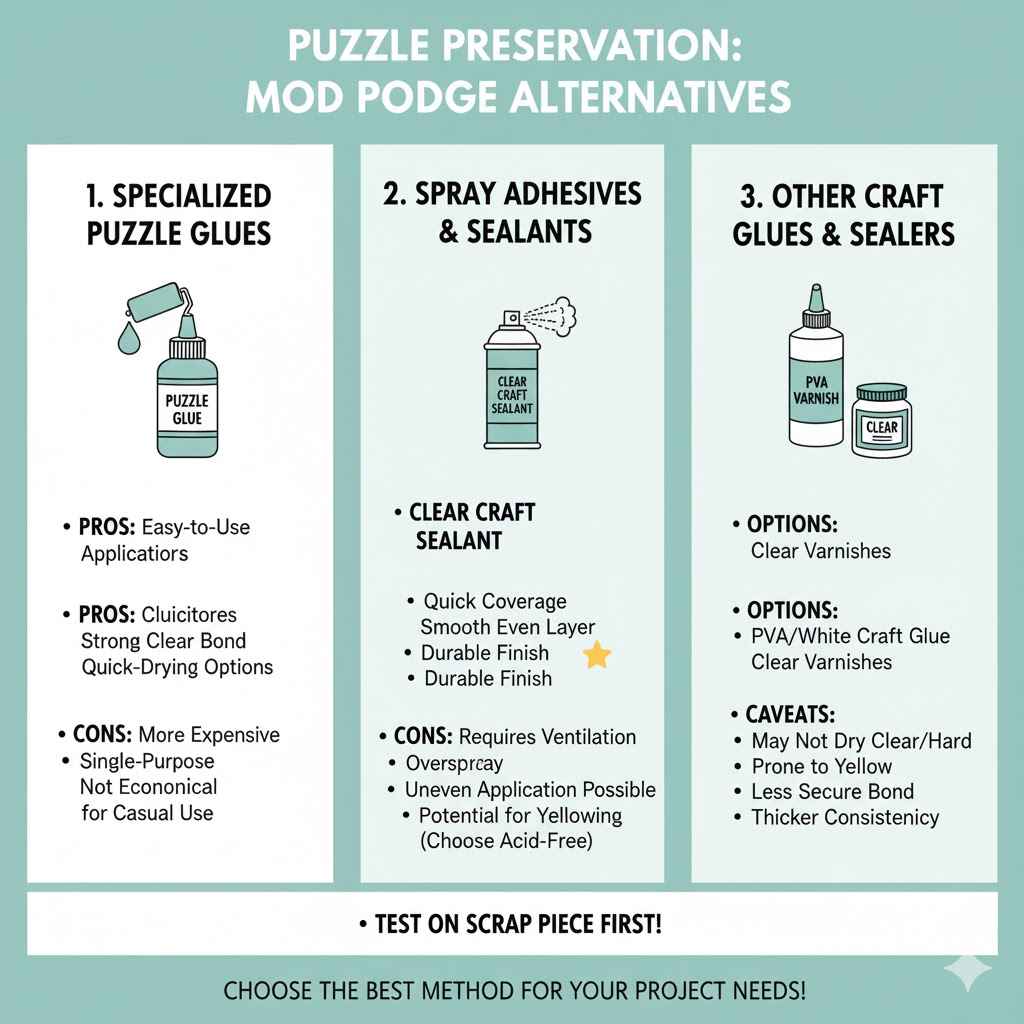
Specialized Puzzle Glues
There are many glues specifically marketed for puzzles. These are often formulated to provide a strong bond and a clear finish. Some come with built-in applicators, like foam rollers or spray bottles, which can make application very convenient.
These specialized glues can be a great option if you plan to glue many puzzles regularly. They are designed to adhere well to puzzle board and dry clear without yellowing.
Some puzzle glues also offer additional benefits. For instance, certain brands are designed to be quick-drying or to provide a flexible finish that won’t crack over time. Others might offer UV protection to prevent fading of the puzzle image.
While they are a direct solution, Mod Podge often offers a more economical choice since it can be used for many other craft projects.
Pros And Cons Of Specialized Glues
Specialized puzzle glues often excel in ease of use. Many come with applicators that make spreading the glue simple and consistent, reducing the chance of streaks or thick spots. They are formulated to bond puzzle pieces securely and dry clear.
The main advantage is their dedicated purpose.
However, these glues can sometimes be more expensive than Mod Podge, especially if you only need them for one or two puzzles. They are also typically single-purpose products, meaning you might not find other uses for them, unlike Mod Podge. If you’re a casual puzzler, a specialized glue might be overkill.
Spray Adhesives And Sealants
Spray adhesives and sealants can also be used for puzzles. These come in aerosol cans and offer a quick way to cover the entire puzzle surface. They are often very effective at creating a smooth, even layer.
Some spray sealants can provide a durable finish that protects the puzzle image.
However, spray products require good ventilation and protection for surrounding areas, as overspray can occur. You also need to be careful to apply them evenly to avoid blotchy patches or uneven coverage. Some spray adhesives might be more prone to yellowing over time compared to Mod Podge, so choosing a high-quality, acid-free option is important.
Choosing The Right Spray Product
When selecting a spray adhesive or sealant for puzzles, look for products labeled as clear, acid-free, and permanent. Many crafting spray adhesives are designed for projects like scrapbooking or decoupage and will work well. Ensure the product dries clear and does not leave a yellow tint, as this can obscure the puzzle’s artwork.
It’s also wise to test the spray on a small, inconspicuous area or a scrap piece of cardboard before applying it to your entire puzzle. This helps you gauge the spray pattern, the amount of product needed, and the drying time. Always use these products in a well-ventilated area, like outdoors or in a garage, and wear a mask to avoid inhaling the fumes.
Other Craft Glues And Sealers
Beyond Mod Podge and specialized puzzle glues, other craft glues and sealers might seem like candidates. For example, craft glues like Elmer’s glue or PVA glue could potentially work, but they might not dry as clear or as hard as Mod Podge. They may also be more prone to yellowing over time.
Some clear varnishes or sealers designed for wood or paper crafts could also be used. However, these are often thicker and may not penetrate the puzzle board as well as Mod Podge, potentially leading to a less secure bond. It’s generally best to stick with products known for their clear, archival quality and ability to adhere well to paper-based materials.
Frequently Asked Questions
Question: Can I use Mod Podge for puzzles that will be framed?
Answer: Yes, Mod Podge is an excellent choice for puzzles that will be framed. It creates a strong seal that holds the pieces together and protects the image, making it ready for framing. Ensure you apply enough coats for durability.
Question: How long does it take for Mod Podge to fully dry on a puzzle?
Answer: While Mod Podge feels dry to the touch in about 30 minutes, it needs about 72 hours (3 days) to fully cure and reach its maximum hardness and durability.
Question: Will Mod Podge make my puzzle shiny?
Answer: Mod Podge comes in different finishes. If you use Mod Podge Gloss, your puzzle will be shiny. If you prefer a matte finish, use Mod Podge Matte.
Mod Podge Satin offers a finish in between.
Question: Can I remove Mod Podge from a puzzle if I make a mistake?
Answer: Once Mod Podge has dried, it is very difficult to remove without damaging the puzzle. It’s best to apply it carefully and only if you are sure you want to permanently seal the puzzle.
Question: Should I apply Mod Podge on both sides of the puzzle?
Answer: Generally, applying Mod Podge to the top side of the puzzle is sufficient for sealing and protection. Applying it to the back might make the puzzle too thick or warp it. Stick to sealing the image side for best results.
Conclusion
Yes, you absolutely can use Mod Podge as puzzle glue. It is a reliable and easy-to-use option for sealing your completed puzzles. By following the simple steps of preparation, application, and drying, you can transform your jigsaw into a lasting piece of art.
Enjoy preserving your puzzles.