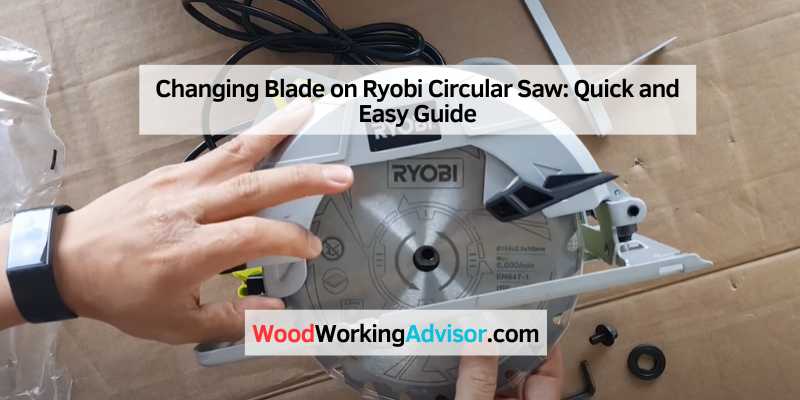
Changing Blade on Ryobi Circular Saw: Quick and Easy Guide
To change the blade on your Ryobi circular saw, first remove the arbor bolt and outer flange, carefully lift the blade off the arbor, and remove it from the saw. Ensure the new blade is compatible with your Ryobi Handyline circular saw and follow the manufacturer’s instructions for installation.
It is a simple process that can be done in just a few steps. A circular saw is a versatile and handy tool to have in your toolbox. However, with frequent use, the blade on your Ryobi circular saw may become dull or damaged, making it necessary to replace it.
Changing the blade on your Ryobi circular saw is a simple process that can be done easily with just a few steps. We will guide you on how to change the blade on your Ryobi circular saw and give you some tips to ensure a safe and successful replacement.
Safety First: Preparing To Change The Blade
When preparing to change the blade on your Ryobi circular saw, it’s important to follow the manufacturer’s instructions for installation. Remove the arbor bolt and outer flange, carefully lift the blade off the arbor, and replace it with a compatible blade.
Always prioritize safety when handling power tools.
Power Off And Unplug
Before you begin changing the blade on your Ryobi Circular Saw, it is crucial to prioritize your safety. The first step is to power off the saw and unplug it from the power source. This ensures that there is no risk of accidental starting or electrical shock during the blade replacement process.
Gather Necessary Tools
To efficiently change the blade on your Ryobi Circular Saw, you will need a few essential tools. Make sure you have the following items readily available before proceeding:
- Allen wrench or wrench set: This will be used to loosen and tighten the blade.
- Protective gloves: Wear gloves to protect your hands from any sharp edges.
- Safety glasses: Eye protection is essential to prevent any debris from getting into your eyes.
- Replacement blade: Ensure that you have the correct size and type of blade compatible with your Ryobi Circular Saw.
Once you have gathered all the necessary tools, you are ready to proceed with changing the blade on your Ryobi Circular Saw. Remember, always prioritize safety and follow the manufacturer’s instructions for a smooth and successful blade replacement process.
Identifying The Parts
Before changing the blade on your Ryobi circular saw, it’s crucial to understand the saw anatomy and identify the essential parts. This will ensure a smooth and efficient blade replacement process.
Understanding The Saw Anatomy
When it comes to understanding the anatomy of your Ryobi circular saw, there are a few key components to be aware of:
- The blade guard: A crucial safety feature that covers the blade when not in use.
- The arbor: The spindle onto which the blade is mounted.
- The arbor nut: Secures the blade in place.
- The handle: Allows for a firm grip and control during operation.
Locating The Arbor Bolt
The arbor bolt is an essential part of the circular saw that holds the blade in place. It is typically located at the center of the blade, securing it to the arbor. Identifying and accessing the arbor bolt is the first step in the blade replacement process.
Securing The Saw
When it comes to changing the blade on your Ryobi circular saw, one of the crucial steps is securing the saw to ensure a safe and effective blade replacement process. By stabilizing the saw and engaging the spindle lock, you can confidently proceed with the blade changing procedure.
Stabilizing The Saw
Before starting the blade replacement process, it’s essential to stabilize the saw to prevent any unexpected movements. Here’s how you can do it:
- Place the saw on a flat and stable surface to ensure it remains steady during the blade changing process.
- Ensure the power cord is unplugged to eliminate any risk of accidental activation.
Engaging The Spindle Lock
The spindle lock plays a crucial role in immobilizing the blade and spindle, allowing for safe and efficient blade replacement. Here’s how to engage the spindle lock:
- Locate the spindle lock button or lever, typically positioned near the blade housing.
- Press and hold the spindle lock to secure the blade and prevent it from rotating.
Removing The Old Blade
When it comes to changing the blade on your Ryobi Circular Saw, the first step is to remove the old blade. This process involves loosening the arbor bolt and detaching the blade safely. Follow these simple steps to remove the old blade:
Loosening The Arbor Bolt
- Start by unplugging the circular saw to ensure safety.
- Locate the arbor bolt on the saw’s housing. This bolt holds the blade in place.
- Using the appropriate wrench or tool, turn the arbor bolt counterclockwise to loosen it. Make sure to hold the blade firmly to prevent any movement.
- Continue loosening the bolt until you can remove it completely.
Detaching The Blade Safely
- Once the arbor bolt is removed, carefully lift the old blade off the arbor. Be cautious not to touch the sharp edges.
- Slide the blade down through the bottom of the saw’s sled, ensuring that it is completely free from the saw.
- Set the old blade aside in a safe place or dispose of it properly.
It’s important to note that if you need to replace the old blade, ensure that the new blade is compatible with your Ryobi Circular Saw. Always refer to the manufacturer’s instructions for proper installation.
Changing the blade on your Ryobi Circular Saw is a simple process that can be done with care and precision. By following these steps to remove the old blade, you’ll be ready to install a new blade and continue with your woodworking projects.
Selecting The Right Blade
Changing the blade on a Ryobi Circular Saw is a straightforward process. To do so, remove the arbor bolt and outer flange, lift the old blade off the arbor, and replace it with a compatible new blade following the manufacturer’s instructions.
For a visual guide, there are helpful videos available on YouTube demonstrating the step-by-step process.
Blade Compatibility
Before changing the blade on your Ryobi circular saw, it is essential to ensure that the new blade is compatible with your saw. Check the manufacturer’s instructions and make sure that the blade’s diameter, arbor size, and maximum RPM match your saw’s specifications. Using an incompatible blade can result in poor cutting performance, increased wear and tear on your saw, and even accidents.
Types Of Blades For Different Materials
Different materials require different types of blades for optimal performance. Here are some of the most common types of blades and the materials they are best suited for:
- Rip Blades: These blades have fewer teeth and are best suited for cutting wood along the grain.
- Crosscut Blades: These blades have more teeth and are designed for cutting wood across the grain.
- Combination Blades: These blades have a mix of rip and crosscut teeth and are versatile enough to handle both types of cuts.
- Metal Blades: These blades have fewer teeth and are designed for cutting through metal, aluminum, and other non-wood materials.
- Masonry Blades: These blades have diamond-tipped teeth and are designed for cutting through concrete, brick, and other masonry materials.
By selecting the right blade for the job, you can ensure that your cuts are precise, clean, and efficient. Remember to always follow the manufacturer’s instructions when changing blades on your Ryobi circular saw, and wear appropriate safety gear to protect yourself from debris and accidents.
Installing The New Blade
To install the new blade on your Ryobi Circular Saw, start by removing the arbor bolt and outer flange. Carefully lift the old blade off the arbor and replace it with the new blade, ensuring compatibility with your Ryobi Handyline circular saw.
Follow the manufacturer’s instructions for proper installation.
Once you have removed the old blade from your Ryobi circular saw, it’s time to install the new one. Follow these steps to ensure a proper installation:
Aligning The Blade Properly
Before attaching the new blade, make sure it is aligned properly with the saw. This will help ensure a clean and accurate cut. To align the blade:
- Ensure the blade teeth are facing the right direction. The teeth should be pointing down towards the front of the saw.
- Align the blade with the arbor hole, making sure it sits flush against the blade washer.
- Rotate the blade until it locks in place.
Attaching The Blade Securely
Once the blade is properly aligned, it’s time to attach it securely to the saw. Follow these steps:
- Replace the outer blade washer and the arbor bolt. Make sure the blade washer is seated properly.
- Tighten the arbor bolt with the wrench provided. Use a clockwise motion to tighten the bolt.
- Double-check the blade’s alignment and tighten the bolt further if necessary.
It’s important to ensure the blade is attached securely to prevent any accidents or injuries during use. With these steps, you can confidently install a new blade on your Ryobi circular saw.
Reassembling Components
To change the blade on your Ryobi circular saw, first remove the arbor bolt and outer flange. Carefully lift the blade off the arbor and replace it with a compatible blade, following the manufacturer’s instructions for installation. Be sure to tighten the bolt back on properly.
Replacing The Outer Flange
To reassemble the components of your Ryobi Circular Saw, start by replacing the outer flange. The outer flange is the part that holds the blade in place and ensures it spins correctly. Here’s how to do it:
- Take the new outer flange and align it with the arbor, making sure it fits snugly.
- Insert the flange onto the arbor, ensuring it is positioned correctly.
- Tighten the flange using the provided wrench or a suitable tool, making sure it is secure.
Tightening The Arbor Bolt
After replacing the outer flange, the next step is to tighten the arbor bolt. The arbor bolt is what holds the blade in place and prevents it from wobbling during use. Follow these steps to properly tighten the arbor bolt:
- Insert the blade onto the arbor, ensuring it is aligned correctly.
- Place the arbor bolt onto the arbor and thread it onto the blade.
- Using the provided wrench or a suitable tool, tighten the arbor bolt securely.
- Ensure the blade is centered and does not wobble when the saw is turned on.
By following these steps, you can easily reassemble the components of your Ryobi Circular Saw and ensure that the blade is securely in place for safe and efficient use. Remember to always refer to the manufacturer’s instructions for any specific guidelines or recommendations.
Safety Check And Testing
When changing the blade on a Ryobi Circular Saw, it is crucial to perform a safety check and test the new blade installation before use. Following these steps ensures that the saw operates safely and efficiently.
Inspecting The Blade Installation
After replacing the blade, it’s essential to inspect the installation to ensure everything is properly in place. Start by checking the blade for any signs of damage or irregularities. Ensure the blade is securely attached to the arbor and that the arbor nut is tightened correctly. Verify that the blade teeth are facing the right direction according to the manufacturer’s guidelines. Additionally, examine the blade guard to confirm it moves freely and covers the blade properly. Any issues with the installation should be addressed before proceeding.
Performing A Test Cut
Once the new blade is installed and inspected, it’s time to perform a test cut to validate its functionality. Before doing so, ensure the saw is disconnected from the power source. After reattaching the power, hold the saw firmly and make a test cut on a piece of scrap material. Observe the cut carefully to ensure it is clean and precise. If the cut appears uneven or the saw exhibits any unusual behavior, stop immediately and recheck the blade installation. Only proceed with using the saw for regular cutting tasks once the test cut confirms the blade’s proper functioning.
Maintenance Tips
To change the blade on your Ryobi Circular Saw, begin by removing the arbor bolt and outer flange. Gently lift the blade off the arbor and take it out from the saw. Ensure the new blade is compatible and follow the manufacturer’s instructions for installation.
Cleaning The Saw
After every use, clean the saw thoroughly to remove any dust, debris, and residue. Use a soft brush or compressed air to clean the blade guard, base plate, and motor vents. Avoid using solvents or harsh chemicals as they can damage the saw’s components.
Regular Blade Inspection
Inspect the blade regularly for any signs of wear, damage, or dulling. Ensure that the teeth are sharp and free from any chips or nicks. If you notice any issues, replace the blade immediately to maintain optimal cutting performance and safety.
Troubleshooting Common Issues
To change the blade on a Ryobi circular saw, start by removing the arbor bolt and outer flange. Carefully lift the blade off the arbor and remove it from the saw. Ensure that the new blade is compatible with your Ryobi Handyline circular saw and follow the manufacturer’s instructions for installation.
Blade Wobble
If you notice a blade wobble while using your Ryobi Circular Saw, it can be an indication of an underlying issue. Blade wobble can affect the accuracy of your cuts and even pose a safety risk. Here are a few troubleshooting steps to address blade wobble:
- Ensure the blade is securely tightened: Loose blade can cause wobbling. Turn off the saw and unplug it, then use the wrench provided to tighten the blade securely.
- Inspect the arbor and flange: Check for any debris or damage on the arbor and flange. Clean or replace them if necessary.
- Check for a bent blade: A bent blade can also cause wobbling. Carefully examine the blade for any signs of warping or damage. If it is bent, replace it with a new one.
- Verify the blade compatibility: Ensure that you are using a compatible blade for your Ryobi Circular Saw. Using an incorrect blade can lead to wobbling.
By following these troubleshooting steps, you can address blade wobble and ensure smooth and accurate cuts with your Ryobi Circular Saw.
Difficulty In Blade Changing
If you are having trouble changing the blade on your Ryobi Circular Saw, don’t worry, it’s a common issue that can be easily resolved. Here are a few troubleshooting steps to help you with blade changing:
- Ensure the saw is unplugged: Safety should always be a priority. Before attempting to change the blade, make sure the saw is unplugged from the power source.
- Refer to the manufacturer’s instructions: Each circular saw model may have specific instructions for blade changing. Consult the user manual or the manufacturer’s website for guidance.
- Use the spindle lock: Many circular saws, including Ryobi models, have a spindle lock feature to hold the blade in place during changing. Engage the spindle lock to prevent the blade from rotating.
- Remove the arbor bolt and outer flange: Using the provided wrench, loosen and remove the arbor bolt and outer flange. This will allow you to lift the blade off the arbor.
- Install the new blade: Carefully align the new blade with the arbor and slide it onto the saw. Make sure it is securely seated.
- Tighten the arbor bolt and outer flange: Use the wrench to tighten the arbor bolt and outer flange, ensuring the blade is held firmly in place.
By following these troubleshooting steps, you can easily change the blade on your Ryobi Circular Saw and continue with your woodworking projects smoothly.
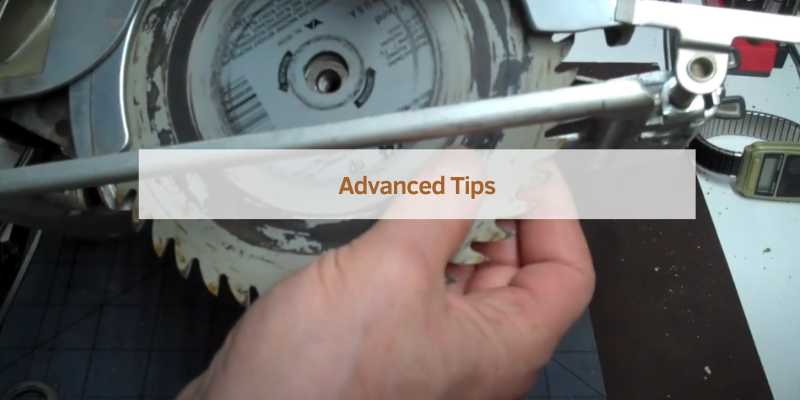
Advanced Tips
When it comes to changing the blade on your Ryobi circular saw, there are advanced tips that can help you improve cut precision and extend blade life. By implementing these tips, you can ensure that your saw operates at its best and delivers high-quality results consistently. Let’s explore these advanced tips in detail.
Improving Cut Precision
One way to improve the cut precision of your Ryobi circular saw is to ensure that the blade is properly aligned and securely fastened. Before making any cuts, verify that the blade is perpendicular to the shoe of the saw to prevent any inaccuracies in the cuts. Using a quality square can help you check the alignment of the blade, ensuring that your cuts are precise and clean.
Another tip for enhancing cut precision is to use the appropriate blade for the material you are cutting. Different blades are designed for specific materials such as wood, metal, or plastic. Selecting the right blade for the job can significantly improve the accuracy and quality of your cuts.
Extending Blade Life
Extending the life of your circular saw blade involves proper maintenance and handling. After using the saw, ensure that the blade is cleaned and free from any debris or residue. This helps to prevent premature dulling of the blade and ensures optimal performance during future use.
Additionally, it’s essential to store the blade properly when not in use. Using a blade cover or storing it in a protective case can prevent damage and prolong the lifespan of the blade. Proper storage also reduces the risk of accidental nicks or dulling caused by contact with other tools or materials.
Frequently Asked Questions
How To Change Blades On A Ryobi Circular Saw?
To change blades on a Ryobi circular saw, remove the arbor bolt and outer flange. Lift the blade off the arbor and replace it with a compatible blade, following manufacturer’s instructions. Always ensure the saw is unplugged before changing blades for safety.
How To Change Blades On Ryobi?
To change blades on a Ryobi, remove the arbor bolt and outer flange. Carefully lift the blade off and replace it with a compatible one. Follow the manufacturer’s instructions for installation.
How Do I Change The Blade On A Circular Saw?
To change the blade on a circular saw, follow these steps:
1. Remove the arbor bolt and outer flange.
2. Carefully lift the blade off the arbor and remove it from the saw.
3. Ensure the new blade is compatible with your Ryobi circular saw.
4. Follow the manufacturer’s instructions to install the new blade.
What Is The Spindle Lock On A Circular Saw?
The spindle lock on a circular saw is a mechanism that locks the blade in place to make it easier to change. By engaging the spindle lock, you can use a wrench or key to remove the blade’s retaining bolt.
This ensures that the blade stays in place while you loosen the bolt and replace the blade.
Conclusion
Changing the blade on a Ryobi Circular Saw is a straightforward process that can be done with ease. By following the manufacturer’s instructions and ensuring compatibility with your specific saw model, you can safely remove the old blade and install a new one.
Remember to remove the arbor bolt and outer flange, lift the blade off the arbor, and carefully replace it with the new blade. With these simple steps, you’ll be ready to tackle your next cutting project with confidence.