Mastering Circular Saw Floating Barriers: A Guide to Precision and Safety
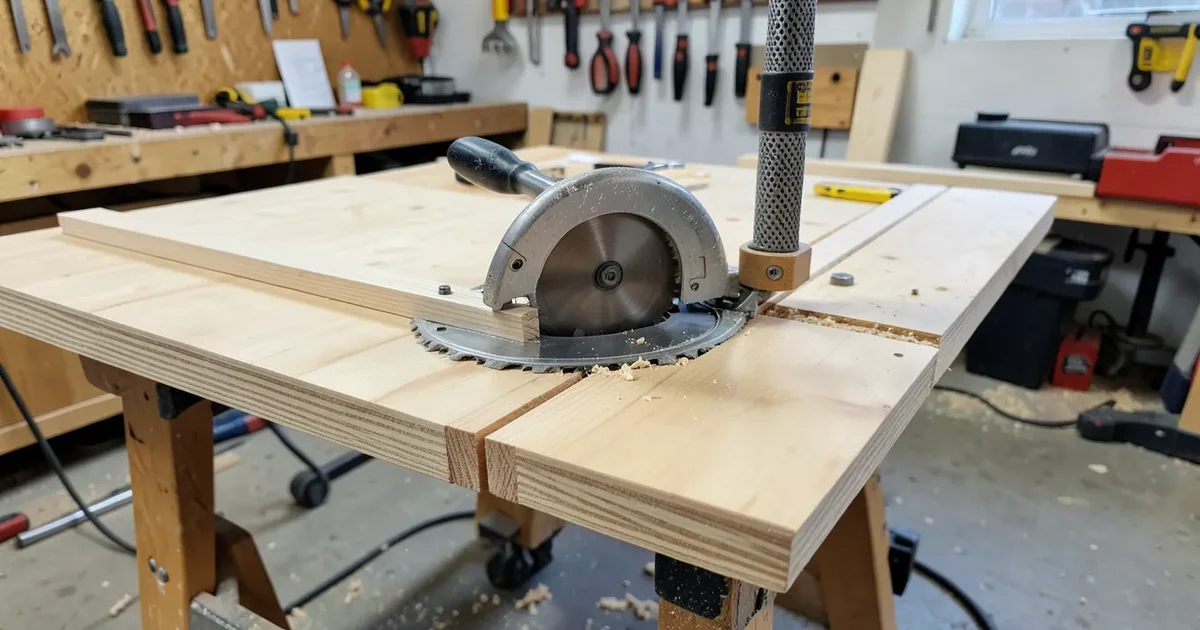
A circular saw floating barrier is a straight-edge guide – homemade from plywood or a store-bought aluminum rail – that clamps to a workpiece so a circular saw’s baseplate can ride against it for a straight cut. It solves the main problem with freehand circular saw cuts on plywood and other sheet goods: the saw wandering off a marked line, especially over a long rip cut.
Unlike a rigid track saw system with a saw purpose-built to lock onto its own rail, a floating barrier is just a straight edge that any circular saw’s baseplate slides against – lightweight, inexpensive to build, and effective for breaking down full sheets of plywood or MDF without a table saw.
Why Use A Floating Barrier
Skip Building One From Scratch
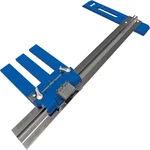 |
Kreg Rip-Cut Circular Saw Guide – $49.00 An adjustable sled that clamps onto most circular saws and rides an aluminum rail – the commercial version of the DIY guide below, with no building required.
|
Freehanding a long cut with a circular saw reliably produces a wavy line, since it’s hard to track a pencil mark accurately over several feet without the saw drifting. A plain straightedge clamped down helps, but it can still shift if it isn’t well secured, and it doesn’t account for the offset between the saw’s blade and the edge of its own baseplate. A floating barrier solves both problems at once – once it’s built to match a specific saw, the baseplate rides directly against the fence and the cut lands exactly where the fence is placed.
- Precision: the saw’s baseplate rides directly against the fence, removing the guesswork of tracking a pencil line freehand.
- Kickback reduction: a stable, well-supported guide reduces the chance of the blade binding mid-cut, one of the more common causes of kickback.
- Portability: a DIY guide is lightweight and stores flat, unlike a table saw or full track saw system.
- Low cost: a basic guide can be built from a few dollars of plywood and hardware, well below the cost of a commercial track saw system.
- Versatility: works with most circular saws, corded or battery-powered, and with the right blade handles wood, some plastics, and thin non-ferrous metal.

Types Of Circular Saw Floating Barriers
| Type | Description | Pros | Cons |
|---|---|---|---|
| DIY Plywood Guide | A homemade guide made from a straight piece of plywood or MDF, often with a factory edge. | Cheap, customizable, easy to make. | Requires a truly straight edge to start; a thin fence can flex on long cuts. |
| Aluminum Guide Rail | A lightweight metal rail, typically store-bought, designed to work with circular saws. | Durable, rigid, reusable across many projects. | Costs more; fit varies by saw model. |
| Foam Board Setup | A foam insulation sheet placed under the workpiece, letting the saw cut through both. | Supports large sheets fully, reduces splintering, no clamps needed underneath. | Bulky to store; less practical for small pieces. |
| Commercial Track Systems | Pre-made systems like Kreg’s Rip-Cut or a dedicated track saw rail. | Consistent, adjustable, no building required. | Higher upfront cost; some require a specific saw or adapter. |
A DIY plywood guide covers most home-workshop needs and is the cheapest entry point. An aluminum rail or a commercial system like Kreg’s Rip-Cut is worth the added cost for anyone breaking down sheet goods often enough that the guide’s durability and repeatability pay for themselves.
How To Build A DIY Floating Barrier
For a DIY version instead, the build is a straightforward zero-clearance jig:
- Gather materials: a piece of 1/2-inch plywood or MDF at least as long as the intended cuts, a factory (machine-cut) straight edge, wood glue, clamps, and brad nails or screws.
- Cut the base: a strip roughly 10 inches wide, as long as needed. One long edge needs to be genuinely straight – a factory edge from the sheet good is more reliable than a hand-cut one.
- Cut the fence: a second strip about 3 inches wide, also with a straight factory edge, that the saw’s baseplate will ride against.
- Measure the saw: measure from the edge of the specific saw’s baseplate to the blade, including the kerf. This distance determines where the fence gets glued down.
- Attach the fence: glue and fasten the fence strip to the base at the measured offset, then clamp flat until the glue cures fully.
- Trim to zero-clearance: once dry, run the actual saw along the fence to trim the base to its final width. This step is what makes the guide’s edge line up exactly with the blade – the guide is now calibrated to that specific saw.
- Test on scrap: clamp the guide to a scrap piece, mark a line, and make a test cut before trusting it on a real project.
Once trimmed to zero-clearance for a specific saw, the same guide won’t automatically fit a different saw model with a different blade offset – each guide is calibrated to one saw unless it’s rebuilt or a new fence is trimmed for the other saw.
Setting Up And Using A Floating Barrier
- Prepare the workpiece: mark the cut line, and if cutting plywood, place the good face down – a circular saw’s blade cuts on the upstroke on top, so tear-out happens on the upward-facing side.
- Support the material: use sawhorses or a bench, and make sure the waste side of the cut is free to fall away rather than pinched between two supports – cutting a board supported at both ends with nothing free to drop can let the kerf close and bind the blade as the cut progresses.
- Position and clamp the guide: align the fence with the marked cut line and clamp both ends securely. Sight down the edge to confirm it’s straight before cutting.
- Set blade depth: roughly 1/4 inch deeper than the material’s thickness – for 3/4-inch plywood, about 1 inch of blade depth. This limits how much blade is exposed while still cutting cleanly through.
- Make the cut: let the saw reach full speed before it contacts the wood, then guide the baseplate along the fence with steady, even pressure rather than forcing the pace.
- Inspect the result: if the edge isn’t clean, check blade sharpness first, then the guide’s alignment.
Safety Practices For Circular Saw Guides
- Wear eye and ear protection, plus a dust mask – circular saws throw fine dust and run loud enough to warrant hearing protection during extended use.
- Check the blade before each session – a dull blade requires more force to push through the cut and is more likely to bind, a direct contributor to kickback.
- Understand kickback: it happens when the blade binds in the kerf and the saw is thrown back toward the operator. Proper workpiece support (letting the waste side fall free), a sharp blade, and a securely clamped guide all reduce the risk.
- Manage the cord on a corded saw so it can’t snag underfoot or catch on the workpiece mid-cut.
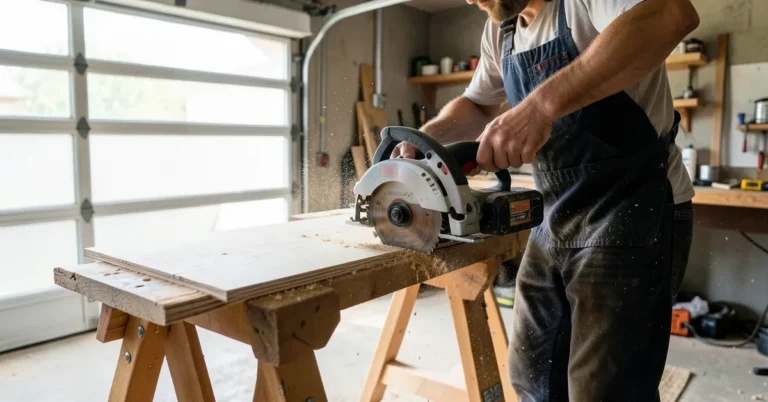
- Use both hands – one on the trigger handle, one on the front grip – for control and to reduce fatigue on longer cuts.
- Inspect the guide itself before each cut for looseness or damage; a guide that shifts mid-cut is a safety issue, not just an accuracy one.
Troubleshooting Common Issues
- Wavy cuts: check that the guide is clamped down firmly and that the fence itself isn’t flexing along its length – a wider fence (4 inches instead of 3) adds rigidity on long cuts.
- Splintering: occurs on the upward-facing side of the cut. Orient the good face down, use a higher-tooth-count blade (around 50-60 teeth for plywood), or score the cut line with a utility knife before cutting.
- Blade binding: stop the saw immediately if it feels stuck rather than forcing it. The workpiece is likely pinching the kerf closed – check the support setup and, if needed, wedge the kerf open with a thin shim before continuing.
- Inaccurate cuts: re-verify the guide’s calibration to the saw and check that the saw’s baseplate itself isn’t bent or damaged, which throws off the offset the guide was built around.
Upgrading A Floating Barrier Setup
- Non-slip strip: adhesive grip tape on the underside of the guide helps on slick surfaces like melamine, where a bare plywood guide can slide under clamping pressure.
- Multiple lengths: a short guide (around 4 feet) for crosscuts and a long one (8 feet) for full sheet rips covers most project needs without one oversized guide getting in the way of smaller cuts.
- Zero-clearance saw subplate: a thin hardboard subplate attached to the saw’s own baseplate, plunge-cut once, supports wood fiber right at the blade and further reduces tear-out independent of the guide itself.
- Measurement marks: marking distances directly on a DIY guide speeds up repeat setups, mimicking the built-in scales some commercial guides include.
Floating Barriers Compared To Other Cutting Systems
- Vs. table saws: a table saw excels at repetitive, precise cuts on manageable-sized stock, but is bulky, expensive, and awkward for breaking down a full 4×8 sheet alone. A floating barrier handles large sheet goods more practically in a small shop.
- Vs. track saws: a dedicated track saw system delivers similarly precise cuts to a floating barrier but at a notably higher price, since it bundles a specialized saw with its own rail rather than adapting an existing circular saw.
- Vs. freehand cutting: freehanding is adequate for rough or non-critical cuts, but can’t match a guided cut for a finished edge that needs to be straight and clean.
Where A Floating Barrier Is Genuinely Useful
Any project built from full plywood or MDF sheets – bookshelves, cabinet carcasses, workbench tops – benefits from a guide that turns breaking down a sheet into a repeatable, controlled cut rather than a freehand guess. It’s equally useful for solid-stock projects like outdoor furniture, where long, straight rip cuts on deck boards or cedar stock matter for a clean glue-up or assembly later. In each case, the value is the same: the guide removes the variability of tracking a line by hand.

Conclusion
A circular saw floating barrier turns a tool prone to wandering off a marked line into one capable of genuinely straight, repeatable cuts – for a fraction of the cost of a table saw or track saw system. Whether it’s a scrap-plywood guide built and calibrated to one saw, or a commercial adjustable sled like Kreg’s Rip-Cut, the underlying principle is the same: give the saw’s baseplate something straight and secure to ride against, and the cut takes care of itself.
Frequently Asked Questions
What’s The Difference Between A Floating Barrier And A Track Saw?
A floating barrier is a straight-edge guide, often homemade from plywood or aluminum, clamped to a workpiece so a standard circular saw’s baseplate can ride against it. A track saw is a purpose-built tool with its own dedicated rail system built into the saw’s design. Floating barriers are cheaper and adapt to a saw you already own; a track saw is more refined but comes at a higher cost.
Can I Use A Floating Barrier With Any Circular Saw?
Yes, as long as the guide is built or adjusted to match that specific saw’s baseplate-to-blade distance. This works with corded and battery-powered saws alike. A commercial adjustable guide like the Kreg Rip-Cut handles different saws without rebuilding, while a DIY zero-clearance guide is calibrated to one saw at a time.
How Do I Prevent Splintering When Using A Floating Barrier?
Place the workpiece’s good side face down, since tear-out happens on the upward-facing surface. A higher-tooth-count blade (50-60 teeth) and scoring the cut line with a utility knife before cutting both reduce splintering further, as does a zero-clearance subplate on the saw itself.
Is It Safe To Use A Floating Barrier On Uneven Surfaces?
No – use a flat, stable surface like sawhorses or a workbench. An uneven surface can let the guide shift during the cut, leading to an inaccurate cut or a safety issue if the blade binds unexpectedly. Clamp both the guide and the workpiece securely regardless of surface.
How Long Does It Take To Build A DIY Floating Barrier?
A basic guide can be built in under an hour with common shop materials and tools, most of that time spent on accurate measuring and the final zero-clearance trim cut. Testing on scrap material before using it on a real project adds a few extra minutes that are worth the confidence.
Sponsored / affiliate links. As an Amazon Associate I earn from qualifying purchases. I may earn additional commission from eligible campaigns.
 Adjustable Cutting Machine Base Guide, New Electric Circular Saw Milling Positioning Clamp, Precision Wood Cutting Guide for Precision Cutting and Diy Enthusiasts (2)
 Gavigain Circular Saw Guide Rail, Heavy Duty Aluminum, Non Slip Clamping, Universal Compatibility, Adjustable Extension Rail for Woodworking Projects