DIY Tack Cloth: The Ultimate Guide to Dust-Free Finishing
Tack cloths are essential for clean, smooth surfaces before painting or staining. They trap dust, dirt, and tiny particles, ensuring a perfect finish.
Making your own DIY tack cloth is simple and cost-effective. You save money and customize it to your needs. Tack cloths are sticky rags that pick up dust and debris from surfaces. Professionals and DIY enthusiasts use them for a flawless finish.
In this guide, you’ll learn how to make a tack cloth at home with basic materials. It’s an easy process with big rewards. Stay with us to see how you can make your own tack cloth and achieve professional-quality results in your projects.
Introduction To Tack Cloth
Tack cloth is a special cloth used in cleaning. It is sticky and soft. This cloth helps remove dust and dirt. It is used before painting or finishing. Craftsmen and painters often use it. It is easy to use. Just wipe the surface with the cloth.
Tack cloth is very important for finishing projects. It helps create a smooth surface. This leads to a better finish. Dust and dirt can ruin a paint job. Using tack cloth prevents this problem. It makes the paint look clean and even. The cloth can be used on wood, metal, and other surfaces. It is a simple tool but very effective.
Materials Needed
To make a tack cloth, gather these supplies: cheesecloth, turpentine, and boiled linseed oil. Cheesecloth is thin and helps collect dust. Turpentine cleans and removes sticky residue. Boiled linseed oil makes the cloth tacky.
The fabric must be soft and lint-free. Cheesecloth works best for this. You can also use cotton fabric. Avoid fabrics with loose fibers. These can leave residue on surfaces. The fabric should be easy to cut and fold.
Step-by-step Guide
Start with a clean piece of cotton cloth. Cut it into small squares. Each square should be about 10 inches wide. Make sure the edges are smooth. This helps keep the cloth lint-free. Wash the fabric in warm water. Dry it completely before moving to the next step. This removes any dirt or dust from the cloth.
Mix one part turpentine with one part varnish. Stir until well blended. Dip the cloth squares into the mixture. Make sure the cloth is damp but not soaked. Wring out any excess solution. Lay the cloth flat to dry. Drying takes a few hours. Once dry, store the tack cloth in a sealed bag. This keeps it fresh and ready to use.
Using Tack Cloth
First, unfold the tack cloth completely. Then, gently wipe it across the surface. Use light, even strokes. This helps remove dust and debris. Avoid pressing too hard. Over time, this cloth can pick up a lot of particles. Regularly check and refold it to use clean sections.
Do not use on wet surfaces. This can damage the cloth. Avoid using too much pressure. It can leave residue behind. Never skip unfolding the cloth. It reduces effectiveness. Also, do not use the same section for too long. Rotate and refold to keep it clean.
Benefits Of Diy Tack Cloth
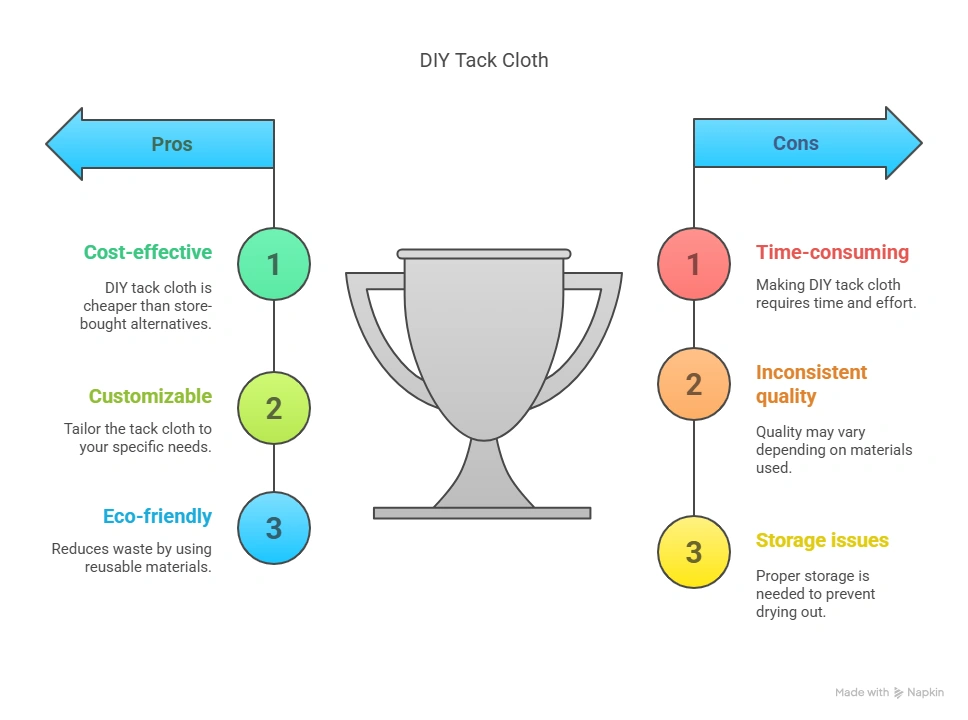
Making a tack cloth at home saves money. Buying materials is cheap. You can use old cloth. No need to buy new ones.
Store-bought tack cloths can be expensive. DIY is a better choice. Save your cash. You can make many with little money.
DIY tack cloth can be customized. Choose your cloth type. Pick your size. Make it fit your needs.
Store-bought ones are limited. DIY lets you decide. It’s easy and fun. Be creative with your choices.

Credit: www.highlandwoodworking.com
Maintenance And Storage
Clean the tack cloth after each use. Shake it outside to remove dust. Wipe it with a damp cloth. Avoid using soap or detergent. Soap can damage the tack cloth. Let it dry completely before storing.
Store the tack cloth in a sealed bag. Keep it in a cool, dry place. Avoid direct sunlight. Sunlight can make it dry and brittle. Check it for damage before each use. Replace it if it’s worn out.
Alternatives To Tack Cloth
Commercial tack cloths are readily available in stores. These are pre-treated with sticky substances. They help remove fine dust and particles. Many people find them easy to use. They are often affordable and work well for quick jobs. Using commercial tack cloths saves time. No need to make your own. Simply open the package and start cleaning.
Homemade options can also be effective. A damp cloth works well for some. It picks up dust without leaving residue. You can also use a microfiber cloth. It attracts dust through static electricity. Another option is a cheesecloth dipped in a bit of linseed oil. All these methods are simple and cost-effective. They help you get the job done with items you already have.

Credit: www.youtube.com
Faqs
Tack cloth can last up to a few days if used carefully. It depends on how much dust and dirt it collects. If it gets too dirty, it won’t work well. Replace it when it stops picking up dust.
Yes, tack cloth can be reused. But it needs to be stored properly. Keep it in an airtight bag when not in use. This keeps it sticky for longer. If it gets too dirty, you might need a new one.
:max_bytes(150000):strip_icc()/get-a-flawless-paint-job-with-tack-cloth-1822686-06-81df672f15de4dc98b085e01dcf8bc06.jpg)
Credit: www.thespruce.com
Frequently Asked Questions
What Can I Use In Place Of Tack Cloth?
You can use a microfiber cloth, damp cloth, or lint-free rag as alternatives to tack cloth. These options effectively remove dust and debris.
How Can I Make My Own Tack Cloth?
To make a tack cloth, cut cheesecloth into squares. Soak in turpentine and squeeze out excess. Let it dry slightly.
What Ingredients Are In Tack Cloth?
Tack cloth contains a sticky resin, often made from beeswax or mineral oils, applied to a cotton or polyester fabric.
What Makes A Good Tack Cloth?
A good tack cloth is made of high-quality, lint-free material. It effectively picks up dust and debris. It remains sticky without leaving residue. It’s reusable and easy to handle. Ideal for preparing surfaces before painting or finishing.
Conclusion
Creating your own tack cloth is simple and cost-effective. Save money and get better results with this easy DIY project. Enjoy cleaner surfaces before painting or staining. Your finished work will look smoother and more professional. Give it a try and see the difference it makes.
Happy crafting!