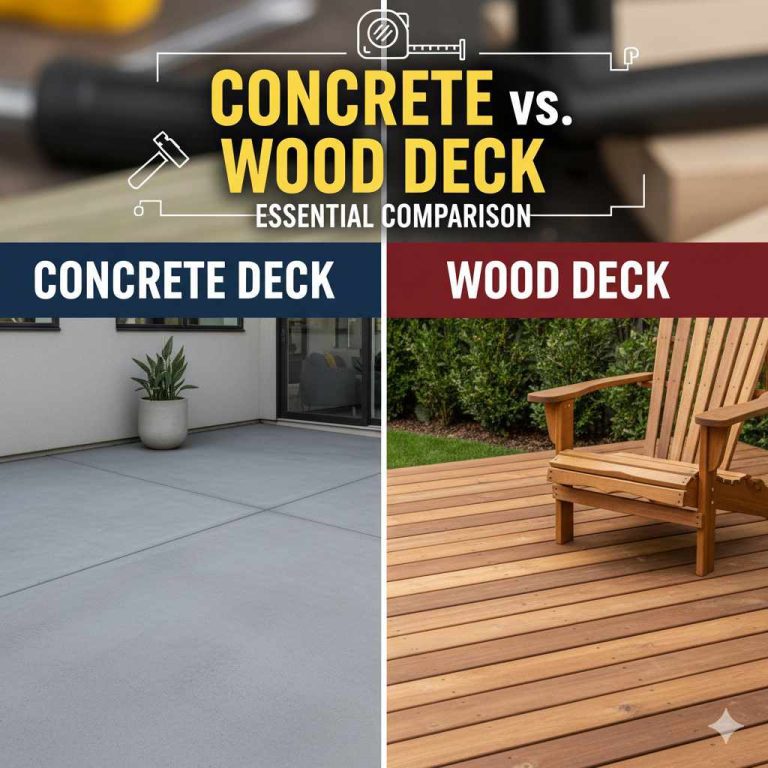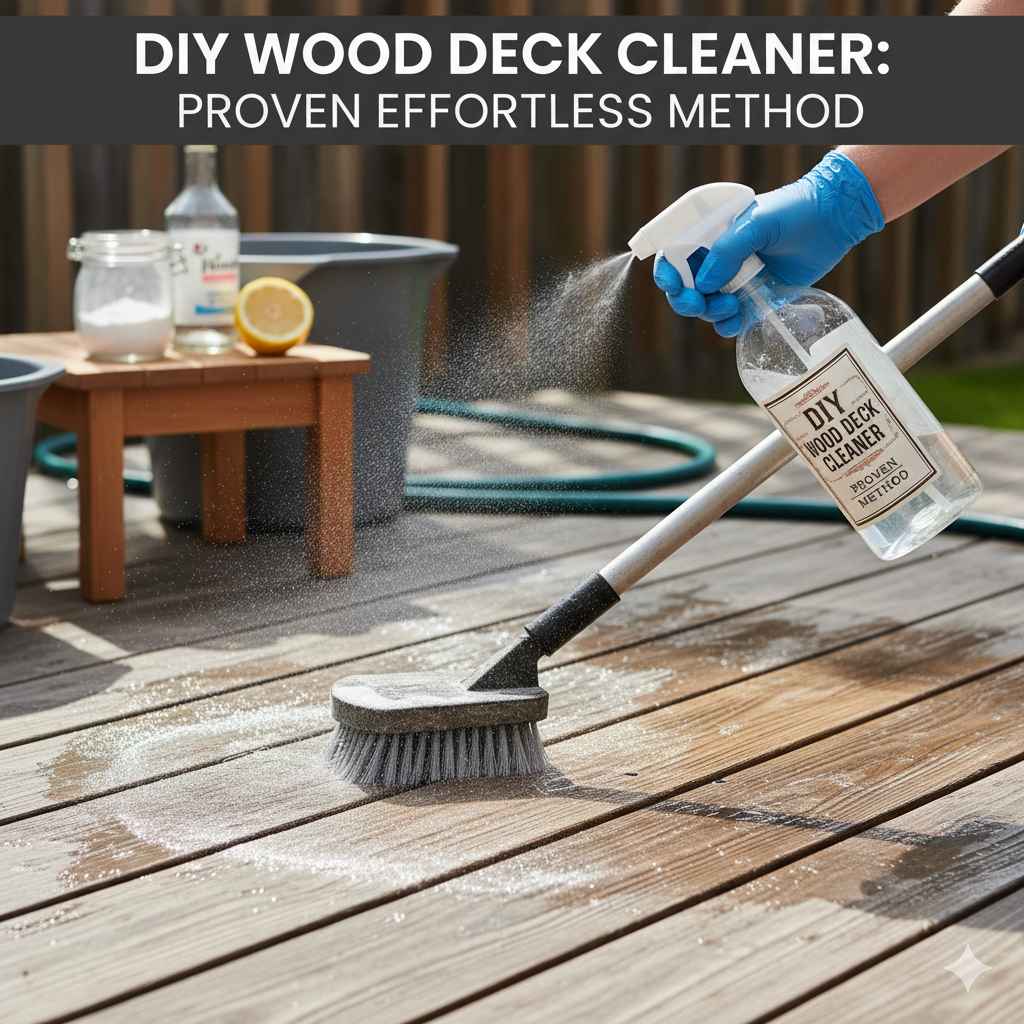
DIY Wood Deck Cleaner: Proven Effortless Method
Easily make a DIY wood deck cleaner at home with simple ingredients like dish soap and water. This proven, effortless method effectively lifts dirt and grime, restoring your deck’s natural beauty without harsh chemicals. Get ready for a sparkling clean deck!
Is your beautiful wooden deck looking a little sad? Covered in dirt, mildew, or those tell-tale grey streaks that scream “neglect”? If you’re nodding along, you’re not alone. Many homeowners struggle with keeping their decks looking their best. The good news? You don’t need expensive, store-bought cleaners with confusing labels. We’re going to show you a super simple, DIY wood deck cleaner that’s incredibly effective and easy on your wallet and your deck.
Imagine stepping onto a clean, inviting deck, ready for barbecues, relaxing afternoons, or morning coffee. This guide will walk you through a proven, effortless method to achieve just that. We’ll cover what you need, how to mix it, and the best way to apply it. Get ready to transform your outdoor living space with minimal fuss!
Why Choose a DIY Wood Deck Cleaner?
Before we dive into the “how,” let’s chat about “why.” Why go the DIY route when there are so many commercial deck cleaners on the market? There are several compelling reasons, all of which align with our DIY-friendly approach:
- Affortability: Store-bought deck cleaners can be pricey, especially if you have a large deck. The ingredients for a DIY cleaner are usually common household items you likely already have.
- Simplicity: No complicated instructions or hard-to-find chemicals. We’re talking about basic ingredients that are easy to work with.
- Effectiveness: Don’t let the simplicity fool you! This method tackles dirt, mildew, algae, and other common deck invaders effectively.
- Gentle on Wood: Harsh chemicals found in some commercial cleaners can damage wood fibers over time, leading to premature wear. Our DIY solution is much kinder to your deck.
- Eco-Friendly: Using milder ingredients is generally better for the environment, reducing the amount of harsh runoff entering your local waterways.
- Control Over Ingredients: You know exactly what’s in your cleaner. This is especially important if you have pets or children who frequent the deck.
Understanding Deck Grime: What’s Making Your Deck Look Dirty?
To effectively clean your deck, it helps to know what you’re up against. The dull, grey appearance and the pesky green or black spots aren’t just superficial dirt. They’re often signs of organic growth and environmental damage:
- Dirt and Dust: The obvious culprit. Wind, surrounding trees, and foot traffic all contribute to a layer of everyday dirt.
- Mildew: This fuzzy, often greenish or grey growth thrives in damp, shady conditions. It loves clinging to porous wood surfaces.
- Algae: Similar to mildew, algae are microscopic organisms that can create slippery green patches, especially on decks that don’t get much direct sunlight.
- Mold: Black or dark spots can indicate mold growth, which can also be a health concern if left unchecked.
- Sun Exposure: UV rays from the sun can degrade the natural lignin in wood, causing it to turn grey and brittle if not protected.
- Stain and Sealant Breakdown: Over time, even the best deck sealants wear away, leaving the wood exposed to the elements.
Our DIY approach targets these issues by breaking down organic matter and lifting away surface debris without stripping the wood’s natural integrity.
The Proven Effortless DIY Wood Deck Cleaner Recipe
Get ready for the simplest, most effective DIY wood deck cleaner you’ll ever use. This recipe relies on common household items that work wonders on wood.
Ingredients You’ll Need:
- Warm Water: Acts as the base and helps dissolve other ingredients.
- Dish Soap: A mild detergent like Dawn or similar is perfect. It cuts through grease, grime, and general dirt. Avoid soaps with bleach or harsh degreasers if possible.
- Optional: Oxygen Bleach (e.g., OxiClean or similar sodium percarbonate product): For tougher stains, mildew, or algae, a scoop of oxygen bleach can be a game-changer. It’s much gentler than chlorine bleach. NEVER use chlorine bleach on your deck.
Tools You’ll Need:
- Bucket: A 5-gallon bucket is ideal for mixing and carrying your cleaning solution.
- Stiff-Bristled Brush or Deck Brush: A long-handled brush makes the job much easier and more ergonomic. Ensure the bristles are stiff but not so stiff they’ll damage the wood.
- Garden Hose with Spray Nozzle: For rinsing.
- Gloves: To protect your hands from the cleaning solution.
- Safety Glasses: Always a good idea when working with cleaning solutions and brushes.
- Optional: Squeegee or Flat Mop: Can help to spread the cleaner and assist in rinsing.
The Simple Mixing Ratio:
This is where “effortless” truly shines. You don’t need precise measurements, but a good starting point is:
- Fill your 5-gallon bucket about halfway or three-quarters full with warm water.
- Add about 1/4 to 1/2 cup of dish soap.
- If using oxygen bleach for tougher jobs: Add 1/2 to 1 cup of oxygen bleach powder.
Stir the mixture gently until the soap is dissolved and the oxygen bleach (if used) is mostly dispersed. You want a good lather, but not an overwhelming amount of suds that will be hard to rinse.
Step-by-Step Guide to Cleaning Your Deck
Now that you have your cleaner and tools ready, let’s get to work! Remember, patience and a gentle approach will yield the best results.
Step 1: Prepare Your Deck Area
Before you start scrubbing, clear your deck completely. Remove all furniture, potted plants, grills, and any other items. This ensures you can clean every inch of the deck surface without interruption.
Sweep away any loose debris like leaves, twigs, and dirt. This initial sweep makes the washing process much more effective.
Step 2: Test a Small, Inconspicuous Area
It’s always wise to test your cleaning solution on a small, hidden spot of your deck first. This helps you ensure it doesn’t cause any discoloration or damage to your specific type of wood. Wait a few minutes after applying and scrubbing, then rinse and let it dry to check the results.
Step 3: Wet the Deck
Using your garden hose, thoroughly wet the entire deck surface. This prevents the cleaner from drying too quickly on the wood and helps loosen embedded dirt. Don’t use a pressure washer here, as it can easily damage wood fibers. A regular garden hose spray is perfect.
Step 4: Apply the DIY Cleaner
Dip your stiff-bristled brush into the cleaning solution. Starting at one end of the deck, apply the cleaner generously. Work in manageable sections, about 6-8 feet at a time. Don’t let the cleaner solution dry on the wood before you rinse it off. You want to keep the surface damp.
Step 5: Scrub the Deck
This is where the elbow grease comes in, but don’t overdo it! Use your brush to scrub the deck following the grain of the wood. Scrubbing with the grain helps prevent swirling marks and ensures a more uniform clean. For stubborn stains or mildew, you might need to apply a little more pressure or let the cleaner sit for a few minutes (but again, don’t let it dry!).
For areas with heavy mildew or moss, the oxygen bleach in the solution will help to lift it. You should see the discolored areas start to break down.
Step 6: Rinse Thoroughly
Immediately after scrubbing a section, rinse it thoroughly with your garden hose. Make sure to rinse away all the soap residue and loosened grime. Work your way across the deck, rinsing each scrubbed section as you go. Overlap your rinsing to ensure no streaks are left behind.
Pay close attention to the gaps between deck boards, as soap residue can linger there and attract dirt later.
Step 7: Repeat if Necessary
For exceptionally dirty areas or stubborn stains, you might need to repeat steps 4-6. Don’t be tempted to use stronger chemicals or more aggressive scrubbing if the first pass doesn’t get everything. Sometimes, a second application is all that’s needed.
Step 8: Let it Dry Completely
Once you’ve rinsed the entire deck, allow it to dry completely. This can take several hours, depending on humidity and sunlight. Inspect the deck for any missed spots. For extremely tough stains that persist after a second cleaning, you might consider a specialized deck cleaner designed for that specific issue, always testing it first.
Maintaining Your Clean Deck
Keeping your deck looking great doesn’t end with a good cleaning. Regular maintenance is key!
- Regular Sweeping: Lightly sweep your deck a few times a month to prevent the buildup of leaves and debris that can trap moisture and promote mold growth.
- Spot Cleaning: Address spills or new spots of mildew/algae immediately with a mild soap and water solution.
- Check for Pests: Insects can damage wood. Keep an eye out for any signs of infestation.
- Annual Sealing/Staining: After your deck is thoroughly clean and dry, consider applying a good quality deck sealer or stain. This protects the wood from UV rays, moisture, and wear. The frequency depends on your climate and the product used, but typically every 1-3 years. For guidance on deck sealing, check out resources like This Old House‘s comprehensive guide for professional tips.
Comparing DIY Cleaner to Commercial Options
Let’s take a quick look at how our DIY solution stacks up against typical commercial deck cleaners.
| Feature | DIY Wood Deck Cleaner (Dish Soap & Water Base) | Typical Commercial Deck Cleaner |
|---|---|---|
| Cost | Very Low | Moderate to High |
| Ingredient Simplicity | High (common household items) | Varies (can contain harsh chemicals like bleach, solvents) |
| Effectiveness on General Dirt/Grime | Excellent | Excellent |
| Effectiveness on Mildew/Algae | Good (excellent with optional oxygen bleach) | Varies (some are very effective, some can be too harsh) |
| Wood Safety | High (gentle) | Varies (can be harsh if not used as directed or if using chlorine bleach) |
| Environmental Impact | Low | Varies (can be higher with potent chemicals) |
| Ease of Use | Very Easy | Easy to Moderate (often requires careful application and safety precautions) |
As you can see, the DIY method offers a fantastic balance of effectiveness, simplicity, and safety, making it an ideal choice for most homeowners, especially for regular maintenance.
When Might You Need Something Stronger?
While our DIY cleaner is highly effective for general cleaning, there are a few scenarios where you might consider a specialized product:
- Heavy Mold Infestations: If your deck has been neglected for a long time and is covered in thick, black mold, a cleaner with a slightly stronger but still safe mildewcide might be necessary. Always look for products specifically designed for decks and follow instructions carefully.
- Tough Stains (Oil, Grease, Rust): While dish soap can handle some grease, deep-set oil or rust stains might require targeted stain removers.
- Paint/Sealer Stripping: If you plan to refinish your deck and need to remove old paint or a stubborn sealer, you’ll need a dedicated stripper.
For these situations, always research the best product for your specific problem and wood type. Reputable sources like the Wood Magazine offer excellent advice on deck maintenance and restoration.
Frequently Asked Questions about DIY Wood Deck Cleaner
Here are some common questions beginners have about cleaning their decks the DIY way.
Q1: Can I use chlorine bleach to clean my deck?
A1: It’s strongly advised NOT to use chlorine bleach on your wood deck. While it can kill mold and mildew, it’s very harsh. It can damage wood fibers, strip natural color, and harm surrounding plants. Oxygen bleach is a much safer alternative.
Q2: How often should I clean my deck?
A2: For most decks, an annual cleaning is sufficient, usually in the spring or fall. If your deck is in a very damp or shaded area prone to mildew, or sees heavy use, you might consider cleaning it twice a year.
Q3: Will this DIY cleaner remove old stain or sealer?
A3: This simple dish soap and water mixture (even with oxygen bleach) is designed for cleaning dirt and organic growth, not for stripping existing finishes. It may lightly fade an old, worn finish, but it won’t remove it entirely. For full refinishing, you’d need a dedicated deck stripper.
Q4: My deck boards are grooved. How can I ensure I clean between them?
A4: Scrubbing with a stiff-bristled brush following the grain will help the solution get into the grooves. Pay extra attention to rinsing, as this is where grime and soap residue can accumulate. You might also consider a scrub brush with slightly longer bristles that can reach into these areas.
Q5: What if I don’t have a stiff-bristled brush?
A5: While a stiff brush is recommended for effectiveness, a firm-bristled push broom or even a heavy-duty scrub pad (ensure it’s not steel wool) can work in a pinch. Just be extra careful not to scrub too aggressively, especially if the material is less durable than a good deck brush.
Q6: Can I use a pressure washer with my DIY cleaner?
A6: It’s generally not recommended for deck cleaning, even with a DIY solution. Pressure washers can easily damage wood by splintering fibers, creating gouges, and forcing water too deep into the wood, leading to faster deterioration. A garden hose and a good brush are safer and more effective for most situations.
Q7: My deck is still looking a bit dull after cleaning. What should I do?
A7: If cleaning doesn’t restore the full richness of the wood’s color, it might be time for a deck stain or sealer. Once the deck is completely dry after cleaning, applying a quality deck treatment will enhance its appearance and protect it from future damage. Always test a stain on an inconspicuous area first.
Conclusion: A Sparkling Deck Awaits!
There you have it – a straightforward, effective, and budget-friendly way to tackle deck grime! By using simple household items, you can achieve a beautifully clean deck without exposing your wood, your family, or the environment to harsh chemicals. Remember, the key is consistency. A little regular maintenance goes a long way in keeping your deck looking its best for years to come.
So, go ahead, mix up your DIY wood deck cleaner, grab your brush, and enjoy the process of restoring your outdoor oasis. You’ll be amazed at the difference even a simple cleaning can make. Happy scrubbing!