How Long for Epoxy Glue to Set Strength Timeline
Ever tried fixing something precious, only to find yourself staring at the pieces, wondering when that super glue will actually hold? It’s a common frustration. You’ve carefully applied the epoxy, held the parts together, and now you’re left in a state of waiting. Knowing the proper curing times for epoxy glue is key to achieving a strong, lasting bond. This post will walk you through the different stages of epoxy setting and how to maximize its strength, so you can get back to your project with confidence.
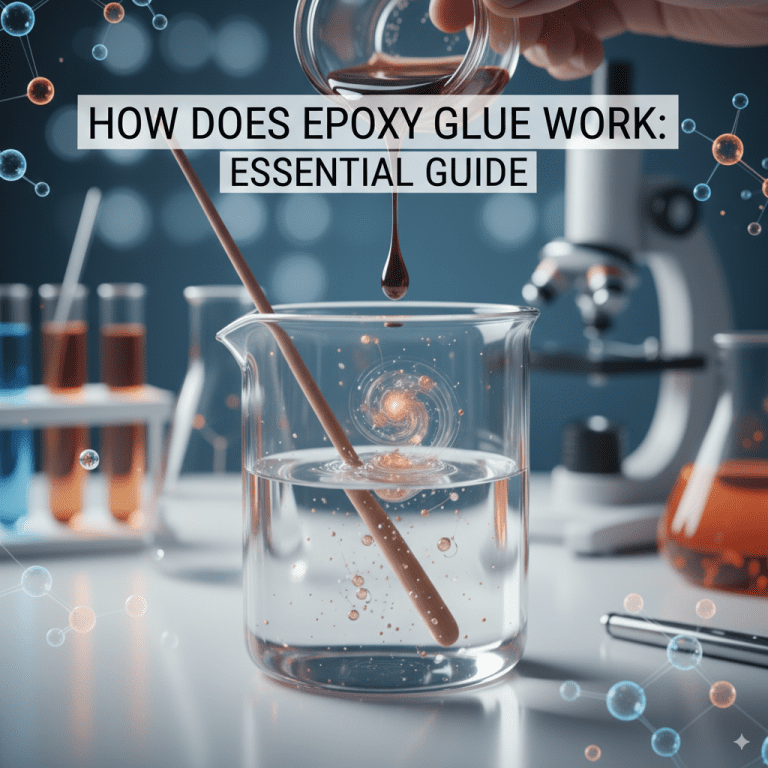
Epoxy glue is a powerful adhesive, but its effectiveness relies heavily on understanding its setting and curing process. Many people assume that once epoxy feels hard, it’s fully set and ready for any stress. However, there’s a significant difference between initial hardening and achieving maximum strength. This difference impacts how you handle your repaired item and what kind of weight or force it can withstand. We’ll explore the typical timeline for epoxy glue to set, the factors that influence this, and how to determine when your bond is truly ready for action.
Understanding Epoxy Setting And Curing
Epoxy adhesives work through a chemical reaction between two components: a resin and a hardener. When these are mixed, they undergo a process called polymerization, which creates a strong, rigid material. This process isn’t instantaneous; it occurs in stages, and recognizing these stages is essential for successful repairs.
Initial Set Time Versus Full Cure Time
It’s important to distinguish between the “set time” and the “cure time” of epoxy glue.
Set time, often referred to as handling time or working time, is the period during which the epoxy is still pliable enough to be adjusted or moved. At this stage, the bond is forming, but it’s not yet strong enough to bear significant weight or stress. If you try to put your mended item to use too early, you risk breaking the bond before it has a chance to fully develop.
Full cure time is the duration required for the epoxy to reach its maximum potential strength. This is when the chemical reaction is complete, and the adhesive has solidified into a hard, durable material. At this point, the bond is at its strongest and can withstand the intended load or application.
The Timeline Explained
While specific times vary depending on the product and environmental conditions, most epoxies follow a general timeline:
Initial Set (Handling Time)
Many common 5-minute or 10-minute epoxies will become firm enough to handle within that initial timeframe. This means you can often release your grip or move the item cautiously. However, this is far from full strength. The bond is still very weak.
* After 30 minutes: The epoxy will feel harder, but it’s still relatively weak. It might hold light objects in place, but it’s not recommended for structural repairs.
* After 1 hour: The epoxy will be quite hard to the touch. Some might consider it “set” at this point. However, its strength is only a fraction of its ultimate capacity.
Achieving Full Cure
The process of achieving full cure takes much longer. This is where the strength of the bond is truly established.
24 hours: For many standard epoxy formulations, 24 hours is considered sufficient for a strong bond. You can usually place moderate stress on the repaired item.
48-72 hours: Some epoxies, especially those designed for extreme strength or specific applications (like marine or automotive), may require 48 to 72 hours to reach their absolute maximum hardness and strength.
Beyond 72 hours: In some cases, particularly with very thick applications or in cooler temperatures, it can take even longer for the epoxy to fully cure and reach 100% of its advertised strength.
Factors Affecting Epoxy Setting and Curing Time
Several variables can influence how quickly your epoxy glue sets and cures. Understanding these factors can help you manage expectations and ensure the best results.
1. Type of Epoxy:
Different epoxy formulations are designed for various purposes and cure at different rates.
Quick-setting epoxies: These are formulated to harden rapidly, often within 5-30 minutes. They are good for quick fixes but may not offer the same ultimate strength as slower-curing types.
Standard epoxies: These typically have a longer working time (e.g., 30-60 minutes) and a longer cure time (24 hours for full strength).
Slow-curing epoxies: Some high-strength or specialized epoxies can take 48-72 hours or more to fully cure. These are often used in demanding applications where maximum bond strength is paramount.
2. Temperature:
Temperature plays a significant role in the chemical reaction of epoxy.
Warmer temperatures: Generally accelerate the curing process. The resin and hardener react faster, leading to quicker setting and curing.
Colder temperatures: Slow down the curing process. If you’re working in a cold environment, it will take longer for the epoxy to harden and reach full strength. It’s often recommended to work in a space between 60°F and 80°F (15°C and 27°C).
3. Humidity:
High humidity can sometimes affect epoxy curing, especially certain formulations. It can sometimes lead to a hazy or milky appearance, known as blushing, which might indicate a weaker bond. It’s best to work in a dry environment if possible.
4. Mixing Ratio:
This is absolutely critical. Epoxy relies on a precise ratio of resin to hardener. If you don’t mix them in the exact proportions recommended by the manufacturer, the chemical reaction will not proceed correctly. This can result in a bond that never truly hardens or cures properly, or one that is significantly weaker than expected. Always measure accurately.
5. Application Thickness:
Thicker layers of epoxy can sometimes cure faster due to the exothermic reaction (heat generated by the chemical process). However, extremely thick applications can also lead to overheating and potential degradation of the bond if not managed correctly. Conversely, very thin layers might cure more slowly.
6. Substrate Material:
The material you are bonding can also have a minor influence. Some porous materials may absorb some of the resin, potentially affecting the reaction slightly. However, proper surface preparation is far more important than the material type itself.
How to Test Epoxy Strength
You don’t want to guess when your epoxy is strong enough. Here are some ways to gauge its readiness:
Consult the Manufacturer’s Data Sheet: The packaging or technical data sheet for your specific epoxy product is your best resource. It will provide estimated set and cure times under ideal conditions.
The “Nail Test” (Caution Advised): A common method is to apply a small dab of the mixed epoxy to a scrap piece of material alongside your main project. After a few hours, try to bend or scratch this test spot. If it’s still soft or sticky, your main repair is not ready. If it’s brittle or breaks cleanly, it’s likely cured enough for light handling. However, this is a very rough test.
Gentle Pressure Test: After the recommended handling time, you can apply very light, gentle pressure to the bond. If it yields or feels soft, it needs more time.
Visual Cues: As epoxy cures, it typically becomes less glossy and more opaque or cloudy, eventually becoming hard and often glass-like. However, visual cues alone are not reliable indicators of full strength.
Listen to Your Application: Consider what the repaired item will be used for. If it’s something that will hold weight or be under stress, it’s always better to err on the side of caution and wait the full recommended cure time.
Common Epoxy Problems and How to Avoid Them
Mistakes can happen, especially when you’re eager to finish a project. Here are some common epoxy issues and how to prevent them:
Weak or Brittle Bond:
Cause: Incorrect mixing ratio, insufficient mixing, low temperature, or premature stress.
Prevention: Measure precisely, mix thoroughly, work in a suitable temperature range, and wait for full cure.
Sticky or Soft Surface:
Cause: Not mixed thoroughly, improper ratio, or high humidity.
Prevention: Ensure thorough mixing and accurate measurement. Use in a dry environment.
Blushing (Milky or Hazy Appearance):
Cause: High humidity during curing.
Prevention: Work in a dry area. If it happens, it might require sanding and reapplication, or it may indicate reduced strength.
Cracking or Shrinking:
Cause: Sometimes occurs with very fast-setting epoxies or large gaps.
Prevention: Use a slower-setting, higher-strength epoxy for larger repairs. Avoid applying excessively thick beads in one go.
Epoxy Strength Over Time
It’s helpful to visualize how epoxy strength increases over time. Think of it as a curve.
Initial Application: 0% strength
Set Time (e.g., 30 minutes): 5-10% strength
A Few Hours Later (e.g., 4-8 hours): 30-50% strength
24 Hours: 70-90% strength
48-72 Hours: 100% strength
This is a general guide. Some specialized epoxies might achieve higher percentages sooner, while others might take longer to reach peak performance.
The Importance of Surface Preparation
While not directly about setting times, proper surface preparation is a key partner to a strong epoxy bond. Even the best epoxy won’t hold if the surfaces aren’t ready.
Cleanliness: Surfaces must be free of dirt, grease, oil, dust, and any old adhesive.
Roughness: For most materials, slightly roughening the surface with sandpaper (e.g., 100-200 grit) helps the epoxy adhere better. It creates microscopic valleys for the epoxy to grip.
Dryness: Ensure surfaces are completely dry.
Choosing the Right Epoxy for Your Project
The type of epoxy you choose directly impacts its setting and curing timeline.
General Purpose Epoxies: These are great for crafts, household repairs, and light-duty bonding. They typically offer a 24-hour cure time.
Quick Set Epoxies: Ideal for situations where you need a rapid hold, like temporarily holding parts in place while a stronger adhesive cures. They are usually not intended for structural strength.
Structural Epoxies: These are designed for high-strength applications like automotive repairs, boat building, or furniture making. They often have longer cure times but provide superior durability.
Flexible Epoxies: Some epoxies are formulated to remain slightly flexible after curing, which is useful for bonding dissimilar materials that might expand or contract at different rates.
Comparison Table: Epoxy Types and Curing
| Epoxy Type | Typical Set Time (to handle) | Typical Full Cure Time (max strength) | Best For |
|---|---|---|---|
| Quick Set | 5–30 minutes | 1–4 hours | Temporary holds, rapid bonding of light items |
| Standard | 30–60 minutes | 24 hours | General repairs, crafts, household fixes |
| Slow Cure / High Strength | 1–2 hours | 48–72 hours | Structural repairs, demanding applications |
| Flexible | 30–60 minutes | 24–48 hours | Bonding dissimilar materials, vibration zones |
This table offers a general overview. Always check the specific product instructions.
Epoxy in Different Applications
Woodworking: For joining wood pieces, especially where strength is needed. Allow for full cure before sanding or finishing.
Metal Repair: Bonding metal parts. Ensure surfaces are clean and free of rust.
Plastic Repair: Some epoxies bond plastics well, but check compatibility. Surface prep is key.
Ceramics and Glass: Can be used, but often requires careful application to avoid visible seams. Full cure ensures the repair is water-resistant.
Frequently Asked Questions
Question: How long does 5-minute epoxy really take to set?
Answer: While called 5-minute epoxy, this refers to its initial hardening time, allowing for handling. It will feel firm in about 5 minutes, but it takes 24 hours or more to reach its full, durable strength. You can usually move the pieces gently after 5-10 minutes, but don’t put them under any stress.
Question: Can I speed up epoxy curing with heat?
Answer: Yes, gentle heat can speed up epoxy curing. Placing the bonded item in a warm environment (like near a heater or in a warm room) can accelerate the chemical reaction. However, avoid excessive heat, which can cause the epoxy to cure too quickly, potentially leading to a weaker bond or discoloration.
Question: What happens if I don’t mix the epoxy thoroughly?
Answer: If the resin and hardener are not mixed thoroughly, the chemical reaction won’t complete properly. This can result in a sticky, soft, or weak bond that never fully cures. You might see streaks of unmixed components.
It’s crucial to mix until the color is uniform.
Question: Is epoxy waterproof after it sets?
Answer: Most epoxies are waterproof once fully cured. However, the degree of waterproofing can vary by product. For applications that will be submerged, look for epoxies specifically rated for marine or wet environments.
Even then, proper application and a complete cure are essential for effective waterproofing.
Question: Can I sand and paint epoxy before it’s fully cured?
Answer: It’s best to wait for the epoxy to fully cure before sanding or painting. Sanding uncured epoxy can be messy and can interfere with the final cure. Painting uncured epoxy might also cause issues with adhesion and finish.
Always check the product’s instructions for recommended finishing times.
Final Thoughts
It’s clear that patience is a virtue when working with epoxy glue. The difference between an epoxy that feels hard and one that is truly strong enough for its intended purpose is significant. Understanding that the initial set time is just the beginning of a longer curing process helps avoid disappointment and ensures the longevity of your repairs. Always refer to the manufacturer’s guidelines for your specific product, as cure times can vary. Factors like temperature and humidity play a role, so creating the right environment can optimize the bonding process.
Don’t rush the process; give the epoxy the time it needs to reach its full potential strength. Proper surface preparation will always set the stage for a superior bond, regardless of how long it takes to cure. By respecting the epoxy’s timeline, you pave the way for durable, reliable repairs that stand the test of time.