How Long Does Gorilla Glue Cure? Clamp vs Full Cure by Type
Original Gorilla Glue needs a 1-2 hour clamp and a full 24 hours to cure, but Gorilla sells several different glues and each reaches strength on its own clock. Wood Glue clamps in 20-30 minutes, Epoxy needs 30 undisturbed minutes, and Super Glue sets in seconds. This guide separates set from cure, then covers temperature limits and skin-safety rules for the foaming formula.
How Long Does Gorilla Glue Take to Cure? Cure Time by Product
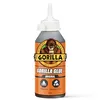 |
Best Polyurethane Cure Pick Gorilla Original Glue, 8 oz – $9.98 The foaming polyurethane formula behind the 1-2 hour clamp and 24 hour cure numbers in this guide.
|
As an Amazon Associate we earn from qualifying purchases.
Every Gorilla formula in the table reaches full strength in about 24 hours, according to the manufacturer. The real difference is how soon you can unclamp and handle the part, which is what most people searching this question need to know.
| Gorilla product | Clamp / set | Full cure | Safe to apply at | What triggers the cure |
|---|---|---|---|---|
| Original (polyurethane) | Clamp 1-2 hours | 24 hours | Above 40 F | Moisture; foams up to 3x |
| Wood Glue (PVA) | Clamp 20-30 minutes | 24 hours | 55-75 F range | Water leaving the glue line |
| Clear Gorilla Glue | Clamp 2 hours | 24 hours | 32-100 F | Non-foaming; dampen non-porous parts |
| 2 Part Epoxy | 5 minute working time, 30 minutes undisturbed | 24 hours before heavy load (retailer spec sheets) | 50-100 F | Mixing resin and hardener |
| Super Glue | Sets in 10-45 seconds | 24 hours | Not stated | Hand-held, tight-fitting bond |
Source: clamp, cure and temperature figures come from Gorilla’s own glue guide and its Original, Wood Glue, Clear and Epoxy product pages. Looking for the dry-to-touch side of the same question? See our companion guide on how long Gorilla Glue takes to dry.
Set, Dry and Cure Are Three Different Milestones
Most forum answers use dry, set and cure as if they were the same thing. They are not, and mixing them up is how joints get loaded too early. The 1-2 hour figure for Original Gorilla Glue is a clamp time: the parts must stay pressed together while the foam expands and grips. It is not the moment the joint is finished.
- Set or clamp time: the glue holds the parts in place, but the bond is still weak. Handle gently, no weight, no twisting.
- Cure: the chemistry is complete and the bond reaches its rated strength. For the Gorilla glues in the table that is 24 hours at room temperature.
- Finishing and loading: sanding, trimming foam, painting and putting weight on the joint all belong after the cure, not after the clamp comes off.
| Time after gluing (Original) | What you can do | What to avoid |
|---|---|---|
| 0 to 2 hours | Keep clamped; wipe wet squeeze-out with a dry cloth | Moving the parts, adding water, re-clamping to a new position |
| 2 to 24 hours | Unclamp and handle carefully; set the part aside indoors | Load, flex, sanding, painting, outdoor exposure |
| After 24 hours | Remove cured foam by sanding, chiseling or scraping; finish and use the joint | Solvents on cured foam: Gorilla says cured glue is best removed mechanically |
The middle row is our conservative rule of thumb built on Gorilla’s own instruction to allow 24 hours for best results. The manufacturer publishes the clamp and cure figures, not a separate “light load” time for Original, so treat anything between hour 2 and hour 24 as a joint that is still gaining strength.
How Moisture Controls the Cure of Original Gorilla Glue
Original Gorilla Glue is a water-activated polyurethane, which is why Gorilla’s instructions boil down to damp it, glue it, clamp it. Bare, bone-dry surfaces can leave the glue with little moisture to react with, which is a likely cause of “my Gorilla Glue never hardened” complaints on dry indoor wood in winter.
Two common beliefs are wrong. First, more water does not mean a faster cure. Gorilla says to lightly dampen one surface, and extra water just makes extra foam. Second, a lot of foam is not a sign the glue is working better. Original expands up to 3 times its size, so a thin layer (Gorilla suggests about half an ounce per square foot) is plenty, and the clamp is what keeps the expanding foam from pushing the joint apart.
Clear Gorilla Glue works differently. It is a non-foaming formula with minimal gap-filling, and per Gorilla you dampen one surface only when bonding non-porous materials such as metal, glass or plastics. For cure planning, treat it as a different product.
Temperature Limits: Cure Time Assumes Room Temperature
Every cure time above is quoted for room temperature, and Gorilla marks each formula as best at room temperature. The detail most competitors skip is that each product has a different cold limit, so a garage in November rules out some of them entirely.
| Product | Apply at | In service (cured) |
|---|---|---|
| Original | Above 40 F | -40 to 200 F |
| Wood Glue | 55-75 F range | Not stated |
| Clear Gorilla Glue | 32-100 F | Not stated |
| 2 Part Epoxy | 50-100 F | -10 to 180 F |
So a joint made with Original glue is rated to survive far colder winters in service than it was rated to be applied in. If the shop is cold, bring both the glue and the parts inside for the full 24 hours instead of hoping a heater will rescue a cold cure. For cold-snap failures after the fact, see our guide to glue joints cracking in cold weather.
How to Get a Full-Strength Cure With Original Gorilla Glue
- Fit the joint dry. Gorilla wants clean, dust-free, tight-fitting surfaces. Roughen smooth surfaces so the glue has something to bite into.
- Dampen one surface lightly. A damp cloth or a light spray is enough. Do not leave standing water.
- Apply a thin layer to the other surface, roughly half an ounce per square foot, and join the parts right away.
- Clamp for 1-2 hours. Use real clamping pressure, not hand pressure, because the foam expands up to 3 times.
- Wipe wet squeeze-out only if you must. Gorilla says wet glue can be wiped with a dry cloth or a standard paint thinner. Smearing it into the grain is worse than leaving it to be cut off later.
- Wait 24 hours, then remove cured foam mechanically. Sand, chisel or scrape it. Gorilla says dried glue is best removed that way.
Gorilla lists Original as a good fit for oily woods such as teak. If you are choosing glue for those species, our oily hardwood glue comparison has the broader picture, and for outdoor projects see gluing wood joints for outdoor use.
Storage note: Gorilla says to store the bottle in a cool, dry location and to avoid laundry rooms, under sinks and kitchen cabinets, where humidity can reach a moisture-activated glue before you do.
Gorilla Glue Safety: Skin, Cleanup and Uncured Glue
This is the part most cure-time articles leave out, and it matters more than the clock. According to Gorilla, Original Gorilla Glue can be a skin sensitizer, so wear gloves from the first squeeze rather than after the first smear. Gorilla also says not to use alcohol or acetone to remove it from skin.
- Skin: for bonded skin Gorilla lists 1-800-420-7186 and recommends speaking to a medical professional. Do not peel bonded skin apart.
- Clear Gorilla Glue: it will stain clothes, and gloves are recommended. For routine smears, wash with gritty soap and warm water.
- Epoxy: not food safe, so keep it away from cutting boards and anything that touches food. Use gloves and ventilation.
- Wrong plastics: Original and Epoxy are not recommended for polypropylene or polyethylene.
This page summarizes manufacturer guidance, not medical advice. If glue gets in an eye, mouth or a large area of skin, get medical help rather than treating it at home.
Which Gorilla Glue Should You Use Based on How Long You Can Wait?
Pick by clamp time, not by brand. If the part cannot stay clamped for two hours, Original and Clear are the wrong choices. If you need the joint tight and instant, Super Glue is the one that sets in 10 to 45 seconds. For ordinary wood-to-wood joints, Wood Glue clamps in 20-30 minutes and does not foam. The head-to-head strength data lives in our Gorilla Glue vs wood glue comparison.
If you are gluing something other than wood, check the project-specific pages first: Gorilla Glue on fabric and gluing veneer to wood. If your project is plumbing, that is a solvent-weld process with its own timing, covered in our PVC glue cure time guide. You can also browse our glue category.
Frequently Asked Questions About Gorilla Glue Cure Time
Can you sand or paint Gorilla Glue after one hour?
Not Original Gorilla Glue. The manufacturer says to clamp it for 1-2 hours and allow 24 hours to cure for best results, so wait the full day before trimming foam or finishing. Gorilla Wood Glue and Gorilla Epoxy are both listed as sandable and paintable, but the same 24 hour full-cure rule is the safe plan before heavy sanding.
Does adding more water make Gorilla Glue cure faster?
No. Original Gorilla Glue is moisture-activated, but the manufacturer says to lightly dampen one surface, not saturate it. Too much water produces extra foam and a weaker, bubbly bond, so a damp cloth wipe or a light spray mist on one surface is the right amount.
Does Gorilla Glue cure in cold weather?
It cures slower, and some formulas have hard limits. Original Gorilla Glue is rated for application above 40 F, Clear Gorilla Glue from 32 to 100 F, Gorilla Epoxy from 50 to 100 F, and Gorilla Wood Glue in a 55 to 75 F range. Below those temperatures, move the parts indoors before gluing.
Is Gorilla Glue waterproof once it has cured?
Only Original Gorilla Glue is sold as 100% waterproof. Gorilla Wood Glue passes the ANSI/HPVA Type II water-resistance standard, and Gorilla Epoxy is water resistant, but neither is recommended for continual water exposure. Gorilla’s own comparison says Super Glue bonds weaken over time when exposed to water.
What should you do if Gorilla Glue bonds to your skin?
Do not use alcohol or acetone on skin. Gorilla says Original Gorilla Glue can be a skin sensitizer and lists 1-800-420-7186 for medical guidance if skin is bonded. For routine smears of the Clear formula, Gorilla suggests gritty soap, warm water, or an exfoliator. Seek medical help for eyes, mouth, or large areas.
Can you use Gorilla Glue on plastic?
Not on every plastic. Gorilla does not recommend Original Gorilla Glue or Gorilla Epoxy for polypropylene (PP) or polyethylene (PE) plastics. Original bonds wood, stone, metal, ceramic, foam, glass and concrete, and Clear Gorilla Glue is listed for non-porous surfaces such as metal, glass and plastics, with one surface dampened.
How long does Gorilla Super Glue take to cure?
Gorilla states Super Glue sets in 10 to 45 seconds with a full cure in 24 hours. It suits tight-fitting, non-porous parts held by hand. It is a different chemistry from the polyurethane formula, so the damp-and-clamp routine for Original does not apply.
Gorilla Glue cures in about 24 hours across its main formulas, but the number that decides your project is the clamp or set time: 1-2 hours for Original, 2 for Clear, 20-30 minutes for Wood Glue, 30 undisturbed minutes for Epoxy and seconds for Super Glue. Match the formula to how long you can hold the part, keep the glue within its temperature limits, and leave the joint alone for the full 24 hours before sanding or loading it.
Sponsored / affiliate links. As an Amazon Associate I earn from qualifying purchases. I may earn additional commission from eligible campaigns.