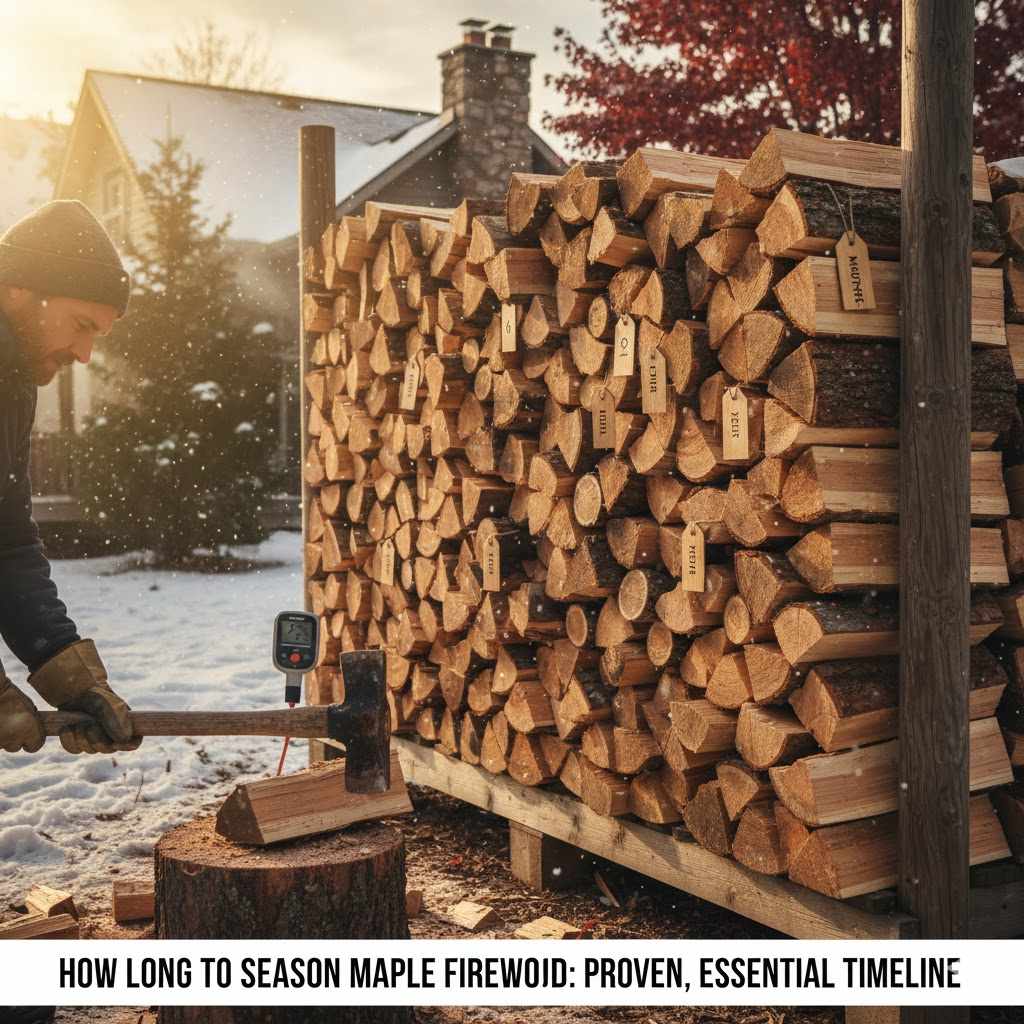
How Long to Season Maple Firewood: Proven, Essential Timeline
For best results, you should season soft maple firewood for at least 6 to 12 months. Hard maple, which is much denser, requires a longer seasoning time of 12 to 24 months. Proper splitting and stacking are key to ensuring your maple wood is ready to burn efficiently and cleanly.
Hello, fellow makers and homeowners! It’s Md Meraj, and today we’re tackling a question I hear all the time in the workshop: “How long does my maple firewood really need to season?” It’s a great question. You’ve done the hard work of cutting and splitting, and now you’re eager to enjoy a cozy fire. But using that wood too soon can lead to a smoky, frustrating mess.
Don’t worry. Getting this right is much easier than you think. There isn’t one magic number, but there are simple guidelines that guarantee perfectly seasoned wood every time. In this guide, I’ll walk you through the essential timeline for both hard and soft maple, and I’ll share the proven steps to get it right. Let’s make sure your next fire is warm, clean, and wonderful.
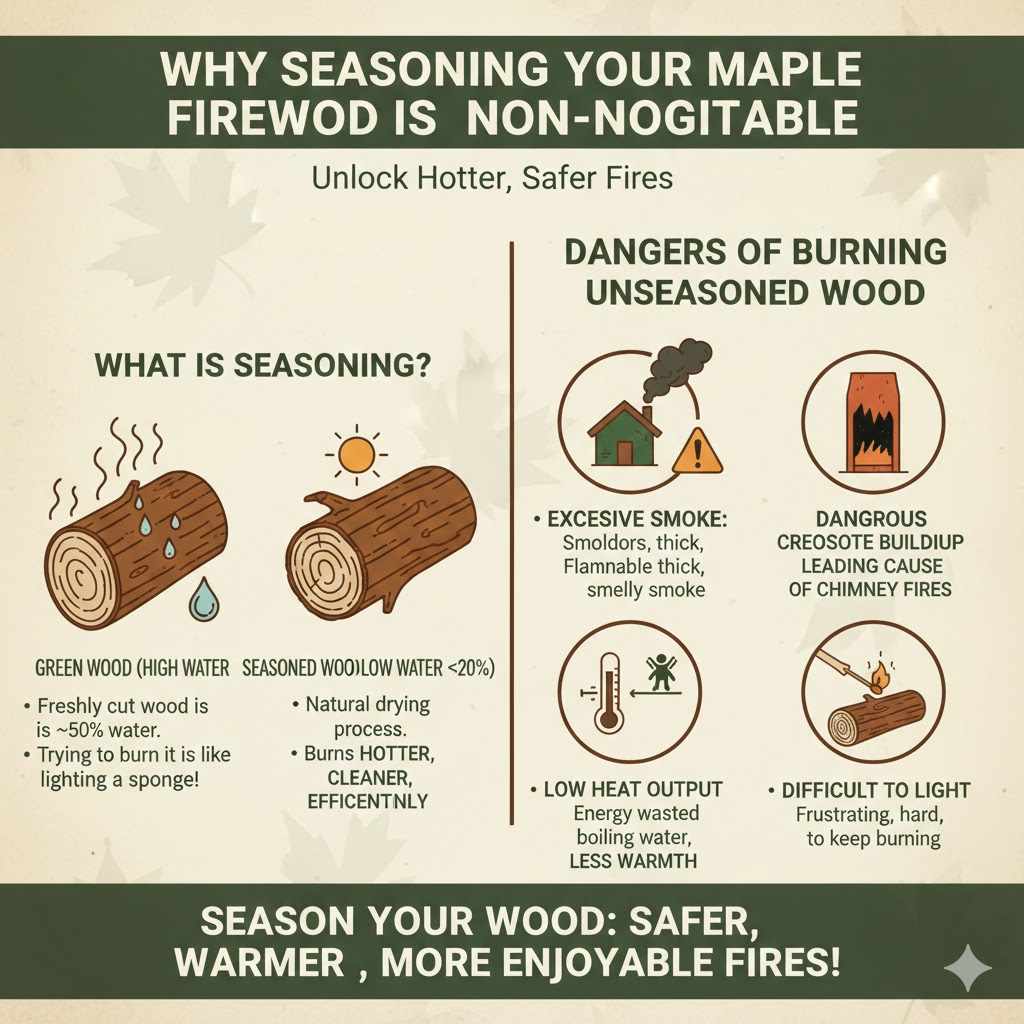
Why Seasoning Your Maple Firewood is Non-Negotiable
Before we jump into timelines, let’s talk about why this step is so important. When you first cut down a maple tree, the wood is full of water. In fact, a freshly cut log, often called “green” wood, can be almost 50% water by weight! Trying to burn this wet wood is like trying to light a sponge.
“Seasoning” is simply the natural process of drying wood to reduce its moisture content. The goal is to get the moisture level below 20%. When wood is properly seasoned, it burns hotter, cleaner, and more efficiently. Burning green wood, on the other hand, causes a host of problems.
Here’s why you should never burn unseasoned maple:
- Excessive Smoke: Green wood smolders instead of burns, producing thick, smelly smoke that can fill your home and annoy your neighbors.
- Dangerous Creosote Buildup: The smoke from wet wood carries unburned tars and minerals that condense on the cool inner walls of your chimney, forming a flammable substance called creosote. According to the U.S. Fire Administration, creosote buildup is a leading cause of chimney fires.
- Low Heat Output: The fire has to waste a huge amount of energy just to boil off the water in the wood. This means you get very little heat in your room and have to burn much more wood to stay warm.
- Difficult to Light: Getting a fire started with wet wood is incredibly frustrating. It’s hard to light and even harder to keep burning.
Taking the time to season your maple is a simple step that makes your fires safer, warmer, and much more enjoyable. It’s a true win-win.
Understanding Maple: Hard vs. Soft Varieties
Not all maple is created equal, especially when it comes to firewood. The maple family is split into two main categories: hard maple and soft maple. Knowing which one you have is the first step in figuring out your seasoning timeline because their densities are very different.
Hard Maple
Hard maple is the champion of firewood. The most common type is Sugar Maple (the same tree that gives us maple syrup!). It’s a very dense, heavy wood. This density means it packs a lot of energy, so it burns for a very long time and produces excellent, hot coals. However, because it’s so dense, it takes much longer for moisture to escape.
- Common Types: Sugar Maple, Black Maple
- BTU Output: High (around 24 million BTUs per cord)
- Key Trait: Burns long and hot, ideal for overnight heating.
Soft Maple
Soft maple, like Red Maple or Silver Maple, is less dense than its harder cousin. It’s still a good quality firewood that provides decent heat. The biggest advantage is that it seasons much more quickly. It also tends to be easier to split by hand. While it doesn’t burn quite as long as hard maple, it’s a fantastic choice that will heat your home well.
- Common Types: Red Maple, Silver Maple, Box Elder
- BTU Output: Medium (around 19 million BTUs per cord)
- Key Trait: Seasons faster and is easier to split.
Here’s a simple table to help you compare the two:
| Feature | Hard Maple (e.g., Sugar Maple) | Soft Maple (e.g., Red Maple) |
|---|---|---|
| Density & Weight | Very heavy and dense | Lighter and less dense |
| Splitting | Can be difficult to split | Generally easier to split |
| Seasoning Time | 12 to 24 months | 6 to 12 months |
| Heat Output | Excellent, long-lasting heat | Good, but burns faster |
| Coals | Produces a long-lasting bed of hot coals | Coals burn out more quickly |
The Essential Timeline: How Long Does It Really Take?
Now we get to the core of the question. Based on the type of maple you have, here are the trusted timelines for proper seasoning. Remember, these are based on wood that has been cut, split, and stacked correctly.
- Soft Maple: Requires a minimum of 6 to 12 months of seasoning.
- Hard Maple: Requires a minimum of 12 to 24 months of seasoning. Many experienced wood burners prefer to give hard maple a full two summers to dry for the absolute best results.
Think of these timelines as your starting point. Several factors can either speed up or slow down the drying process, so let’s look at what you can control to get your firewood ready faster.
Key Factors That Speed Up or Slow Down Seasoning
Where you live and how you prepare your wood can make a huge difference. Here are the most important variables:
- Climate: If you live in a hot, dry, and windy area like Arizona, your wood will season much faster than if you live in a cool, humid region like the Pacific Northwest. More sun and less air moisture are your best friends.
- Time of Year: The best time to cut and split your wood is in the late winter or early spring. This allows it to sit out and dry during the hottest, driest months of summer, dramatically speeding up the seasoning process.
- Splitting: This is the most critical factor you control. A whole log can take years to dry, and it will likely start to rot before it ever seasons. Splitting the wood exposes the interior surfaces to air and sun, allowing moisture to escape quickly. The smaller the split, the faster it will dry.
- Stacking Method: A well-stacked woodpile promotes airflow through every piece of wood. A tight, jumbled pile traps moisture and will slow down seasoning significantly.
- Sun and Wind: A woodpile located in a sunny, breezy spot will season far faster than one tucked away in a shady, sheltered corner of your yard.
The Step-by-Step Guide to Seasoning Maple Firewood Perfectly
Ready to get it right from the start? Following these steps will ensure your maple is perfectly seasoned and ready for a great fire.
Step 1: Cut to Length
Before you split, cut your logs to the right length for your wood stove or fireplace. A standard length is 16 inches, but measure your firebox to be sure. It’s much easier to cut logs to length now than after they are seasoned and hard.
Step 2: Split the Logs Promptly
This is the secret to fast seasoning. Split every piece as soon as you can after cutting it to length. For logs larger than 6 inches in diameter, split them into smaller pieces. A good rule of thumb is to have no piece wider than 6 inches on any side. Splitting the wood cracks open the grain and creates a superhighway for moisture to escape.
Step 3: Find the Right Location for Your Stack
Choose a spot that gets plenty of sunlight and is exposed to prevailing winds. Avoid shady spots or areas close to a wall where air can’t circulate. Most importantly, get your woodpile off the ground! Stacking wood directly on the dirt traps ground moisture and invites pests and rot. Lay down a pair of parallel 2x4s, pallets, or build a simple firewood rack.
Step 4: Stack for Maximum Airflow
A neat stack isn’t just for looks—it’s for function. Stack your wood in single rows so that air can move freely around every piece. If you are building a large pile, leave a few inches of space between each row for ventilation. Some people like to use a crisscross pattern on the ends to create stable “towers” that hold the rows in place.
Step 5: Cover the Top (But Not the Sides)
You want to protect your pile from rain and snow, but you don’t want to trap moisture. A common mistake is to wrap the entire pile in a plastic tarp. This creates a greenhouse effect, trapping humidity and encouraging mold. Instead, only cover the top 1/3 of the pile. You can use a tarp secured over the top or build a simple, permanent roof for your wood storage area. The sides must be left open to the wind.
Step 6: Be Patient and Test
Now, let nature do its work. Let the sun and wind dry out your wood for the recommended time (6-12 months for soft maple, 12-24 for hard maple). When you think it’s ready, you can perform a few simple tests to be sure.
How to Know When Your Maple Firewood is Ready to Burn
After waiting patiently, how can you be absolutely sure your maple is seasoned? Your senses are a great guide. Here are the simple, telltale signs that your firewood is ready.
The Telltale Signs of Seasoned Wood
- Color: Seasoned wood loses its vibrant, fresh-cut look. It will appear faded, turning a grayish or yellowish-brown color.
- Weight: Pick up a piece of seasoned maple and a piece of green maple of the same size. The seasoned piece will feel significantly lighter because it has lost its water weight.
- Sound: This is a classic test. Knock two pieces of seasoned wood together. They should make a sharp, hollow “clink” or “thock” sound. If they make a dull “thud,” they are still wet inside.
- Cracks (or “Checks”): Look at the ends of the logs. Seasoned wood will have visible cracks radiating from the center toward the bark. These are a great sign that moisture has left the wood.
- Bark: The bark on seasoned wood is often loose and can sometimes be peeled off easily. On green wood, the bark is stuck on tight.
- Smell: Green wood has a strong, sappy, almost sweet smell. Seasoned wood smells light and woody, or has very little scent at all.
This table summarizes what to look for:
| Feature | Green (Unseasoned) Maple | Seasoned Maple |
|---|---|---|
| Color | Bright, creamy white or reddish sapwood | Faded, grayish, or yellowish tones |
| Weight | Heavy and dense for its size | Noticeably lighter |
| Sound (when struck) | Dull “thud” | Sharp, hollow “clink” |
| Ends | Smooth, may feel damp | Dry, with visible cracks (checks) |
| Bark | Tightly attached to the wood | Often loose or easy to peel off |
| Moisture | Above 30% | Below 20% |
The Surefire Method: Using a Moisture Meter
If you want to be 100% certain, a wood moisture meter is a fantastic tool. These affordable gadgets give you an exact reading of the moisture content. According to the EPA’s Burn Wise program, firewood burns best when its moisture content is below 20%.
To get an accurate reading, take a piece of firewood from your stack and split it open again. Press the pins of the meter into the newly exposed inner surface. Testing the outside of the log can give you a false low reading, as the exterior always dries first.
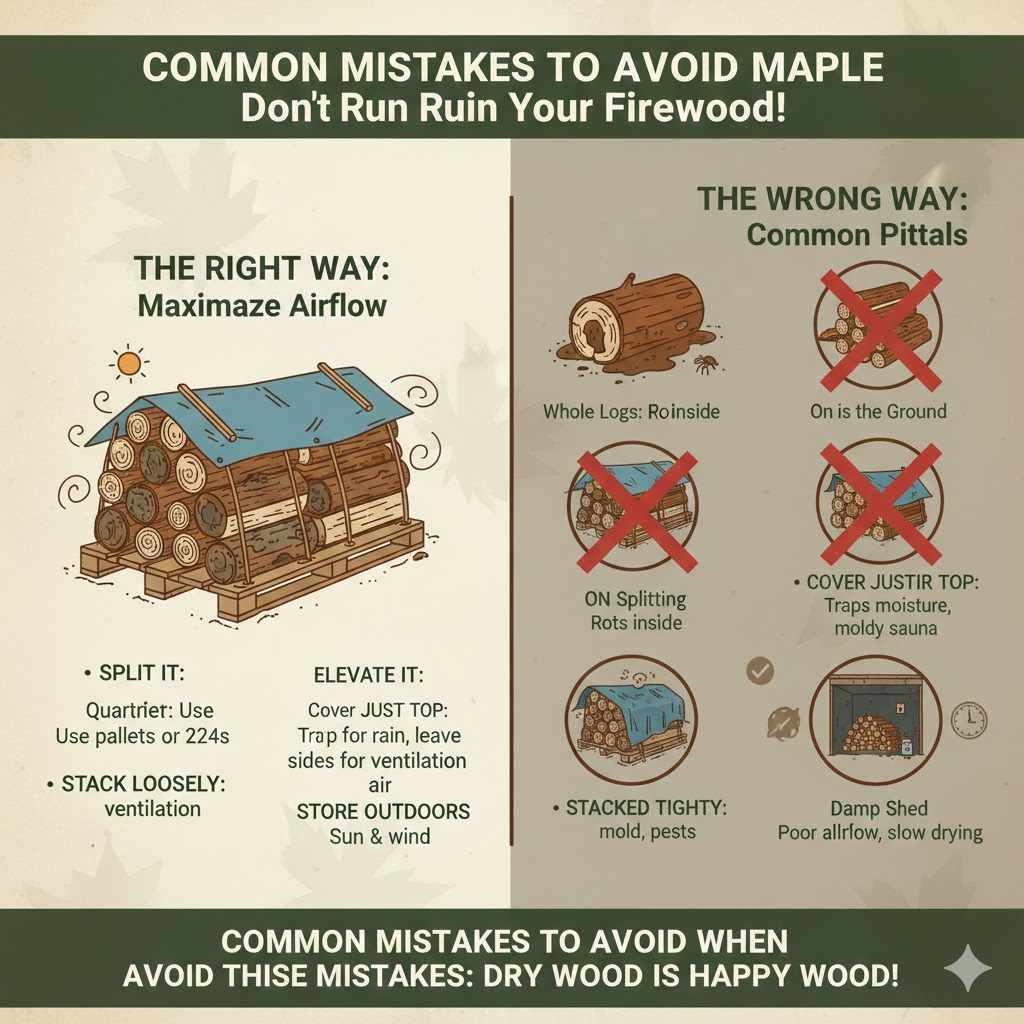
Common Mistakes to Avoid When Seasoning Maple
Even with the best intentions, a few simple mistakes can ruin a good pile of firewood. Here are the most common pitfalls to watch out for:
- Not Splitting It: I can’t say this enough! Trying to season whole logs is the number one mistake. They will rot from the inside out before they ever get dry enough to burn well.
- Stacking on the Ground: This is an open invitation for moisture, mold, termites, and other insects. Always elevate your woodpile.
- Covering the Entire Pile: A tarp covering the entire stack traps moisture and prevents airflow, turning your woodpile into a moldy sauna. Only cover the top.
- Stacking It Too Tightly: Air needs to move. Jamming pieces together without any gaps for ventilation will drastically increase your seasoning time.
- Storing It in a Damp Shed or Basement: Seasoning requires airflow. A stagnant, damp space like a basement is one of the worst places to season wood. Store it outdoors where the wind and sun can do their work.
Your FAQs on Seasoning Maple Firewood
1. Can I season maple wood faster?
Yes, to an extent. The fastest way to season maple is to cut and split it in the early spring, make the splits smaller (around 3-4 inches wide), and stack it in a single row in a very sunny and windy location. Some people build solar kilns for even faster results, but that’s a more advanced project.
2. What’s the seasoning time difference between Sugar Maple and Red Maple?
A big difference! Red Maple is a soft maple and will be ready in 6 to 12 months. Sugar Maple is a hard maple and needs 12 to 24 months. The density of Sugar Maple holds much more water that takes longer to escape.
3. Is it okay if my seasoning firewood gets rained on?
Yes, it’s perfectly fine. A little rain won’t hurt a properly stacked pile. The wind and sun will quickly dry the surface moisture off. That’s why the sides of the pile are left uncovered—to let it breathe and dry out after a storm. The main goal of covering the top is to prevent constant saturation from heavy rain or melting snow.
4. How can I tell hard maple from soft maple?
It can be tricky. When green, hard maple is significantly heavier. The end grain of hard maple is usually denser with less space between growth rings. The leaves are also a clue: Sugar Maple leaves have smooth, U-shaped valleys between the points, while Red Maple leaves have jagged, V-shaped valleys.
5. Does maple create a lot of creosote?
No, quite the opposite. When properly seasoned, maple is a very clean-burning wood that produces very little creosote. The creosote problems associated with firewood almost always come from burning wood that is too wet, regardless of the species.
6. What happens if I burn wood that is only partially seasoned?
You’ll get a frustrating fire that is hard to start, produces very little heat, and creates a lot of smoke and creosote. You are essentially wasting the energy in the wood to boil water instead of heating your home. It’s always better to wait.
Conclusion: The Reward of Patience
Seasoning maple firewood isn’t a complicated process, but it is one that rewards patience. The simple acts of splitting your wood, stacking it for airflow, and giving it enough time will transform it from a smoky nuisance into a premium fuel source for your home.
For soft maples, aim for at least six months. For the dense hard maples, plan on a year or even two. Trust the process and use the signs—the sound, the weight, the cracks—to know when it’s ready. Your reward will be a bright, beautiful fire that burns hot and clean, providing warmth and comfort all winter long.
So get out there, get stacking, and look forward to the cozy days ahead. Happy woodworking, and stay warm!