How Long to Wait After Water Popping before Staining: Quick Tips
Wait at least 24 to 48 hours after water popping before staining your wood. This timeframe allows the wood to dry properly.
Water popping is an essential preparation step for achieving a smooth finish on wood surfaces. It involves applying water to raise the grain, enhancing the wood’s texture. After this process, it’s crucial to allow sufficient drying time before staining. Staining too soon can lead to uneven absorption and an unsatisfactory appearance.
Proper timing ensures that the stain penetrates evenly, resulting in a more vibrant and durable finish. Understanding the drying process helps you avoid common pitfalls and achieve the best results for your woodworking project. Patience is key to transforming your wood into a beautifully stained masterpiece.
Introduction To Water Popping
Water popping is a method used to prepare wood for staining. It involves applying water to the wood surface. This process raises the wood grain, making it smoother for stain application.
Waiting after water popping is crucial for the best results. Allow the wood to dry completely. This usually takes about 1 to 2 hours. Staining too soon can lead to uneven color.
The benefits of water popping are significant:
- Improved Stain Absorption: Wood absorbs stain better when the grain is raised.
- Smoother Finish: A smoother surface leads to a more attractive final look.
- Enhanced Color Depth: Water popping can enhance the richness of the stain color.
Preparation For Water Popping
Proper sanding is vital for a smooth finish. Start with a coarse grit sandpaper. This removes imperfections and prepares the wood. Use a finer grit sandpaper for a smoother surface.
Clean the surface after sanding. Dust and debris can ruin the stain. Use a vacuum or a damp cloth to remove dust. Make sure the wood is completely dry before applying any stain.
Check for any missed spots. Uneven areas may affect the final look. Always sand in the direction of the wood grain. This helps to avoid scratches and marks.
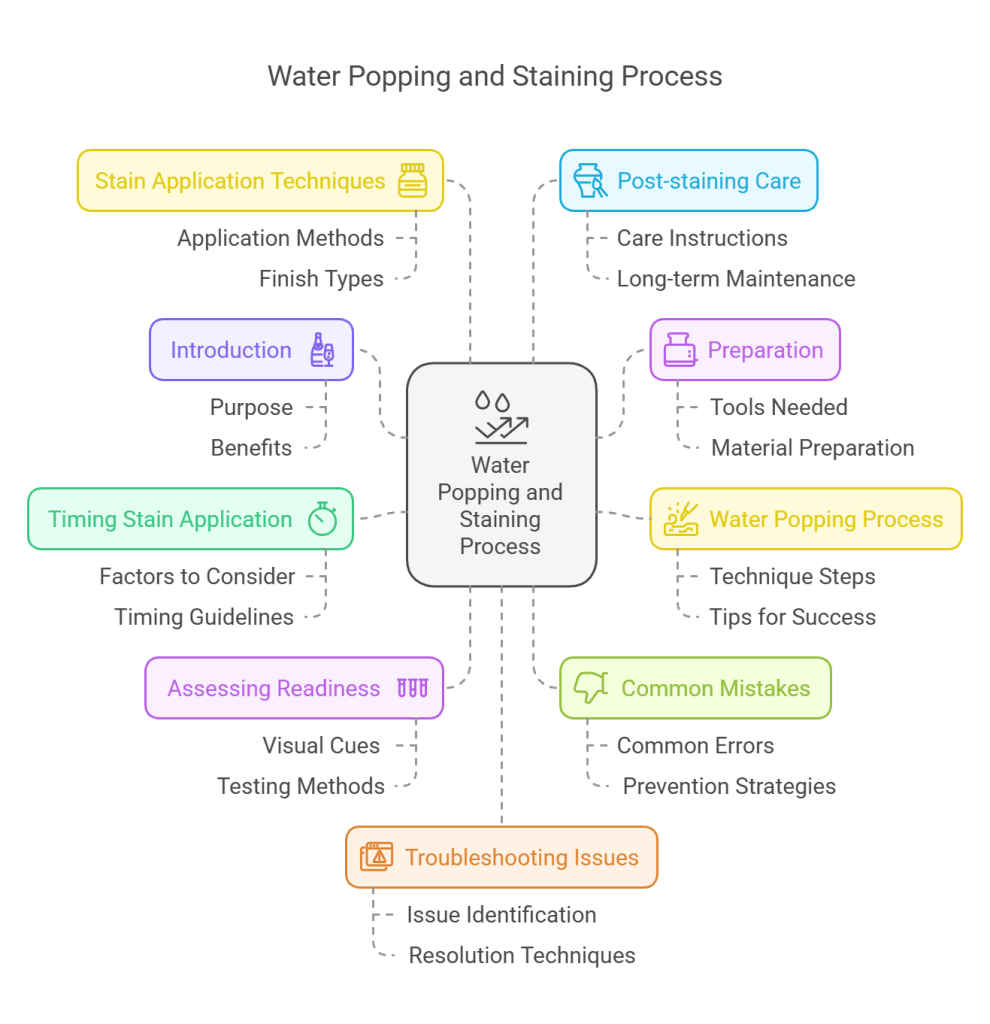
The Water Popping Process
The water popping process helps to prepare wood for staining. Start by applying water evenly across the surface. Use a spray bottle or brush for best results. Make sure every area gets the same amount of water. This ensures an even finish later on.
Ideal conditions for water popping are essential. Humidity should be moderate, around 50-60%. Temperature plays a role too; aim for 60-80°F. Avoid direct sunlight during this process. This prevents quick drying and uneven results. Allow the wood to soak for about 15-30 minutes before staining.
Timing Your Stain Application
Timing is crucial for the best results. Waiting too long or staining too soon can cause issues. Generally, a waiting period of 24 to 48 hours is recommended. This allows the wood to dry properly.
Many factors can affect drying time. Humidity, temperature, and airflow play important roles. A hot and dry environment can speed up the process. Conversely, a cool and humid space may slow it down.
| Condition | Effect on Drying Time |
|---|---|
| High Humidity | Slows drying |
| High Temperature | Speeds up drying |
| Good Airflow | Speeds up drying |
| Low Airflow | Slows drying |
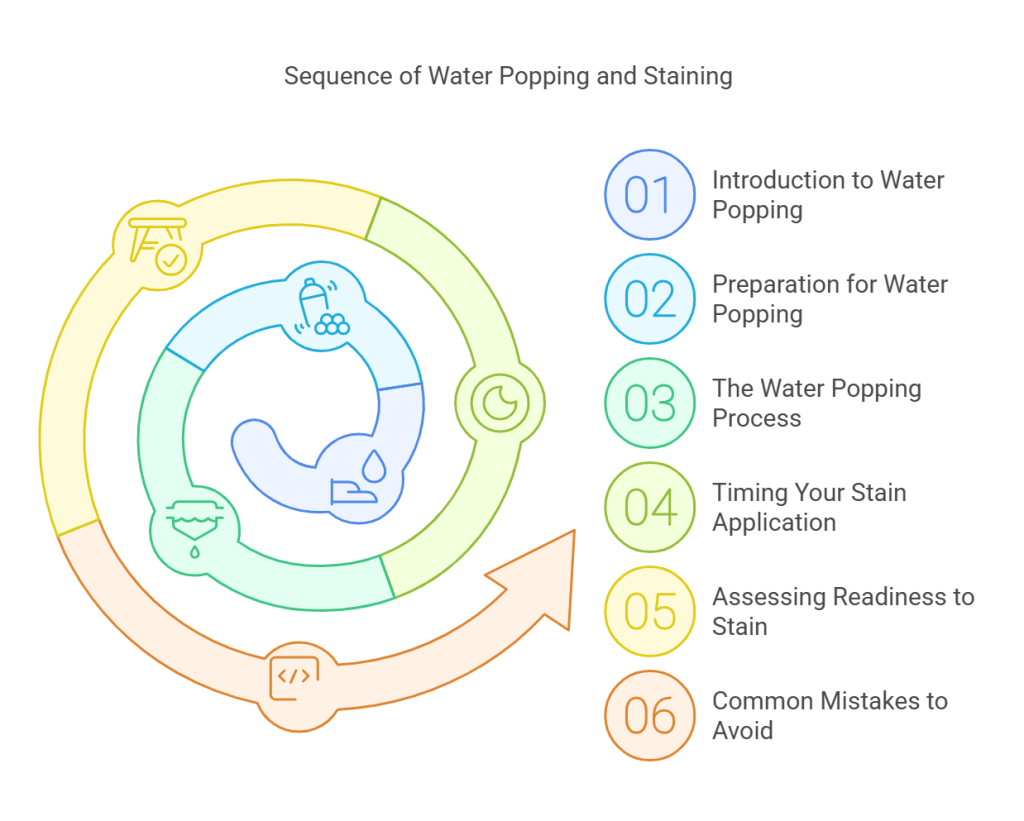
Assessing Readiness To Stain
To determine the right time to stain, start with a visual inspection. Look for color changes on the surface. A darker appearance usually means the wood is ready.
Check for water pooling. If water beads up, wait longer before staining. Absorption is a key sign of readiness.
Using touch is another effective method. Gently press your fingers on the surface. If it feels cool or damp, wait. A dry surface indicates it’s time to stain.
Always ensure the wood is completely dry before applying any stain. This helps achieve the best results and improves the wood’s look.
Common Mistakes To Avoid
Many people make the mistake of using too much water. Over-application can lead to staining problems. Always use just enough water to dampen the surface.
Rushing the drying process is another common error. It’s important to let the surface dry completely before staining. A wet surface can cause uneven color and blotches. Patience is key for the best results.
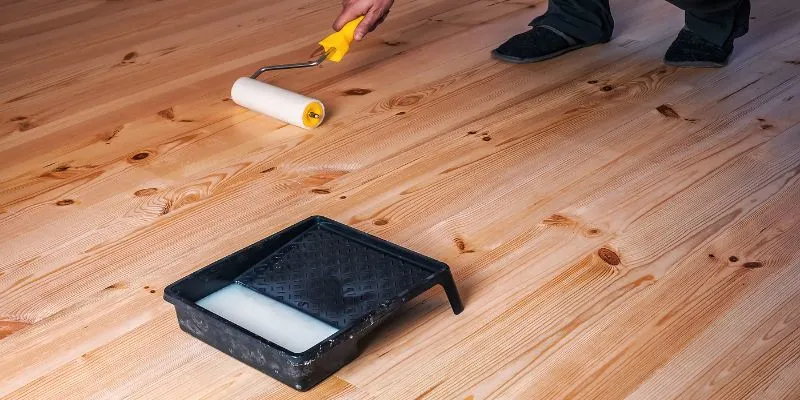
Stain Application Techniques
Choosing the right stain is crucial for a beautiful finish. Consider the type of wood you have. Different woods absorb stains differently. Oil-based stains work well for softwoods. Water-based stains are great for hardwoods.
Best practices for even staining include prepping the surface first. Sand the wood to create a smooth finish. Wipe away dust before applying the stain. Use a clean, lint-free cloth for best results.
Apply the stain with a brush or rag. Work in small sections to avoid uneven color. Allow the stain to sit for a few minutes. Wipe off the excess with a clean cloth.
Post-staining Care
After water popping, waiting is crucial before staining your wood. A good drying time is essential. Generally, allow 24 to 48 hours for the wood to dry completely. This helps the stain adhere better.
Protecting your newly stained wood is important. Use a clear sealer after staining. This adds a protective layer. Avoid heavy traffic on the wood for at least 72 hours. This ensures the stain cures properly.
Keep the area well-ventilated. Fresh air helps the drying process. Avoid using fans directly on the wood. It can cause uneven drying and affect the finish.
Troubleshooting Common Issues
Dealing with uneven stain can be frustrating. First, check if the surface is clean. Use a soft cloth to remove any dust or debris. If there are blotchy areas, apply a new coat of stain. Choose a color that matches the original stain. Work in small sections for even coverage.
For areas that absorbed too much stain, use a clean rag to wipe away excess. Be gentle to avoid damaging the wood. If blotches remain, sand the area lightly. After sanding, reapply the stain for a smooth finish.
Always allow the stain to dry completely. This can take several hours. Test a small area first to ensure the result is what you want. Patience is key in achieving a beautiful, even stain.
Frequently Asked Questions
How Long Should I Wait After Water Popping?
After water popping, it’s best to wait 24 to 48 hours before staining. This allows the wood to dry thoroughly. Staining too soon can trap moisture, leading to poor adhesion and uneven finishes. Always check the wood’s dryness before proceeding with any staining.
Can I Stain Wood Immediately After Water Popping?
No, staining immediately after water popping is not recommended. The wood needs adequate drying time to prevent moisture-related issues. Staining too soon can cause the stain to lift or not adhere properly. Always ensure the wood is completely dry for the best results.
What Is Water Popping In Woodworking?
Water popping is a technique used to raise wood grain. It involves applying water to the surface before staining. This helps achieve a smoother finish and enhances the wood’s natural color. The process improves stain absorption, resulting in a more vibrant appearance.
Why Is Drying Time Important After Water Popping?
Drying time is crucial after water popping to avoid moisture issues. If the wood remains damp, it can lead to poor stain adhesion. This can result in an uneven finish or peeling later on. Always prioritize proper drying to achieve the best results.
Conclusion
Waiting after water popping is crucial for achieving the best staining results. Ensuring the surface is dry prevents issues like uneven color or peeling. Always test a small area first. By following these guidelines, you’ll enhance the durability and appearance of your stain, leading to a beautiful finish that lasts.