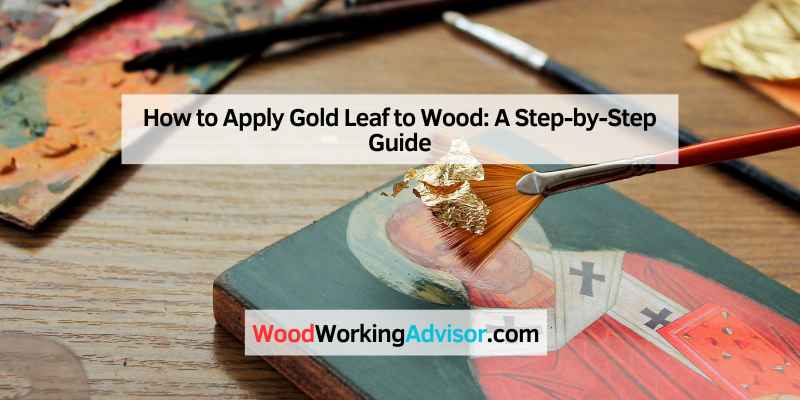
How to Apply Gold Leaf to Wood: A Step-by-Step Guide
To apply gold leaf to wood, start by preparing the surface with a suitable primer. Use an adhesive size to ensure the gold leaf adheres properly.
Gold leaf application can transform ordinary wooden surfaces into stunning focal points. This technique is popular in decorative art, furniture design, and home décor. Gold leaf adds elegance and a luxurious touch to various projects. Achieving a flawless finish requires attention to detail and the right materials.
Beginners and experienced artisans alike appreciate the beauty gold leaf brings. The process involves several steps, including surface preparation, adhesive application, and careful placement of the leaf. Mastering this skill can elevate your craft and provide a unique aesthetic appeal to your wood projects. Explore the art of gold leafing and unleash your creativity.
Introduction To Gold Leafing
The allure of gold leaf has fascinated artists for centuries. Its shine and rich color add a unique touch to wood. Gold leaf can transform ordinary items into extraordinary pieces. Many cultures used gold leaf in art and decoration.
Gold leafing has a historical significance in woodworking. Ancient civilizations used it to decorate temples and furniture. Craftsmen valued gold leaf for its beauty and luxury. This practice continues in modern woodworking.
Applying gold leaf requires patience and skill. It makes pieces look more elegant and refined. Gold leaf can symbolize wealth and prestige. Today, many artisans still embrace this timeless technique.
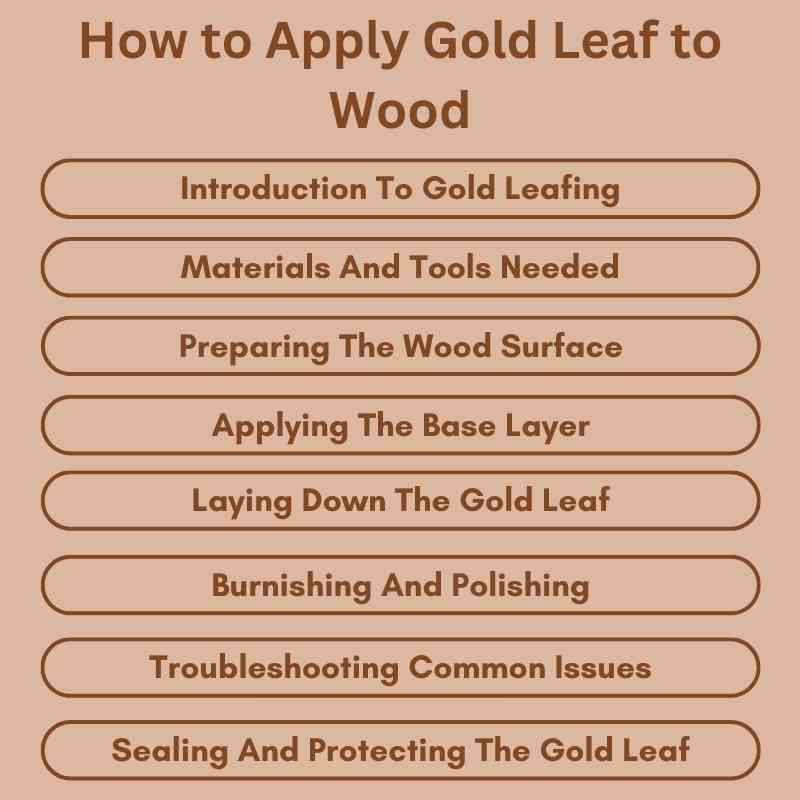
Materials And Tools Needed
Gold leaf comes in various types. Each type has unique qualities and uses. The most common types include:
| Type of Gold Leaf | Description |
|---|---|
| Loose Leaf | Easy to handle and apply. Great for beginners. |
| Transfer Leaf | Comes on a backing sheet. Simplifies the application process. |
| Imitation Gold Leaf | Looks similar but costs less. Good for budget projects. |
Essential tools for applying gold leaf include:
- Brushes: Use soft brushes for smooth application.
- Adhesive: A special gold leaf adhesive is necessary.
- Sealer: Protects the gold leaf once applied.
- Cutting Knife: For trimming excess gold leaf.
Preparing The Wood Surface
Start by sanding the wood surface. Use fine-grit sandpaper for a smooth finish. Sand in the direction of the grain. This will help the gold leaf stick better.
After sanding, clean the surface. Wipe away any dust with a damp cloth. Make sure the wood is completely dry before moving on.
Next, seal the wood. Apply a thin layer of wood primer. This layer will protect the wood and create a better surface for gold leaf. Allow the primer to dry completely.
Applying The Base Layer
Choosing the right adhesive is crucial for applying gold leaf to wood. Use a quality adhesive designed for gilding. Water-based options work well for indoor projects. Oil-based adhesives offer durability for outdoor use.
For an even coat, apply the adhesive with a soft brush. Make sure to cover the area evenly. Avoid clumps and excess adhesive. Let the adhesive become tacky before applying the gold leaf. This usually takes about 30 minutes.
Check the instructions on your adhesive for the best results. Patience is key in this process. Allow the layers to dry completely before adding more gold leaf.
Laying Down The Gold Leaf
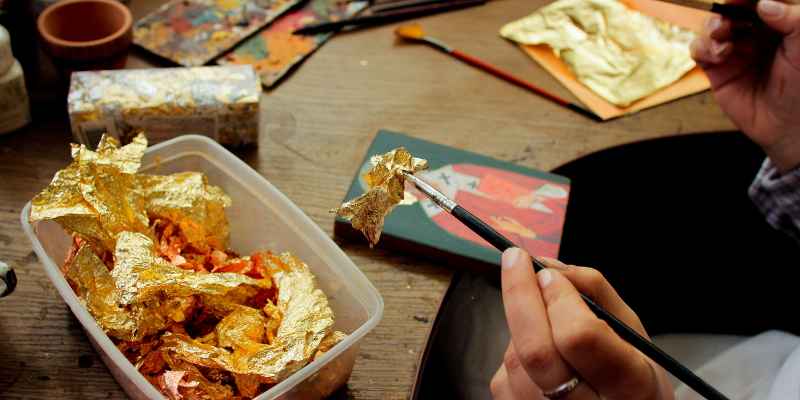
Gold leaf is very delicate. Handle it carefully to avoid tearing. Use a soft brush to pick it up. Always work in a clean area to prevent dust.
To apply gold leaf, prepare the wood surface. Make sure it is smooth and dry. Use an adhesive that dries clear. This helps the gold leaf stick well.
Place the gold leaf gently on the wood. Use the brush to press it down lightly. Ensure there are no air bubbles. This helps create a seamless layer.
For a perfect finish, trim any excess gold leaf. Use a sharp blade for a clean edge. Finally, seal the gold leaf with a clear topcoat.
Burnishing And Polishing
Achieving a smooth finish is essential for gold leaf application. Start by using fine sandpaper. This helps to remove any rough spots. After sanding, clean the wood surface thoroughly. Dust and dirt can ruin the finish.
Use a soft cloth to wipe the wood. Next, apply a thin layer of polishing compound. Choose a compound designed for wood surfaces. This will help enhance the wood’s natural beauty.
For protective polishing methods, consider using beeswax or natural oils. These options provide a protective layer. They also add shine to the gold leaf. Reapply these methods regularly for best results.
| Method | Benefits |
|---|---|
| Beeswax | Provides a protective layer and enhances shine. |
| Natural Oils | Protects and nourishes the wood surface. |
Troubleshooting Common Issues
Dealing with tearing can be frustrating. First, ensure the wood surface is smooth and clean. Use a fine-grit sandpaper to prepare the area. Apply a thin layer of adhesive evenly. Wait for it to become tacky before laying down the gold leaf.
For fixing uneven textures, start by identifying the rough areas. Sand those spots gently until they feel even. After sanding, apply a fresh layer of adhesive. Place the gold leaf carefully over the repaired areas. Press it down lightly to ensure it sticks well.
Sealing And Protecting The Gold Leaf
Choosing the right sealant is crucial for protecting gold leaf. Use a water-based sealant for best results. It dries clear and does not harm the gold leaf. Oil-based sealants can also be used, but they may yellow over time.
Look for products that offer UV protection. This helps keep the gold leaf shining bright. Varnish is another option for sealing. It adds a layer of protection against dust and moisture.
| Sealant Type | Pros | Cons |
|---|---|---|
| Water-based | Dries clear, non-toxic | May require multiple coats |
| Oil-based | Durable, rich finish | Can yellow over time |
| Varnish | Good dust protection | Can be hard to remove |
Regular care keeps the gold leaf looking new. Dust it gently with a soft cloth. Avoid harsh chemicals that can damage the surface. Store items in a cool, dry place to prevent deterioration.
Creative Applications And Techniques
Gold leaf can add a stunning touch to wooden items. Use it to create vibrant colors and unique designs. Choose bright paints or stains under the gold leaf. This creates contrast and makes the gold pop.
Try using stencils for detailed designs. Apply the gold leaf over the stencils for defined patterns. Freehand techniques also work well for a more artistic feel.
| Technique | Description |
|---|---|
| Stenciling | Use stencils for sharp, clear designs. |
| Freehand | Create unique patterns with a brush. |
| Layering | Apply multiple layers for depth and richness. |
Advanced methods include applying size for better adhesion. Ensure the surface is clean for a smooth finish. Experiment with different techniques to find your style.
Conclusion: Crafting With Confidence
Applying gold leaf to wood can be a fun and rewarding project. Practice is key to achieving the best results. Start with small pieces of wood to build your skills.
Consider different designs for your future projects. Try different shapes and patterns to see what you like. Use stencils for added precision.
Experiment with colors and textures. Mixing gold leaf with other materials can create unique effects. Always remember to enjoy the process and express your creativity.
Your confidence will grow with each project. Embrace mistakes as learning opportunities. Soon, you’ll master the art of applying gold leaf!
Frequently Asked Questions
How Do I Prepare Wood For Gold Leaf Application?
Preparing wood for gold leaf application involves sanding the surface to make it smooth. Clean off any dust and debris. Apply a primer or base coat to ensure better adhesion. Allow it to dry completely before applying the gold leaf.
This preparation ensures a flawless finish.
What Tools Do I Need For Applying Gold Leaf?
You’ll need a few essential tools for applying gold leaf. A soft brush helps apply the adhesive smoothly. Use a gilding adhesive or size for better adhesion. Tweezers are handy for handling the delicate gold leaf. A burnishing tool can help create a smooth finish.
How Long Does Gold Leaf Last On Wood?
Gold leaf can last many years on wood if applied correctly. Proper sealing and maintenance enhance its longevity. Use a clear sealer to protect the gold leaf from damage. Avoid exposure to harsh sunlight and moisture to preserve its shine and integrity.
Can I Use Gold Leaf On Painted Wood?
Yes, you can use gold leaf on painted wood. Ensure the paint is fully cured before application. A smooth surface allows for better adhesion of the gold leaf. Choose a compatible adhesive for optimal results. This technique creates a beautiful contrast and enhances your project.
Conclusion
Applying gold leaf to wood can transform your projects into stunning works of art. With the right tools and techniques, anyone can achieve a professional finish. Embrace this craft and let your creativity shine. Remember, practice makes perfect, so don’t hesitate to experiment and refine your skills.
Happy gilding!