How to Carve a Wooden Whistle: Master Craft Tips
To carve a wooden whistle, start with a softwood block and use a knife to shape the body. Create a channel for the air passage and a mouthpiece at one end.
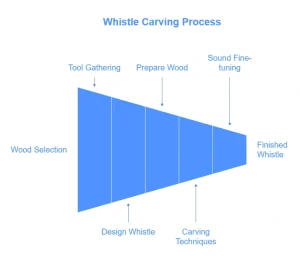
Carving a wooden whistle is a rewarding and enjoyable project for both beginners and experienced woodworkers. This simple instrument combines creativity with craftsmanship. With just a few tools and materials, you can transform a piece of wood into a functional and melodious item.
Whistles have a long history and remain popular for their simplicity and charm. Whether you want to make one for personal use or as a gift, this guide will help you navigate the carving process effectively. Embrace the joy of woodworking while producing a unique, handcrafted whistle that produces delightful sounds.
Choosing Your Wood
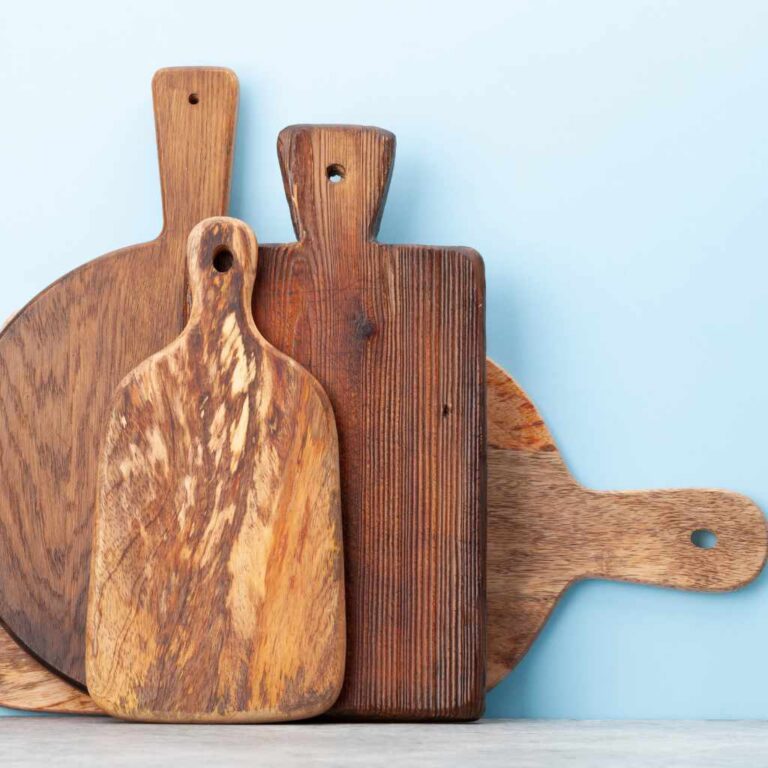
Choosing the right wood is important for making a wooden whistle. Some ideal types of wood include:
- Maple: Offers a clear, bright sound.
- Birch: Known for its strong tone and durability.
- Pine: Lightweight and easy to carve.
- Cherry: Gives a warm, rich sound.
The hardness of the wood affects the whistle’s sound quality. Softer woods create a softer tone, while harder woods produce a sharper sound. Choose wood based on the sound you want to achieve.
Gathering Tools And Materials
Gathering the right tools is important for carving a wooden whistle. Essential carving tools include:
- Carving Knife: A sharp knife helps shape the wood.
- Gouges: These tools create curves and detailed designs.
- Chisels: Perfect for making clean cuts in the wood.
- Sandpaper: Smooths the surface for a polished finish.
Safety should always come first. Use the following safety equipment:
- Safety Glasses: Protect your eyes from wood chips.
- Cut-Resistant Gloves: Keep your hands safe while carving.
- Dust Mask: Avoid inhaling wood dust during sanding.
Designing Your Whistle
Start by sketching a simple design for your wooden whistle. Make sure to include all important details. Consider the size of the whistle. A smaller whistle produces a higher pitch, while a larger one gives a lower pitch.
Next, think about the tone you want. Different shapes and sizes affect the sound greatly. A straight design may produce a clearer note. Curved designs often create a warmer tone.
| Size | Pitch | Tone |
|---|---|---|
| Small | High | Clear |
| Medium | Medium | Balanced |
| Large | Low | Warm |
Preparing The Wood
Choose a suitable piece of wood for carving. Softwood like pine or cedar works well. Cut the wood into the desired length for your whistle. Aim for about 6 to 8 inches.
Use a sharp knife or saw for cutting. Make sure your cuts are straight and clean. This helps in making a good whistle.
After cutting, focus on smoothing the surfaces. Use sandpaper to remove rough edges. Start with coarse sandpaper, then use finer grades.
Ensure all surfaces are smooth to the touch. A smooth finish helps in sound quality when you play the whistle.
Carving Techniques
To shape the exterior of the whistle, start with a piece of wood. Use a knife to carve away the bark. Create a smooth and rounded shape. Keep the design simple for better sound.
Next, focus on the sound chamber. This part controls the whistle’s pitch. Carve a hollow area inside the wood. Make it deep enough for good sound quality. Test the sound as you go along. Adjust the size until it sounds right.
Fine-tuning The Sound
Fine-tuning the sound of a wooden whistle is essential. Start by adjusting the airway. This area controls how air flows through the whistle. A narrow airway gives a higher pitch. A wider airway results in a lower tone.
Next, focus on carving the fipple. The fipple is the part where air enters the whistle. It should be shaped carefully for the best sound. Make sure the angle is correct. A good angle helps produce clear notes.
Test the whistle as you carve. Listen closely to the changes in sound. Small adjustments can make a big difference. Keep refining until you achieve the desired tone.
Finishing Touches
To achieve a great finish, sanding is essential. Start with coarse sandpaper. Gradually use finer grits for a smooth surface. Pay attention to corners and edges. This ensures every part feels nice to the touch.
After sanding, it’s time to apply finishes. Choose a suitable wood finish that protects and enhances the wood. Options include oil, wax, or varnish. Apply thin coats and let each coat dry completely. Repeat until the desired look is achieved. Always follow the manufacturer’s instructions for the best results.
Maintenance And Care
Cleaning your wooden whistle is essential for its longevity. Use a soft, damp cloth to wipe it down. Avoid using harsh chemicals that can damage the wood. For stubborn dirt, a mild soap solution works well.
Let the whistle dry completely before storing it. This prevents mold and moisture build-up. Regularly check for any signs of wear or cracks. If you notice damage, repair it immediately.
Long-term preservation is crucial for maintaining sound quality. Store the whistle in a cool, dry place. Avoid exposing it to direct sunlight or extreme temperatures. Applying a light coat of mineral oil can help protect the wood.
Always handle your whistle with clean hands. This prevents oils and dirt from transferring to the wood. A little care goes a long way in keeping your wooden whistle in great shape!
Frequently Asked Questions
How Do You Start Carving A Wooden Whistle?
Begin by selecting a suitable piece of wood, such as pine or cedar. Use a sharp carving knife to outline the shape of the whistle. Focus on removing excess wood gradually. Ensure the interior is hollowed out to create sound.
Sand the surface for a smooth finish.
What Tools Are Needed For Whistle Carving?
Essential tools include a carving knife, wood chisel, and sandpaper. A small saw can help with initial cuts. A hook knife is useful for hollowing the interior. Always have a safety glove to protect your hands. These tools ensure precision and safety during carving.
How Long Does It Take To Carve A Whistle?
The time required to carve a wooden whistle varies. Beginners may take a few hours, while experienced carvers can finish in under an hour. Factors include the complexity of the design and skill level. Patience is essential, as rushing can lead to mistakes.
Can I Use Any Type Of Wood For Carving?
While you can use various woods, some are better suited for whistles. Softwoods like pine and cedar are ideal due to their workability and sound quality. Avoid hardwoods, as they can be challenging to carve. Always choose dry, seasoned wood for the best results.
Conclusion
Carving a wooden whistle is a rewarding craft. With patience and practice, anyone can create a beautiful instrument. Remember to choose the right wood and tools for the best results. Enjoy the process and let your creativity shine. Happy whittling, and may your new whistle bring you joy and music!