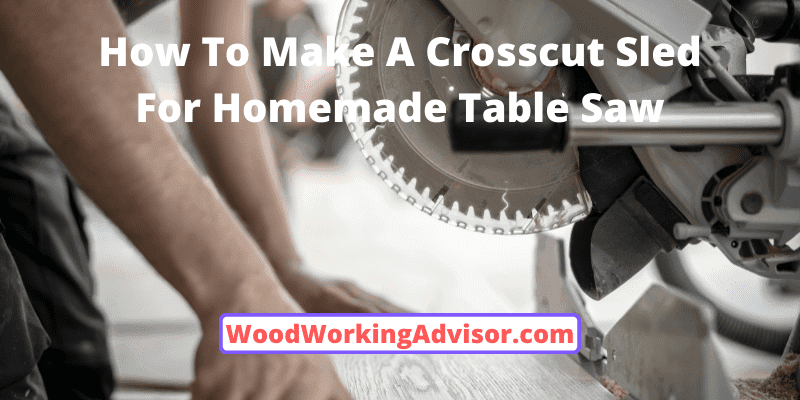
How To Make A Crosscut Sled For Homemade Table Saw?
How important a crosscut sled for a homemade table saw is! Since it is very crafty and important, today I am going to tell you about how to make a crosscut sled for a homemade table saw step by step so that you guys can make it on your own. Therefore no need to worry about how smoothly it will work, I am going to share the process from my personal experience.
Hey dear crafty bees, today I am going to share an awesome project which you guys will be going to enjoy, and know about the process of how to make a crosscut sled for a table saw.
Before starting the steps, you guys will need some materials, patience, and concentration to read this article carefully. The mixture of this will finally result in a nice, efficient, and smooth crosscut sled.
7 Easy Steps To Make A Crosscut Sled For Homemade Table Saw:
Since it is more or less beneficial for you, I have made the whole process into several steps so that this looks easier. Let’s start the steps.
Step-1: Necessary Equipment
You need to arrange the following equipment:
- Plywoods
- Screw and nuts
- Hand drill machine
- Amalgamate material
- Burnish
- Washers
- Scale
- Point maker
- Plainer
- Screwdriver
After arranging mentioned equipment, follow the process step by step.
Step-2: Make Important Measurement
Since the whole process will have been done by you for your table saw, make necessary measurements for your table. First of all, mark two points on two sides of the saw for making a parallel line. The lines will conduct the washers and they will be counted of the seld’s pathway.
Measure the sled plywood also so that it can be the same width as the table. Therefore, the pathway should be exactly 90 degrees with the table. Or else, the cutting system will not make an accurate piece.
Then the part comes to the measurement of beams. The beams are also important and need to be sized accurately. Again the slot which will be placed under the sled also needs to be an accurate size. Because the piece of wood is not equal, the saw won’t work properly.
Step-3: Operations
First of all, take the point marker and make two parts of the two sides of the saw. These parts will be turned into a pathway for the sled’s bottom part so that it can move in a particular way and help the user to cut.
Then make a measured deep pathway for the sled. You will need two pieces of the same height and width piece of plywood as the bottom part of the sled. These pieces of plywood will drive the sled. The pieces of pathway plywood need to be well planned. So you can use the planer to make the pieces smooth. Since these pieces of plywood will move through the way, they need to be more smooth.
On The other end of the plywood, you have to add a beam clamped to make some tension and screw in place. It slides very nicely and tight. Again you need to make a temporary fence to cut unnecessary plywood pieces. To make the sled front bigger and stronger it needs to add a three by six centimeters beam.
Clamped check if everything is square, pre-drilled and screwed in place. And last but very important parts, the blade guard for deep full blade hay cuts took some scrap wood in needed dimension, cut it, and screwed it in place. With this card, the blade always will be covered, and finally, let’s make some crosscuts. Final check, does it square? That’s what I call a well-done job!
Step-4: Arrangement
Now the step comes is the arrangement part. I expect you have already collected the equipment, made its sizes, and completed the operation part as well. Now you have to arrange the right equipment at the right place.
First of all, come to the bottom part of the sled. The rail-lined plywood part should be placed correctly. You can use the washers under the line so that it becomes smoother. Sometimes you have to cut a weighty piece of wood with the saw. It will prove handy and beneficial for you to have a washer under the line.
The lined wood will make the sled a bit higher from the table. So the moving part will be more flexible and easier. It will work like a wheel to the sled. Bringing the sled will be more comfortable.
Then comes the sled plywood. This piece of wood has to be exactly square-shaped. You have to cut down the extra part of the sled from the loser line. Fix the sled with the lined wood with a screw. Make sure it is properly fixed. You can use gum at first then make the exact position with the lines. Then fix it with screws.
The line and sled have to be smaller than the saw table. If the sled becomes wider than the table, the user may feel uncomfortable. At the same time, the lines and sleds have to be exactly 90 degrees with the saw. I repeat it once again, the sled and the lines have to be exactly 90 degrees with the saw. Or else, the result won’t be proven crafty. The whole process will have to follow again. It is more painful and time-wasting.
Now come to the size of the sled. The sled has to be a size that some part of the sled will pass the saw and the other part will remain with the table size. At the same time, the passed part of the sled has to be ripped with the saw. Rather a bit wide ripped will be more crafty. It will ensure the asked piece of the wood is completely cut off.
An extra piece of plywood has to be attached to the bottom part of the sled. The extra part of plywood will be attached at the size of the table end. This part will stop the sled from being cut off. The part will indicate the last edge of the sled which can be moved. This part is a security or notification part of where to stop.
You can add another small piece of small wood at the front part of the sled. This part is helpful but not mandatory. Sometimes, you have to cut a wide piece of wood through your table saw, and this extra part of the wood will prove crafty on that occasion. Therefore, this extra bit of wood will also have to wipe off at that amount of the sled.
Step-5: Applying Burnish:
Finally the easiest and the most important. Burnishing or making the sled slippery will help to move the sled easily. It is important for making the job easier. If the sled is too tight to move, the user often fails to make the exact cutting of wood or another coveted thing. But a bit of awareness is necessary.
Since the whole element is plywood-built, the burnishing equipment also needs to be initiated. Any burnishing material won’t suit the plywood. Finally, you have to use wax to make the screw holes covered. The wax will develop the user’s experiences.
After following all these steps, I think you have completely made your crosscut sled for your homemade table saw. I am sure you can easily make it without any help from others. Only one condition left for you, please read this article properly.
Tips To Make A Crosscut Sled For Homemade Table Saw:
Well, a bit of disclaimer needs to be mentioned. Since it is a work with a saw, you need to be very careful. Therefore, the use of the saw also depends on electricity. So carefulness is mandatory. Some other disclaimers also need to be mentioned.
- Be conscious about the size of the line pathway woods.
- The height of the line wood needs to be the same.
- The quality of the plywood needs to be top quality.
- The blade guards need to be well placed.
- Don’t plug the saw till you complete all the job.
- Check and double-check the electric line.
- Keep the electric wires away from the surface of the table
- Never use a curved saw to cut down anything.
- Use goggles during cutting the wood with the table saw.
- Don’t talk to anyone while cutting something and keep your hands at a safe distance.
Some Relevant Questions:
What Is The Importance Of Making A Crosscut Sled For Homemade Table Saw?
The plan is to make the task easier. Since the whole process of tearing the wood off, you need to make support along with a comfort zone. If you do not use any sled for a homemade table saw, it would work but you will get tired after doing a minimal job.
There is a matter of security related to using a sled over the table. The saw won’t understand your hands or your finger. Rather it will cut down whatever it will get. Using a sled will be proven crafty for you. Again it will accelerate the speed of work without making you that tired. In this era of being happier and easy working, who wants to work an arduous job!
Why Are The Measurements So Important?
The measurements of building the element are very important. You are cutting a piece of wood for your personal need and the piece would have to be of a specific size. If the sled is not well measured, how will it provide the correct sized wood?
Therefore, the measurement of the sled will also ensure its smooth use. If the sizes of the lined pieces are not the same, the sled will face difficulty running through it. Then the main purpose of building a sled won’t be fulfilled.
Is It Worth To Build A Crosscut Sled For Homemade Table Saw?
Bearing the use of a crosscut sled for a homemade table saw, there is no doubt of its worth. Who does not want a fast working machine? Therefore a sled will offer you an accelerated working surface of cutting.
As a safe and fast working condition, a crosscut sled has no alternative if you intend to cut a wood piece. At the same time, it is aesthetic to watch. It is important to make yourself happier when you are working. Though it is a secondary benefit of having a sled, the importance is huge.
I think these answers will make you free from hesitation to make a crosscut sled for a homemade table saw. These are those questions that I am asked often. If you have any more questions to ask me, the comment box is given for you. Please own the comment box so that I can reply to your question and make this article a one proper for you.
Final Verdict:
Since the working condition is a big deal for anyone, building a crosscut sled for a homemade table saw will serve you in many ways. People will love to use it for its comfort-making quality.
Costing a minimum, applying some techniques, and investing some time can serve you a big deal. The process I have mentioned above will help you to make the sled. I hope you guys will love this way to apply. Please inform me how this article helped you to make the sled.