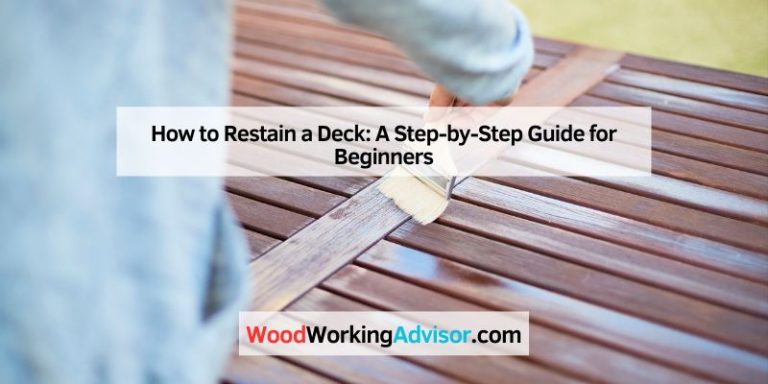
How to Fix Wood Rot: Expert Tips for a Lasting Solution
Fixing wood rot is essential for maintaining the integrity of wooden structures. It’s a common issue many homeowners face.
Wood rot occurs when moisture infiltrates wood, leading to decay. This can weaken the structure and cause significant damage if not addressed. It’s vital to recognize early signs of wood rot to prevent extensive repairs. In this guide, you will learn simple steps to identify and fix wood rot.
Whether it’s a small patch or a larger area, addressing wood rot promptly ensures the longevity of your wooden fixtures. Stay tuned to understand the tools and techniques needed for an effective repair. This knowledge will help you save time, money, and effort while keeping your wooden structures in top shape.
Identifying Wood Rot
Spotting wood rot early can save you time and money. Check for soft, discolored, or crumbling wood. Fix wood rot by replacing damaged sections and treating the area with a wood preservative.
Signs Of Wood Rot
Wood rot appears as soft, discolored, or crumbling wood. Sometimes it smells musty. Spots may feel spongy when touched. Look for peeling paint or dark stains. These can indicate hidden rot. Notice any cracks or splits in the wood. Rot often hides there.
Common Areas Affected
Wood rot often affects areas exposed to moisture. Windowsills, door frames, and decks are common spots. Check wooden porches and railings too. Basements can be damp, so inspect wooden beams there. Roofs and gutters can also be problem areas. Water leaks lead to rot in these places.
Causes Of Wood Rot
Wood rot occurs due to moisture and fungi. Fix wood rot by removing damaged areas and treating with wood hardener. Ensure proper ventilation to prevent future issues.
Moisture Issues
Wood rot often starts because of excess moisture. Rain, snow, or leaks can make wood wet. Wet wood is a perfect place for fungi to grow. Fungi eat the wood and cause it to rot. To stop wood rot, keep wood dry. Fix leaks and clean up water spills quickly.
Poor Ventilation
Poor ventilation can also cause wood rot. Good airflow helps keep wood dry. Without good airflow, moisture stays on the wood. This makes rot more likely. Use fans or vents to improve airflow. Keep windows open when possible. This helps prevent rot and keeps wood healthy.
Preventative Measures
Wood needs to be sealed well. Use a high-quality sealant. Apply it to all wood surfaces. Check for any gaps. Seal them immediately. This stops water from getting in.
Do not skip edges. Seal them too. Reapply sealant every year. This keeps the wood safe. Proper sealing is the first step to prevent wood rot.
Inspect wood often. Look for signs of damage. Replace damaged wood quickly. Clean wood surfaces regularly. Dirt and debris can cause rot.
Fix leaks around wood. Water is the enemy. Keep wood dry. Use fans if needed. Regular maintenance helps keep wood strong.

Credit: www.youtube.com
Necessary Tools And Materials
Essential tools include a chisel, hammer, and wood hardener. Gather materials like epoxy, sandpaper, and paint for repairs. These items ensure effective wood rot fixing.
Essential Tools
Some tools are crucial to fix wood rot. You will need a hammer, chisel, screwdriver, and saw. A drill can also help. A putty knife is useful too. Sandpaper is a must for a smooth finish. Safety gear like gloves and goggles is important.
Recommended Materials
Get some wood filler or epoxy. These materials fill gaps and holes. You will need primer and paint. These protect the wood. Wood hardener is also good. It strengthens weak wood. Make sure to have wood patches if the damage is big. Screws and nails are also needed.
Preparing The Area
Start by clearing the damaged area of any debris. Remove loose wood and clean the surface thoroughly to ensure effective repair.
Safety Precautions
Wear safety goggles to protect your eyes. Use gloves to keep your hands safe. Ensure the area is well-ventilated. This helps avoid breathing in dust or fumes. Keep a first aid kit nearby. In case of injury, you can treat it quickly. Make sure your tools are in good condition. Dull tools can be dangerous. Keep children and pets away from the work area. Safety first.
Cleaning And Drying
Remove any loose wood pieces. Use a brush to sweep away debris. Next, wash the area with soapy water. This removes dirt and mold. Rinse with clean water and let it dry. Drying is important. Use a fan to speed up drying. Wood must be completely dry before you begin repairs. Check for any remaining moisture. Moisture can cause more rot.

Credit: www.housepaintingguide.org
Repair Techniques
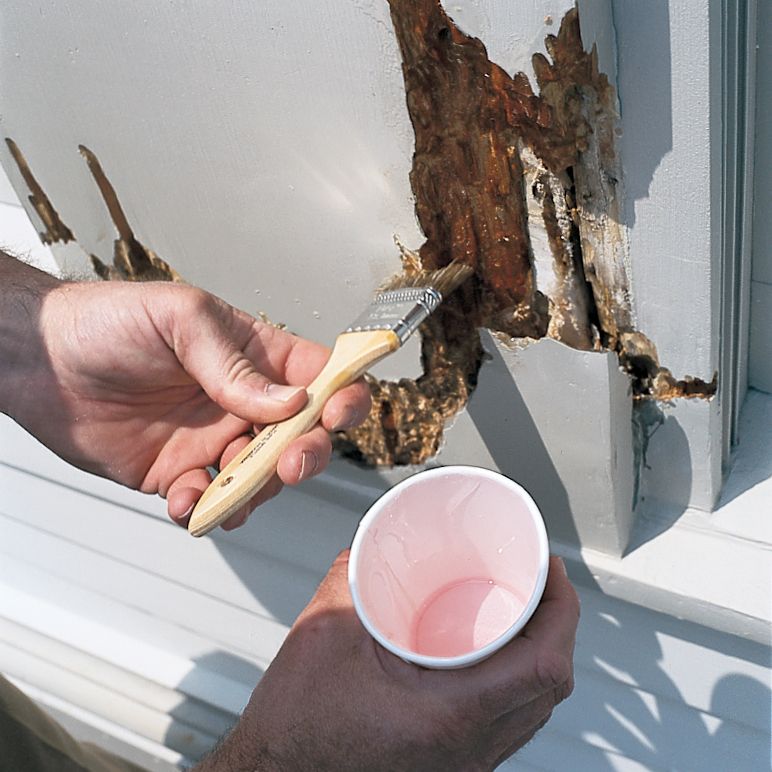
First, find the rotten wood. Use a chisel or a knife to remove it. Cut away all the soft, rotten parts. Keep going until you reach solid wood. Make sure no rot is left behind. Clean the area well. This step is crucial for a strong repair.
Mix wood filler as per instructions. Fill the gap with this filler. Use a putty knife for smooth application. Let it dry completely. Once dry, sand the area to make it smooth. Now, your wood is ready for painting or staining. This makes the repair blend in.
Finishing Touches
Use sandpaper to smooth the wood. Start with coarse grit sandpaper. Then, use fine grit sandpaper for a smooth finish. Make sure to sand evenly. This helps the wood look good.
Always sand in the direction of the wood grain. This prevents scratches. Clean the dust with a damp cloth. Let it dry before moving on. Smooth wood will hold paint better. It also feels nice to touch.
Choose the right paint or stain for the wood. Prime the wood if you plan to paint. This helps the paint stick. Use a paintbrush for small areas. For large areas, a roller works well. Apply the paint evenly.
For staining, use a clean rag or brush. Apply the stain in thin layers. Let each layer dry. This ensures a deep, rich color. Always follow the manufacturer’s instructions on the paint or stain can.
Long-term Maintenance
Inspect wood surfaces every few months. Look for signs of rot or decay. Catching problems early prevents major damage. Check areas exposed to water. Gutters, roofs, and windows can hide problems. Use a screwdriver to test wood. Soft spots mean trouble. Address issues promptly. Replace or repair damaged wood quickly.
Seal wood with protective coatings. Use paint or varnish. Keep wood dry. Fix leaks in roofs and pipes. Ensure proper drainage around your home. Clean gutters regularly. Remove debris that traps moisture. Keep plants away from wooden structures. Allow air to circulate. Proper ventilation helps wood stay dry.
Credit: www.thisoldhouse.com
Frequently Asked Questions
How Do You Fix Rotting Wood Without Replacing It?
Apply a wood hardener to strengthen the rotting area. Use epoxy wood filler to rebuild damaged sections. Sand the area smooth. Seal and paint to protect.
Can Rotten Wood Be Restored?
Yes, you can restore rotten wood. Remove the decayed parts, treat with wood hardener, and fill with epoxy. Finally, sand and repaint.
What Is The Best Thing To Fill Rotted Wood With?
Epoxy wood filler is the best for filling rotted wood. It bonds well and provides a durable finish.
What Is The Cheapest Way To Fix Wood Rot?
The cheapest way to fix wood rot is to remove the damaged area and fill it with epoxy wood filler. This method is cost-effective and easy to do yourself. Ensure you properly seal and paint the area to prevent future rot.
Conclusion
Fixing wood rot is crucial for home maintenance. Follow these steps carefully. Identify the affected area. Remove the rotted wood. Treat with wood preservative. Replace with new wood. Seal and paint to protect. Regular inspections help prevent future rot. Maintain proper ventilation and drainage.
Wood rot can be managed effectively with consistent care. Keep your home safe and sturdy. Remember, timely action saves time and money. Happy repairing!