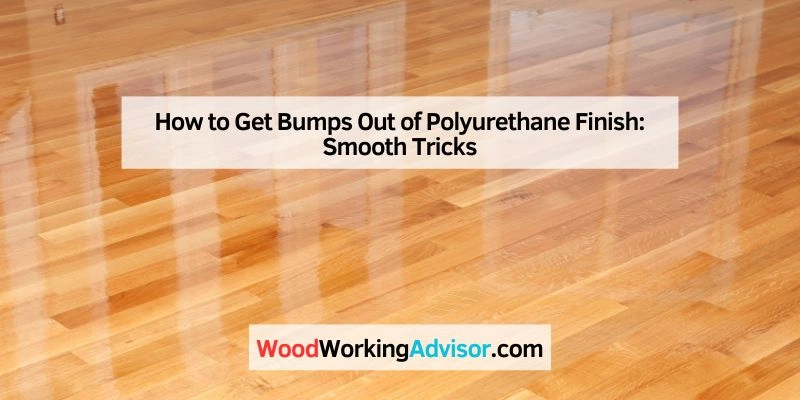
How to Get Bumps Out of Polyurethane Finish: Smooth Tricks
To remove bumps from a polyurethane finish, sand the area gently with fine-grit sandpaper. After sanding, reapply the finish for a smooth surface.
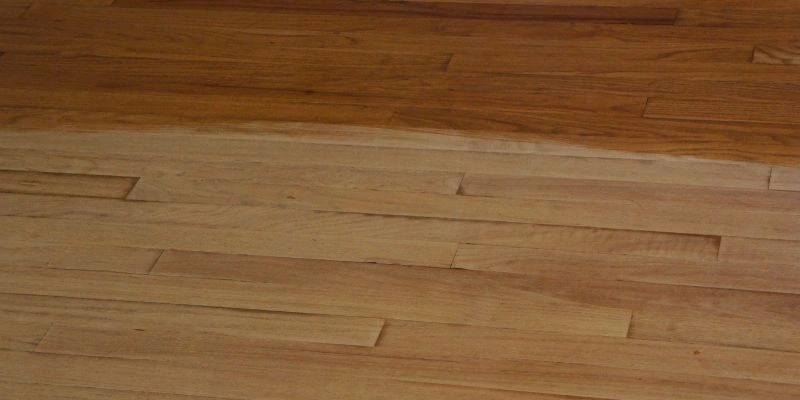
A smooth polyurethane finish enhances the beauty of wood surfaces. Unfortunately, bumps can form during application, ruining the appearance. Causes for these imperfections include dust, bubbles, or improper application techniques. Understanding how to fix these issues is crucial for achieving a flawless finish.
By using the right tools and techniques, you can easily restore the surface. This guide will provide step-by-step instructions to eliminate bumps effectively. Whether you’re working on furniture, cabinets, or flooring, these tips will help you achieve a professional-looking result. Say goodbye to imperfections and enjoy the stunning look of your wood projects.
Introduction To Polyurethane Finishes
Polyurethane finishes are popular for their durability and beauty. They protect wood surfaces while enhancing their natural grain. Many choose polyurethane for furniture, floors, and cabinetry. Understanding these finishes helps in achieving flawless results.
The Basics Of Polyurethane
Polyurethane is a type of protective coating. It comes in two main forms: water-based and oil-based. Each has its own benefits.
- Water-based polyurethane: Dries quickly, less odor, easy cleanup.
- Oil-based polyurethane: Offers a warm tone, more durable, longer drying time.
Applying polyurethane creates a strong barrier against scratches and stains. It adds a glossy or satin sheen, depending on the type chosen.
Common Issues With Polyurethane Finishes
Even experienced users face problems with polyurethane finishes. Here are some common issues:
| Issue | Description |
|---|---|
| Bumps | Small raised spots appear on the finish. |
| Dust Particles | Visible particles trapped in the finish. |
| Cloudiness | Finish appears hazy or milky. |
These problems can ruin the look of your project. Knowing how to fix them is essential for a smooth finish.
Preparation: Key To A Smooth Finish
Proper preparation is essential for achieving a smooth polyurethane finish. Skipping this step can lead to bumps and imperfections. Focus on cleaning and sanding the surface well. This ensures the finish adheres properly and looks great.
Surface Cleaning
Cleaning the surface is the first step. Dust, dirt, and grease can ruin your finish. Follow these steps for effective cleaning:
- Use a vacuum to remove dust.
- Wipe the surface with a damp cloth.
- Use a mild soap solution for stubborn stains.
- Rinse with clean water.
- Let it dry completely.
Sanding Techniques
Sanding prepares the surface for a smooth finish. It helps remove bumps and irregularities. Use these sanding tips:
- Start with coarse sandpaper (80-120 grit).
- Sand in the direction of the grain.
- Switch to finer sandpaper (220 grit) for a smooth finish.
- Ensure even pressure while sanding.
- Clean the surface after sanding to remove dust.
Use a sanding block for flat surfaces. For curves, use sanding sponges. This will help you achieve an even surface.
Choosing The Right Tools
Using the right tools makes a big difference in finishing. The right tools help create a smooth, clean finish. This section covers two main types: brushes and rollers.
Brushes Vs. Rollers
Both brushes and rollers have their benefits. Knowing when to use each tool can improve your finish.
- Brushes
- Great for detailed work.
- Can reach tight spots easily.
- Offer better control on edges.
- Rollers
- Cover large areas quickly.
- Leave fewer brush strokes.
- Good for flat surfaces.
The Importance Of Quality Applicators
Using quality applicators is vital. Poor-quality tools can ruin your finish.
Here’s why quality matters:
| Quality Tool | Benefits |
|---|---|
| Quality Brushes | Even application and fewer streaks. |
| High-Quality Rollers | Less lint and smoother finish. |
Investing in quality tools pays off in the end. Good tools can save time and effort.
Applying Polyurethane: Best Practices
Applying polyurethane correctly is key for a smooth finish. Following best practices ensures a durable and beautiful surface. This section covers essential tips to avoid bumps and imperfections.
Thin Coats For The Win
Using thin coats is crucial. Thick layers trap bubbles and dust. Aim for a maximum thickness of:
| Coat Type | Recommended Thickness |
|---|---|
| Initial Coat | 1/8 inch |
| Subsequent Coats | 1/16 inch |
Apply multiple thin coats instead of one thick coat. This method allows for better adhesion and a smoother finish. Use a quality brush or foam applicator for best results.
Drying Times And Conditions
Proper drying time is essential. Each coat needs time to cure. Follow these tips for best results:
- Wait at least 2-4 hours between coats.
- Ensure room temperature is between 65-75°F.
- Keep humidity below 70% for better drying.
Avoid applying polyurethane in damp or cold conditions. Dust can settle on wet finishes, causing bumps. Use a fan for better airflow during drying.
Be patient. Rushing leads to mistakes. A well-cured surface makes all the difference.
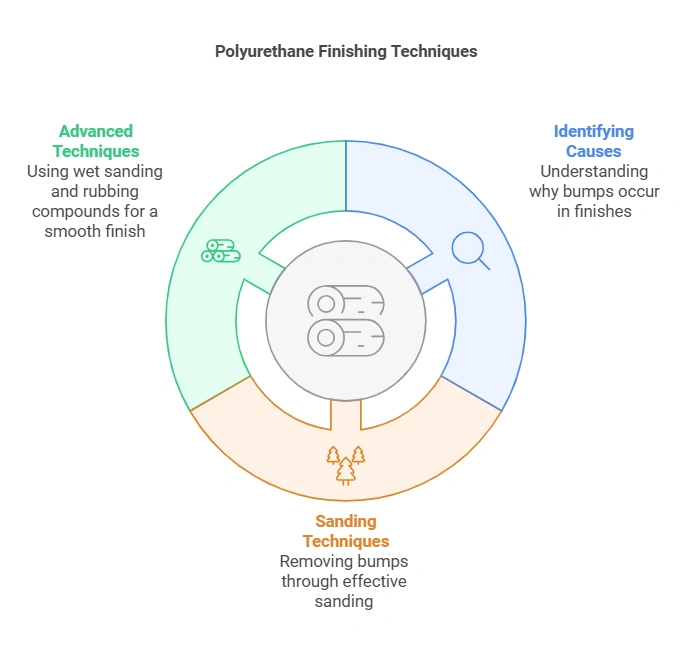
Dealing With Bumps And Imperfections
Bumps and imperfections can ruin the look of your polyurethane finish. Understanding their causes helps you address them effectively. Let’s explore how to identify and fix these flaws.
Identifying The Cause
To fix bumps, first determine their source. Common causes include:
- Dust and Debris: Tiny particles can settle on wet finish.
- Air Bubbles: Trapped air can form during application.
- Improper Mixing: Unevenly mixed finish can lead to lumps.
- Humidity and Temperature: High humidity can cause issues.
Inspect your surface carefully. Identifying the cause helps prevent future problems.
Sanding Out Bumps
Sanding is a common solution for bumps in polyurethane. Follow these steps:
- Wait for the finish to dry completely.
- Use fine-grit sandpaper (220-grit or higher).
- Gently sand the affected area.
- Clean the surface with a tack cloth.
- Reapply the polyurethane finish.
Ensure even pressure while sanding. This prevents further damage. Let the new coat dry completely.
For best results, consider these tips:
| Tip | Description |
|---|---|
| Work in a Dust-Free Area | Minimize dust to avoid new bumps. |
| Use a Light Touch | Too much pressure can create more damage. |
| Wear a Mask | Protect your lungs from dust while sanding. |
By following these steps, your polyurethane finish will look smooth and flawless.
Advanced Techniques
Removing bumps from a polyurethane finish requires precision. Advanced techniques offer effective methods for achieving a smooth surface. Two key methods include wet sanding and using a rubbing compound.
Wet Sanding For Perfection
Wet sanding is a popular method for smoothing out bumps. This technique minimizes scratches and enhances the finish. Follow these steps:
- Gather materials: fine-grit sandpaper (400-600 grit), water, and a sanding block.
- Wet the surface with water.
- Use the sanding block with wet sandpaper.
- Sand gently over the bumps.
- Keep the surface wet to reduce friction.
- Wipe off the residue and check the smoothness.
Wet sanding allows for control and detail. It’s important to keep the paper wet to avoid scratches. Always finish with a clean cloth.
Using A Rubbing Compound
A rubbing compound can effectively remove imperfections. This method works well after wet sanding. Here’s how to apply it:
- Choose a good-quality rubbing compound.
- Apply a small amount to a soft cloth.
- Rub the compound onto the surface in circular motions.
- Focus on areas with bumps.
- Wipe off excess compound with a clean cloth.
- Inspect the surface for smoothness.
The rubbing compound will restore shine and smoothness. Ensure to use it sparingly. Too much can lead to a cloudy finish.
Maintenance Tips
Proper maintenance extends the life of your polyurethane finish. Regular care keeps the surface smooth and beautiful. Follow these tips for the best results.
Regular Care For Longevity
Keep your polyurethane finish looking great with these simple steps:
- Clean Regularly: Use a soft, damp cloth. Avoid harsh chemicals.
- Avoid Scratches: Use coasters and placemats. Place felt pads under furniture.
- Dust Often: Dust with a microfiber cloth. This prevents buildup.
- Use Gentle Cleaners: Choose pH-balanced cleaners. Never use ammonia.
These actions help maintain the finish’s shine. Regular care can prevent bumps and imperfections.
When To Reapply
Reapplying polyurethane ensures continued protection. Watch for these signs:
- Fading: If the finish looks dull, it’s time to reapply.
- Water Spots: If water beads do not form, reapply.
- Scratch Visibility: If scratches show, consider a new coat.
Generally, reapply every 3 to 5 years. Check high-traffic areas more often. Follow the manufacturer’s instructions for best results.
| Signs of Wear | Action Needed |
|---|---|
| Fading | Reapply finish |
| Water spots | Reapply finish |
| Visible scratches | Reapply finish |
Following these tips ensures a long-lasting, beautiful finish.
Troubleshooting Common Issues
Dealing with bumps in a polyurethane finish can be frustrating. These issues often stem from bubbles, cracks, or dust contamination. Understanding how to resolve these problems is crucial for a smooth, professional finish.
Bubbles And Cracks
Bubbles and cracks can ruin an otherwise perfect finish. Here are some common causes and solutions:
| Issue | Cause | Solution |
|---|---|---|
| Bubbles | Air trapped in the finish | Use a foam brush. Apply slowly. |
| Cracks | Improper mixing or drying | Mix thoroughly. Allow proper drying time. |
Always sand between coats. This helps to minimize imperfections.
Preventing Dust Contamination
Dust can settle on wet polyurethane. This leads to bumps and uneven textures. Follow these tips to avoid dust contamination:
- Choose a dust-free area for application.
- Use drop cloths to cover surrounding surfaces.
- Seal windows and doors to prevent drafts.
- Work during low-traffic times.
Proper preparation makes a big difference. Keeping the environment clean ensures a smooth finish.
Frequently Asked Questions
How Can I Remove Bumps From Polyurethane Finish?
To remove bumps from a polyurethane finish, first allow the finish to cure completely. Then, gently sand the surface with fine-grit sandpaper. After sanding, clean the area and apply a fresh coat of polyurethane. This process smooths the surface and restores its glossy appearance.
What Causes Bumps In Polyurethane Finish?
Bumps in a polyurethane finish can be caused by dust, dirt, or debris settling on the surface while it dries. Additionally, applying the finish too thickly or in humid conditions can lead to this issue. Understanding these causes can help you prevent bumps in future applications.
Can I Fix Bumps Without Sanding?
Yes, you can fix bumps without sanding by using a clean, damp cloth to wipe them down. This method may work for small imperfections. However, for larger bumps, sanding is often necessary to achieve a smooth finish. Always ensure the surface is fully dry before applying a new coat.
Is It Safe To Apply Polyurethane Over Bumps?
Applying polyurethane over bumps is not recommended. The bumps can create an uneven finish, affecting the overall appearance. It is best to smooth the surface first. This ensures a uniform application and a professional-looking result.
Conclusion
Removing bumps from a polyurethane finish can restore the beauty of your project. By following the right techniques, you can achieve a smooth, professional look. Remember to take your time and use the proper tools. With patience and care, your finish will shine brilliantly.
Happy refinishing!