How to Make Shiplap Boards: Step-by-Step Guide for Crafting Perfect Panels
To make shiplap boards, measure and cut plywood into desired widths, then attach the boards to the wall using a nail gun or screws. Shiplap boards are a popular and trendy choice for adding a rustic and charming touch to any space.
Whether you’re looking to create an accent wall in your living room or revamp a room with a coastal-inspired theme, shiplap boards are an excellent choice. We will guide you on how to make shiplap boards easily and efficiently. By following a few simple steps, you can transform your space and achieve a desired aesthetic.
So, let’s dive into the process and learn how to make shiplap boards from scratch.
Understanding Shiplap Boards
Shiplap boards are a popular choice for adding rustic charm to your home. Learn how to make your own shiplap boards with our step-by-step guide. Achieve the timeless look you desire with this DIY project.
What Are Shiplap Boards?
Shiplap boards are a type of interior or exterior cladding made from wooden planks that fit together tightly, creating a smooth, overlapping surface. The boards have a distinctive profile with a rabbet joint, allowing them to interlock, providing a seamless appearance.
Shiplap boards are known for their simplicity and clean lines, making them a popular choice for creating a rustic or coastal feel in both traditional and modern spaces.
Advantages Of Using Shiplap Boards:
- Durability: Shiplap boards are made from high-quality wood, which ensures their longevity and ability to withstand wear and tear.
- Easy installation: With their interlocking design, shiplap boards are relatively simple to install, making them a convenient choice for DIYers.
- Versatility: Shiplap boards can be used in various applications, both indoors and outdoors, allowing for creative and flexible design options.
- Visual appeal: The distinctive horizontal lines created by shiplap boards add visual interest to any space, creating a cozy and inviting atmosphere.
- Ease of maintenance: Due to their smooth, overlapping surface, cleaning and maintaining shiplap boards is relatively easy, requiring minimal effort.
Common Applications For Shiplap Boards:
- Wall cladding: Shiplap boards are commonly used to cover interior or exterior walls, adding texture and visual appeal to any room or facade.
- Ceilings: Installing shiplap boards on the ceiling creates a visually stunning and unique feature, adding character and warmth to the space.
- Accent walls: Shiplap accent walls are a popular trend in interior design, allowing you to create a focal point and add a touch of charm to any room.
- Cabinetry: Shiplap can be used to cover cabinet doors or create custom-built cabinetry, offering a fresh and stylish alternative to traditional options.
- Furniture: Shiplap boards can be incorporated into furniture design, such as creating headboards or paneling on cabinets, giving a rustic and timeless look.
Remember, shiplap boards are a versatile and aesthetically pleasing choice for enhancing any space, be it residential or commercial. With their durability, easy installation, and timeless charm, it’s no wonder that shiplap boards have gained popularity in the world of interior design and construction.
Credit: www.homedepot.com
Materials And Tools Needed
To make shiplap boards, gather essential materials and tools: wood planks, saw, measuring tape, level, nail gun, and sandpaper.
Shiplap boards add a touch of rustic charm to any space, and creating them yourself can be a rewarding DIY project. To bring your shiplap dreams to life, you’ll need a few key materials and tools. Let’s dive into what you’ll require:
Tools Required For Making Shiplap Boards:
- Circular saw: This versatile power tool will be your best friend when it comes to cutting the shiplap boards to size. Make sure you have a sharp blade to achieve clean and precise cuts.
- Measuring tape: Accurate measurements are crucial for creating seamless shiplap boards. Always double-check your measurements before making any cuts.
- Level: To ensure your shiplap boards are installed perfectly straight, a level is essential. It will help you maintain evenness throughout the process.
- Nail gun or hammer: Shiplap boards are typically secured with nails, so having a nail gun can save you time and effort. If you don’t have access to one, a hammer will do the job just fine.
- Safety goggles and ear protection: Never compromise on safety. Protect your eyes with goggles and wear ear protection to shield your hearing from the noise of power tools.
Types Of Wood Suitable For Shiplap Boards:
- Pine: Pine is a popular choice for shiplap boards due to its affordability and natural grain patterns. It’s easy to work with and takes stain or paint well.
- Cedar: Known for its durability and resistance to moisture and insects, cedar is a great option for shiplap boards that will be exposed to outdoor elements.
- Fir: Fir wood offers a beautiful grain pattern and exceptional stability, making it an excellent choice for shiplap boards in high-traffic areas.
- Poplar: If you prefer a smoother surface for painting, poplar is a good choice. It’s relatively inexpensive and readily available.
Other Materials Needed For Crafting Shiplap Boards:
- Wood filler: Fill any cracks, gaps, or imperfections in your shiplap boards with wood filler for a polished final result.
- Sandpaper: Smooth down rough edges and ensure a flawless finish on your shiplap boards by using various grits of sandpaper.
- Primer and paint or stain: Choose your desired finish for the shiplap boards. Apply a primer before painting or use a stain to enhance the natural beauty of the wood.
- Nails or screws: Depending on your preference and the look you want to achieve, you’ll need nails or screws to attach the shiplap boards to the wall or surface.
- Construction adhesive (optional): For added stability, you may opt to use construction adhesive in conjunction with nails or screws to secure the shiplap boards.
Now that you have a comprehensive list of the materials and tools needed for crafting shiplap boards, you’re one step closer to transforming your space into a cozy and inviting haven. Get ready to roll up your sleeves and let your creativity shine!
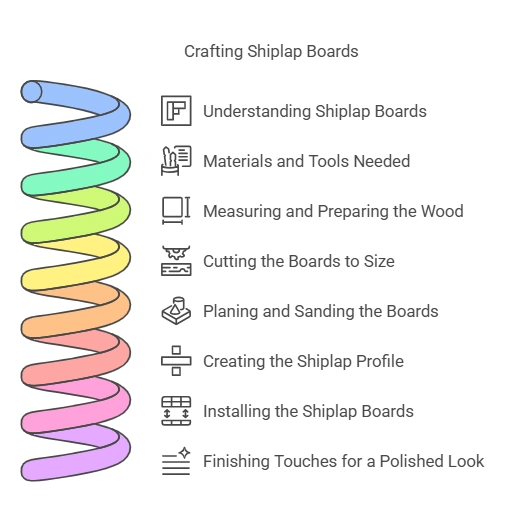
Step-By-Step Guide: Crafting Shiplap Boards
Crafting shiplap boards is made easy with this step-by-step guide. Learn how to make your own shiplap boards with clear instructions and tips, creating a stunning addition to your home decor.
Measuring And Preparing The Wood:
Before you begin crafting shiplap boards, it’s essential to accurately measure and prepare the wood. Here’s how:
- Measure the wall or area where you plan to install the shiplap boards.
- Calculate the amount of wood needed based on the measurements.
- Purchase high-quality lumber that is suitable for shiplap, such as pine or cedar.
- Ensure the wood is straight, free from knots, and properly dried to prevent warping.
- Prepare the wood by removing any rough edges or imperfections with a hand plane or sandpaper.
Cutting The Boards To Size:
Once you have prepared the wood, the next step is cutting the boards to the desired size. Follow these steps:
- Use a pencil and measuring tape to mark the dimensions on each board.
- Use a circular saw or miter saw to make precise cuts along the marked lines.
- Double-check the measurements and make adjustments if necessary.
- Ensure all the boards are cut to the same length for a uniform appearance.
Planing And Sanding The Boards:
To achieve a smooth and polished finish on your shiplap boards, planing and sanding are crucial. Here’s what you need to do:
- Use a hand plane to remove any irregularities on the surface of the boards. This will create a level and even texture.
- After planing, sand the boards thoroughly using coarse grit sandpaper to remove any remaining rough spots.
- Gradually switch to finer grit sandpaper to achieve a smooth finish.
- Be meticulous in sanding the edges and corners to avoid any sharp edges.
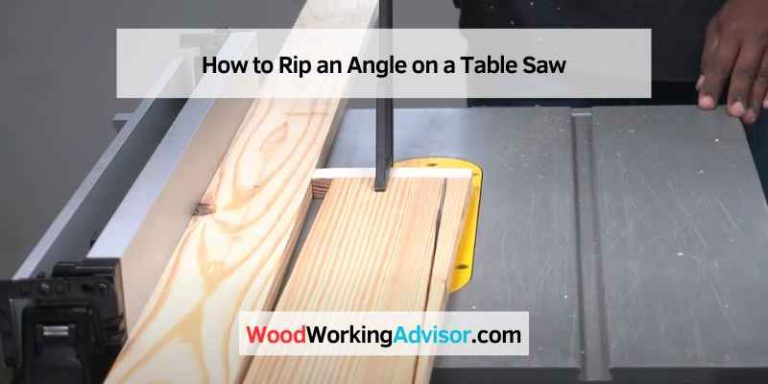
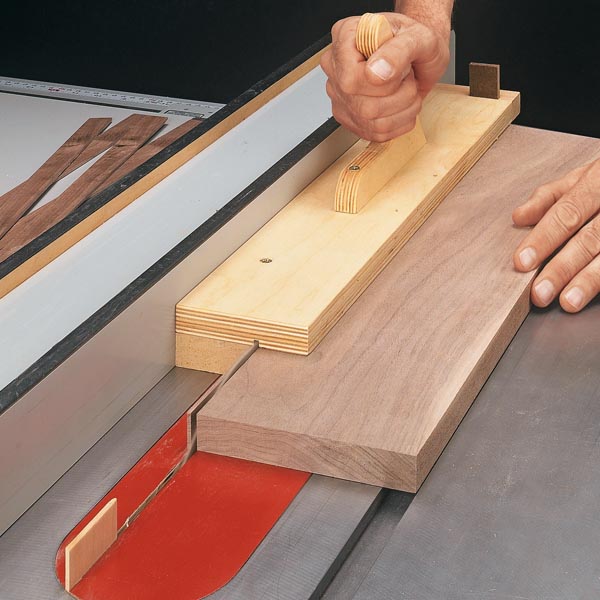
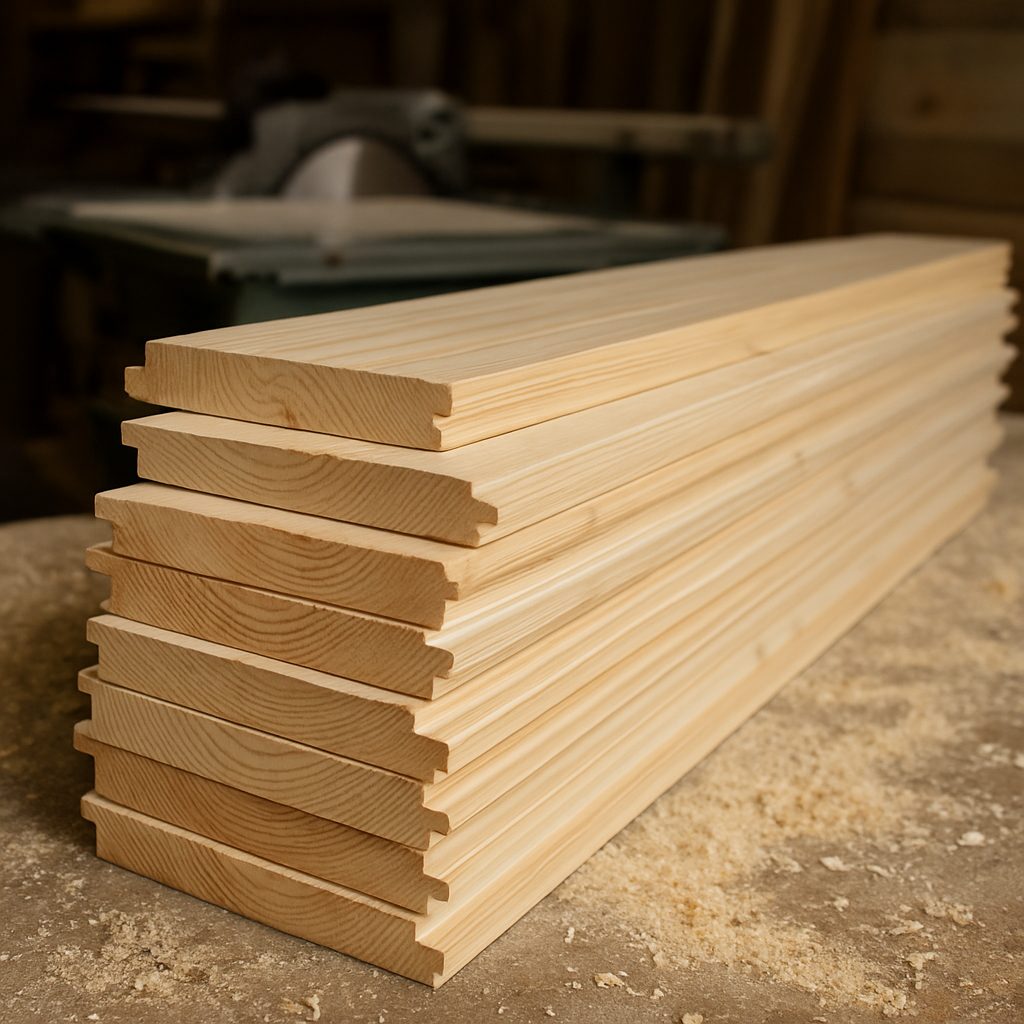
Creating The Shiplap Profile:
The signature shiplap profile is what sets these boards apart. Follow these steps to create the shiplap profile:
- Measure and mark the desired width of the reveal for each board. This is the space between each board when installed.
- Use either a table saw or a router to cut a groove along the edge of each board to achieve the shiplap effect.
- Ensure each groove is at a consistent depth and width to maintain a uniform look.
- Sand the cut edges to smoothen any rough surfaces.
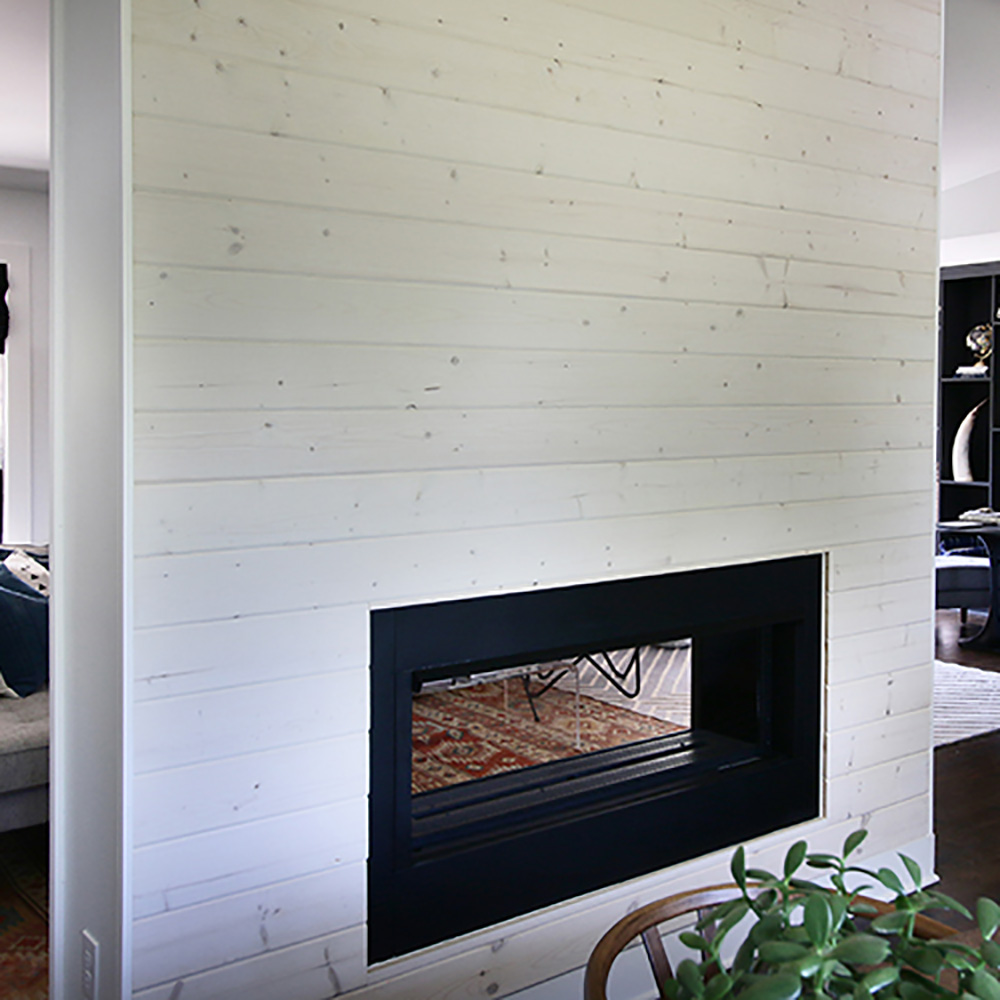
Installing The Shiplap Boards:
Now that your shiplap boards are ready, it’s time to install them on the wall. Follow these installation steps:
- Start by locating and marking the studs on the wall where you will be installing the shiplap boards.
- Begin at the bottom of the wall and work your way up to ensure a level installation.
- Apply adhesive to the back of each board and affix it to the wall, making sure it aligns with the marked studs.
- Secure the boards further using finishing nails, making sure to countersink them slightly.
- Repeat this process until all the boards are installed, ensuring consistent spacing between each board.
Finishing Touches For A Polished Look:
To achieve a polished and professional look for your shiplap boards, consider these finishing touches:
- Fill any nail holes or gaps between boards with wood filler, allowing it to dry completely before sanding.
- Sand down the filled areas to create a seamless surface.
- Apply a primer to the boards to enhance their durability and longevity.
- Finally, choose a paint or stain color that complements your desired aesthetic and apply it evenly to the shiplap boards.
Crafting your own shiplap boards may require time and effort, but the end result is a stunning and timeless addition to your home’s interior. Just follow this step-by-step guide, and soon you’ll have a beautiful shiplap accent wall or ceiling that will elevate the style of any room.
Considerations For Crafting Perfect Panels
Crafting perfect panels requires careful consideration when making shiplap boards. By following these guidelines, you can create beautiful and flawless panels that enhance any space effortlessly. The process involves attention to detail, precision, and ensuring the panels are seamlessly installed for a polished and professional finish.
Crafting shiplap boards for your home can be a rewarding DIY project that instantly adds charm to your space. To ensure that your shiplap installation turns out flawless, there are a few key considerations you need to keep in mind.
From choosing the right wood grain orientation to addressing imperfections and knots, these steps will help you create the perfect shiplap panels for your project.
Choosing The Right Wood Grain Orientation:
- Vertical or horizontal: Decide whether you want the wood grain on your shiplap boards to run vertically or horizontally. Consider the overall aesthetic you want to achieve and the dimensions of your space to determine the best option.
- Vertical orientation: Opting for vertical wood grain orientation can make your space appear taller. This orientation is especially suitable for areas with low ceilings or when you want to create a sense of height.
- Horizontal orientation: If you prefer a more traditional or rustic look, horizontal wood grain orientation is an excellent choice. This style can give your space a cozy and inviting atmosphere.
Proper Spacing Between The Boards:
- Consistency is key: When installing shiplap boards, maintaining consistent spacing between each board is crucial for a polished end result. This uniformity will create clean lines and a visually pleasing finish.
- Use spacers: To ensure consistent spacing, consider using spacers between each board. Spacers can be small wooden blocks or even nickels, placed at regular intervals along the length of the boards.
- Measure twice, cut once: Before installing each board, take precise measurements to ensure that the spacing remains consistent throughout the entire installation process. This attention to detail will prevent any noticeable variations in spacing.
Painting, Staining, Or Leaving The Boards Raw:
- Personal preference: Deciding on the finish of your shiplap boards is entirely up to personal preference and the desired look for your space. Consider the color scheme and overall style you want to achieve.
- Painted shiplap boards: Painting your shiplap boards can offer versatility and allow you to match them to your existing color palette. It also provides a clean and modern look that is easy to maintain.
- Stained shiplap boards: If you prefer a more natural and rustic appearance, staining your shiplap boards can highlight the wood’s natural beauty. Stains come in various shades, allowing you to choose the perfect tone for your space.
- Raw shiplap boards: Leaving the boards raw without any finish provides a more authentic and weathered look. This option is ideal for those who love the natural texture and character of the wood.
Dealing With Imperfections And Knots:
- Fill imperfections: Before installing the shiplap boards, inspect them for any imperfections such as cracks or dents. Fill these imperfections with wood filler and sand them smooth to create a flawless surface.
- Knots as design elements: Knots in the wood can add unique character to your shiplap installation. Embrace them as part of the natural beauty of the wood and consider highlighting them with a clear coat or stain.
- Seal the knots: If you prefer a smoother surface, seal the knots with a shellac or a knot sealer to prevent them from bleeding through the paint or stain.
Crafting the perfect shiplap panels requires thoughtful consideration of wood grain orientation, spacing, finish options, and how to address any imperfections or knots. By following these guidelines, you can create stunning shiplap installations that will enhance the visual appeal of your home.
Tips And Tricks For Successful Shiplap Board Crafts
Discover the ultimate tips and tricks for creating stunning shiplap board crafts. Learn how to make shiplap boards with ease and bring a touch of rustic charm to your home decor projects.
Crafting shiplap boards can be a fun and fulfilling DIY project. By following some key tips and tricks, you can ensure successful results that will beautify your space. Here are some important pointers to keep in mind:
Preparing The Work Area For Effective Crafting
- Clear the workspace: Before you begin your shiplap board crafts, ensure that your work area is clean and clutter-free. This will provide you with enough space to measure and cut the boards accurately.
- Gather the necessary tools: Make sure you have all the tools required for the project, such as a miter saw, nails, hammer, level, and measuring tape. Having everything at hand will save you time and effort.
- Mark the wall studs: Before installing the shiplap boards, it’s crucial to mark the wall studs. Use a stud finder or tap the wall lightly to locate the stud positions. This will help you secure the boards firmly.
Using Clamps And Jigs For Accurate Results
- Invest in clamps: Using clamps to secure the shiplap boards in place while you work will ensure precise results. The clamps will prevent the boards from shifting or moving during installation.
- Utilize jigs: Jigs are handy tools that help maintain consistency in your cuts. Creating jigs for trimming the edges or making angled cuts will enhance the overall finish of your shiplap boards.
Preventing Common Mistakes While Crafting
- Accurate measurements: Measure twice, cut once! Double-check the measurements before cutting your shiplap boards to avoid wasting materials and achieving a professional-looking end result.
- Use proper safety precautions: Always wear safety goggles and gloves when handling tools or working with sharp objects. Accidents can happen, and it’s better to be safe than sorry.
- Allow for expansion: Remember that wood naturally expands and contracts due to changes in humidity. To prevent issues like warping, leave a small gap between the boards during installation.
Creative Design Ideas For Unique Shiplap Board Projects
- Horizontal or vertical installation: Shiplap boards can be installed either horizontally or vertically, depending on the aesthetic you want to achieve. Experiment with different layouts to find the one that suits your space best.
- Two-tone effects: Consider painting the shiplap boards in contrasting colors to create a captivating two-tone effect. This adds depth and visual interest to your project.
- Accent walls: Use shiplap boards to create an accent wall in a room. This can be a focal point that adds texture and character to your space.
Remember, with the right preparation, tools, and design ideas, your shiplap board crafts will turn out beautifully. So get ready to embark on a rewarding journey that will transform your living space into a charming haven.
Maintaining And Caring For Shiplap Boards
Learn how to properly maintain and care for shiplap boards with these helpful tips. Discover the best practices for making shiplap boards that will last for years to come.
Shiplap boards are a popular choice in interior design due to their rustic charm and timeless appeal. However, like any other material, shiplap boards require regular maintenance to keep them looking their best. Here are some tips on cleaning, preventing warping and moisture damage, and refinishing and repairing shiplap boards:
Cleaning And Maintaining Shiplap Boards:
- Dust the shiplap boards regularly with a dry cloth or a soft-bristle brush to remove any accumulated dirt or debris.
- For stubborn stains, mix a mild detergent with warm water and gently scrub the affected area using a sponge or a soft cloth.
- Avoid using harsh or abrasive cleaners as they can damage the finish of the shiplap boards.
- After cleaning, thoroughly dry the boards to prevent any moisture from seeping into the wood.
Preventing Warping And Moisture Damage:
- Ensure proper installation of the shiplap boards, leaving a small gap between each board to allow for expansion and contraction due to changes in humidity.
- Apply a high-quality primer and paint or sealant to the shiplap boards to protect them from moisture and prevent warping.
- Maintain optimal humidity levels in the room where the shiplap boards are installed to minimize the risk of moisture damage. Use a dehumidifier in humid climates or during wet seasons.
Refinishing And Repairing Shiplap Boards:
- Over time, the finish on shiplap boards may fade or become worn. When refinishing, start by sanding the boards to remove any existing finish and smooth out imperfections.
- Apply a fresh coat of paint or stain to enhance the appearance of the shiplap boards and provide them with added protection.
- Regularly inspect the shiplap boards for any signs of damage, such as cracks or loose boards. Repair any issues promptly to prevent further damage and maintain the integrity of the installation.
Remember, proper care and maintenance are essential for preserving the beauty and longevity of your shiplap boards. By following these guidelines, you can ensure that your shiplap boards remain a stunning feature in your home for years to come.
Frequently Asked Questions Of How To Make Shiplap Boards
How Do You Make Homemade Shiplap?
To make homemade shiplap, measure and cut wood planks, attach them vertically to your wall, and paint or stain as desired.
Is It Cheaper To Make Shiplap?
Yes, making shiplap is generally less expensive compared to purchasing pre-made shiplap.
What Kind Of Wood Do You Use For Shiplap?
Shiplap is typically made from pine wood, as it is durable and easy to work with.
What Material To Use For Diy Shiplap?
The best material for DIY shiplap is commonly pine boards due to their affordability and ease of installation.
Conclusion
Shiplap boards are a versatile and popular choice for adding a touch of rustic charm to any space. By following the steps outlined in this blog post, you can easily create your own shiplap boards and transform your walls, ceilings, or even furniture pieces.
The key is to start with quality materials, ensuring your boards are sturdy and durable. Remember to measure carefully and cut each board precisely to achieve a seamless and professional finish. Installing the boards securely and using the correct techniques will ensure they stay in place for years to come.
Whether you’re a seasoned DIYer or a beginner, making shiplap boards can be a rewarding and fun project that adds character and warmth to your home. Get creative with your design ideas, and enjoy the results of your hard work!