
How to Make Wooden Car Ramps: A DIY Guide
To make wooden car ramps, gather materials like plywood, screws, and wood glue. Cut the plywood into desired ramp shapes and assemble them securely.
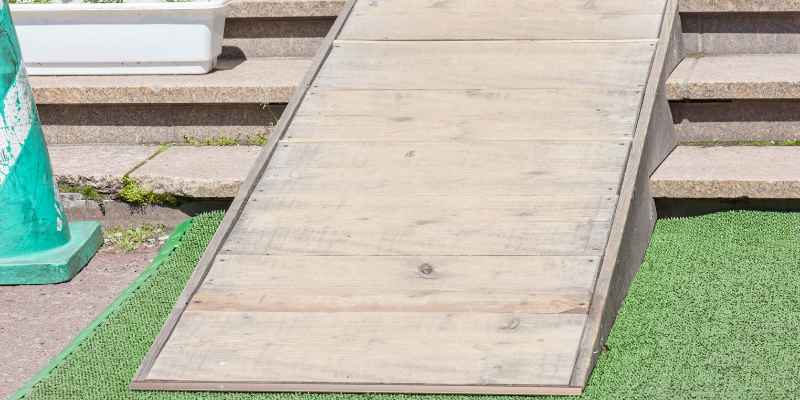
Creating wooden car ramps can enhance your garage or driveway, making vehicle access easier. These ramps are ideal for low-clearance cars or for loading and unloading equipment. Crafting your own ramps not only saves money but also allows for customization to fit your specific needs.
Whether you need a temporary solution or a permanent fixture, building wooden ramps offers practical benefits. You’ll enjoy the satisfaction of a DIY project while ensuring safety and functionality. Follow this guide for an efficient and straightforward process to create durable wooden car ramps.
Introduction To DIY Wooden Car Ramps
Making your own wooden car ramps offers many benefits. These ramps can save money compared to store-bought options. You can customize the size and design to fit your needs. Homemade ramps can also be made from recycled materials, which is eco-friendly.
Safety is very important before starting this project. Always wear protective gear like gloves and goggles. Use sturdy wood to ensure the ramp can hold the car’s weight. Check for sharp edges and sand them down. Make sure the ramp is stable and not too steep.
Materials Needed For Wooden Car Ramps
Making wooden car ramps requires the right materials. Start with strong wood like pine or oak. These types are sturdy and easy to work with. Avoid using softwoods that may not support weight.
Gather other important supplies. You will need wood screws, wood glue, and a saw. A drill helps make holes for screws. Sandpaper is useful for smoothing rough edges.
Consider using a level to ensure the ramp is even. A tape measure helps with accurate cuts. Always wear safety goggles when working with tools.
Designing Your Car Ramps
Designing wooden car ramps starts with accurate dimensions. Measure the height of the vehicle. Choose a safe angle for the ramp. A 15 to 20-degree incline works well.
Weight capacity is crucial. Calculate the total weight of the vehicle. Consider extra weight from tools or equipment. Use strong wood like oak or maple for durability.
| Vehicle Weight (lbs) | Recommended Ramp Capacity (lbs) |
|---|---|
| 2,000 | 3,000 |
| 3,500 | 5,000 |
| 5,000 | 7,500 |
Step-by-step Construction Process
Start by measuring the area where the ramp will sit. Choose sturdy wood for durability. Cut the wood to the desired length and width. Use a saw for clean edges.
Make sure all pieces are smooth and free of splinters. Lay the wood pieces on a flat surface. Assemble the ramp structure using wood screws or nails. Ensure everything is secure and stable.
Double-check the angles to ensure the ramp is safe to use. Test the structure by applying weight gradually. This helps confirm that the ramp can support a vehicle’s weight.
Reinforcing The Ramps For Durability
To make wooden car ramps strong, use effective bracing techniques. Cross braces can provide extra support. They help distribute weight evenly and prevent wobbling.
Use triangular braces for the best stability. Attach them at each ramp joint. This design keeps the ramps sturdy.
After building, seal and weatherproof the wood. Choose a high-quality water-resistant sealant. This protects the ramps from rain and sun damage.
Apply the sealant evenly to all surfaces. Let it dry completely before using the ramps. Regular maintenance will prolong their life.
Testing The Ramps For Safety
Testing ramps is crucial for safety. Load testing helps ensure they can support weight. Start with light loads and gradually increase the weight. Check for any bending or cracking during the test. Monitor how the ramp handles the stress.
Identifying weak points is essential. Look for cracks, splits, or sagging areas. Inspect joints and connections closely. Reinforce any weak spots with extra support. Regular checks will keep ramps safe for use.
| Load Weight | Observation |
|---|---|
| 100 lbs | No visible issues |
| 200 lbs | Minor bending observed |
| 300 lbs | Cracking at joint |
Maintenance And Care For Wooden Ramps
Regular routine inspections of wooden ramps are very important. Check for cracks or splits in the wood. Look for loose screws or nails that may need tightening. Ensure the surface is free from splinters or debris. This helps keep the ramp safe and usable.
For long-term storage, keep the ramps in a dry place. Avoid areas with high moisture to prevent wood rot. Use a cover to protect the ramps from dust and dirt. Place ramps on a flat surface to avoid bending or warping. Regular care will extend the life of your wooden ramps.
Customization And Additional Features
Adding non-slip surfaces to wooden car ramps is very important. It helps prevent accidents. Textured materials like rubber or sandpaper work well. These surfaces provide grip for tires.
Ramp extensions can make your ramps longer. This is useful for higher vehicles. They can also help with steeper angles. Accessories like side rails improve safety and stability.
| Accessory | Benefit |
|---|---|
| Non-Slip Surface | Prevents slipping and enhances grip. |
| Ramp Extensions | Increases length for higher vehicles. |
| Side Rails | Provides extra safety and support. |
Troubleshooting Common Issues
Wooden car ramps can face wear and tear over time. Check for cracks or splinters regularly. Sand down rough areas to keep the surface smooth. Consider applying a wood sealant to protect against moisture.
Adjustments can improve stability. Use rubber pads on the bottom of the ramp for better grip. Ensure the ramp angle is not too steep. Adding cross supports can help strengthen the ramp. Regularly inspect the joints for tightness and reinforce them if needed.
Conclusion: Enhancing Your DIY Skills
Building wooden car ramps can be a fun and rewarding experience. It teaches valuable skills like measuring and cutting. Each step you take adds to your confidence as a DIYer.
Reflecting on the building experience shows growth in your abilities. You learn to solve problems and think creatively. Every mistake becomes a lesson for future projects.
Consider these future DIY project ideas:
| Project Idea | Description |
|---|---|
| Wooden Toy Box | A simple storage box for toys. |
| Birdhouse | A cozy home for birds in your garden. |
| Garden Bench | A place to relax outdoors. |
Frequently Asked Questions
How Do I Choose Wood For Car Ramps?
Selecting the right wood is crucial for durability. Opt for hardwoods like oak or maple for strength. Softwoods may bend or break under heavy loads. Ensure the wood is treated to resist moisture and decay. This will enhance the longevity and safety of your wooden car ramps.
What Tools Do I Need To Build Car Ramps?
To build wooden car ramps, you’ll need basic tools. Essential tools include a saw, drill, measuring tape, and screws. A sander will help smooth rough edges for safety. A level ensures your ramps are even. Having the right tools simplifies the construction process significantly.
How Can I Ensure My Ramps Are Safe?
Safety is paramount when building car ramps. Use sturdy materials and secure all joints with screws. Regularly check for signs of wear or damage. Adding traction strips can help prevent slips. Always test the ramps with lighter weights before full use to ensure stability.
What Is The Best Angle For Car Ramps?
The ideal angle for car ramps is typically between 15 to 20 degrees. This angle ensures easy access without risking damage to vehicles. Steeper angles may pose safety hazards or cause bottoming out. Always consider the vehicle’s height and weight when determining the ramp angle.
Conclusion
Building wooden car ramps is a rewarding project. It enhances your garage’s functionality and ensures safe vehicle access. With the right materials and careful planning, you can create sturdy ramps tailored to your needs. Enjoy the satisfaction of DIY craftsmanship while adding value to your home.
Start your project today!