How to Build a Wooden Banjo: DIY Mastery Guide
To build a wooden banjo, start with a round wooden body and attach a neck securely. Install the strings and tuning pegs to complete the instrument.
Creating a wooden banjo is a rewarding project that combines craftsmanship and musicality. This stringed instrument has roots in various cultures and is celebrated for its distinct sound. Building your own banjo allows you to customize its design, materials, and tone, resulting in a unique musical experience.
Whether you’re a seasoned woodworker or a beginner, crafting a banjo can enhance your woodworking skills while providing a personal connection to music. This guide will walk you through the essential steps and materials needed to construct a beautiful, functional wooden banjo that you can proudly play. Get ready to embark on a creative journey that blends art with sound.
Introduction To Wooden Banjo Crafting
Building your own wooden banjo offers many benefits. It allows for personal expression and creativity. You gain a deeper understanding of the instrument. Crafting a banjo can also be a fun project.
Here are the tools and materials you will need:
| Tools | Materials |
|---|---|
| Saw | Wood (maple, walnut, etc.) |
| Drill | Strings |
| Screwdriver | Glue |
| Sandpaper | Finish (varnish, lacquer) |
Designing Your Banjo

Choosing the right wood is key for your wooden banjo. Maple is a popular choice. It offers great sound quality and durability. Mahogany provides warmth and richness in tone. For a brighter sound, birch is a good option.
Consider the weight of the wood. A lighter wood makes the banjo easier to handle. Density affects the sound as well. Denser woods produce a fuller tone.
| Wood Type | Characteristics |
|---|---|
| Maple | Great sound quality and durability |
| Mahogany | Warm and rich tone |
| Birch | Bright sound |
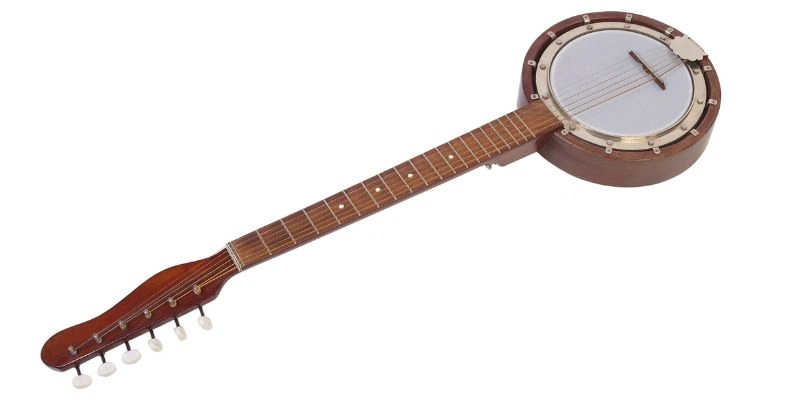
Understanding banjo parts helps in building. The drum head creates sound vibrations. The neck holds the frets and strings. The bridge transfers vibrations to the body. Each part plays an important role.
Preparing The Wood
Start by carefully cutting the wood into the right shapes. Use a saw to make clean cuts. Follow your design closely for best results. Shaping the body is important for sound.
Next, use sandpaper to smooth the edges. This makes the wood feel nice and look good. Start with coarse sandpaper and then switch to finer grades. Pay attention to every curve and joint.
After sanding, check for any rough spots. If found, sand those areas again. A well-sanded banjo will look professional and sound better.
Assembling The Neck And Fingerboard
Start by attaching the neck to the body of the banjo. Use strong wood glue for a secure bond. Ensure the neck is aligned correctly with the body. This step is crucial for good playability.
Next, fretting the fingerboard is essential. Mark the fret positions accurately. Use a saw to cut slots for the frets. Insert the frets into the slots gently. Make sure they fit snugly.
After fretting, trim any excess fret wire. Use a file to smooth the edges. This will prevent any sharp edges when playing. Sand the fingerboard to create a smooth surface.
Crafting The Pot Assembly
To build the rim for your banjo, start with a wooden circle. Use sturdy wood like maple or birch. Cut the wood to the desired thickness. Make sure the circle is smooth and even.
Next, use a router to shape the inner edge. This will help fit the drum head later. Sand the edges well for a nice finish. Check for any rough spots that might cause problems.
| Hardware | Purpose |
|---|---|
| Tailpiece | Holds the strings in place |
| Brackets | Secure the drum head |
| Rim Hardware | Connects the rim to the neck |
Install the hardware carefully. Make sure each piece is tight and secure. This helps the banjo sound its best. Check everything before you start playing.
Final Assembly
Join the neck and pot carefully. Align them so they fit snugly together. Use wood glue to secure the joint. Clamp the pieces tightly and let the glue dry.
Next, set up the bridge and tailpiece. Position the bridge on the drumhead. Make sure it is centered for the best sound. Attach the tailpiece to the end of the neck. This helps hold the strings in place.
Tune the banjo after everything is attached. Check that all parts are stable and secure. Enjoy playing your newly built wooden banjo!
Finishing Touches
Applying the finish is an important step. Choose a high-quality wood finish for your banjo. Use a brush or cloth to apply it evenly. Make sure to cover all surfaces. Allow the finish to dry completely before moving on.
For the best results, sand lightly between coats. This helps achieve a smooth surface. Apply at least two coats for a durable finish. Wait for the recommended drying time between coats.
Next is stringing your banjo. Start by placing the bridge in the correct position. Then, attach the strings to the tailpiece. Feed each string through the tuning pegs. Make sure to leave some slack for tuning.
Once all strings are in place, start tuning. Use a tuner for accuracy. Stretch the strings gently to ensure they stay in tune.
Playing And Maintenance
Tuning your new banjo is essential for the best sound. Use a reliable tuner to get started. Start with the fifth string, tuning it to a G. Next, tune the fourth string to a C. The third string should be tuned to a G as well. Tune the second string to a B and the first string to a D. Check each string after you finish. Re-tune if necessary for a clear sound.
Ongoing care is important for your banjo’s longevity. Keep it clean by wiping it after each use. Store it in a cool, dry place to prevent damage. Change the strings regularly, as they can wear out. Check the bridge and head tension often. This helps maintain the best tone. Regular maintenance ensures your banjo stays in great shape.
Frequently Asked Questions
How Do I Start Building A Wooden Banjo?
Begin by gathering necessary materials: wood, strings, and tools. Choose a design that suits your skill level. Sketch a plan to guide your construction. Make sure to measure and cut accurately for the best results. Start with the rim and neck, then assemble the parts carefully.
What Type Of Wood Is Best For A Banjo?
Maple and mahogany are popular choices for banjos. Maple offers brightness and clarity in sound, while mahogany provides warmth and depth. Consider using birch or walnut for unique tonal qualities. Each wood type impacts the banjo’s sound and aesthetics, so choose based on your preference.
Can I Build A Banjo Without Experience?
Yes, you can build a banjo as a beginner. Start with simpler designs and follow detailed tutorials. Gather all tools and materials before starting. Patience and practice will help you improve. Learning from mistakes is part of the process, so don’t hesitate to try!
What Tools Do I Need To Build A Banjo?
Essential tools include a saw, drill, and sander. A measuring tape, clamps, and wood glue are also important. A file or rasp will help in shaping parts. Investing in quality tools will enhance your building experience. Ensure you have a workbench for better stability and control.
Conclusion
Building a wooden banjo is a rewarding experience. It combines creativity with craftsmanship. Each step enhances your skills and deepens your appreciation for music. Embrace the process, and don’t rush. Your unique instrument will reflect your dedication. Enjoy the journey and share your beautiful banjo with others.
Happy building!