How to Rehydrate Wood: A Step-by-Step Revival Guide
To rehydrate wood, soak it in water for several hours or use a steam treatment. Ensure the wood absorbs moisture evenly to prevent warping.
Wood can dry out due to various factors like humidity changes or prolonged exposure to heat. This drying process can lead to cracks, splits, and overall weakening of the material. Rehydrating wood restores its original moisture content, enhancing durability and appearance.
Whether you’re working on furniture, musical instruments, or flooring, understanding how to rehydrate wood is crucial. Proper techniques can help preserve your wood’s integrity and extend its lifespan. Use simple methods such as soaking or steaming to revive your wood pieces effectively. With the right care, you can maintain both the beauty and functionality of your wooden items.
The Importance Of Wood Hydration
Proper wood hydration is key to preserving its durability. Dry wood can crack and warp. This damage can make furniture and structures weak. Regular hydration keeps wood strong and long-lasting.
Wood also looks better when hydrated. It can maintain its color and shine. Well-hydrated wood enhances the aesthetic appeal of any space. Keeping wood moist prevents it from looking dull.
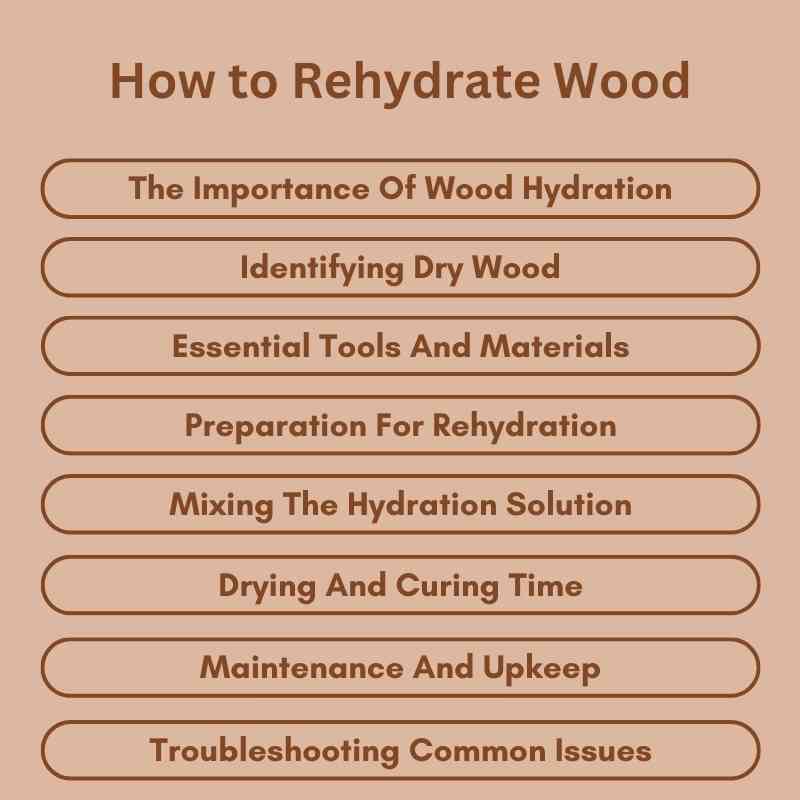
Identifying Dry Wood
To identify dry wood, start with a visual inspection. Look for cracks or splits on the surface. Check for a dull color instead of a rich hue. Warped shapes can also indicate dryness.
Next, use tactile clues. Feel the wood for smoothness. Dry wood often feels rough or bumpy. Tap the wood lightly. A hollow sound suggests it may be dry.
Use a moisture meter for a precise reading. This tool shows the exact moisture content. Aim for a level above 6% for healthy wood.
Essential Tools And Materials
To rehydrate wood, various hydration agents can be used. Water is the most common choice. Other options include oil and special wood conditioners. These agents help restore the wood’s moisture content.
For applying these hydration agents, specific application tools are necessary. A brush works well for spreading oil. Spray bottles can also be effective for water or liquid conditioners. Cloths can help wipe excess moisture.
Using the right tools makes the process easier and more effective. Always remember to work in a well-ventilated area. This ensures safety and better results.
Preparation For Rehydration
Start by cleaning the wooden surface. Remove dirt and dust using a soft cloth. Use mild soap and water for stubborn stains. Rinse with clean water and let it dry completely.
Next, sanding helps the wood absorb moisture better. Use fine-grit sandpaper to smooth the surface. Sand in the direction of the wood grain for best results. This process opens up the wood’s pores.
After sanding, wipe away any dust with a damp cloth. Let it dry again before rehydrating. Proper preparation makes the rehydration process more effective.
Mixing The Hydration Solution
Mixing a hydration solution for wood is simple and effective. Use natural oils for best results. These oils help restore moisture and protect wood surfaces.
Common natural oils include linseed oil, coconut oil, and olive oil. Each oil offers unique benefits. For example, linseed oil provides a rich finish.
To create a custom blend, combine different oils. This mix can enhance the wood’s appearance and durability. Use equal parts of each oil for a balanced solution.
Apply the solution with a clean cloth. Ensure even coverage across the wood surface. Allow it to absorb fully for optimal results.
The Application Process
Start by cleaning the wood surface. Remove any dust or dirt. Use a damp cloth for best results.
Choose a suitable rehydrating solution. Options include water, mineral oil, or specialized products. Test the solution on a small area first.
Apply the solution evenly. Use a brush or cloth to spread it. Make sure to cover all areas.
Wait for the wood to absorb the solution. This may take a few hours. Check frequently to ensure it’s not drying out.
Reapply if necessary. This helps to achieve the desired moisture level. Monitor the wood’s condition over time.
Drying And Curing Time
Drying wood needs optimal conditions for best results. Keep wood in a dry area with good air circulation. Temperature should be between 60°F and 80°F. Humidity levels should stay low, ideally below 50%.
To test if wood is properly hydrated, use a moisture meter. Insert the meter into the wood. A reading of 6% to 8% indicates good hydration. If the reading is higher, further drying is needed.
| Moisture Level | Condition |
|---|---|
| 6% – 8% | Well Hydrated |
| Above 8% | Too Moist |
Maintenance And Upkeep
Creating a regular hydration schedule for wood is essential. Watering should occur every few weeks. Use a spray bottle for even distribution. Always check the wood’s moisture level first.
Implementing protective measures can greatly enhance wood longevity. Store wood in a cool, dry place away from sunlight. Use a humidifier in dry environments to maintain moisture. Avoid letting wood stay in damp areas.
| Protective Measure | Description |
|---|---|
| Cool Storage | Prevents warping and cracking. |
| Humidity Control | Keeps wood from drying out. |
| Regular Checks | Ensure moisture levels stay balanced. |
Troubleshooting Common Issues
Over-hydration can cause wood to swell. This can lead to cracks and warping. To fix this, allow the wood to dry naturally. Place it in a well-ventilated area. Avoid direct sunlight, which can cause uneven drying.
Restoring unevenly hydrated wood requires patience. Use a damp cloth to lightly moisten dry areas. Then, allow the wood to absorb moisture evenly. Monitor the wood closely. This process may take several days.
| Issue | Solution |
|---|---|
| Swelling | Allow it to dry naturally. |
| Cracking | Moisten dry areas with a damp cloth. |
| Warping | Place in a well-ventilated area. |
Frequently Asked Questions
How Does Wood Lose Moisture?
Wood loses moisture through evaporation and exposure to air. Factors like temperature and humidity significantly affect this process. When the environment is dry, wood can dry out quickly. Over time, this leads to cracks, warping, and structural issues. Understanding this is crucial for maintaining wood integrity.
What Are The Signs Of Dry Wood?
Signs of dry wood include visible cracks and warping. It may also produce a hollow sound when tapped. Additionally, the surface can feel rough and splinter easily. Recognizing these signs early is essential for effective rehydration. Taking action can help preserve the wood’s longevity and appearance.
How Can I Rehydrate My Wood?
To rehydrate wood, use a moisture meter to check levels. Applying a wood conditioner or oil helps restore moisture. Alternatively, place the wood in a humid environment, like a bathroom. Regular maintenance can prevent excessive drying. Always monitor moisture levels to ensure optimal results.
Is It Safe To Soak Wood In Water?
Soaking wood in water can be risky. While it may rehydrate, excess moisture can cause swelling and warping. Instead, consider using a damp cloth or steam method. This approach is gentler and more controlled. Always test a small area first to avoid damage.
Conclusion
Rehydrating wood is essential for maintaining its strength and beauty. By following the methods outlined, you can restore moisture effectively. Regular maintenance will prevent damage and extend the lifespan of your wooden items. Embrace these techniques for a healthier, more durable wood that enhances your space.
Happy woodworking!