How to Remove a Stripped Screw: Easy and Effective Methods
Removing a stripped screw can be frustrating. It often feels impossible to get it out.
But don’t worry, solutions exist. Stripped screws happen when the head gets damaged. The screwdriver can’t grip it anymore. This is common with over-tightening or using the wrong tools. You might think you’re stuck, but several methods can help. In this guide, we will explore easy ways to remove a stripped screw.
These tips will save you time and prevent damage to your projects. So, keep reading to learn how to tackle this common issue with confidence.
Identifying A Stripped Screw
Identifying a stripped screw can save you time and frustration. A stripped screw is one where the head is damaged, making it hard to turn. Before removing it, you must first identify it correctly.
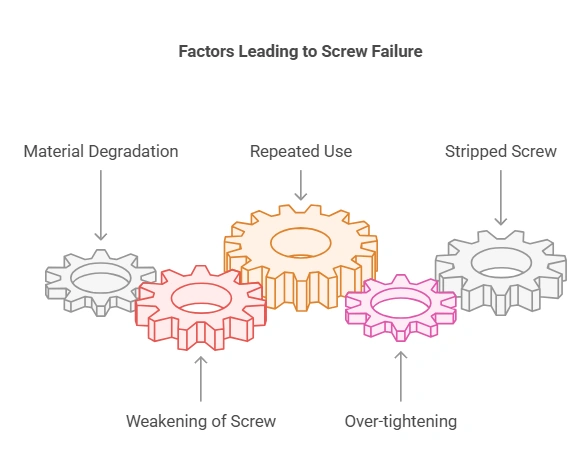
Common Causes
There are several reasons why screws get stripped. Using the wrong screwdriver size is a common cause. Applying too much force can also damage the screw head. Another reason is rust or corrosion, which weakens the screw. Repeated use and over-tightening can also strip screws.
Recognizing The Signs
Recognizing a stripped screw is crucial. Look for a worn or rounded screw head. This is a clear sign of stripping. The screwdriver will slip out when you try to turn the screw. The screw may also appear rusty or damaged. If the screw doesn’t budge despite your efforts, it’s likely stripped. Listening for grinding sounds can also help identify a stripped screw.
Preparing For Removal
Removing a stripped screw can seem like a daunting task, especially when you’re not sure where to start. But worry not! With a little preparation, you can tackle this challenge head-on. In this section, we’ll walk you through the essential steps to get ready for the job. Let’s dive into the details of Gathering Tools and Ensuring Safety to make sure you’re fully equipped and protected.
Gathering Tools
First things first, you need the right tools for the job. Without them, removing a stripped screw can be nearly impossible. Here’s a list of items you should gather before you begin:
- Screwdriver Set: Make sure you have different sizes and types, such as Phillips and flathead.
- Rubber Band: Yes, a simple rubber band can provide extra grip.
- Pliers: Useful for turning the screw if the head is too damaged.
- Drill: With a set of drill bits, it can help create a new slot.
- Extraction Kit: Designed specifically for stripped screws, these kits can be lifesavers.
Having these tools at your disposal will save you time and frustration. Plus, it makes the whole process smoother and more efficient. Ever tried to unscrew something with the wrong tool? It’s like trying to fit a square peg in a round hole – not fun!
Ensuring Safety
Safety should always be a top priority, even for a seemingly simple task like removing a screw. Here are some key safety tips to keep in mind:
- Wear Safety Glasses: Protect your eyes from metal shards or debris.
- Use Gloves: Avoid cuts and improve your grip by wearing sturdy gloves.
- Work in a Well-Lit Area: Good lighting helps you see what you’re doing and avoid accidents.
- Ensure a Stable Work Surface: Make sure your work area is stable to prevent slipping or tipping.
- Take Your Time: Rushing can lead to mistakes. Work methodically and carefully.
Remember the time I tried to rush removing a screw without gloves? Not only did I almost lose my grip, but I also ended up with a nasty scrape on my hand. Lesson learned: safety first!
By gathering the right tools and ensuring your safety, you’re setting yourself up for success. Now that you’re prepared, you’re ready to move on to the actual removal process. Stay tuned for the next section where we’ll break down the step-by-step guide to getting that pesky stripped screw out. Happy unscrewing!
Using A Rubber Band
Ever found yourself frustrated with a stripped screw that just won’t budge? It’s like trying to open a locked door without a key. Luckily, there’s a simple trick that can save you from this predicament: using a rubber band. This easy hack can help you gain the grip you need to remove the troublesome screw. Let’s dive into how you can use a rubber band to solve this common problem.
Choosing The Right Band
Not all rubber bands are created equal. Some are too thin, while others might be too thick. You need one that’s just right. Here’s how to pick the perfect rubber band:
- Thickness: Choose a rubber band that’s thick enough to provide grip but not so thick that it won’t fit between the screw and the screwdriver.
- Width: A wider band will cover more surface area, giving you a better grip.
- Elasticity: Make sure the rubber band is elastic enough to stretch but firm enough to hold its shape.
So, dig through your office supplies and find that ideal rubber band. Once you have it, you’re ready for the next steps.
Step-by-step Guide
Now that you have the right rubber band, follow these simple steps to remove the stripped screw:
- Position the Rubber Band: Place the rubber band flat over the stripped screw head. Ensure it covers the entire surface.
- Insert the Screwdriver: Carefully insert your screwdriver into the screw head, pressing down firmly on the rubber band.
- Twist Gently: Turn the screwdriver slowly and steadily. The rubber band should provide the extra grip needed to turn the screw.
- Apply Consistent Pressure: Maintain steady pressure as you twist. If the screw doesn’t budge, try repositioning the rubber band and repeat.
And there you have it! With a little patience and the right technique, that stubborn screw should come loose. If the screw remains stuck, don’t worry, there are other methods to try. But often, this simple rubber band trick does the job.
Have you ever tried using a rubber band to remove a stripped screw? Share your experiences in the comments below. And don’t forget to check out our other tips and tricks for solving common DIY dilemmas!
Employing Pliers
Using pliers is an effective way to remove a stripped screw. Grip the screw firmly with the pliers and twist gently to extract it.
Removing a stripped screw can be frustrating. One effective method is using pliers. Pliers give you a firm grip on the screw. They can turn the screw even if the head is damaged. This method works best for screws that are not fully recessed.
Types Of Pliers
Different pliers are available for this task. Each type has its advantages.
– Needle-nose pliers: These have a long, narrow tip. They are good for small screws.
– Locking pliers: These can clamp down on the screw tightly. They provide a strong grip.
– Groove joint pliers: These have adjustable jaws. They can fit screws of various sizes.
Proper Technique
Using pliers requires some technique. Follow these steps for best results.
1. Select the right pliers for the job.
2. Open the pliers wide enough to fit around the screw head.
3. Clamp down on the screw firmly. Ensure the grip is tight.
4. Turn the pliers counterclockwise. Apply steady pressure.
5. Continue turning until the screw is loose.
Avoid applying too much force. This can damage the screw further. If the screw is still stuck, try a different pair of pliers.
Utilizing A Screw Extractor
Removing a stripped screw can be frustrating. But using a screw extractor makes it easier. This tool helps you remove screws with damaged heads. The process is straightforward and efficient.
Selecting An Extractor
First, choose the right screw extractor. They come in different sizes. Match the size of the extractor to the stripped screw. Check the packaging for guidelines. You can also ask for help at the hardware store.
Extraction Process
Start by drilling a small hole in the screw. Use a drill bit slightly smaller than the extractor. This helps the extractor grip the screw better. Be careful not to drill too deep.
Next, insert the screw extractor into the hole. Turn it counterclockwise using a wrench or pliers. Apply steady pressure. The extractor’s threads will bite into the screw. Continue turning until the screw comes out.
If the screw is stubborn, use a penetrating oil. Spray the oil around the screw and wait for a few minutes. This can help loosen it. Then try the extractor again.
Finally, remove the screw and clean the area. Check for any damage that may need repair. Store your screw extractor properly for future use.
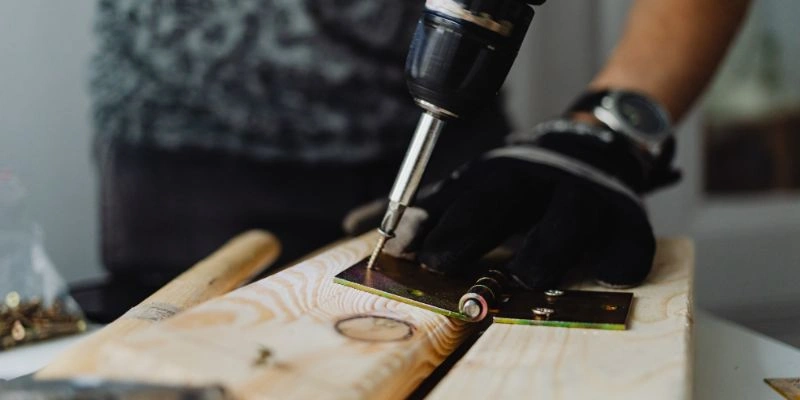
Drilling Out The Screw
Removing a stripped screw can be a frustrating task, especially when the usual methods fail. One effective technique is to drill out the screw. This method requires precision and the right tools, but it can save you from hours of headache. Below, we will guide you through the process step-by-step, ensuring you can tackle this challenge with confidence.
Drill Bit Selection
Choosing the correct drill bit is crucial for successfully removing a stripped screw. Here are some tips to help you select the right one:
- Material: High-speed steel (HSS) drill bits are ideal for this job. They are durable and can handle the toughness of the screw material.
- Size: Select a drill bit slightly smaller than the screw’s shaft. This ensures you do not damage the surrounding material.
- Type: A left-hand drill bit can be particularly useful. As it drills, it may actually unscrew the stripped screw.
Drilling Steps
Once you have the right drill bit, follow these steps to drill out the stripped screw:
- Secure the area: Make sure the object with the stripped screw is stable. Use clamps if necessary.
- Mark the center: Use a center punch to create a small indentation in the center of the screw. This helps to guide the drill bit.
- Set up the drill: Attach the selected drill bit to your drill. Ensure it is tightly secured.
- Start drilling: Begin drilling at a slow speed. Increase the speed gradually as you feel more comfortable.
- Apply consistent pressure: Keep the drill steady and apply even pressure. Do not rush the process.
- Check progress: Periodically stop and check your progress. If the screw starts to turn, you may be able to remove it with pliers.
- Remove the screw: Once you have drilled deep enough, the screw should be loose enough to remove. Use a screw extractor if needed.
Drilling out a stripped screw may seem intimidating, but with the right approach, it can be straightforward. Remember, patience and precision are key. Have you ever faced a stubborn screw? How did you handle it? Share your experiences in the comments below!
Applying Chemical Solutions
Encountering a stripped screw can be a real headache. Sometimes, all the usual tricks just don’t work, and that’s where chemical solutions come into play. These solutions can help loosen the grip of the screw, making removal easier. Let’s dive into the types of solutions you can use and how to apply them effectively.
Types Of Solutions
There are various chemical solutions that can help when you’re dealing with a stubborn stripped screw. Here are some common ones:
- WD-40: This is a multipurpose lubricant that can help loosen rusted or stuck screws.
- Penetrating Oil: Products like PB Blaster or Liquid Wrench are specifically designed to penetrate and loosen rust and corrosion.
- Rust Removers: These are chemical solutions designed to dissolve rust. They can be very effective if your screw is rusted in place.
Application Methods
Applying these solutions correctly is key to successfully removing a stripped screw. Here’s a step-by-step guide:
- Clean the Area: Before applying any solution, make sure the area around the screw is clean. Wipe away any dust or debris.
- Apply the Solution:
- If using WD-40 or penetrating oil, spray a small amount directly onto the screw. Let it sit for about 10-15 minutes to allow the solution to penetrate.
- If using a rust remover, follow the instructions on the product. Typically, you will apply it to the screw and let it sit for a specified period.
- Attempt Removal: After the solution has had time to work, try removing the screw again. Use a screwdriver that fits snugly in the screw head to avoid further stripping.
- Repeat if Necessary: If the screw still won’t budge, reapply the solution and give it more time to work. Sometimes, patience is key!
Using chemical solutions can save you a lot of frustration when dealing with stripped screws. Have you ever had a screw that wouldn’t budge no matter what you tried? Share your experiences and tips below!
Preventing Future Stripped Screws
Encountering a stripped screw can be frustrating, especially when you’re in the middle of a project. But the good news is, you can take steps to prevent this from happening again. Here, we’ll share some practical tips to help you avoid stripped screws in the future. Let’s dive in!
Proper Screwdriver Usage
Using the right screwdriver is crucial. Here’s how you can ensure you’re doing it correctly:
- Choose the Right Size: Make sure the screwdriver fits the screw head perfectly. A mismatched size can cause slippage and strip the screw.
- Apply Steady Pressure: Apply firm, consistent pressure. Too much force can damage the screw, while too little can cause the screwdriver to slip.
- Use Quality Tools: Invest in good quality screwdrivers. They provide a better grip and are less likely to wear down.
Regular Maintenance
Regular maintenance of your tools and screws can go a long way in preventing stripped screws. Here’s what you can do:
- Clean Your Tools: Regularly clean your screwdrivers and other tools. Dirt and debris can affect their performance.
- Inspect Screws: Before using, check screws for any signs of wear or damage. Replace them if necessary.
- Lubricate Screws: Applying a small amount of lubricant can make it easier to drive screws in and out, reducing the risk of stripping.
Remember, a little bit of care and attention can save you a lot of trouble down the line. By following these simple tips, you can keep your screws and tools in great condition, ensuring smooth and hassle-free projects every time.
Have you ever had a screw strip on you at the worst possible moment? Share your experiences in the comments below!
Frequently Asked Questions
What Is The Easiest Way To Remove A Stripped Screw?
Use a rubber band between the screwdriver and the stripped screw. Apply firm pressure and turn slowly.
How Do You Get A Screw Out When The Head Is Ruined?
Use a rubber band for grip. Try pliers or a screw extractor. Drill a new slot into the screw head.
How Do You Remove A Stripped Screw With Duct Tape?
Place duct tape over the stripped screw head. Press firmly to ensure a good grip. Use a screwdriver to turn the screw slowly and remove it.
How To Get A Screw Out That’s Rounded Off?
Use pliers or a rubber band for grip, apply penetrating oil, or use a screw extractor tool.
Conclusion
Removing a stripped screw can seem daunting. With the right tools, it’s manageable. Follow the steps carefully. Try different methods if needed. Patience is key. Don’t rush the process. This guide should help you succeed. Happy fixing!