
How to Restain a Deck: A Step-by-Step Guide for Beginners
Restaining a deck involves a few key steps. First, you prepare the surface.
Then, you apply the new stain. A well-maintained deck is a point of pride for any homeowner. Over time, however, exposure to the elements can wear down its finish, leaving it looking dull and weathered. Restaining your deck is not just about aesthetics; it also protects the wood from damage.
Whether you’re a seasoned DIY enthusiast or tackling this for the first time, knowing the right steps can make the process much smoother. In this guide, we will walk you through each stage of restaining your deck, ensuring it looks as good as new and lasts for years to come. Keep reading to learn how to give your deck a fresh, revitalized appearance.
Preparing Your Deck
Restaining a deck starts with thorough cleaning. Remove old stain, dirt, and debris for a fresh surface. Once clean, let the deck dry completely before applying the new stain.
Cleaning The Surface
Start by sweeping your deck. Remove all dirt and debris. Use a garden hose to wet the wood. Apply a deck cleaner with a brush. Scrub the surface gently. Let the cleaner sit for 15 minutes. Rinse the deck with water. Allow it to dry completely.
Repairing Damage
Inspect the deck for damage. Look for loose nails or screws. Replace any broken boards. Tighten all loose screws. Fill cracks with wood filler. Smooth the filler with a putty knife. Let it dry according to the instructions.
Sanding The Wood
Sand the deck to remove old stain. Use a belt sander for large areas. Sandpaper works for small spots. Sand along the grain of the wood. Wear a mask to avoid dust. Wipe the deck with a damp cloth. Remove all dust and particles. Let the deck dry before staining.

Credit: www.youtube.com
Choosing The Right Stain
Stains can be oil-based or water-based. Oil-based stains are durable and penetrate well. Water-based stains are eco-friendly and dry faster. Each type has its benefits. Choose what fits your needs.
Color choice affects the look of your deck. Lighter colors show wood grain. Darker colors hide imperfections. Match the color with your home’s style. Use a small area to test the color first.
Measure your deck to know how much stain you need. Stain cans show coverage per square foot. Always buy a little extra. This ensures you have enough.
Gathering Essential Tools
Brushes and rollers help apply stain evenly. Brushes are good for small areas and details. Rollers cover large areas quickly. Use high-quality brushes for best results. Get rollers with a thick nap for rough surfaces. They hold more stain and cover better.
Protective gear keeps you safe. Wear gloves to protect your hands. Goggles shield your eyes from splashes. A mask helps you avoid inhaling fumes. Safety is important. Gear up before starting your work.
Gather all needed supplies beforehand. You need drop cloths to protect the ground. Sandpaper smooths rough spots. Have a bucket for cleaning brushes. Keep rags handy for spills. A stir stick mixes the stain well. Being prepared makes the job easier.
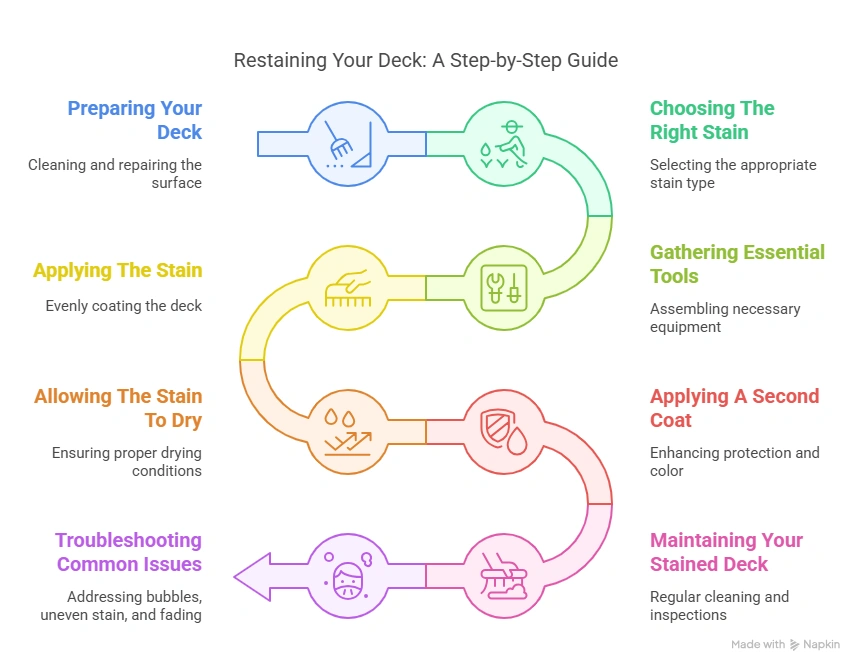
Applying The Stain
Begin with the edges. Use a brush for small areas. This helps control the stain. Avoid drips on other parts. Work slowly and steady. This keeps the stain even.
Use long strokes to apply the stain. This helps cover more area. Wipe off extra stain. It prevents build-up. Keep a rag handy for this. Mix the stain well before starting.
Do not rush the job. It leads to uneven spots. Avoid staining in direct sunlight. This dries the stain too fast. Check the weather before starting. Wet wood can ruin the stain. Test a small area first. This shows how the stain looks.
Allowing The Stain To Dry
Let the stain dry completely before using the deck. This ensures a smooth and even finish. Patience is key.
Optimal Drying Conditions
Staining the deck is just one part of the process. Proper drying is crucial. Ideal conditions include dry weather and moderate temperatures. A temperature range of 50-90 degrees Fahrenheit is best. Humidity levels should be low. This helps the stain dry evenly and quickly.
Estimated Drying Time
Drying time varies. Typically, it takes 24-48 hours for the stain to dry. Check the stain can for specific drying times. Avoid using the deck until it is fully dry. This ensures the stain sets well and lasts longer.
Credit: deckrestorationco.com.au
Applying A Second Coat
Wait for the first coat to dry fully. This usually takes 24 to 48 hours. Check the weather forecast. Choose a day with no rain. Make sure the temperature is between 50°F and 90°F. This helps the stain to dry properly.
Use a high-quality brush or roller. Start at one end of the deck. Work in small sections. Apply a thin, even coat. Overlap each stroke slightly. This avoids lines and streaks. Wipe off excess stain with a clean cloth. This ensures an even finish.
Maintaining Your Stained Deck
Restaining a deck can enhance its appearance and prolong its life. Clean the surface, sand any rough spots, and apply a fresh coat of stain. Regular maintenance keeps your deck looking new.
Regular Cleaning
Cleaning your deck often keeps it looking nice. Dirt and leaves can hurt the stain. Sweep the deck and wash it with water. Use a mild soap if needed. A clean deck will last longer.
Periodic Inspections
Inspect the deck every few months. Look for any damage or wear. Check for cracks or splinters. Fix any problems you find. Keep an eye on the stain. It helps you know when to reapply.
Reapplying Stain
Reapply stain every few years. This keeps the deck strong. The sun and rain can wear out the stain. Follow the instructions on the stain. Apply it evenly. Let it dry completely. This helps protect your deck.
Credit: www.olympic.com
Troubleshooting Common Issues
Struggling with how to restain a deck? Ensure the surface is clean, sand any rough spots, and apply stain evenly. This helps prevent peeling and ensures a smooth finish.
Dealing With Bubbles
Bubbles can form if the stain is too thick. Apply thin, even coats. Sand the surface lightly if bubbles appear. Wipe off dust before applying a new coat.
Fixing Uneven Stain
Stains can look uneven if not applied well. Use a brush or roller for a uniform finish. Work in small sections. Blend edges carefully. Sand any dark spots. Reapply stain to light areas.
Addressing Fading
Fading can happen over time. Clean the deck first. Use a wood brightener. Apply a fresh coat of stain. Choose a high-quality stain for better results. Follow the manufacturer’s instructions.
Frequently Asked Questions
Do I Need To Remove Old Stain Before Restaining A Deck?
Yes, you need to remove old stain before restaining a deck. This ensures proper adhesion and a smooth finish. Use a deck cleaner or stripper, then sand the surface for best results.
Can You Stain Over An Already Stained Deck?
Yes, you can stain over an already stained deck. Clean and sand the surface first for better adhesion.
Do You Have To Sand A Deck Before You Restain It?
Yes, sanding a deck before restaining ensures better adhesion and a smoother finish. Clean the deck thoroughly first.
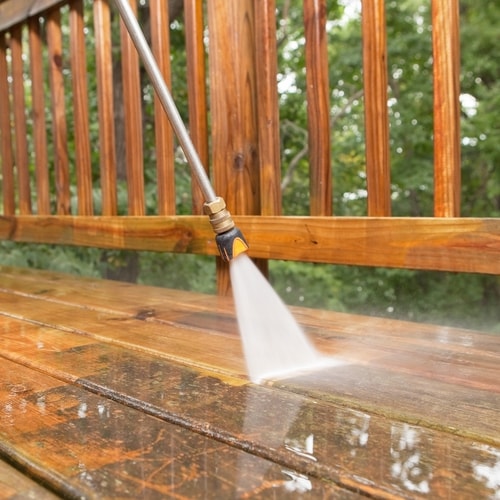
Do You Need To Pressure Wash A Deck Before Restaining?
Yes, pressure wash the deck to remove dirt, mildew, and old stain. This ensures better stain adhesion.
Conclusion
Restaining a deck breathes new life into your outdoor space. It’s a straightforward task with big results. Clean the deck thoroughly before starting. Choose the right stain for your deck type. Apply evenly and let it dry properly. Regular maintenance keeps your deck looking great for years.
Enjoy your refreshed and beautiful deck, perfect for gatherings or relaxation. Taking the time to restain ensures durability and aesthetic appeal. Your deck deserves care and attention. Now, get ready to enjoy those sunny days and cozy evenings on your stunning deck!