How to Roll Polyurethane Without Bubbles: Expert Tips
To roll polyurethane without bubbles, use a high-density foam roller and apply thin, even coats. Work quickly and maintain a wet edge to minimize air entrapment.
Applying polyurethane can enhance the beauty of wood surfaces, offering durability and protection. However, achieving a flawless finish requires careful technique. Bubbles can form during application, leading to an uneven appearance. Understanding how to prevent this issue is essential for a smooth, professional-looking result.
Selecting the right tools and materials plays a crucial role in this process. A high-density foam roller is often preferred for its ability to distribute polyurethane evenly. Proper rolling technique, including maintaining a wet edge, helps avoid air pockets. With a few simple strategies, you can achieve a perfect, bubble-free finish on your projects.
Introduction To Polyurethane Finishes
Polyurethane finishes are popular in woodworking and DIY projects. They provide a strong, durable coat for various surfaces. This finish can protect wood from moisture and wear. It enhances the natural beauty of the wood, making it shine.
Popularity In Woodworking And DIY Projects
Many woodworkers and DIY enthusiasts favor polyurethane for several reasons:
- Durability: Polyurethane resists scratches and heat.
- Versatility: Suitable for furniture, floors, and cabinets.
- Finish Options: Available in gloss, semi-gloss, and matte.
- Easy Application: Can be applied with a brush, roller, or spray.
This finish is widely used by both professionals and hobbyists. Its ability to create a protective barrier makes it essential in many projects.
Challenges With Bubbles During Application
Bubbles can form during the application of polyurethane. This can ruin the smooth finish you desire. Common causes of bubbles include:
- Excessive brushing or rolling.
- Humidity or temperature changes.
- Using the wrong tools.
To achieve a perfect finish, it’s essential to minimize bubbles. Proper techniques can prevent this common problem. Understanding these challenges helps improve your finishing skills.
Selecting The Right Tools
Choosing the right tools is vital for a bubble-free finish. The tools you select can make a significant difference in the application of polyurethane. High-quality materials lead to better results and less frustration.
Types Of Rollers For Polyurethane
Different types of rollers work best with polyurethane. Here are some key options:
- Nap Rollers: Ideal for textured surfaces.
- Sponge Rollers: Great for smooth finishes.
- Microfiber Rollers: Excellent for an even coat.
Choose a roller with a nap thickness suitable for your project. A thicker nap holds more polyurethane, while a thinner nap offers a smoother finish.
Importance Of High-quality Brushes
Using high-quality brushes can help eliminate bubbles. Brushes allow for precision in hard-to-reach areas. Here’s why you should invest in them:
- Better Control: High-quality brushes provide better control over application.
- Less Shedding: Good brushes shed fewer bristles, reducing imperfections.
- Smoother Finish: A fine bristle brush offers a smooth, even surface.
Look for brushes made from synthetic materials. They work well with water-based polyurethanes. Remember, quality tools enhance the overall appearance of your project.
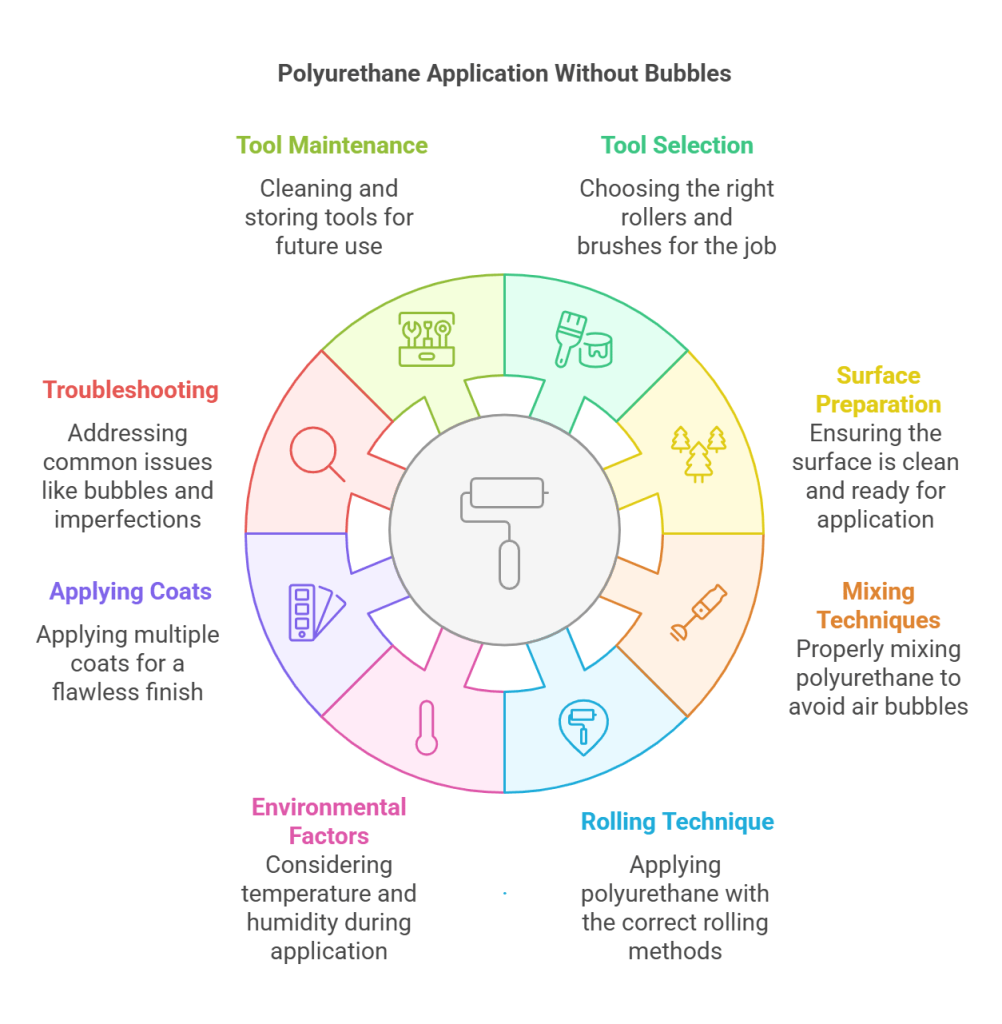
Preparation Of The Surface
Preparing the surface is crucial for a bubble-free finish. Proper preparation helps the polyurethane adhere better. A clean and smooth surface ensures a professional look.
Cleaning And Sanding Techniques
Start with effective cleaning methods. Remove dirt, grease, and old finishes.
- Use a mild detergent and water.
- Wipe the surface with a clean cloth.
- For tough stains, use a solvent like mineral spirits.
Once clean, focus on sanding. Sanding creates a rough surface for better adhesion.
- Use 120-grit sandpaper for initial sanding.
- Follow up with 220-grit sandpaper for a smooth finish.
Always sand in the direction of the wood grain. This prevents scratches and uneven spots.
Dust Removal Strategies
Dust removal is essential after cleaning and sanding. Dust can trap air and cause bubbles.
- Use a vacuum with a brush attachment.
- Wipe the surface with a damp cloth.
- Consider using a tack cloth to pick up fine dust.
Make sure the surface is completely dry before applying polyurethane. This ensures a smooth application.
Mixing Polyurethane Properly
Mixing polyurethane correctly is vital for a smooth finish. Proper mixing reduces bubbles and ensures even application. Follow these tips to achieve the best results.
Avoiding Air Introduction
Air bubbles form during mixing. Avoiding this is key. Here are some tips:
- Use a slow-speed mixer.
- Mix gently to minimize air intake.
- Choose the right container; a tall, narrow one works best.
Techniques For A Smooth Mixture
Using the right techniques is crucial. Here are some effective methods:
- Measure Accurately: Use precise measurements for each component.
- Stir Slowly: Stir the mixture gently and consistently.
- Use a Stir Stick: A wooden stick helps avoid bubbles.
- Let it Rest: Allow the mixture to sit for a few minutes. This lets bubbles rise to the surface.
Follow these methods to ensure a bubble-free polyurethane mix. Enjoy your smooth finish!
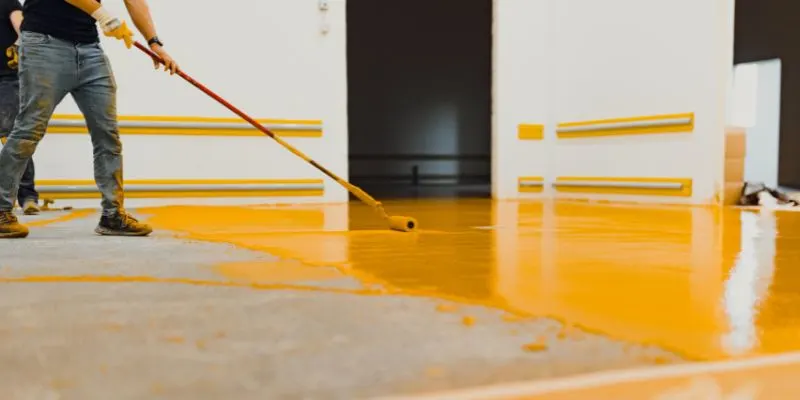
The Rolling Technique
Mastering the rolling technique is essential for a smooth polyurethane finish. Proper technique reduces bubbles and ensures an even coat. Focus on the details to achieve the best results.
Correct Roller Loading
Loading the roller correctly is key. An overloaded roller can create bubbles. Follow these steps for optimal loading:
- Use a high-quality roller designed for polyurethane.
- Dip the roller into the paint tray.
- Roll it back and forth to evenly distribute the polyurethane.
- Remove excess product by rolling on the tray’s sloped side.
Ensure the roller is moist, not dripping. This prevents bubbles from forming during application.
Roller Angles And Pressure
The angle and pressure you apply matter. Incorrect angles can trap air and create bubbles. Follow these tips:
- Hold the roller at a 30-degree angle to the surface.
- Apply consistent, gentle pressure while rolling.
- Use long, even strokes for smooth application.
Avoid pressing too hard. This can cause uneven layers and bubbles. Practice makes perfect!
Environmental Factors
Environmental factors play a crucial role in achieving a smooth finish when rolling polyurethane. Understanding these elements helps avoid bubbles and imperfections. Two major factors include temperature and humidity, along with proper workspace ventilation.
Temperature And Humidity Effects
Temperature and humidity affect the curing process of polyurethane. High temperatures can lead to rapid drying. This may trap air bubbles in the finish. Low temperatures slow drying, allowing bubbles to rise but can also cause a sticky surface.
Humidity impacts the moisture content in the air. Higher humidity can introduce water into the mix, affecting adhesion. Optimal conditions ensure a smooth application.
| Temperature | Humidity | Effect |
|---|---|---|
| Above 85°F | High | Fast drying, more bubbles |
| Below 60°F | Low | Slow drying, possible tackiness |
| 70°F – 80°F | Moderate | Ideal conditions |
Workspace Ventilation
Good ventilation is essential for rolling polyurethane. It helps disperse fumes and improves drying. Proper airflow reduces humidity levels in the workspace.
- Open windows and doors for fresh air.
- Use fans to promote airflow.
- Avoid enclosed spaces.
Monitor air quality. Poor ventilation can lead to trapped bubbles. Ensure your workspace is comfortable and safe.
Applying Multiple Coats
Applying multiple coats of polyurethane enhances the finish. Each layer adds depth and durability. Follow the right steps to avoid bubbles.
Timing Between Coats
Timing is crucial for applying polyurethane coats. Wait for the first coat to dry completely. Follow the manufacturer’s instructions for drying times. Here are general guidelines:
| Coat Number | Drying Time |
|---|---|
| First Coat | 2-4 hours |
| Second Coat | 4-6 hours |
| Third Coat | 6-8 hours |
Check for tackiness before applying the next coat. This prevents trapping air and forming bubbles.
Sanding Between Layers
Sanding between layers is essential. It creates a smooth surface for the next coat. Use fine-grit sandpaper, around 220 grit. Follow these steps:
- Allow the previous coat to dry completely.
- Lightly sand the surface.
- Remove dust with a clean cloth.
- Apply the next coat of polyurethane.
This method enhances adhesion and reduces imperfections. Sanding prevents bubbles by ensuring each layer bonds well.
Troubleshooting Common Issues
Applying polyurethane smoothly is essential. Yet, problems can arise. Understanding common issues helps you achieve a flawless finish. Below are solutions to two common problems.
Dealing With Bubbles After Application
Bubbles can ruin your beautiful finish. Here’s how to manage them:
- Inspect the Surface: Check for dust or debris before applying.
- Use a Quality Roller: A high-density roller minimizes bubbles.
- Roll Gently: Don’t press too hard. Let the roller do the work.
- Apply Thin Coats: Thinner layers reduce the chance of bubbles.
If bubbles appear after application:
- Wait for the finish to dry completely.
- Sand the area lightly with fine-grit sandpaper.
- Clean the surface to remove dust.
- Reapply a thin layer of polyurethane.
Fixing Imperfections
Imperfections can happen, but they are fixable. Follow these steps:
- Identify the Issue: Look for scratches, dents, or rough spots.
- Sand the Area: Use fine-grit sandpaper to smooth out imperfections.
- Clean Thoroughly: Remove dust using a damp cloth.
- Reapply Polyurethane: Apply a thin coat over the affected area.
For best results:
| Tip | Description |
|---|---|
| Use a Brush | A brush works well for small areas and corners. |
| Feather Edges | Blend new application with existing finish. |
| Allow Proper Drying | Let each coat dry completely before adding another. |
Following these steps will ensure a smooth finish. Troubleshooting common issues makes your project easier.
Maintenance Of Tools Post-application
Maintaining tools after applying polyurethane is essential. Proper care ensures tools last longer. It also saves money. Clean and store your tools correctly to keep them in top shape.
Cleaning Rollers And Brushes
Cleaning rollers and brushes after use prevents hardening. Follow these steps for effective cleaning:
- Remove Excess Material: Wipe off any excess polyurethane with a rag.
- Use Solvent: Dip rollers and brushes in mineral spirits or paint thinner.
- Scrub Gently: Use a brush comb or stiff bristle brush to scrub away residue.
- Rinse: Rinse with warm soapy water to remove all solvent.
- Dry: Shake off excess water and lay flat to dry.
Follow these steps for clean and bubble-free application next time.
Storage For Future Use
Proper storage keeps your tools ready for future projects. Consider these tips:
| Tool Type | Storage Method |
|---|---|
| Rollers | Wrap in plastic or place in a sealed bag. |
| Brushes | Store upright or hang them to retain shape. |
| Trays | Clean and dry before storing to avoid rust. |
Remember to label your tools for easy identification. This simple step saves time on your next project.
Expert Tips And Tricks
Achieving a bubble-free finish with polyurethane can be challenging. Follow these expert tips to ensure a smooth application. These strategies will help you create a flawless look every time.
Professional Advice For Flawless Finish
- Choose the Right Roller: Use a high-density foam roller. This type minimizes bubbles.
- Prepare the Surface: Clean and sand the area. A smooth surface reduces imperfections.
- Thin the Polyurethane: Mix in a small amount of mineral spirits. This helps the product flow better.
- Work in Sections: Apply the finish in small areas. This prevents the polyurethane from drying too quickly.
- Use Gentle Pressure: Don’t press too hard. Let the roller do the work.
Advanced Techniques For Experienced DIYers
For those comfortable with DIY projects, these advanced techniques can elevate your results:
- Pre-Wet the Roller: Before dipping, wet the roller with mineral spirits. This helps reduce bubbles.
- Use a Paint Tray: Fill a tray with polyurethane. Roll the roller until it’s evenly coated.
- Keep a Wet Edge: Avoid stopping in the middle of a section. A wet edge prevents lap marks.
- Apply Multiple Thin Coats: Instead of one thick coat, apply several thin ones. This reduces the chance of bubbles.
- Sand Between Coats: Lightly sand after each coat dries. This smooths the surface for the next layer.
By following these expert tips and advanced techniques, you can achieve a stunning, bubble-free finish with polyurethane.
Frequently Asked Questions
How Do I Prevent Bubbles When Rolling Polyurethane?
To prevent bubbles while rolling polyurethane, start with a clean surface. Use a high-quality roller designed for smooth finishes. Apply the polyurethane in thin layers, avoiding excessive pressure. Work in small sections and maintain a consistent speed. Finally, use a brush to gently tip off bubbles that may form.
What Tools Are Best For Rolling Polyurethane?
The best tools for rolling polyurethane include a foam roller and a high-density microfiber roller. Foam rollers minimize air bubbles and provide smooth application. Microfiber rollers hold more material and reduce streaks. Always ensure your tools are clean to achieve the best finish without imperfections.
How Long Does Polyurethane Take To Dry?
Polyurethane typically takes about 4 to 6 hours to dry to the touch. However, full curing can take up to 24 hours or more, depending on the product and environmental conditions. Ensure adequate ventilation and avoid heavy traffic on the surface until fully cured to prevent damage.
Can I Use A Brush Instead Of A Roller?
Yes, you can use a brush instead of a roller for polyurethane application. Brushes allow for more control and can reach tight areas. However, rolling generally produces a smoother finish. If using a brush, apply the polyurethane in thin layers to minimize bubbles and ensure an even coat.
Conclusion
Achieving a bubble-free finish with polyurethane is entirely possible. By following the right techniques and using the appropriate tools, you can enhance your project’s appearance. Remember to work in a well-ventilated space and apply thin layers. With practice, you’ll master the art of rolling polyurethane smoothly and efficiently.
Happy crafting!