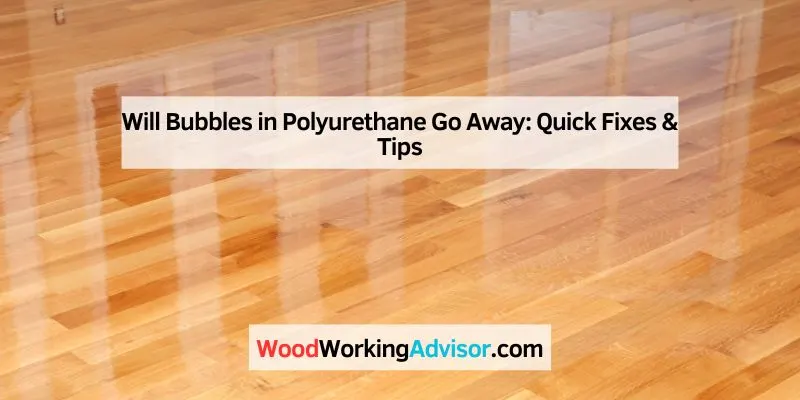
Will Bubbles in Polyurethane Go Away: Quick Fixes & Tips
Bubbles in polyurethane may not completely go away, especially if they are trapped. Proper application techniques can minimize their appearance.
Polyurethane finishes are popular for their durability and aesthetic appeal. However, bubbles can form during application, leading to an uneven surface. Understanding the causes of these bubbles is crucial for achieving a smooth finish. Common culprits include air entrapment, improper mixing, or applying the product in humid conditions.
Knowing how to prevent and address these issues can save time and enhance the final result. This guide will delve into effective strategies to minimize bubbles in polyurethane and ensure a flawless application. By mastering these techniques, you can enjoy a professional-looking finish on your projects.
Introduction To Polyurethane Bubbles
Polyurethane is widely used in coatings and foams. Bubbles can form in polyurethane, causing problems. Understanding these bubbles helps in fixing and preventing them. This guide explains the common causes and their impact on surface finishes.
Common Causes Of Bubbles
Several factors can cause bubbles in polyurethane. Here are some common reasons:
- Air Trapped During Mixing: Mixing polyurethane too quickly can trap air.
- Moisture: Water can react with polyurethane, creating bubbles.
- Inadequate Surface Preparation: Dust or grease can lead to improper adhesion.
- Temperature Fluctuations: Extreme temperatures can create expansion and contraction.
Impact On Surface Finish
Bubbles can significantly affect the appearance and durability of the finish. Here’s how:
| Impact | Description |
|---|---|
| Aesthetic Damage | Bubbles create uneven surfaces and an unprofessional look. |
| Weakening of Coating | Trapped air can lead to chipping and peeling. |
| Reduced Durability | Bubbles can weaken the structure and longevity of the finish. |
| Increased Maintenance | More frequent repairs may be needed for damaged areas. |
Addressing bubbles early helps maintain a smooth and durable finish.
Misconceptions About Polyurethane Bubbles
Many people misunderstand bubbles in polyurethane. They think bubbles always mean a bad job. Some believe they will eventually disappear. Let’s clear up these myths.
Myths Vs. Reality
Here are common myths about polyurethane bubbles:
- Myth 1: Bubbles indicate poor quality.
- Myth 2: Bubbles will always vanish.
- Myth 3: Bubbles weaken the material.
Now, let’s look at the reality:
- Reality 1: Bubbles can occur during application.
- Reality 2: Some bubbles may stay forever.
- Reality 3: Many bubbles do not affect strength.
Do Bubbles Disappear Over Time?
Many believe bubbles will disappear. This is not always true.
Some bubbles may shrink or fade. Others might remain visible. It depends on several factors:
| Factor | Impact on Bubbles |
|---|---|
| Type of Polyurethane | Some types are more prone to bubbles. |
| Application Method | Air can get trapped during mixing. |
| Temperature and Humidity | High humidity can cause more bubbles. |
Understanding these factors helps manage expectations about bubbles.
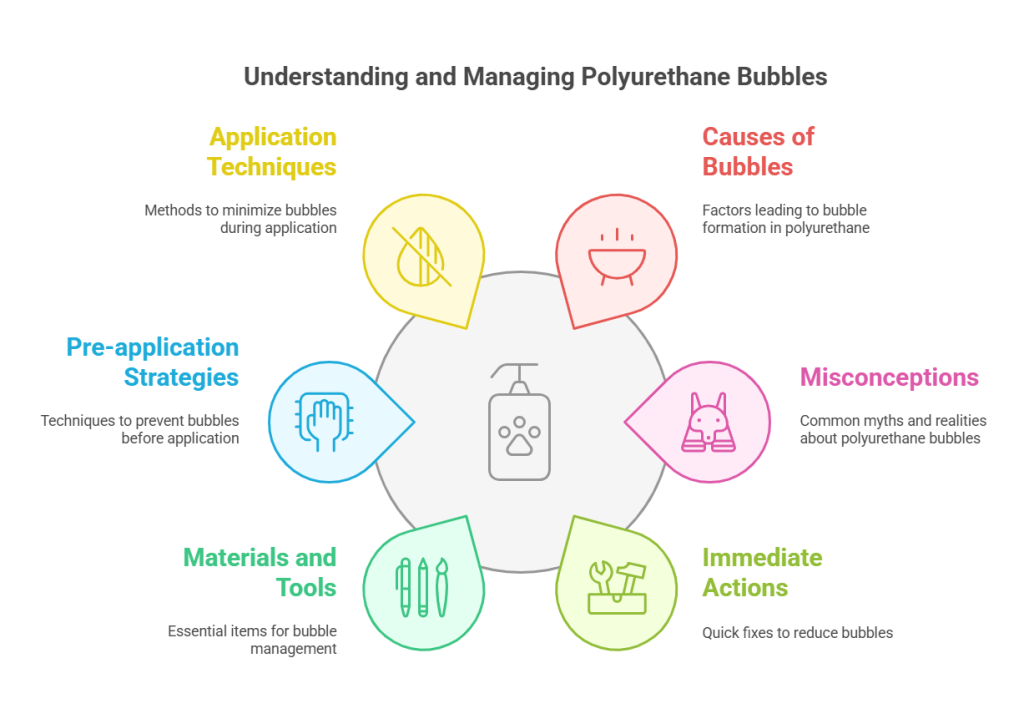
Immediate Actions To Reduce Bubbles
Reducing bubbles in polyurethane requires quick and effective actions. Addressing the issue early can prevent further complications. Here are some effective strategies to tackle this problem.
Adjusting Application Technique
Improper application techniques often cause bubbles. Consider these adjustments:
- Mix Thoroughly: Ensure all components mix well.
- Use a Slow Speed: Mix at a lower speed to reduce air entrapment.
- Pour Gently: Avoid splashing during application.
- Layering: Apply in thin layers to minimize bubble formation.
These simple changes can significantly reduce bubble formation in polyurethane.
Environmental Factors Affecting Bubbles
Environmental conditions play a crucial role in bubble formation. Keep these factors in mind:
| Factor | Impact on Bubbles |
|---|---|
| Temperature | High temperatures can increase bubble size. |
| Humidity | High humidity can lead to excessive bubbles. |
| Ventilation | Poor ventilation may trap air in the mix. |
Monitor these factors closely. Adjust the environment to create optimal conditions.
Materials And Tools For Fixing Bubbles
Fixing bubbles in polyurethane requires the right materials and tools. Choosing the best items ensures a smooth finish. Here are some essentials you need for effective repairs.
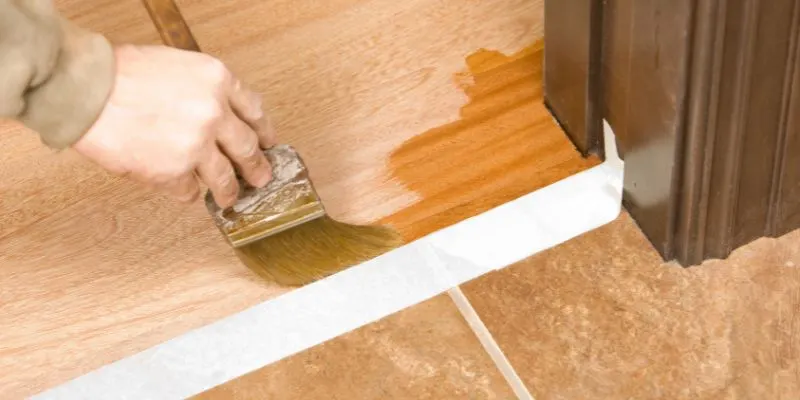
Choosing The Right Brush
Selecting the correct brush is vital for bubble repair. A good brush helps apply polyurethane evenly.
- Brush Type: Use a foam or synthetic brush.
- Size: Choose a size that fits your project.
- Shape: A flat brush works well for larger areas.
Using the right brush minimizes streaks and bubbles. Always clean the brush after use for best results.
Importance Of Quality Polyurethane
Quality polyurethane makes a big difference in your project. It affects adhesion and finish quality.
| Type of Polyurethane | Benefits | Considerations |
|---|---|---|
| Water-based | Quick drying, low odor. | May raise wood grain. |
| Oil-based | Durable, rich finish. | Longer drying time, strong smell. |
Invest in high-quality polyurethane. It reduces the chance of bubbles and provides a smooth finish.
Pre-application Strategies To Prevent Bubbles
Preventing bubbles in polyurethane is crucial for a smooth finish. Proper preparation can significantly reduce bubble formation. Follow these strategies to ensure a flawless application.
Surface Preparation
Surface preparation is essential for a successful polyurethane application. Clean and smooth surfaces allow for better adhesion and fewer bubbles. Here are key steps:
- Clean the Surface: Remove dust, dirt, and oils.
- Sanding: Sand the surface to create a rough texture.
- Repair Imperfections: Fill cracks or holes before applying.
- Dry the Surface: Ensure the surface is completely dry.
Use the right tools for preparation:
| Tool | Purpose |
|---|---|
| Vacuum | Removes dust and debris |
| Sanding Block | Smooths the surface |
| Putty Knife | Repairs imperfections |
Polyurethane Thinning Practices
Thinning polyurethane can help reduce bubbles. Follow these thinning practices for best results:
- Use the Right Solvent: Use recommended solvents only.
- Measure Carefully: Use a measuring cup for accuracy.
- Mix Gently: Stir slowly to avoid introducing air.
- Check Consistency: Aim for a smooth, pourable mix.
Remember these tips:
- Thin polyurethane only if necessary.
- Test a small area first.
- Follow manufacturer instructions.
During Application: Techniques To Minimize Bubbles
Bubbles in polyurethane can ruin a smooth finish. Applying the right techniques can help reduce these pesky bubbles. Here are some effective methods to minimize bubbles during application.
Optimal Application Conditions
Setting the right conditions is crucial. Follow these tips for optimal results:
- Temperature: Keep the temperature between 60°F and 80°F.
- Humidity: Aim for a humidity level below 70%.
- Ventilation: Ensure good airflow in the workspace.
- Mixing: Mix slowly to avoid introducing air into the mixture.
Applying Thin Coats
Applying thin coats can significantly reduce bubbles. Here’s how:
- Start with a primer: It prepares the surface and reduces bubbles.
- Use a brush or roller: Choose tools that suit thin applications.
- Apply in multiple layers: Thin layers dry faster and trap less air.
- Allow drying time: Let each coat cure properly before adding another.
By following these techniques, you can achieve a smooth, bubble-free finish. Take your time and focus on the application process.
Post-application Fixes For Polyurethane Bubbles
Finding bubbles in your polyurethane finish can be frustrating. Fortunately, several effective methods can help you fix this issue. Here are two main techniques to eliminate those pesky bubbles after application.
Sanding Techniques
Sanding is a simple yet effective way to remove bubbles. Follow these steps for the best results:
- Wait for the finish to dry. Allow the polyurethane to cure fully.
- Use fine-grit sandpaper. Choose 220-grit or higher.
- Sand gently. Focus on the bubbled areas without damaging the surrounding finish.
- Clean the surface. Use a tack cloth to remove dust.
This technique smooths out the finish. It prepares the surface for recoating.
Recoating The Surface
After sanding, recoating can restore the finish. Follow these steps:
- Choose the right polyurethane. Select a compatible product.
- Apply a thin coat. Use a brush or roller for even application.
- Work in sections. This prevents bubbles from forming again.
- Allow adequate drying time. Follow the manufacturer’s instructions.
Recoating enhances the look and durability of your surface. It ensures a smooth finish free of bubbles.
Long-term Solutions And Best Practices
To ensure your polyurethane surfaces remain bubble-free, follow these long-term solutions. Proper planning and care can prevent future issues. Regular maintenance is key to keeping your projects in top condition.
Regular Maintenance Tips
Regular maintenance helps avoid bubbles in polyurethane. Here are some effective tips:
- Clean Surfaces: Always clean surfaces before applying polyurethane.
- Check Humidity: Apply in low humidity to prevent bubbles.
- Use Proper Tools: Use high-quality brushes or rollers.
- Apply Thin Coats: Thin layers reduce the chance of bubbles.
- Sand Between Coats: Lightly sand to smooth surfaces.
Choosing The Right Polyurethane For Your Project
Selecting the right polyurethane can make a big difference. Consider these factors:
| Type | Best Use | Drying Time | Finish |
|---|---|---|---|
| Water-Based | Indoor furniture | 1-2 hours | Clear |
| Oil-Based | Outdoor projects | 4-6 hours | Amber |
| Spray-On | Large surfaces | 1-3 hours | Glossy |
Choose the type that fits your needs. Using the right product reduces bubble formation. Always follow manufacturer instructions for best results.
Troubleshooting Uncommon Bubble Issues
Bubble problems in polyurethane can be frustrating. Understanding how to troubleshoot these issues is essential. Addressing bubbles quickly can save time and money.
Dealing With Persistent Bubbles
Some bubbles refuse to go away. Here are common reasons and solutions:
| Reason | Solution |
|---|---|
| Improper Mixing | Mix thoroughly for at least 3 minutes. |
| Excess Moisture | Ensure surfaces are dry before application. |
| Temperature Issues | Apply in a controlled environment, ideally 70°F. |
| Low-Quality Product | Use reputable brands for reliable results. |
Check your workspace conditions. Clean the area thoroughly. Remove any debris before applying polyurethane.
When To Seek Professional Help
Some bubble issues require expert intervention. Look for these signs:
- Consistent Bubble Formation: Bubbles appear even after multiple attempts.
- Large Bubbles: Size indicates a deeper issue.
- Structural Compromise: Bubbles may weaken the surface.
- Unfamiliarity with Product: Lack of experience may lead to mistakes.
Consulting a professional can save you time and effort. They bring expertise and tools for effective solutions.
Frequently Asked Questions
Will Bubbles In Polyurethane Disappear Over Time?
Bubbles in polyurethane may not disappear entirely on their own. Factors like temperature and humidity can affect their lifespan. Proper application techniques can minimize bubble formation. However, if you notice persistent bubbles, consider sanding or refinishing the surface for a smoother finish.
What Causes Bubbles In Polyurethane?
Bubbles in polyurethane are usually caused by improper mixing or application. Air can be trapped during stirring or brushing. Additionally, applying the finish too thickly can contribute to bubble formation. Understanding these causes helps in preventing them in future applications.
Can I Fix Bubbles In Polyurethane?
Yes, you can fix bubbles in polyurethane. Allow the finish to cure completely, then lightly sand the affected area. After sanding, wipe away dust and reapply a thin coat of polyurethane. This method usually results in a smoother finish without bubbles.
How To Prevent Bubbles In Polyurethane?
To prevent bubbles in polyurethane, mix the product slowly and gently. Use a high-quality brush or roller designed for smooth finishes. Additionally, avoid applying the finish in overly humid or hot conditions. Following these steps can significantly reduce bubble formation in your project.
Conclusion
Bubbles in polyurethane can be frustrating, but they often resolve over time. Proper application techniques and environmental conditions can minimize their occurrence. Regular maintenance and monitoring will help ensure a smooth finish. Understanding these factors can lead to better results and a more durable surface.
Your patience will pay off in the end.